Ooey-Gluey Colors

Ooey Gooey Colors (5).JPG

It’s not often that I find an art project for my 5-year-old that feels refreshingly new. This artsy idea from Highlights magazine had definite goo factor that appealed to him!

First, drip school glue all over the clear acrylic cover from an empty photo frame. We used an 8×10 frame for maximum work space.

Ooey Gooey Colors (1)

Drip food coloring over the glue, ideally with some restraint, although Travis loved making big puddles of color.

Ooey Gooey Colors (2)

Finally, use a paintbrush to smear it all together.

Ooey Gooey Colors (3)

The colors will swirl and mix in neat ways and make little bubbles on the acrylic. This is a fun chance to experiment with different brushstrokes.

Ooey Gooey Colors (4)

Let dry completely, then insert back into the photo frame (gooey side in) for instant art. These look particular pretty when the sun hits them through a window, acting almost like a suncatcher.

Cactus Toss

Cactus Toss (8).JPG

This game is sure to get laughs from your kids, and is a fun craft to boot!

Start by drawing two cactus shapes on green poster board, about 1 foot high. Older kids will have fun drawing these on their own; I did this part for Travis, who declared my cactus “clumsy”, which I thought was just about the best description in the world.

Cactus Toss (1)

Decorate the cactus with paint markers. I helped Travis think about how we could depict spikes and thorns, with lots of crosses and slash marks.

Cactus Toss (3)

Make a slit in the bottom of one cactus half and a slit in the top of the other so they can slot together. Add point values to each arm of the cactus, and glue pom poms on top.

Cactus Toss (5)

Time to play! To set up the cactus, place it in a clay dish. We added sand and rocks for desert authenticity.

Cactus Toss (6)

Twist pipe cleaners into circles for your playing pieces. I was yellow and Travis was red. Here’s the wind up…

Cactus Toss (7)

…and the toss!

Cactus Toss (9)

First player to 10 points wins. Travis was so proud when he hooked a 5 pointer on the top!


Can Toss Tumble

Can Tumble (2)

Travis has been having lots of arcade fun recently, and we continued the theme with this homemade carnival game. Play it just with family members or invite friends over for a can tumble tournament!

For about a week, I saved any canned goods we opened up: beans, soup, lentils etc. Rinse each can thoroughly and let dry completely.

To make the cans more presentable, we went through a pad of brightly-patterned craft paper and selected patterns we liked best.

Can Tumble (1)

Glue the paper to the cans and let dry. If your kids want to get even more decorative, feel free to add other embellishment like glitter glue or stickers.

Now set up the cans in a pyramid and it’s time to compete.

Can Tumble (4)

We used a beanbag, though a ball would also work.

Can Tumble (5)

Travis was gleeful with each tumbling can! This was such simple but great fun for a little after-school “sport”.

Can Tumble (6)

Note: I didn’t worry about sharp can edges with my five year old, but if you play with younger children, make sure to cover any jagged metal edges with masking tape or painter’s tape.

Old English Crackers

Christmas Crackers (6).JPG

Every year at Christmas dinner, we pull about old-fashioned Christmas crackers. If you don’t know what these are, it’s a British holiday tradition, featuring a cardboard tube wrapped in shiny paper. When pulled apart, it makes a loud “crack!” (hence the name) and the recipient finds a joke or toy inside.

This year, Travis and I made a homemade version! I bought a few trinkets at the toy shop that could fit inside toilet paper tubes. Mini tins of putty, mood rings, and jingle bell necklaces were all perfect!

Christmas Crackers (1)

Cut a 12-inch square of holiday wrapping paper, and wrap around the empty toilet paper tube. Twist the edges and secure with pretty ribbon.

Christmas Crackers (2)

Now cut the tube in half. Travis helped place a toy inside each tube, as well as a joke from his Raddish Kids Holiday Traditions crate; you can also write your own jokes on cardstock. Tape the two halves of the tube back together.

Christmas Crackers (4)

Cut a second piece of wrapping paper, this time measuring 12 inches by 4 inches. Wrap around the tube to conceal that you’ve cut it in half. Your cracker is now ready to pop!

Christmas Crackers (5)

We repeated 6 times so everyone at Christmas dinner will receive one… But Travis already stole one mood ring because he loved it so much, which means one unlucky Christmas Goose is going to receive an empty cracker! Chances are that’s going to be mommy.

Christmas Crackers (3)

Paint with a Sponge

Paint with Sponge (6)

I’m dabbling into art and paint projects with Veronika, and one fun idea for young toddlers is to paint with a sponge. The sponges are easy for little hands to grasp, and there’s not (too much!) mess.

I taped a thick piece of paper to her high chair, and set out a few sponges. Cut these into slightly smaller piece or even fun shapes like triangles.

Paint with Sponge (1)

I put two blobs of washable paint on the paper. To my surprise, first she wanted to dip in with her fingers, since she’s resisted finger painting in the past.

Paint with Sponge (2)

Then I showed her how to dip the sponges into the paint and dab back down. She was a quick study!

Paint with Sponge (3)

We varied the way the marks looked by sliding the sponges across the paper instead.

Paint with Sponge (5)

What a pretty final product!

Paint with Sponge (7)

As a bonus, she loved playing with leftover (clean) sponge pieces in her playroom afterwards.


Paint with Sponge (4)

Peppermint Candy Box

Peppermint Candy Box (5).JPG

It was all about holiday gifts in our home over the weekend. When we spotted these decorated cookie tins in Travis’s Highlights magazine, we knew we’d found the perfect gift for his kindergarten teachers!

Wrap a store-bought cookie tin in white felt.

Peppermint Candy Box (1)

Use hot glue or tacky glue to adhere securely. We wrapped only the lids, since the bottom of our tins were already printed in holiday pictures, but you can wrap the whole box if desired. Cut out red pieces of felt to mimic the red swirls of a peppermint candy and glue these to the lid.

Peppermint Candy Box (2)

Fill the tin with your favorite holiday cookies or other treats, of course!

Peppermint Candy Box (3)

To finish the presentation, wrap in plastic wrap (or clear cellophane) and secure with green ribbon on each side so it looks like a peppermint candy waiting to be twisted open.

Peppermint Candy Box (4)

My Gingerbread House Kiwi Crate

GIngerbread House (9)

Travis’s kindergarten class is doing a unit on gingerbread houses, featuring everything from social studies (types of houses) to literature (stories featuring gingerbread boys and girls) to math (patterns and shapes). Who knew so much could go into a holiday project! So I purchased Kiwi Co.’s special holiday gingerbread kit to augment the theme. Travis was so proud of his creation.

To start, fold up the cardboard house and secure with a clear plastic sticker. Travis helped glue on the rectangle roof with the provided glue stick.

GIngerbread House (1)

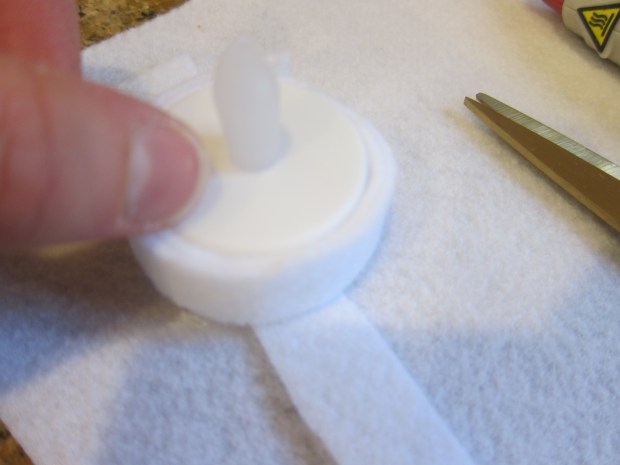
Now the decorations are really up to your little creator! Travis and I followed some of the suggestions, including cutting white felt stickers into half circles for a “Snowy Rooftop”.

GIngerbread House (4)

Travis wanted to add colorful pom poms and felt shapes on the roof as well.

GIngerbread House (6)

You can also make “Gingerbread Candy Canes” by twisting together the provided red and white pipe cleaners. Travis decided ours should be straight, instead of curving into a hook.

GIngerbread House (5)

Next we made “Paper Candies” by twisting a sheet of provided tissue paper around a pom pom. We glued one just above the gingerbread house door.

GIngerbread House (2)

Finally, our window could be “Stained Glass” by gluing a sheet of tissue paper (Travis chose blue) to the inside.

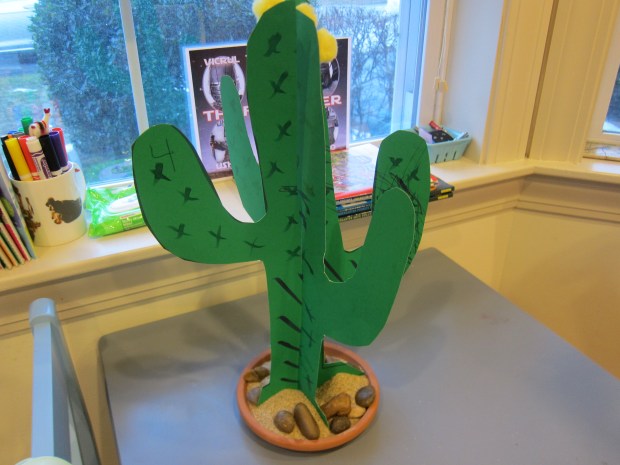
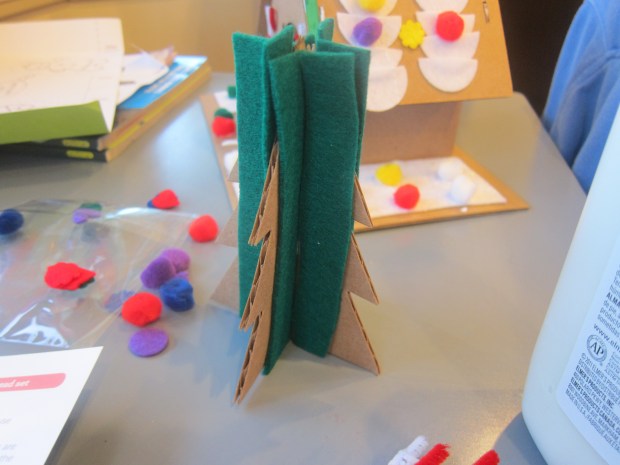
Glue down white felt on the cardboard base for a snowy scene. Travis also wanted to glue green felt to the cardboard tree, which slots together.

GIngerbread House (8)

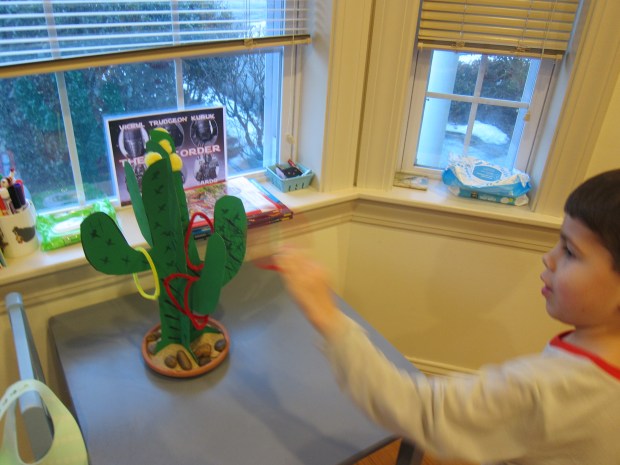
He loved wrapping the two provided gingerbread people in ribbon as decoration, and was particularly proud of himself for this idea.

GIngerbread House (3)

Additional pom poms and crumpled bits of tissue paper finished our gingerbread scene. We love that this creation will last, unlike houses meant to be eaten!

GIngerbread House (10)

Shining-Bright Advent Wreath

Shining Advent (10).JPG

One of my favorite holiday traditions as a girl was lighting the advent wreath, a new candle each week of December leading up until Christmas,. But I had forgotten all about it until I spotted this craft in Travis’s Highlights magazine. So we were eager to continue the tradition and light up our home!

Cut two empty paper towel tubes in half, so that now you have four “candles”. Wrap three of them in purple cardstock, and one in pink cardstock. Secure with tape.

Shining Advent (2)

Wrap a length of similar colored ribbon around the top and secure with tape. (Note: The tape was Highlight’s suggestion, but for more elegance I would secure the ribbon and cardstock with glue next time).

Shining Advent (3)

Cut a wreath shape from green cardstock, and glue down onto cardboard for extra stability. Glue on the pillars, and add decorations.

Shining Advent (5)

We included green leaves cut from more cardstock as well as a few tiny red bells. Originally I planned to use small red pom poms as the “berries”, but the bells turned out to be lovely!

Shining Advent (6)

For the candle flames, wrap tea lights in several layers of white felt (otherwise they will be too small and will slip inside the tubes).

Shining Advent (4)

Place on top of the pillars. Each Sunday, a new candle is lit, and the pink one will join in on Christmas Eve!

Shining Advent (9)

How are you counting down to Christmas? Please share in the comments!

Advent Candles var

Harvest Coasters

Harvest Coasters (6).JPG

These coasters are a great project to have your kid feel involved in Thanksgiving prep, whether or you’re hosting and need extra coasters for guests, or whether you bring them as a hostess gift.

Harvest Coasters (2)

I helped Travis draw a few common fall fruits and veggies onto different colors of craft foam. He tackled a round red apple, while I made trickier shapes like a green bell pepper, yellow butternut squash, and orange pumpkin.

Harvest Coasters (1)

We added a few details like leaves and stems with marker, and cut out.

Harvest Coasters (3)

Cut circles from thin cardboard to fit the back of each shape and glue on with tacky glue.

Harvest Coasters (5)

Let dry completely before putting your festive drink on top.

Harvest Coasters (4)

Holiday nog anyone?

Harvest Coasters (7)

Giraffe Cord Keeper

Giraffe Cord (7).JPG

Let’s face it: cords are a part of our kids lives these days, whether for tablets, toys, or any of a dozen other gadgets and games. This adorable cord keeper from Highlights magazine is the perfect way for Travis to wind up his favorite robot’s cord when it’s not charging.

To start, I drew a giraffe head and neck on thin cardboard (an old cereal box was perfect), and we glued it onto yellow felt. Let dry, then cut out.

Giraffe Cord (2)

I also cut out details from other colors of felt (big kids can do this themselves). We used brown for the nose and horns, orange for the ears, and a quirky purple for the giraffe’s spots!

Giraffe Cord (4)

Travis loved gluing everything down, especially a silly white tie.

Giraffe Cord (5)

Decorate with puffy paint for a few final touches. I loved the “smile” that Travis gave his giraffe.

Giraffe Cord (6)

Once dry, cut a slit in the giraffe’s neck. This is the notch to start winding your cord. Simply continue winding around the giraffe’s long neck until everything is nice and tidy.

Giraffe Cord alt.JPG