Bubble Wrap & Paint

Bubble Wrap Paint (8).JPG

This project is messy but so worth it – paint, cool textures, exciting results… What more could a toddler want from an art project?

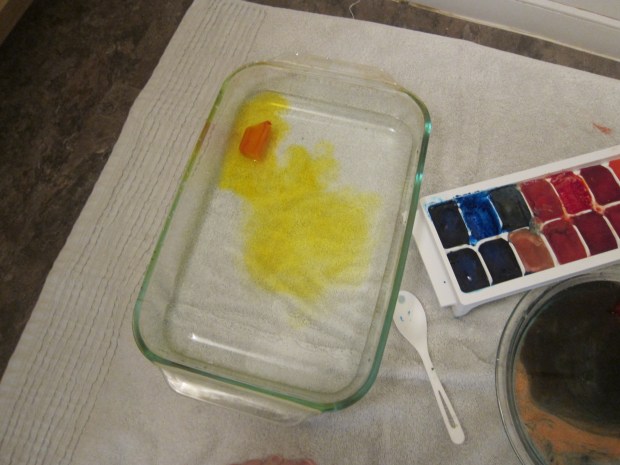
To start, I set Travis up with a disposable cookie sheet and paints, and told him he could squeeze on whatever colors he wanted. This alone was cause for excitement, since usually I measure out a portion of paint for him to use. He was very deliberate choosing which color should go where!

Bubble Wrap Paint (1)

Now it was time to smear it all together with a plastic spoon, which he loved.

Bubble Wrap Paint (2)

Once our baking sheet was filled with paint, we placed a piece of bubble wrap, bumpy side down, over the paint and pressed to make sure it was fully coated.

Bubble Wrap Paint (3)

Carefully peel up the bubble wrap and transfer to a piece of poster board. Press down again, then lift off and reveal your painting!

Bubble Wrap Paint (5)

We had to make several prints of course, adding new colors each time.

Bubble Wrap Paint (9)

Then Travis wanted to get his hands on the painted side of the bubble wrap, and pressed his painted hands onto a clean piece of bubble wrap, which was nearly as fun since it led to popping the bubbles.

Bubble Wrap Paint (7)

Great messy fun!

Bubble Wrap Paint (6)

Milk Carton Animals

Milk Carton (6)

With several empty Silk cartons around the house, we decided to play with them instead of relegating them immediately to the recycling bin!

This was a craft that I largely had to put together for Travis (too complicated for a two year old’s fingers!) but he was so into it, watching intently every step of the way, and mimicking making his own version with all the materials that were out.

Milk Carton (1)

First, we turned a creamer carton into a pig. I covered it with pink construction paper, which I cut to fit and taped in place (sorry, my woeful crafting skills are on display here, folks!)

Milk Carton (2)

Travis then helped glue two googly eyes into place and to tape on the curly pink pipe cleaner tale. He loved the pink cap that we turned into the nose!

Milk Carton (3)

No sooner finished than he asked if we could make a cow. We were all out of brown and black construction paper, so our cow was white with very vibrant orange spots – why not? Travis loved “helping” cut spots for the cow.

Milk Carton (4)

Once finished, he had a blast moving the animals around the living room, making them oink and moo.

Milk Carton (7)

Great imaginative props to play with!

Milk Carton (8)

Color Mixing Sensory Table

color-explore-1

With a little food coloring and an ice cube tray, you can start to teach your child all about how colors mix to form new ones. If you’re in a warm climate, play this game outside at a water table or empty sand table! Truth be told though, I’m glad we did it indoors since the clear glass containers we used made it easy to see the colors we created.

For my indoor winter set up, I laid out a few spoons and three glass containers on a towel in the bathroom, each filled with a little bit of water (use a towel that you don’t mind getting dirty!). I brought in the ice cubes I had frozen ahead of time, with drops of food coloring added in the 3 primary colors – blue, yellow, and red.

First, we simply dropped individual ice cubes into the containers – Travis loved seeing the water instantly turn a beautiful hue.

color-explore-2

It didn’t take long before he was mixing. Seeing yellow and blue make green was a big hit for Travis.

color-explore-3

Our red and blue made a very muddy purple, but even this was fun to stir around for a while. Whenever our containers got a bit icky in color from over-mixing, I poured them down the tub and refilled with clean water to begin again.

color-explore-4A big hit!

Shaving Cream Polar Bear

Shaving Cream Polar Bear (6).JPG

We’ve just come through a blizzard and we were snowed in for a couple of days. So what better animal to make than a snowy white polar bear? I decided we needed sensory paint for this one, not boring old regular paint.

I wish I could tell you what ratio of shaving cream to glue we used, but to be honest I just let Travis have a blast squeezing both ingredients into a foil pie plate.

shaving-cream-polar-bear-1

My guess would be a roughly 1:1 ratio. Mix together until you have a creamy sticky paint.

shaving-cream-polar-bear-2

I didn’t even tell Travis to start painting – he just began glopping the mixture onto the paper plate that I had set out for the polar bear’s face.

shaving-cream-polar-bear-3

Travis being a toddler, it wasn’t long before he discovered how awesome the mixture felt on his hands, too!

shaving-cream-polar-bear-4

I loved how this paint made a nice imitation of fluffy polar bear. We set the plate aside to dry overnight.

shaving-cream-polar-bear-5

In the meantime, I cut one cup from a recycled egg carton and we painted it black for the nose. Set that aside to dry, too.

Travis had sort of lost interest in the polar bear by the next morning, so I was a solo act to glue on two googly eyes, white cotton pads for ears, and our black nose.

shaving-cream-polar-bear-7

Once he saw the face, though, he loved the new friendly polar bear in our house, and carried him around for quite some time. He also loved that it smelled like his dad’s shaving cream!

Be careful, that black nose will be hard for toddlers to resist pulling off…

I Heart You Stickers

i-heart-stickers-8We always love the craft ideas that come in our High Five magazine, and this month’s was perfect for Valentine’s Day! Before you begin, you’ll need to buy sticker paper, which can be found at any craft store.

On the sticker paper, I drew the outlines of several hearts.

i-heart-stickers-1

Now it was up to Travis to color them in with pink and red crayons or colored pencils. This was great practice for coloring inside the lines!

i-heart-stickers-3

(Note: Big kids can not only color in their hearts, but draw the outline of the shape as well).

i-heart-stickers-2

I cut out the heart stickers, and Travis helped peel off the backing to attach to index cards, which I had folded in half. We added extra heart stickers from the store as well – the more the merrier.

i-heart-stickers-5

On the inside of the index card, we wrote Valentine’s notes to all of his cousins. Travis grabbed a colored pencil and told me he was writing “Love Travis.”

i-heart-stickers-6

Although I filled in most of the actual detail on these cards – the words, adding enough stickers to each – I could tell Travis was so proud to be making something special for his loved ones, and that’s part of what I wanted to teach him as to what Valentine’s Day is all about.

i-heart-stickers-7

Don’t forget a special trip to the post office to send your Valentine’s cards on their way!

Handprint and Footprint Hearts

footprint-heart-7

We kicked off our Valentine’s Day projects today! As with the handprint wreath we made for Christmas, I love holiday projects that incorporate the current size of your child’s hands – they serve as an adorable reminder as years go by. For this craft, we added in feet, too!

Let your child paint one hand (preferably in red or pink), and then help him or her paint the other hand.

footprint-heart-1

Press the hands onto white paper like a stamp, and ideally you’ll get a heart shape. Travis didn’t exactly keep his hands still, which meant our “heart” is open to interpretation in this one!

footprint-heart-4

The feet, believe it or not, turned out better. While he sat on a stool, I painted the bottoms of his feet red – which he loved, giggling the whole time. We then pressed the feet down one at a time for a very successful “heart.”

footprint-heart-2

Once the paint dries, cut a heart shape around your hand or foot prints. Scalloped scissors make a nice decorative edge. Travis helped glue these onto larger pieces of pink and red construction paper as backing. I then trimmed these into a final, largest heart.

footprint-heart-5

As a finishing touch, you can write your child’s name and the date.

footprint-heart-6

Toddler Stained Glass Window

stained-glass-14

This art project is gorgeous in a window hit by direct sunlight, and your toddler will be unable to resist the sticky surface!

While Travis was asleep, I cut scraps of multi-colored tissue paper and crepe paper, and arranged them in a bin. I then drew little floral motifs and various shapes on a large piece of contact paper with permanent markers.

Tape the contact paper, sticky side out, to a window and leave it for your toddler to find. In the morning, it only took Travis about 5 minutes. “Mom, you drew clouds!” (Well, I was going for flowers, but good enough!)

stained-glass-1

Now that he had spotted it, I brought over the tissue paper scraps and showed him how they adhered to the paper.

stained-glass-5

He tested out a few pieces, and then became very interested in the tissue paper itself for a while.

stained-glass-4

His favorite way to attach the pieces was by crumpling them into balls first, an idea I hadn’t even considered!

stained-glass-7

It was a project that we didn’t do all at once, bur rather one that he returned to over the course of the day. He also discovered how sticky the contact paper felt if he pressed it with his fingers!

stained-glass-9

The project was best when we had gorgeous sunlight spilling in at midday. “Look at our stained [glass]!” he exclaimed, and added a few more pieces.

stained-glass-11

Because I wanted him to have a real-world reference for the art we had created, we also popped into a local cathedral to marvel at the stained glass there.

stained-glass-15

Be sure to leave your artwork up in the window for a few days to enjoy it!

stained-glass-13

Glitter Star Jars

IMG_0003.JPG

On a whim, we put together this glowing glittery project today, after spotting some glow-in-the-dark stars at the grocery store checkout.

First, I showed Travis the shooting stars in the package, which he already thought were cool enough. When I asked him if he wanted to make a galaxy for the stars to float in, he couldn’t wait to get started.

glitter-star-jars-1

Step one, filling a mason jar with corn syrup, was right up a 2 and 1/2 year old’s alley. Travis had to help with the gooey squeezing, and in fact ended up filling our jar a little too high (more on that later). Make sure you leave enough space at the top for your stars to fit.

glitter-star-jars-2

Next we needed star dust aka glitter. We might have gotten a little too carried away with the glitter, but Travis insisted on dumping in a lot.

glitter-star-jars-3

Next we shook up our galaxy, and watched as the glitter dispersed through the oozing corn syrup – Travis thought this part was too cool.

glitter-star-jars-4

Finally it was time to add the stars.

glitter-star-jars-5

Although your glittery jar will work best with the stars on the surface of the corn syrup, Travis’s favorite part of the whole activity was stirring the stars deep into the glittery goop, so we did that for quite a while (prepare to get a little sticky!).

glitter-star-jars-7

Once the contents of the jar settled, the stars rose back up again, and at that point you’ll be able to “charge” your stars, whether by lamp or sunlight, so they glow at night. In the meantime, the jar is gorgeous just glittering by day in the sunshine! As mentioned, Travis made our jar very full of corn syrup, meaning less light could reach our stars, but the effect still worked beautifully.

glitter-star-jars-6

This might make a neat project for a child who’s afraid of the dark, since the beautiful sparkles make a dark, bedtime room feel magical.

Safari Tracks

koala-safari-20

We tacked on one final craft after having fun with our recent Safari crate from Koala Crate – animal stamp foot prints!

To make the stamps, you’ll need sticky foam sheets from a craft store. Draw footprints on the sheets to look like various animals – pads with toes for lion’s paws, a hoof for a zebra, a webbed foot for a crocodile, and so on.

koala-safari-15

Travis loved playing with the sticky foam while I drew the shapes, but wasn’t interested in drawing animal prints of his own.

Help your child cut out the shapes, and attach each print to cardboard squares. Voila! You have a stamp!

koala-safari-16

Paint over the stamps with a foam brush, and press onto paper for animal tracks.

koala-safari-18

Travis got very impish splattering the green paint to begin with, but soon loved the way the brush felt over the bumpy raised footprints.

koala-safari-21

Don’t forget the binoculars to explore which animals have made tracks in your home.

koala-safari-17

A is for Alligator

a-for-alligator-2

Letter-shaped animals are a cute way to bring letters to life for your little one. The letter A lends itself perfectly to the big jaws of an alligator!

I cut a letter A from green construction paper, and several triangles from white paper to be the teeth. Attach the teeth to the sides of the A with glue.

a-for-alligator-1

Travis’s favorite part of the craft was applying the glue so we could add buttons as “scales,” a task he took very seriously! We used green buttons for the scales and 2 blue buttons for eyes.

a-for-alligator-3

Voila, A is for Alligator… Watch out or he might eat extra buttons!

a-for-alligator-4

What other letter and animal pairs can you think of? Please share in the comments!