Little Tree Crate

Little Tree final.JPG

We loved our Swirly Ornaments holiday crate from Kiwi Co., and the kit for Little Tree turned out to be just as wonderful. The project set the stage for a festive mood inside our apartment on a drizzly December morning. Read on!

To start making the tree, we first needed to do some math, dividing the kit’s green pipe cleaners into two equal piles. This was a neat way to introduce Travis to counting out two sets of something, just as you would for dealing out cards in a game, for example.

Little Tree (15)

Cut the pipe cleaners from one pile in half, and leave the others long.

Insert the provided wooden stick into the round wooden stand.

Little Tree (16)

Starting with the long pipe cleaners, wrap around the stand.

Little Tree (17)

Repeat with the short pipe cleaners. Travis loved the wrapping, and insisted on doing so himself for each one.

Little Tree (4)

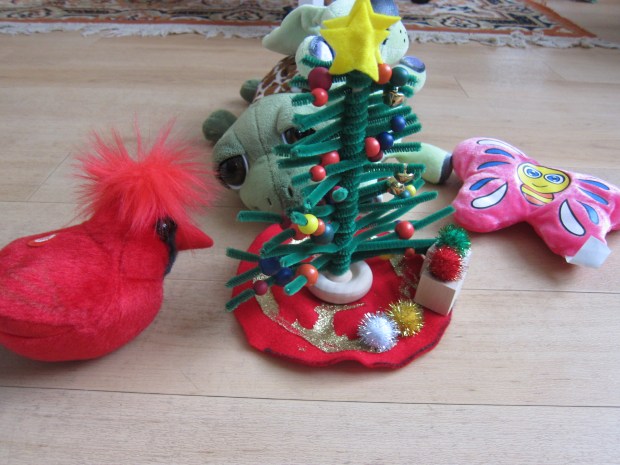
Adult step: snip the pipe cleaners at an angle, so your tree is a triangle shape. Travis was really psyched to see our fake tree in the same tapered shape as our real tree.

Little Tree (5)

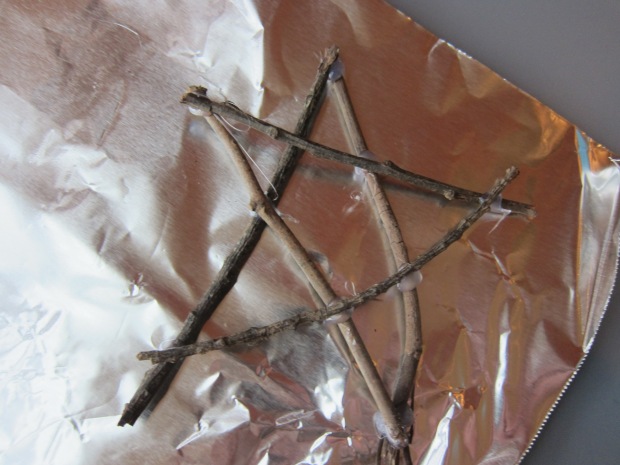
Peel the backing off a provided star sticker, and attach at the top of the tree.

Little Tree (6)

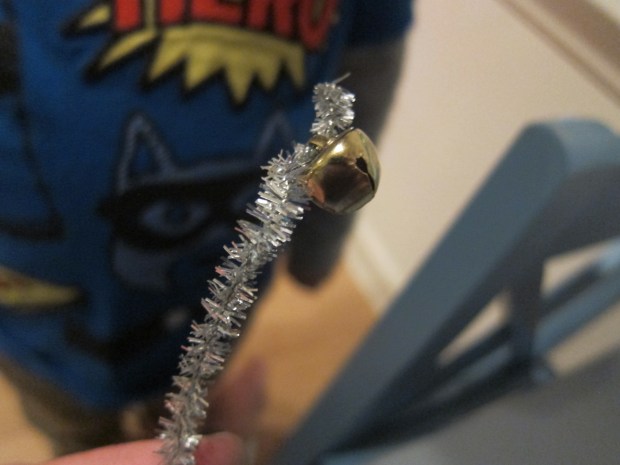
Next up, thread on the provided beads and bells as ornaments. “Which are ornaments and which are lights?” Travis wanted to know.

Little Tree (9)

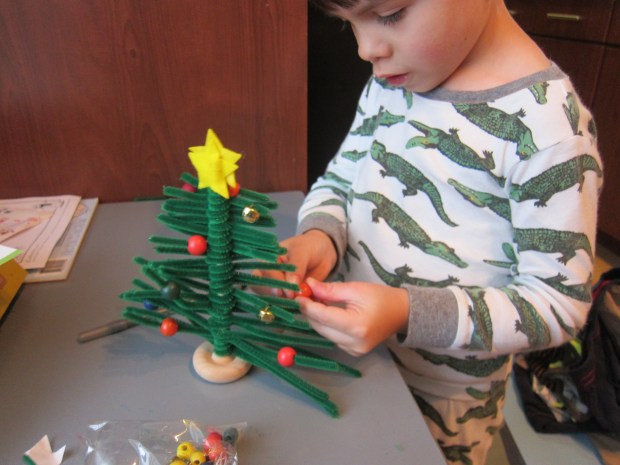
Good question, but either way, all beautiful!

Little Tree (10)

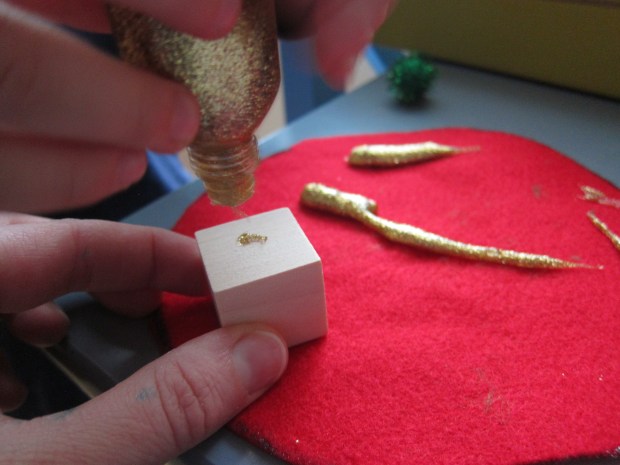
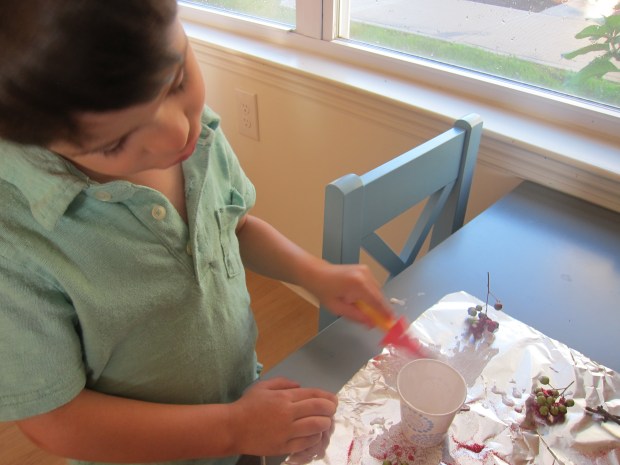
To make the base, use any round bowl to trace a circle onto the provided red felt.

Little Tree (11)

Cut out and decorate with the provided gold glitter glue.

Little Tree (14)

Travis was equally delighted by the “presents” that can go under the tree – two wooden cubes, onto which we glittered-glued pom poms.

Little Tree (13)

You can set your tree out as a pretty decoration, and we also plan to leave it alongside cookies and non-dairy milk for Santa on Christmas Eve! It’s also the perfect size to be a play tree for your child’s stuffed animals.

Little Tree alt.JPG

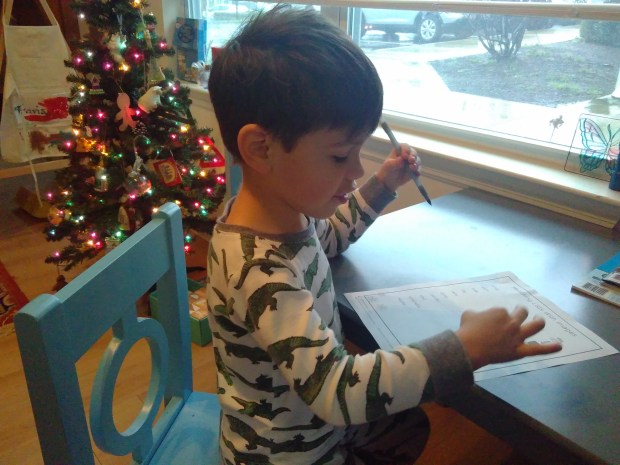
To round out our festive morning, we made hot cocoa and added in a cute Snowman-themed spelling lesson from Education.com.

Little Tree (1)

This fun picture word match was a great way to cuddle up inside during the cold winter months and practice Travis’s spelling skills. For more spelling activities and printables like this check out Education.com!

Little Tree (2)

In sum, we had all the makings of a cozy winter morning.

Little Tree (3)

Swirly Ornaments Crate

Swirly Ornament (8).JPG

Kiwi Company occasionally puts out special holiday-themed crates, and we’ve been holding on to this one since last December! Reading the title on the box, I imagined the final product would be ornaments with beautiful swirls. Little did we know the method to make the ornaments was swirly, too!

Travis was so excited seeing the three plastic globe ornaments, since we had just set up our tree. Add two of the provided watercolors (in primary colors) to each globe for a quick lesson in color mixing. You’ll be able to make one orange, one green, and one purple ornament. Next squirt in a drop of the glittery silver paint.

Swirly Ornament (1)

Add a marble, and get swirling! As you swirl, the marble will help the paint coat the entire globe.

Swirly Ornament (3)

As a parental aside, this was very precarious proposition with a four-year-old. Of all the Koala projects we’ve ever done, this was by far the messiest! It was quite hard for Travis to swirl enough to coat the inside of the ornament without also spilling paint, so step in if you need to.

He loved the drying method that came next though; upend the ornament over a provided paper cup. The marble and any excess paint will fall out.

Swirly Ornament (2)

We set ours aside to dry for about an hour.

Swirly Ornament (4)

Ideally, flip the ornaments at this point and allow to dry on the inside, too, overnight. Travis was too impatient though and wanted to pop in the provided corks and seal them up!

Swirly Ornament (5)

To finish each ornament, we wrapped a sparkly pipe cleaner around the neck.

Swirly Ornament (6)

Add a silver ribbon (a great chance to practice tying a bow), then thread a provided bell onto the pipe cleaner. Hook the end.

Swirly Ornament (7)

Now it’s ready to hang on your tree!

Swirly Ornament (9)

The kit also suggested gifting the ornaments (just slip on a gift tag and it’s ready to go)…

Swirly Ornament var

…or attaching one to your stocking as a sparkly decoration.

Swirly Ornament alt

Let the holiday season begin!

Swirly Ornament (10)


Twig Stars

Twig Stars (10).JPG

There is a beautiful, yuletide feel to these stars, although here we are crafting them in October! Make them now, or set the idea aside for the upcoming Christmas season.

For each star, you’ll need 5 sticks that are roughly the same thickness and length; break any to the proper size if they are too long.

Twig Stars (1)

I hot glued the stars together, then set Travis up with tidbits to decorate them – berries, pine needles, a bowl of glue, and a bowl of glitter. Little pinecones would look sweet, too.

Twig Stars (2)

First dunk the berries in the glue, then immediately transfer to the glitter. He loved this part!

Twig Stars (3)

If you like, dunk in the tips of your pine needles, too, or any other nature finds you have to add to your stars. Let dry completely.

Twig Stars (5)

The next morning, we dabbed glue all over the stick stars, and added our berries and other treasures.

Twig Stars (6)

Travis got a bit impish and loved smearing glue over the leftover glitter on our work surface, too. Good thing I had things covered with a layer of foil!

Twig Stars (7)

Hang the resulting stars from twine, indoors or out.

Twig Stars (9)

As mentioned, these would be beautiful at Christmas, but will light up a windowsill or other area of your home any time!

Twig Stars (8)

Sponge-Print Wrapping Paper

Sponge Wrapping Paper (8).JPG

Enlist the kids help with gift wrapping this year… not just to wrap up the presents, but to make the wrapping paper first. Not only will they enjoy making this easy DIY gift wrap, but they’ll be so proud when they see gifts presented to loved ones in the paper that they made.

To start, cut sponges into shapes and glue onto old jar lids – the sponge should be cut until about the same size as or smaller than the lid. Simple shapes like triangles and squares are easiest, but get fancy if you’re handy with a paring knife!

Sponge Wrapping Paper (1)

I spread out a leftover roll of craft paper, and Travis immediately set to dipping his sponge stamps into paint…

Sponge Wrapping Paper (5)

…and dotting all over the paper. He liked making “patterns” as he worked.

Sponge Wrapping Paper (4)

Sometimes he spaced the stamps far apart, and sometimes he liked clustering them, so we ended up with a final product that was decidedly his creation.

Sponge Wrapping Paper (7)

We also had fun swirling together blue and white paint to make a light blue.

Sponge Wrapping Paper (9)

Once the paint is completely dry, it’s gift wrapping time!

Sponge Wrapping Paper (10)

What fun wrapping ideas have you used this holiday season? Please share in the comments!

Coffee Candles

Coffee Candle (6)

This is a beautiful and simple project, and to be honest was more of a craft for the grown-up in the room than for Travis! But he loved the materials involved, which were completely novel to him. Whether your little helper actually pitches in with the craft or just plays with the materials, it’s a cozy winter afternoon activity to do together.

The goal was to decorate the bottom of pillar candles with whole coffee beans – a toasty smelling and lovely touch that will add beauty to your holiday decorations or would make a great gift if wrapped up in cellophane with a big bow.

First, Travis needed to investigate the coffee beans. He loved the way that they felt and smelled – it didn’t hurt that we used an intense dark roast!

Coffee Candle (1)

The next cool object was the candles, since I don’t usually have these around the house. He loved the smooth wax, and was very curious how the wick and flame work (adult supervision required around candles at all times, of course!)

Coffee Candle (2)

To decorate a candle, you’ll need tacky glue (not white school glue) so that the coffee beans will hold in place as your little assistant helps glue them on. We decided we liked the beans best with the dimpled side facing outward.

Coffee Candle (3)

As mentioned though, Travis’s interest quickly turned simply to playing with the coffee beans. He was soon delightedly busy with a coffee bean kitchen…

Coffee Candle (4)

….while mama glued on the beans. Since it was just me, I actually switched to using a hot glue gun, which held the beans in place even better than tacky glue.

Coffee Candle (5)

Once the beans are set, place your holiday candles where friends and family can enjoy their sight and aroma too!

Coffee Candle (7)


Give a Super Soup!

Super Soup (5)

Need a gift for teachers that they’ll actually use? Assemble the dry ingredients for this warming winter soup in a jar, add a hand-made note from your child, and tie it all with a pretty ribbon for a perfect gift. Thanks to High Five magazine for the suggestion!

First, the full recipe, because you’re going to want to make a batch of this soup at home, too:

Super Soup (1)

Ingredients:

  • 1 and 1/2 tablespoons low-sodium vegetable bouillon cubes, crumbled
  • 1 tablespoon dried parsley
  • 1 tablespoon dried minced onion
  • 1/2 teaspoon black pepper
  • 1/4 teaspoon dried thyme
  • 1/8 teaspoon celery seeds
  • 1/8 teaspoon garlic powder
  • 1 bay leaf
  • 1 cup tricolor rotini or fusilli pasta
  • 1 cup chopped carrot
  • 2 chopped celery stalks
  • 1 and 1/2 cups cooked and chopped Gardein chickn
  • 1/2 cup oyster crackers
  1. In a large pot, combine the bouillon, parsley, onion, black pepper, thyme, celery seeds, garlic powder, bay leaf, pasta, carrot, celery, chickn, and 6 cups water.
  2. Bring to a boil, then cover, reduce heat, and simmer for 15 minutes.
  3. Uncover and remove the bay leaf; continue to simmer for an additional 5 minutes.
  4. Serve with the oyster crackers!

To prepare the soup as a gift, have your child help layer the ingredients from the bouillon through the pasta in a 1-quart clear glass jar. Travis loved adding in the herbs:

Super Soup (8)

And untwisting caps to smell each one before we added it!

Super Soup (11)

Place the oyster crackers in a small zip-top plastic bag, and nest atop the other ingredients. Put the lid on the jar and tighten.

Super Soup (9)

Write out the recipe instructions on a recipe card (Note: teachers will supply their own carrots, celery, and chickn when the time comes).

Super Soup (4)

Have your child decorate the index card with crayons or stickers. Of course Travis needed to help punch a hole in each index card.

Super Soup (6)
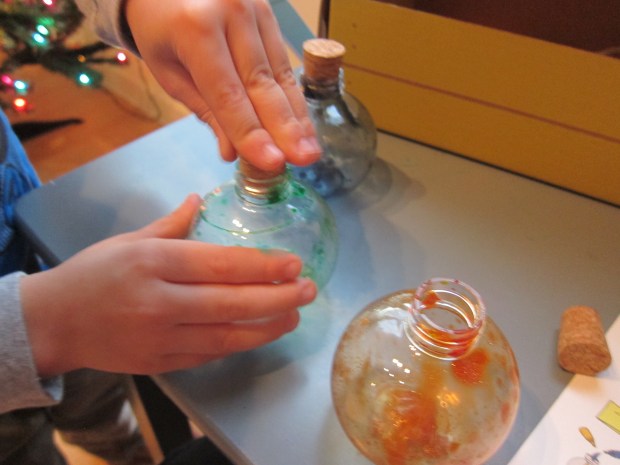
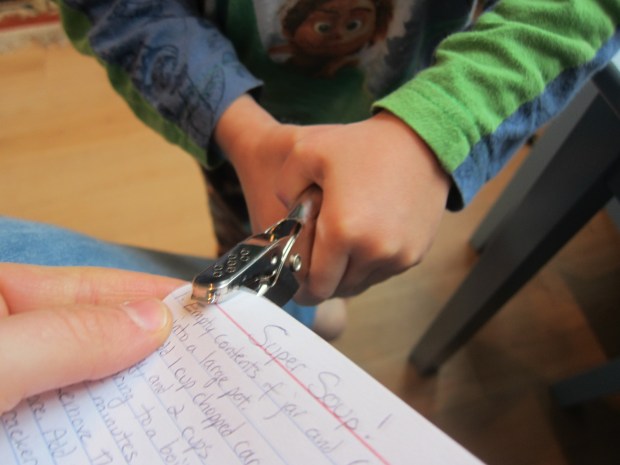
Now slip a ribbon through the hole and secure around the lid of each jar.

Super Soup (7)

Think that your kid’s teacher would prefer something sweet to something savory? Check out the Rocky Road Brownies we used for a gift mix last year!

Don’t forget to save the recipe and make a big pot of this for your own family, too.

Super Soup (2)

Hand-Shaped Dish

Hand Bowl (7)

I’m a sucker for any craft that incorporates the size of a child’s hand. Last year, we made  a wreath featuring Travis’s handprints. This year we switched our art medium to clay. This little dish is perfect for holding holiday candies, and would also make a great gift for grandparents on your Christmas list!

To start, we gathered our materials: air-dry clay and balloons. Balloons and clay first thing in the morning? Travis was in heaven!

Hand Bowl (1)

Blow up one balloon to a size your child can comfortably hold in his or her hand; set aside.

Hand Bowl (2)

Trace your child’s hand onto a piece of paper and cut out; set aside.

Hand Bowl (3)

Now flatten your clay using a rolling pin until it is large enough to hold the handprint.

Use a clay slicing tool or plastic knife to cut around the handprint.

Hand Bowl (4)

Now here’s the slightly funny part: drape the hand over the balloon, and let sit somewhere kids can’t touch it or mess with it until dry.

Hand Bowl (5)

Once dry, remove the balloon and set your hand on the counter as a decorative dish.

Hand Bowl (6)

Don’t forget to inscribe with kids’ names and the year, so you’ll always remember!

Hand Bowl (8)

Starry Holiday Table Runner

Starry Table (7)

This project is a great way to get kids involved in holiday décor! The result is charmingly homespun and sure to delight relatives or other visitors at your holiday table.

To start, I prepped a star stencil. Ideally, you’ll want to use a real star stencil from a craft store. I printed a star template on paper and cut out the star shapes, which worked in a pinch; if you use this method, however, be sure to have several templates on hand, as each one can only take a coat or two of paint before tearing.

Starry Table (5)

Next we prepped our workspace, unrolling a large length of craft paper, and pouring white paint into a foil pie plate.

Starry Table (1)

Travis loved helping thin the paint with just a touch of water, for a creamy consistency.

Starry Table (2)

Next I showed him how to hold the stencil in one place on the paper, and paint over the exposed open star shapes. He loved the challenge, and although his paintbrush sometimes slopped over the edges, this only added to the charm of our final runner.

Starry Table (3)

Keep moving your stencil until you’ve covered the entire length needed with star shapes. He even pretended he was a professional painter as he worked!

Starry Table (4)

We left the paint to dry, and then I cut the craft paper to form a thinner rectangular runner, with a triangle snipped from each end for a banner-like effect.

Starry Table (6)

The runner is perfect under our advent calendar display while we wait for the day to actually celebrate with relatives, and then we’ll move it to the buffet table!

Starry Table (8)

Cardboard Learning Tree

Learning Tree (11)

This is a great activity that combines seasonal holiday crafting with a little learning. If you play your cards right, the kids won’t even know you’ve slipped in some education with their fun!

For the shape of your tree, you can either paint a large piece of cardboard (holiday gift delivery boxes, perhaps?) or poster board. We chose poster board because I knew it would be easier to cut out the tree. Either way, Travis was thrilled when I said I needed the entire thing painted green.

Learning Tree (2)

We left the paint to dry overnight, and the next day I cut out the tree shape.

Learning Tree (3)

Next we gathered supplies for the “ornaments.” Use holiday-themed cookie cutters or other shapes, and trace the outlines on colored construction paper.

Learning Tree (4)

Don’t worry if your kids don’t trace perfectly, you can always neaten up the lines when cutting the shapes out later.

Learning Tree (5)

The next step was even more fun: laminating the cards. Although this step is optional, it will definitely make your paper pieces last longer. Travis adores whenever he’s allowed to help laminate, so this was a big hit.

Learning Tree (7)

I cut out the shapes, and set them aside.

We hung our tree on the wall and added a brown piece of construction paper as the trunk.

The final step was to add Velcro strips to our tree and ornaments. Place the soft side of the Velcro on the tree at random intervals, then attach one rough Velcro piece to each ornament. Travis loved this even before we added the learning element, hanging his ornaments and then changing their positions.

Learning Tree (10)

There are so many games you can play from this point on! First, I numbered the ornaments one through twenty with a wipe-clean marker, for a number search game.

Learning Tree (12)

A simple wipe with a paper towel and we could play alphabet games. One suggestion is to hide the letters in your child’s name, and have them pinpoint those on the tree.

Learning Tree (13)

As an alternative, write the upper and lower case of a batch of letters, and have your child find the pairs.

In full honesty, Travis was way more into the mechanics of this game (taking on and off the ornaments, wiping them clean with paper towels), than he was with the learning games, but we’ll play again over the course of the next few weeks!

Advent Christmas Books

book-wrap-7

We didn’t have a proper advent calendar for Travis this year, but here’s a neat idea I nabbed from Parents magazine. Each night of December leading up to Christmas, set one holiday book under the tree for a special storytime.

The first night that Travis noticed a tissue-paper wrapped item under our tree, his eyes popped with delight. It soon became his favorite part of our bedtime ritual, rushing up after dessert to discover what awaited under the tree.

book-wrap-3

There’s no need to buy 25 holiday stories! You no doubt have a few at home, but supplement the list with picks from your local library.

Some of our books were hits and some were misses (the pickings grew a bit slim at the library towards mid-December), but that didn’t lessen Travis’ delight tearing through the tissue paper each evening.

book-wrap-4

Save favorites for the final week before Christmas. In our house that includes The Polar Express, Twas the Night Before Christmas, and The Snowman.

book-wrap-6

Other books, ranging from the silly to the sweet, included:

Little Blue’s Christmas

The Animal’s Santa

Where is Baby’s Christmas Present?

Gingerbread Christmas

Santa Shimmy

and Christmas Parade

What holiday books are favorites in your household? Please share in the comments!