Nuts and Bolts

Nuts and Bolts (6)

When Travis was in preschool, he had a whole “tool shop” apparatus of screws that pointed up through a wooden board, onto which he could attach all manner of washers, bolts, twist tops, plastic caps, and more. It was fun, but it was also complicated! For pure toddler fun, try this much easier variation to keep little hands busy, using only a few different sizes of nuts and bolts.

This is definitely an activity for older toddlers who are past the stage of putting objects in their mouth. And even so, be sure to supervise play closely.

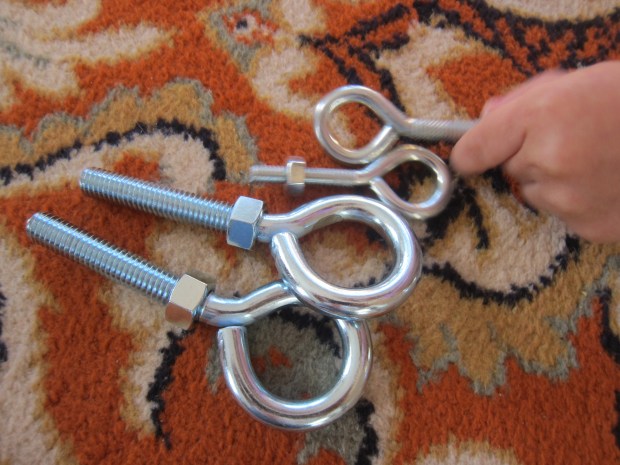
I gave Veronika several nuts and bolts in two sizes, first just setting them down for her to explore with all her senses. I pointed out the size comparison to her, and we sorted them by big and little.

Nuts and Bolts (1)

Next, I showed her how to twist the little nuts down the ridges of the bolts.

Nuts and Bolts (4)

She quite quickly loved screwing these off and on. At first she thought she could simply push on the nuts, so it was a good lesson in perseverance when she realized that twisting was necessary.

Nuts and Bolts (3)

This mess-free game is great exercise for little fingers, and sure to keep mischievous hands busy!

Nuts and Bolts (2)

Rubber Band Activity

Rubber Band Activity (13)

I spotted this gem of a hand-strengthening and boredom-busting activity over at Hands on As We Grow ages ago and finally decided to see if Veronika was up for it. The activity couldn’t be simpler; you just need lots of rubber bands and a can from the pantry and you’re ready to go.

We have a rubber band ball that is an endless source of fascination for the kids, so Veronika was thrilled when I showed her how to peel a rubber band off of it.

Rubber Band Activity (3)

I challenged her to get one rubber band onto the can. At first she simply stretched it wide, but quickly realized it wasn’t going to get around the full circle of the cylinder like that.

Rubber Band Activity (1)

She’s still young, so she needed my help to loop the rubber band over one side of the can. But from there she could pull it across and over the other side.

Rubber Band Activity (5)

She had fun on our first round using only orange rubber bands, but enjoyed it even more when I pulled out a pack of multi-colored ones. She loved selecting which color to put on next (blue was the favorite today).

Rubber Band Activity (12)

Your kids might want to be really neat and careful as they go about this task; make patterns with different colors; or just pull on as many as they can in an allotted amount of time. Older kids could even make it into a race or a competition.

Rubber Band Activity (10)

Veronika was too young for all that, but when I challenged her to see how many rubber bands she could get on the can, she came up with her own method: Sprinkling them on top! Now that’s thinking outside the box.

Rubber Band Activity (16)

This is sure to be an activity we return to again and again as she gets older.

Rubber Band Activity (14)

Basic Cereal Threading

Basic Cereal Threading (3)

This easy threading game is a great intro to the activity for toddlers. All of the items involved (play dough, cereal, and dry spaghetti) lend themselves to solo toddler play either before or after the activity, too, meaning you’ll get double-duty from one game.

To set up, we first rolled a few balls from different colors of play dough. Veronika loved helping with this step.

Basic Cereal Threading (1)

I then speared a strand of dry spaghetti into each mound of play dough. We were working on a craft tray, so I simply poured out some o-shaped cereal right onto the tray. If you’re doing this activity in a high chair, give your toddler a bowl of the cereal instead.

I showed her how to thread one cereal piece at a time onto the spaghetti. After a few misses, she was quickly a pro at the activity!

Basic Cereal Threading (2)

I loved watching her work with great care, not only looping the cereal over the top, but then holding onto it as she guided it all the way down to the play dough base.

Basic Cereal Threading (5)

Don’t be surprised if there’s some snacking involved, too, with all the cereal around!

Basic Cereal Threading (6)

Glue Dots and Buttons

Glue Dots and Buttons (6)

Veronika seems to enjoy art projects best when I squeeze out the dots of glue ahead of time and then she gets to press down materials on each little white blob. So today, with no other agenda or other final product in mind, that’s exactly what she got to do!

To set up, I used a piece of black construction paper as the background so that the white dots would show up clearly, and simply dotted all over it with glue. I set out a plate of buttons, pom poms, and dried beans for her. Anything else easy to glue down would be great in the mix, too.

Glue Dots and Buttons (1)

Veronika immediately began adding buttons, and wanted to name the color of each as she pressed down.

Glue Dots and Buttons (3)

For fun, I made some of the glue dots in a representation of other things, like a smiley face. She was delighted as soon as she saw what we’d made.

Glue Dots and Buttons (4)

She didn’t want to add any of the pom poms, but enjoyed pressing down the dried beans, too.

Glue Dots and Buttons (5)

This was a simple activity for fine motor skills, and would work well as a busy activity for preschoolers who can even make the glue dots by themselves.

Glue Dots and Buttons (2)

Threading Pipe Cleaners for Christmas

Threading Christmas Pipe Cleaners (3)

I had intended this project as a fine motor activity with a holiday twist for Veronika, but big brother Travis immediately wanted in on the action, too, so it makes a great project for the whole family on a winter afternoon.

First up, I filled a tray with the following: sparkly red, silver, and green chenille stems; red and green beads; and an assortment of colored jingle bells.

Threading Christmas Pipe Cleaners (6)

I showed Veronika how to thread a bead onto one of the pipe cleaners.

Threading Christmas Pipe Cleaners (8)

She took a few tries, but then was much more interested in the jingle bells. She actually was quite skilled at inserting a pipe cleaner into the narrow loop on each bell!

Threading Christmas Pipe Cleaners (9)

I helped a little and she produced this little bracelet.

Threading Christmas Pipe Cleaners (12)

Travis jumped in on the action and wanted to make holiday gifts for friends, a unexpected bonus of the activity.

Threading Christmas Pipe Cleaners (2)

I was so proud that he even made patterns, counting out the same number and color of beads on each side of his jingle bells.

Threading Christmas Pipe Cleaners (4)

Meanwhile, Veronika was honing those fine motor skills or just busy digging through the materials as if this were a sensory tray. Between the sparkly chenille stems and the jingling bells, there was lots to love!

Threading Christmas Pipe Cleaners (11)

Sticker Christmas Tree Craft

Sticker Christmas Tree (9)

This activity will appeal to both kids and caregivers equally; toddlers will think they’re simply having fun with stickers, but you’ll secretly know that the craft hones fine motor skills and teaches direction-taking!

To start, I drew a Christmas tree shape on green construction paper, then cut out and glued down to a sheet of red paper.

Sticker Christmas Tree (1)

Next, draw zig-zag lines across the tree with pen, as if you’re drawing on strings of lights or garlands. I sat Veronika down with this tree and a bunch of happy face circle stickers. You can use Christmas-themed stickers instead, but I wanted her focus to be on the placement of the stickers, not the images.

Sticker Christmas Tree (2)

I asked her if she could put a sticker directly on the black line I had drawn. “Anywhere you see black!” I told her with a big smile. After one moment of hesitation, Veronika aced the task every time!

Sticker Christmas Tree (5)

In fact, when I worried she was running out of blank spaces to cover on the line, I suggested she could start to sticker anywhere. She looked at me like I was crazy and stuck to the line! She even fixed her own errors a few times.

Sticker Christmas Tree (6)

I had intended the activity as a test in listening to instructions only, and never would have guessed my 26-month-old would do so well. Look at this work!

Sticker Christmas Tree (7)

If you have preschoolers, this would make a great “busy bag” activity to work on solo, particularly if you need to, oh, wrap presents.

Sticker Christmas Tree (8)

Coloring the Snow with Droppers

Coloring Snow with Droppers (11)

We have snow, but it’s not the soft fluffy kind you’d want to roll around in. This snow iced over pretty quickly in a thin layer on the ground. So it was the kind of snow to take inside!

I scooped some of the snow onto a tray, and set it out alongside pipettes and liquid watercolors (in the compartments of an ice cube tray). Because I only had 3 colors of liquid watercolor, I added food coloring to a few compartments, too.

Coloring Snow with Droppers (1)

I showed Veronika how to dip a pipette in one of the colors, squeeze to fill it up, and then squeeze again to release the color over the snow.

Coloring Snow with Droppers (2)

She loved watching the colors appear against the white snow. “It’s yellow!” she exclaimed with delight for her favorite color.

Coloring Snow with Droppers (5)

It was hard for her to get the mechanics of filling and releasing the pipette, but that was totally fine since this is the first time I’ve introduced her to the tool.

Coloring Snow with Droppers (4)

She was so proud of her work nonetheless and did a lot of simply stabbing at the snow, or dipping the tip of the pipette into the colors and brushing it over the snow like a paintbrush.

Coloring Snow with Droppers (6)

We mixed colors, too, (although our mix of red and blue looked more black than purple), which was good for a quick art lesson. After she tired of that, we put small chunks of snow directly into the ice cube tray, which now only had a shallow layer of each color. The color would saturate the snow immediately, which was fun to watch.

Coloring Snow with Droppers (9)

Veronika worked so seriously to move the snow pieces over to the ice cube tray with tongs; another tool to hone her fine motor skills!

Coloring Snow with Droppers (8)

When your toddler tires of the play, clean up couldn’t be easier. Simply put your snow in the sink and let it melt!

Coloring Snow with Droppers (10)

Pipe-Cleaner Party

Pipe-Cleaner Party (7)

Here’s an old activity I used to do with Travis, and today was Veronika’s turn. Make your kitchen colander into the prettiest one in the world with pipe cleaner decorations!

I set out a big handful of pipe cleaners and showed Veronika how to poke one down into the colander’s holes.

Pipe-Cleaner Party (1)

She took over immediately!

Pipe-Cleaner Party (4)

Big brother Travis wanted in on the party, too! He liked making the pipe cleaners into loops instead of simply sticking them out straight.

Pipe-Cleaner Party (5)

I challenged the kids to see if they could fill all the holes, which they nearly achieved!

Pipe-Cleaner Party (6)

For an extra challenge at the end, I sorted the pipe cleaners around the colander by color. Could Veronika figure out where a few leftovers were supposed to go?

Pipe-Cleaner Party (8)

After a bit of prompting, she aced the test! This was a great way to play with common household items, now that colder days have us inside longer hours once more.

Pipe-Cleaner Party (9)

Straw-Threaded Shoestring Necklace

Straw-Beaded Necklace (6)

Veronika is just starting to love dress-up, especially adorning herself with ribbons, beaded bracelets, and other accessories. She’s also at the perfect age to hone the fine motor skills needed for threading. So this activity combined the two perfectly!

To start, I set out a tray with colorful paper straws and her safety scissors. She wasn’t strong enough to cut through the straws, but she loved trying! Meanwhile, I worked alongside her and snipped each straw into several smaller pieces.

Straw-Beaded Necklace (2)

Give your toddler a shoelace or craft lace, and show him or her how to poke the tip into each piece of straw, then pull all the way through.

Straw-Beaded Necklace (3)

Veronika was delighted when she could do this alone, working with such concentration on her face. It was harder for her to pull the lace all the way through, but a little mommy assistance did the trick.

Straw-Beaded Necklace (5)

She loved deciding which color straw piece we should add next! Once the lace was full, I tied it into a knot so she could wear it as a necklace.

Straw-Beaded Necklace (7)

My little fashionista! She had so much fun that we made a second one for mommy to wear, too.

Straw-Beaded Necklace (4)

Threading for Toddlers

Threading (7)

Veronika wanted to copy along when Travis threaded beads to make friendship bracelets back in the spring, so today I thought I’d introduce her to the skill! Threading is a fantastic fine motor activity for toddlers, and although I didn’t expect Veronika to ace it today, the idea was to introduce the concept and see if she could loop some items with large holes onto string.

Threading (3)

Good, early items for toddlers to thread include dried tube-shaped pasta, cut up pieces of a paper towel tube, beads with big holes, and wooden craft spools.

Threading (1)

At first I was going to have her thread onto shoe laces…

Threading (2)

…but these were a little droopy and wobbly. We switched over to pipe cleaners which were much sturdier for her!

Threading (3)

She was most interested in the pasta, which was by far the easiest item for her to thread. She could loop it onto the shoelace or the pipe cleaner with a little assistance.

Threading (5)

She also loved testing out the beads, although these were tough for her fingers.

Threading (4)

After a short while, she was mostly just interested in playing with the materials.

Threading (9)

But I thought it was so sweet when big brother Travis swooped in and created a “bracelet” for Veronika.

Threading (11)

She loved his creation!

Threading (8)