Frozen Treasures

Frozen Treasures (3)

Ice play is fascinating for babies and it doubles as a first science lesson on the states of matter (water into ice or vice versa). This little activity is also a puzzle for your little one to figure out!

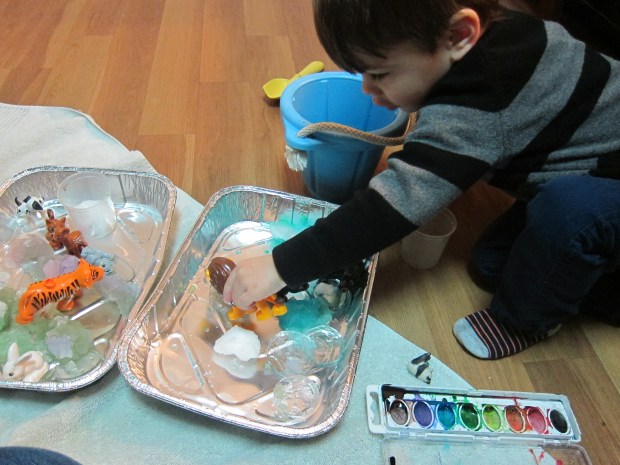
You’ll need to prep the night before you want to play the game. I cut an old soy milk carton in half, and cleaned it out. Fill with water, then add a few plastic toys. Toy farm animals were perfect! Place in the freezer until completely solid.

Frozen Treasures (1)

The next day I presented the little cube of ice to Veronika. She touched it immediately, then withdrew her hand, quite surprised. It was cold!

Frozen Treasures (2)

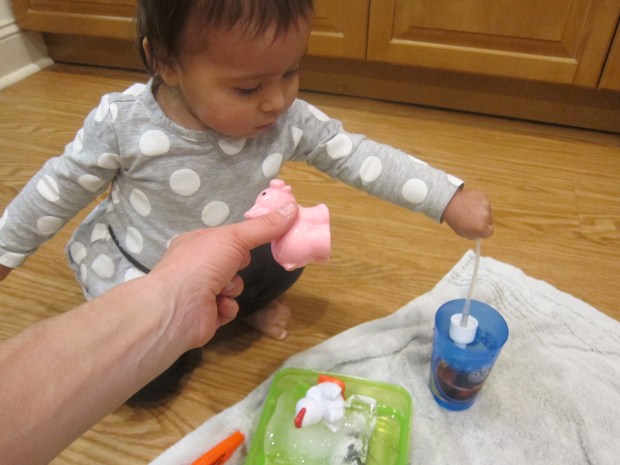
I removed the outer carton layer, and posed the question to her of how we could free piggy and the other animals. Big brother immediately swooped in and wanted in on the action.

Frozen Treasures (4)

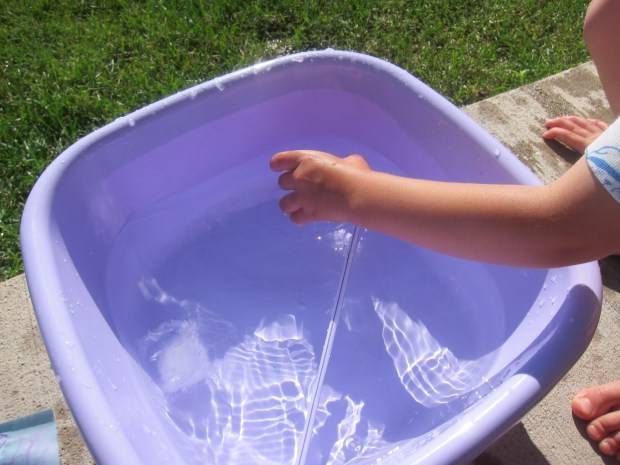
We tried pouring warm water over the ice first. Veronika loved the cup, and wanted to be a part of every pour!

Frozen Treasures (5)

This made the game great for action words (pour, tip), and great for talking about what was happening. I asked Veronika about how the temperature of the water was changing, from warm to cold once the ice touched it, to warmer again when we poured more from the cup.

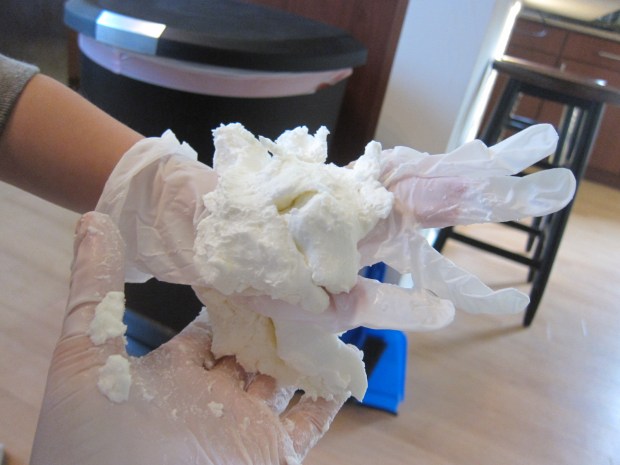
Travis wanted to try a little chisel, too, but we decided we liked the warm water method better.

Frozen Treasures (6)

Finally, the animals were free!

Frozen Treasures (7)

Honestly by that point Veronika was more into the tools we had used than the animals themselves, but she was busy and happy, which meant mama was too.

Frozen Treasures (8)

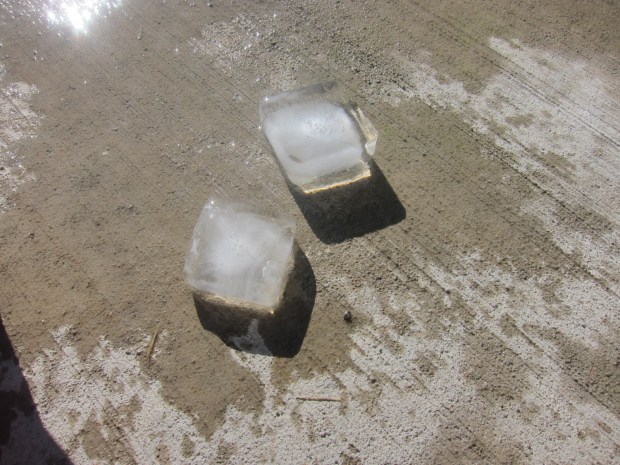
We took the final chunk of ice up to bath time to watch it dissolve – good fun!

Ice Boat Races

Ice Boat (2)

This is one of those projects that didn’t turn out quite like we planned, but it got us outside into beautiful summer sunshine, and turned into a separate kind of fun – always a happy ending!

The night before you want to race your boats, freeze water in small containers – tupperware works best. After about an hour, when the water has started to set, insert a straw into each boat to be the mast.

The next morning we decorated flags as the sails and taped to our masts. Run a little warm water on the bottom of the container, and your boats will slip out.

Ice Boat (1)

We were sort of set up for disappointment because I didn’t have a large “ocean” for us to race the boats in. An empty sand table or water table would work best, but lacking those, I filled a small craft bin with water.

Oh no, our sails fell off in the water right away!

Ice Boat (4)

Still, Travis got a kick out of huffing through a second pair of straws to move our boats, and see who could sail across the bin fastest. When that didn’t quite work, we paddled the boats with our straws.

Ice Boat (3)

Perhaps more fun, though, was simply holding the slippery “boats”, and then seeing how quickly the ice melted in the summer sunshine. Travis spent the next hour or so on the patio, playing with the water in the bin and cracking apart the ice. So all in all, not a fail!

Ice Boat (6)

Arctic Animal Experiment

Arctic Animal (4)

Following up on fun and icy magnetic play, we wanted another way to play with ice indoors. Recent reading about arctic animals such as penguins and seals was the perfect launching off point. I posed the question to Travis: How do arctic animals stay warm in icy water? The answer of course lies in their blubber, the thick layer of fat under their skin. To illustrate this for your child, get messy with this silly experiment!

First, give your child a bowl of water with ice cubes, and encourage them to plunge their hand in – if they dare! Travis cautiously dipped a finger. Brr!

Arctic Animal (1)

I promised him we could keep his hand warm in the icy water with a few simple steps. First add a latex glove. This layer alone won’t do the trick, of course, but we tested just to be sure.

Arctic Animal (2)

Next, dip your child’s glove-covered hand in a big vat of vegetable shortening (if you’re looking for a vegan and organic option, try Spectrum Organics). It will make a huge mess as you get your child’s hand covered front and back in the shortening (let alone take pics in the process!) but we mostly managed. Next time I would wrap the shortening-covered hand in plastic wrap to seal in all the mess.

Arctic Animal (3)

Now it was time to dip in. To be honest, Travis was significantly less impressed than I was, but he did notice that the fat-sealed hand didn’t flinch away from the cold ice cubes. I took a turn after, just to feel the difference.

Yup, here’s mama, just hanging out with her hand in icy water.

Arctic Animal (5)

Truly, you could keep your hand immersed this way for quite some time and not be bothered by the cold. If I’m ever crazy enough to do a polar bear swim, I’ll be layering up in shortening first.

Ice Lanterns

Ice Lanterns (9)

This is a beautiful project to showcase finds from winter nature walks! It’s a multi-day project, requiring two separate rounds of freezing, but kids will love the final glowing result.

First you’ll need those winter treasures – think holly leaves, little berries, pinecones, and pine needles.

Ice Lanterns (1)

Arrange some of the items in a plastic container (or multiple containers, if you have enough nature items), and fill halfway with water. Freeze overnight.

Ice Lanterns (2)

The next day, Travis was very eager to check out the layer of ice we’d created.

Ice Lanterns (3)

Add a second layer of winter finds over the ice, and also place a glass jelly jar inside. Add water to the top of the plastic container, and freeze again overnight.

Ice Lanterns (4)

Note: If the weather is cold enough, you can even do the freezing outside!

For the final lantern, you need to release the glass jelly jar, leaving behind a hole for a candle. Fill the jelly jar with warm water just for a minute or two, and it should slip out.

Ice Lanterns (5)

Now run water around the outside of the plastic container, and release your whole ice lantern.

Ice Lanterns (6)

Note: Because our pinecone extended past the middle of our container, our jelly jar wasn’t centered. This didn’t present a problem; it just meant that our final ice lantern wasn’t going to glow as evenly! You can see in the above photo how our candle hole is on one side of the lantern, instead of directly centered.

Finally, place a battery operated tea light inside, and watch the lantern light up the winter night!

Ice Lanterns (7)

You can leave these outside, or take them inside for a warm winter glow.

Ice Lanterns (8)

Ice, Water, Vapor

Ice Steam (2)

It’s been quite some time since I hopped over to Hands on As We Grow, but glad I stumbled upon this experiment and remembered what a treasure trove the site is for games and learning!

Parents, use your discretion before embarking on this activity. Kids will need to stand near a burner and hot pot on the stove. If you think they will reach out, wait until they are older. However, if you’ve started to include them as a little sous-chef in the kitchen and they understand the basics of kitchen safety, they are likely ready for it.

Travis loves playing with ice, and today I told him we’d take ice cubes all the way from frozen to steamy vapor. He was so excited to see how it would happen!

First, have your child help you count ice cubes into two pots. There really was no need to use two, except that it doubled the excitement of watching what happened during the experiment.

Ice Steam (1)

We placed the pots on the stove, where the ice quickly reached the next phase – water! I gave Travis a big wooden spoon to stir with so he could feel the difference between the chunky ice cubes and smooth water.

Ice Steam (3)

Very quickly, our pots started bubbling and we waited for the steam to appear. We had two ice cubes left over, and added them to the pot when it was at its hottest – Travis couldn’t believe how quickly they melted!

Ice Steam (4)

A great intro to states of matter.

Toddler Science Experiment

Toddler Science (5).JPG

This game involved a simple introduction to the scientific method, with Travis needing to make a hypothesis. Although I thought the answer would be obvious, even I was surprised with our results!

To set up, place ice cubes in one bowl (with a little water) next to an empty bowl. If you’re inside, it helps to have a towel under the bowls to contain any spills… or save the game for when you can play outside on a warm day!

toddler-science-1
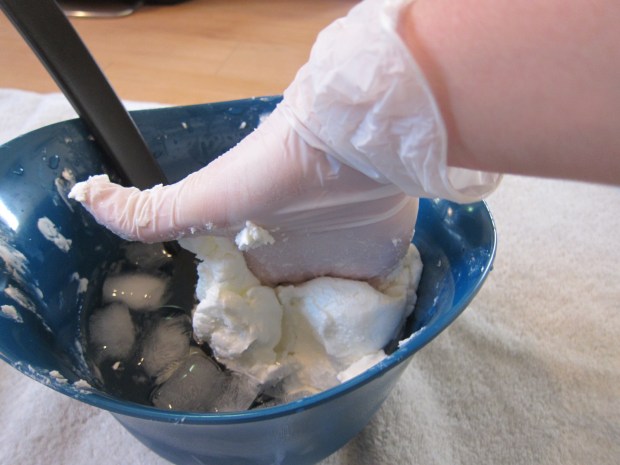
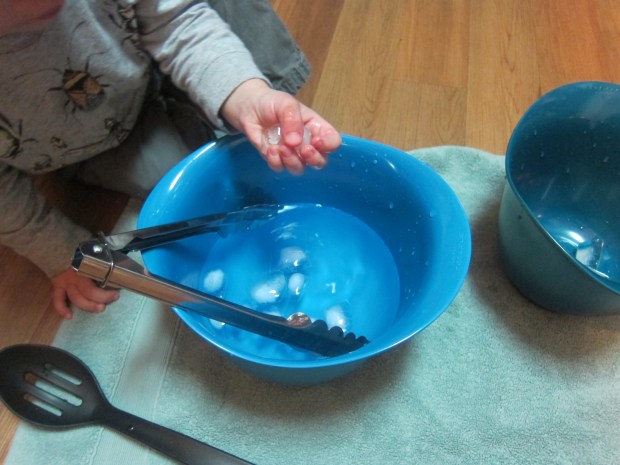
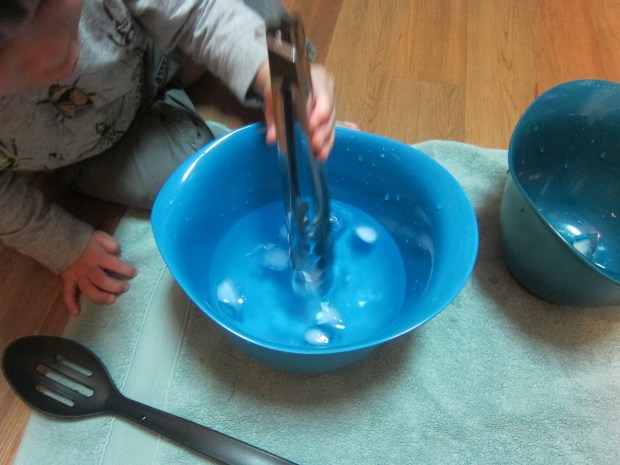
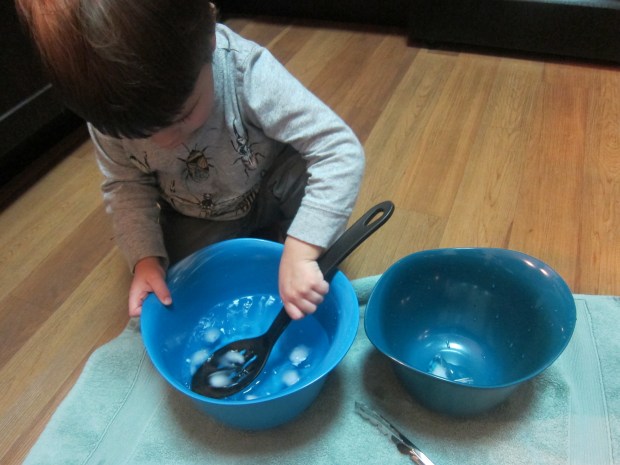
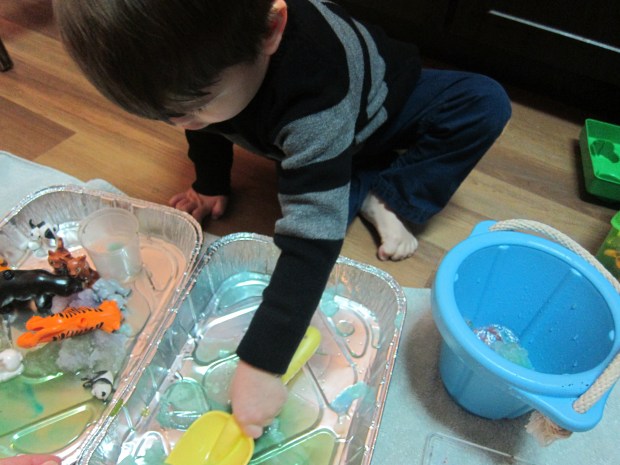
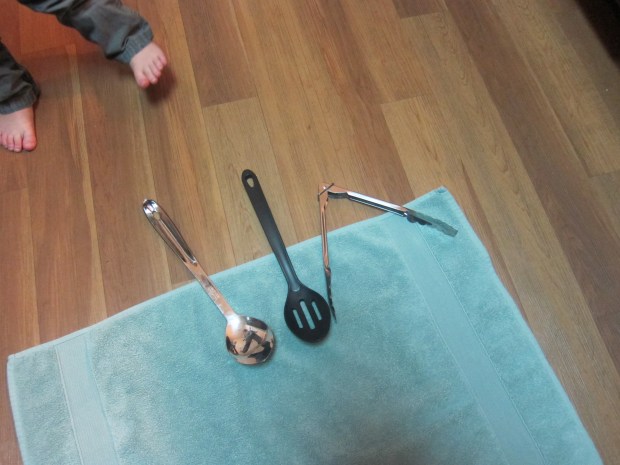
Next I presented Travis with three options for moving the ice from one bowl to the other – a regular spoon, a slotted spoon, and kitchen tongs. Which one would be the best way to move the ice, I asked him. He immediately grabbed the regular spoon and started transferring.

toddler-science-2

What happened next was quite interesting though. The spoon worked great, but as the ice cubes began to melt and grew smaller, they slid off the spoon. The best tool for the job turned out to be…the tongs, which I hadn’t thought Travis had mastered! So the result surprised us both.

toddler-science-3

The slotted spoon, which I had surmised would be his favorite, was a bit of a dud. He was so into the regular spoon and tongs that it didn’t interest him to see the way the water slid through the slots as he scooped up a piece of ice.

toddler-science-4

The fun lasted until the ice cubes all melted!

Ice Excavation

ice-excavate-4

This morning we had some fun with a little dinosaur skull we recently purchased. Ahead of time, I put the skull into a dixie cup and filled the cup with water, then left it in the freezer overnight. I did the same with a rock to be a “fossil” and a little plastic lizard, for lack of any other dinosaur “bones”!

In the morning, I asked Travis if he wanted to be a paleontologist and excavate dinosaurs from the ice. How, I asked him, would we get them out?

ice-excavate-1

He loved the puzzle behind this game more than I thought, asking me which tools we could use. I gave him cups of warm water, a spoon, an eye dropper, and a little (child-safe) chisel.

ice-excavate-5

I was so proud of how patient he was with our “excavation! I thought he might just pour the warm water onto the ice, but he loved spooning it carefully, and watching the toys be freed little by little.

ice-excavate-3

The best was when our T-rex was nearly out, but a final chunk of ice remained in its jaws – Travis loved reaching in to pull it out.

ice-excavate-7

A cute game for the imagination and for a tiny intro to archaeology.

Ice Towers

ice-towers-5

It’s an arctic 20 degrees outside, so – acting on a suggestion from Kiwi Crate’s app – we made ice towers!

I thought Travis would have the most fun if the towers were different colors, so we filled various Tupperware and plastic cups with water, and then swirled in watercolor paint with a brush. Now it was time to set them on the balcony to freeze!

ice-towers-1

As luck would have it, it snowed overnight, so when we brought in our ice the next morning, we also shoveled a bucket of fresh snow.

ice-towers-7

Now it was time to play with it all. I put out 2 disposable foil pans to catch the mess. The ice “towers” unfortunately hadn’t frozen all the way through, so we had very short little ice circles, but lots of cold colored water. When we shoveled in our fresh snow, it immediately took on beautiful hues wherever the colored water ran into it.

ice-towers-8

We added Duplo animals to play in our wintry landscape.

ice-towers-3

Because the paints ran together and soon turned a muddy brown, I took the watercolors back out so Travis could paint on the ice more vividly again.

ice-towers-4

Next time I would let our Tupperware containers freeze longer so we had taller ice towers and mountains, but Travis didn’t seem to mind! As someone who used to dislike winter, it’s projects like these that remind me to find joy on even the coldest days.

ice-towers-6

Ice Luminaries

ice-luminaries-7
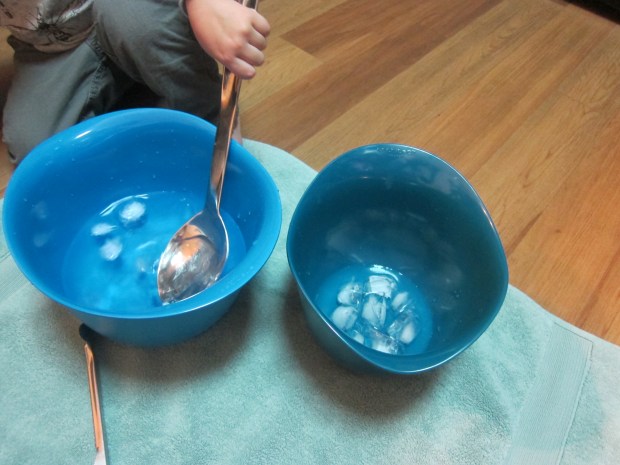
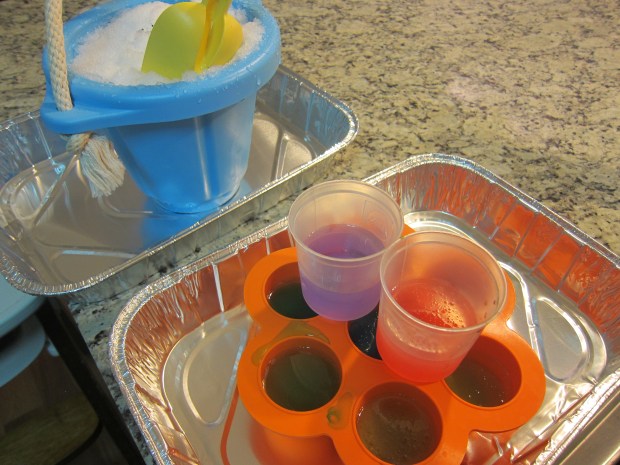
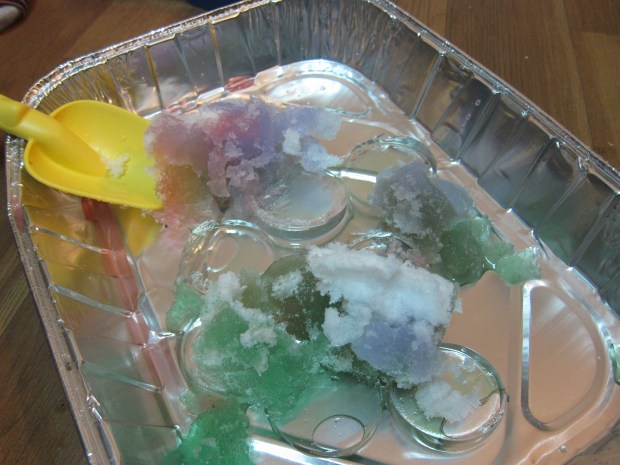
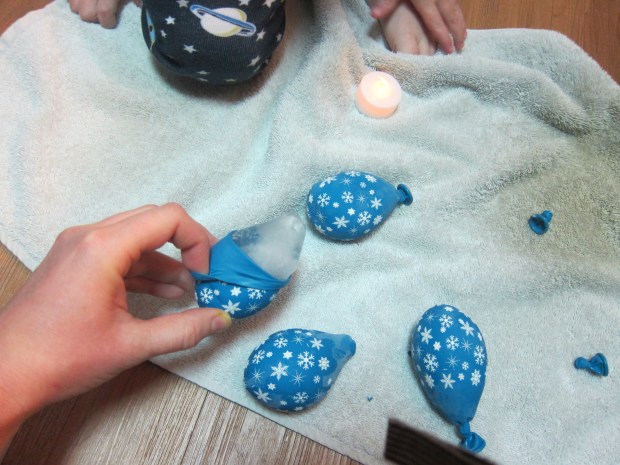
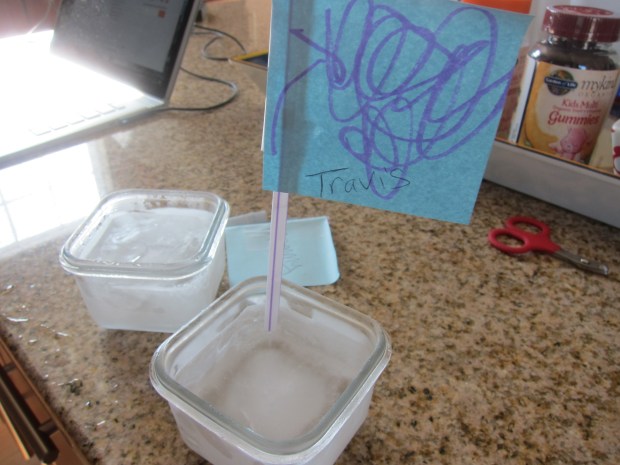
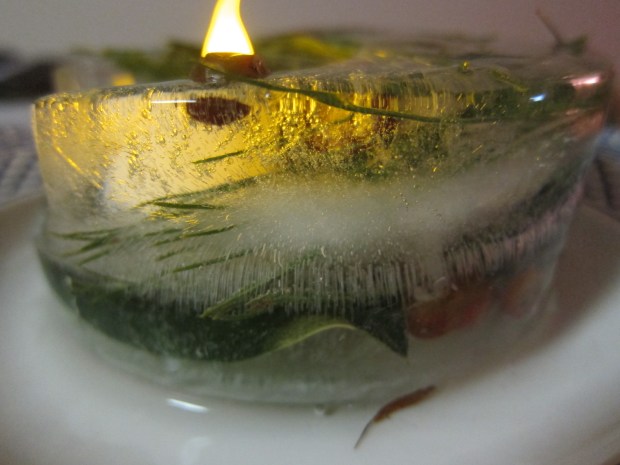
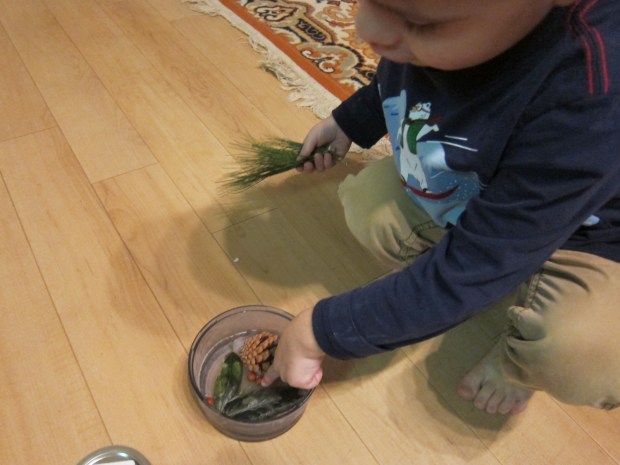
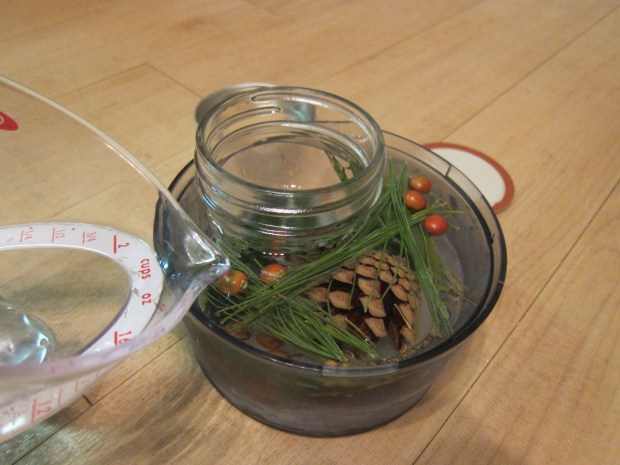
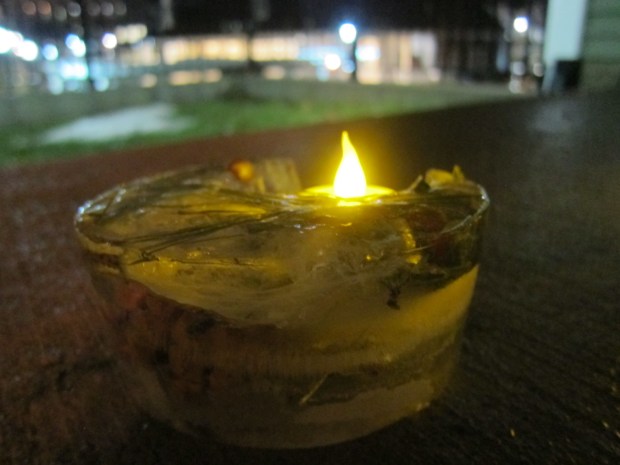
The purpose of this winter project was to make beautiful glowing ice lanterns. They were beautiful… but as you’ll see, we found numerous ways to enjoy the game beyond that stated purpose. Read on!

To make the luminaries, fill balloons with water and knot off securely. I used a funnel to fill the balloons since our faucet taps are too big for stretching the mouth of a balloon onto them.

Travis impishly discovered that the project was fun already, threatening to pop open the balloons and get water everywhere, testing just how hard he could squeeze them.

ice-luminaries-3

Luckily, the balloons were strong! Once he’d had his fill of fun, I popped them into the freezer to freeze overnight.

The next morning, it was time to reveal the ice bulbs we had made. Cut the knot off each balloon with scissors, and you’ll be able to peel down the rest of the rubber, leaving a globe of ice behind.

ice-luminaries-5

When you place the ice in a jar with a battery-operated tea light behind them, they create an ethereal glow. (In retrospect, we ought to have waited until after dark to remove from the freezer!).

ice-luminaries-6

Travis enjoyed the luminaries for a time, but then he just wanted to play with the ice! I thought I’d show him how salt makes ice melt faster, so we placed the ice globes in an old baking sheet and poured salt on top.

ice-luminaries-9

Travis easily spent the next 45 minutes with the game – pouring more salt, scooping at the resulting slushy mixture of water and salt, shoveling out the chunks of ice that remained, and so on.

ice-luminaries-10

A delightful morning of icy enjoyment. How have you and your child made winter mornings fun recently? Please share in the comments!

Cookie Cutter Ice Ornaments

cookie-cutter-ice-8

These sparkling ice ornaments are the perfect way to bring joy to even the coldest of winter cold snaps!

To wit, we have weather in the teens this week, which meant the perfect chance to try out the project.

In the evening, we filled an old baking sheet about 1/2-inch deep with water. Travis enjoyed placing the cookie cutters on the sheet, and we decorated a few of them with dried cranberries and raisins.

cookie-cutter-ice-3

If you’re feeling extra artsy, you could add drops of food coloring, too, but Travis said he wanted ours clear.

Drape a length of string into each cookie cutter, so the water will freeze around it and enable you to hang the ornament once frozen.

cookie-cutter-ice-2

I asked him what he thought would happen when we placed the water outside in the cold. To my surprise, he knew the answer was, “Ice!” Precisely!

We left the baking sheet on our balcony overnight, while the temperature dipped near 10 degrees with the wind chill.

In the morning, I told Travis it was time to check on our ice – he was so excited. The sheet got some experimental taps and pokes first.

cookie-cutter-ice-4

To liberate our ornaments, we simply jiggled the cookie cutters a little, and the shapes came free. Travis had fun playing with the leftover ice chunks for a little while.

cookie-cutter-ice-5

I tied them up to our balcony, where they were a gorgeous reminder of the beauty in even the coldest of days.

cookie-cutter-ice-7