Kazoo

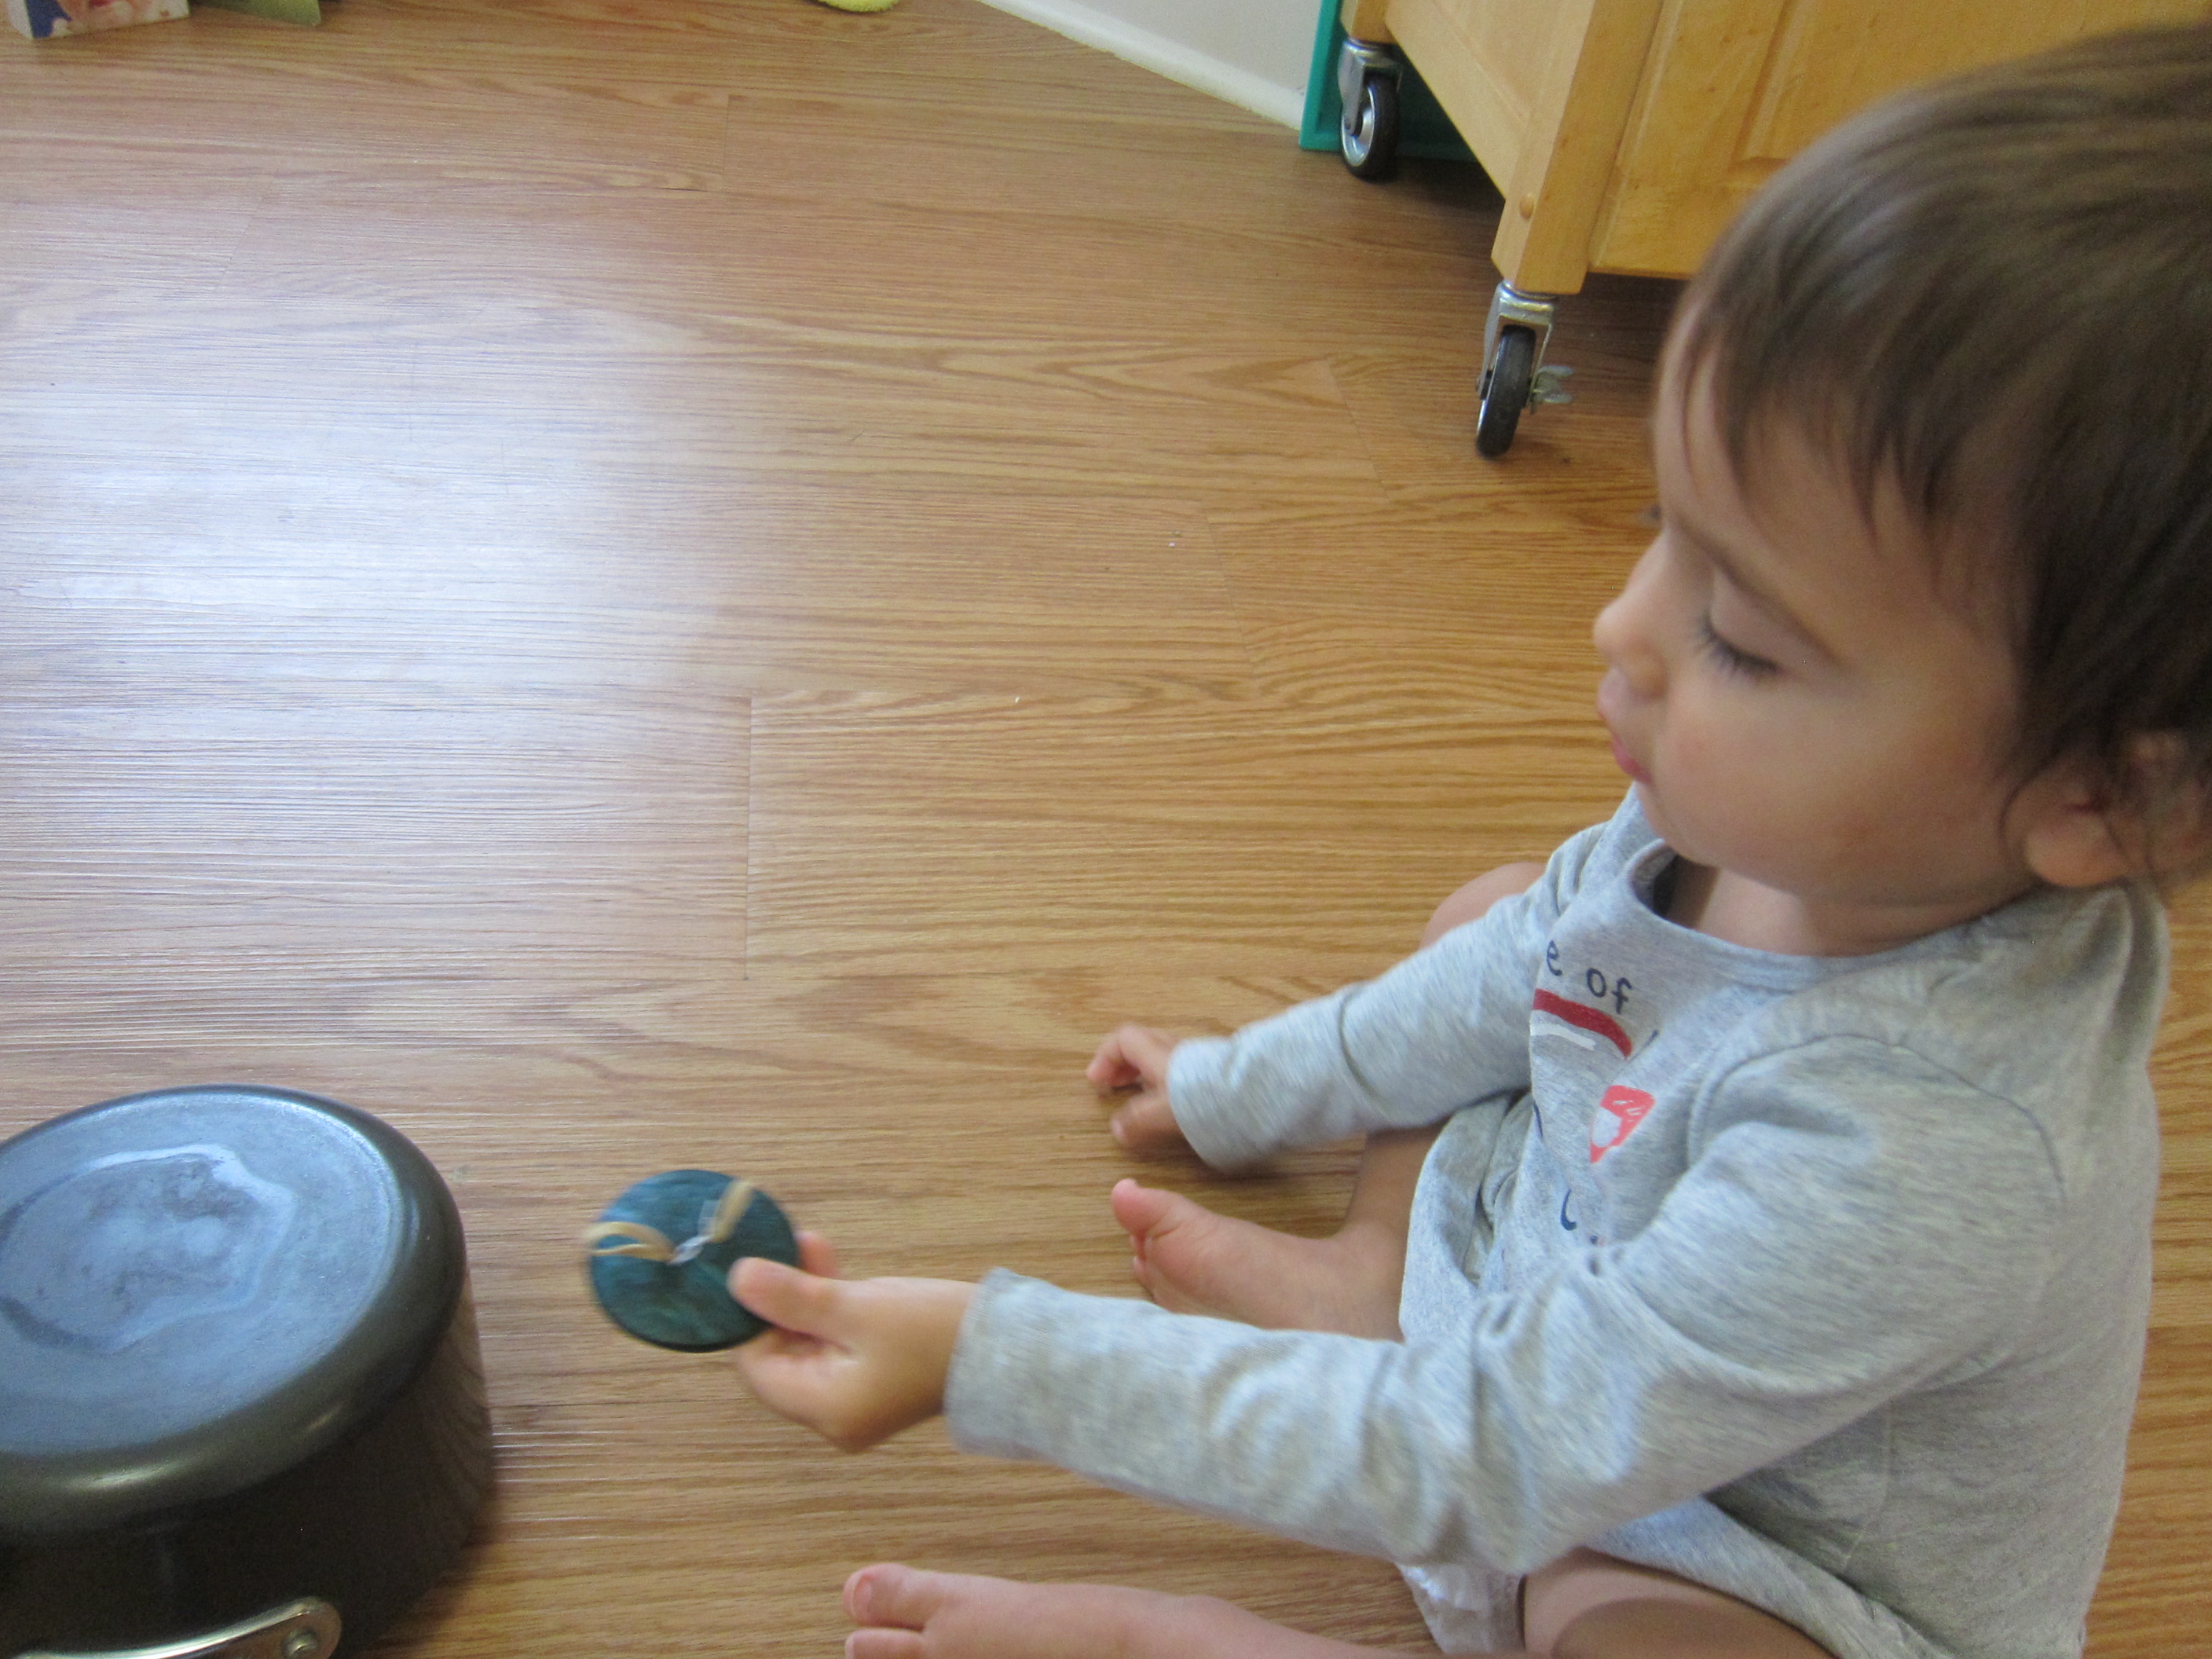
We’ve been having fun with super-simple homemade instruments lately, and this one is a riff on an oldie but goodie.

To make a “kazoo” that sounds nearly like the real thing, simply use a hole punch to make a hole down the side of an empty toilet paper tube, as far as the punch will reach.

Apply glue on the opposite rim of the tube, and place on a square of wax paper. Let dry completely. Once the glue dried, I invited Veronika to decorate the kazoo! She added purple marker and some stickers before declaring it complete.

Now, I showed her how this little creation could make music. Hum any favorite tune into the tube, as you would with a regular kazoo, and the vibrations against the wax paper will make a fantastic kazoo-like sound.

Veronika couldn’t quite master the art of humming into the kazoo, but certainly loved singing down into it, or listening to my hum! This was a great way to add to our musical play.

Advertisement

Toddler Triangle

This musical idea (from the Toddler’s Busy Book) was one of those reminders that sometimes the best ideas are the simplest ones. It can be hard for Veronika to make beautiful pinging noises on our triangle instrument, because she always holds the metal of the triangle itself, which stops the vibration. But this at-home version is the perfect hack for making beautiful music!

Simply tie a length of colorful yarn to a three-inch long screw. (Note: You can use nails of the same length, too, but be sure to tape over the sharp end).

Now hold onto the yarn, and tap the first screw with a second one. Ping ping ping!

This brought instant delight to Veronika’s face. She even wanted to help her toys “play” the triangle, showing them how to make music on it just as I had shown her! This was the perfect way to make music on a rainy afternoon.

Simple Shakers, Two Ways

Veronika and I made two versions of homemade maracas today, all from upcycled items!

The first suggestion came from the Toddler’s Busy Book, where the author originally suggests filling old film canisters with beads, buttons, or similar small items (pebbles, dried beans, etc.). But who has film canisters anymore? But the toy medicine jars from Veronika’s vet set are nearly identical to this throwback, in terms of shape, size, and color. The perfect vessel to be our shakers!

I filled one jar with beads and another with buttons, for contrast, and put the lids on firmly. We loved having an early morning dance party and shaking along!

The second version was the perfect way to upcycle plastic Easter eggs. I used six eggs total and three different items (beads, buttons, and pennies), adding each item to two eggs. Hot glue the eggs shut, then set out. Now it was a bit of a guessing game! The trick is to see if your toddler can find the “match” for each egg by listening to the different sounds. To make the task easier, both eggs with buttons were blue, both eggs with beads were pink, and so forth.

The easiest for her to distinguish were the pennies, since they made such a loud clang. Buttons and beads were harder to tell apart.

But no matter what was inside, these sure were fun to shake!

Musical Teepee

Sound is often a neglected part of “sensory” outdoor play, since we focus so much on touch or sight. This was a great way to get Veronika’s ears buzzing on a spring morning.

First, we gathered a few large sticks (which were easy to find after recent wind storms!), and then positioned them until they formed a little teepee. The sticks propped each other up so securely that I didn’t have to do much more, but added a little string for extra insurance.

The first item I wanted to add was a small wind chime. I dangled this from one of the sticks so it hung just below the teepee. Veronika was immediately intrigued!

I also added a musical triangle, a metal colander, and a metal cookie cutter, then handed Veronika a mallet. Time to play!

She loved exploring all the different sounds, from the tinkle of the wind chines to the ping of the triangle, to almost a snare drum sound from the colander on top!

I plan to leave this up for at least a few days so she can interact with it differently every time we pop outdoors.

Musical Animals

Musical Animals (1)

Here’s a fun riff on Musical Chairs, although there are no winners or losers here: just music and stuffed animals and a way to get moving indoors!

To start, I set up several of the kids’ stuffed animals in a circle on the floor. Note: You can also sit every stuffed animal on a chair if you have enough chairs in your home. But the floor worked just fine in a pinch.

Musical Animals alt

Since our circle was on the floor, I opted for stuffies that could mostly “sit up” on their own, although that’s not a requirement. Then I set some jazzy music playing and told the kids to run around the circle of animals.

Musical Animals (2)

When the music stops, everyone freezes and sits with the nearest stuffed animal in his or her lap!

Musical Animals (5)

There’s no element of elimination to this game, as in normal musical chairs, but between music, freezing, and giving big stuffed animal hugs, this game is a reward in itself.

Musical Animals var

Soon, the kids found some extra pillowcases in the closet and were tucking the stuffed animals into little “beds”. Veronika even leaned in to give this one a kiss!

Musical Animals (4)

So it turned into a very cozy way to pass a cold morning.

Musical Animals (3)

Christmas Noisemaker

Christmas Noisemaker (4)

I love Christmas music and have been introducing Veronika not just to the classic carols this holiday season but also to fun contemporary tunes (think: Rockin’ Around the Christmas Tree and Jingle Bell Rock). So of course she needed a Christmas instrument to shake along as we rocked (around the tree quite literally!).

An empty frozen juice can makes the perfect size shaker. We filled this was dried beans and a few jingle bells. Popped popcorn pieces would work, too!

Christmas Noisemaker (1)

Seal the lid tightly. I used hot glue, but you can also secure with tape. We then covered with red felt and Veronika helped decorate it with Christmas-themed stickers.

Christmas Noisemaker (3)

Time to shake!

Christmas Noisemaker (5)

She loved prancing around with the shaker and drumming on drums as we put on our favorite Christmas tunes.

Christmas Noisemaker (6)

We wish you merry music making!

Straw Windpipe Craft

Straw Flute (9)

This classic DIY instrument is a perfect one for toddlers, requiring no complicated steps or materials.

Simply line up brightly colored plastic or paper straws. I made some flutes that were 8 “pipes” long and a few smaller ones only 6 straws long, which were easier for Veronika to hold in her hands.

Straw Flute (2)

Secure with tape near the top and bottom third, then use scissors to snip in a diagonal so your pipes run from longest to shortest.

Straw Flute (4)

Toot toot toot! These were perfect to play during her at-home Zoom music class, adding to the hands-on fun!

Straw Flute (10)

It turned out that big brother Travis loved the windpipe, too, quickly incorporating it into his play.

Straw Flute (7)

The perfect instrument for a homemade marching band, in sum.

Straw Flute (8)

Button Tap

Button Tap (5)

Mix up your toddler’s musical play with this silly D.I.Y. instrument. The buttons can be drumsticks, cymbals, or anything else your toddler imagines as you jam to favorite tunes.

To assemble, I used large two-hole buttons from the craft store and simply threaded one end of an elastic through each hole.

Button Tap (1)

Now, the two loops of the elastic stick out from the back. Slip these loops over fingers, then turn pots and pans upside-down for some classic drumming.

Button Tap (2)

Veronika didn’t actually like wearing the loops on her fingers, but she sure loved clanging the buttons against the pans.

Button Tap (3)

She also liked putting the buttons in the pan, covering with the lid, and then shaking it to make noise.

Button Tap (6)

For a slightly different version of buttons-on-pans, I hot-glued smaller buttons to the fingertips of an old garden glove.

Button Tap (7)

Now she could slip this on and tap tap tap her fingers against the metal.

Button Tap (9)

Consider this homemade instrument the next time you have a toddler sing-along over Zoom!

Dance Ribbon

Dance Ribbon (6)

This easy dance ribbon made the perfect rhythmic accessory for Veronika’s at-home music class today! I put it together just before class, and she continued to play with it long after the Zoom session had ended.

First, tie lengths of colorful ribbon to a ring that your toddler can easily hold. I used a canning ring for this, but a shower curtain ring or even key chain would work, too!

Dance Ribbon (1)

I alternated strands of green and pink ribbon. You can make your dance ribbon with one color, two, or a full rainbow!

Dance Ribbon (7)

I handed the ring to Veronika and showed her how to wave it through the air to the rhythm.

Dance Ribbon (3)

A lilting, slow tune felt just right for making big beautiful ribbon circles. Your toddler can take it from there!

Dance Ribbon (5)

She loved waving the ribbons around and dancing with them, and requested a tutu to be a ballerina!

Dance Ribbon (9)

She also later found other uses for it, like pretending it was her doll’s swing on the playground! I always love watching the way toddlers can invent worlds of imagination from just a few simple materials.

Dance Ribbon (8)

Paint Dancing

Paint Dancing (8)

I love throwing in a sensory project for the feet now and then, such a different experience for toddlers than working with their hands! All you need for this project is an old crib sheet (or similar large piece of fabric), and a willing pair of toddler feet.

I squirted two colors of washable paint onto a baking tray and added a little dish soap to each color, which will make clean up easier in case any paint goes off the fabric.

Paint Dancing (2)

Fill a second shallow tray with warm soapy water, and have a towel handy. Then tape your old sheet down to the floor securely at all four corners. I put on some tunes (Walking on Sunshine felt just right!) and Veronika immediately started bopping and dancing before the paint was even involved.

Paint Dancing (1)

Then I dipped her feet into the paint and set her painted soles down on the fabric. “Let’s dance!” I said.

Paint Dancing (3)

She was initially hesitant when the paint was thickest, but as she began to move around, a big smile formed.

Paint Dancing (5)

We dipped her toes and repeated a few times, and mixed up the tempo for a little music lesson, too!

Paint Dancing (6)

Arguably her favorite part was washing off in the sudsy water at the end. At first she just dipped in her toes, but then I turned around and found her sitting completely in the soapy tray like it was a mini bathtub. Well, time for an outfit change!

Paint Dancing (7)