Halloween Sensory Bin

Halloween Sensory (3)

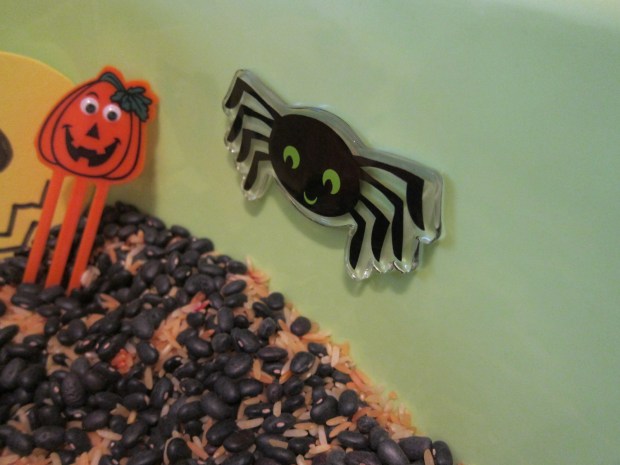
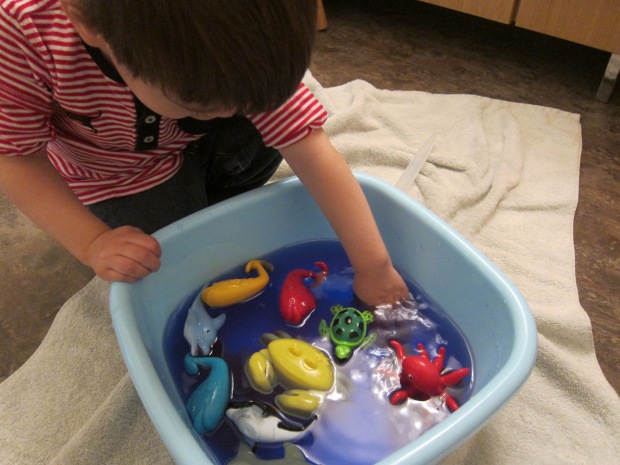
Seasonal sensory bins are always good fun, equally delightful for little tots as they are for preschoolers. This one gets an October twist with an orange and black background, and Halloween goodies tucked inside.

To prepare the rice, place white rice in a zip-top bag and shake with orange food coloring – I achieved a nice orange by mixing the yellow and red from Color Kitchen. Spread on a foil-lined baking sheet and let dry.

Halloween Sensory (1)

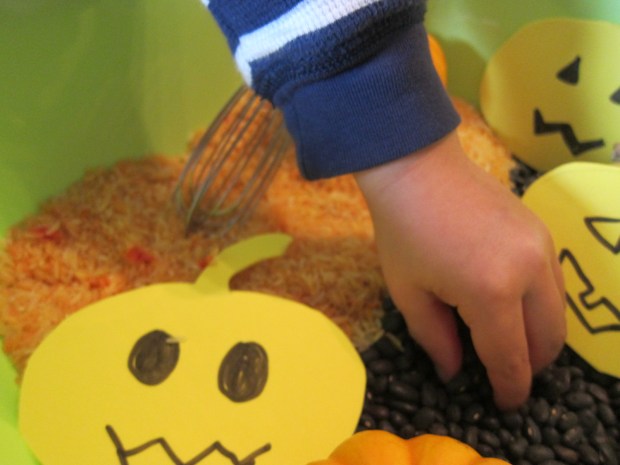
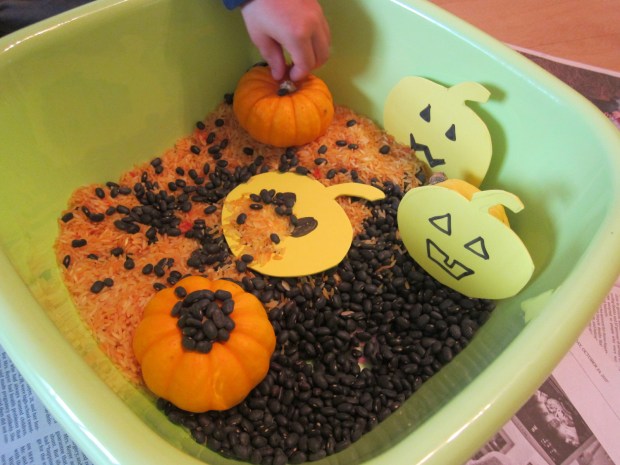
Fill a tub with the orange rice on one half and dried black beans on the other – it’s getting spooky in here!

Halloween Sensory (2)

Next I placed a few odds and ends in the bin, like mini pumpkins and gourds, and foam in the shape of jack-o-lanterns. I added a whisk and spatula, then presented the bin to Travis after a morning at school.

Halloween Sensory (4)

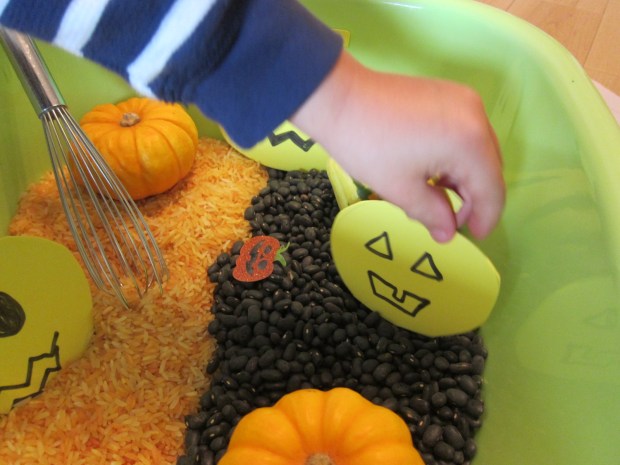
He loved sprinkling the black beans onto the rice for a startling contrast. Pretty soon this was an imaginative game of making pumpkin soup.

Halloween Sensory (7)

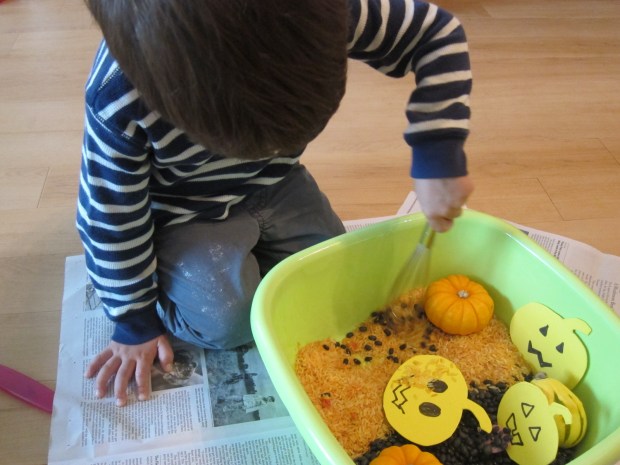
The texture of the dried beans was a big hit…

Halloween Sensory (5)

…as was the sound they made when sprinkled on top of the pumpkins, making this bin a delight for auditory senses as well.

Halloween Sensory (10)

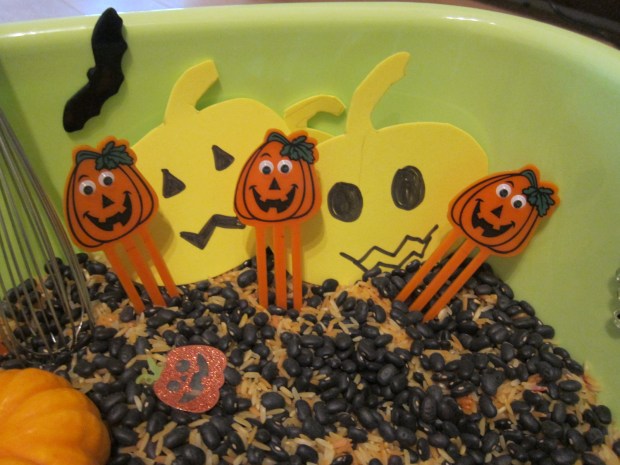
You can keep bins like this around for a couple of days for children to return to. Later, we added some wobbly Halloween stickers and a few more pumpkins to our “patch.”

Halloween Sensory (12)

What else would you add to your Halloween sensory bin? Please share in the comments!

Halloween Sensory (13)

Fall Sensory Jars

Fall Sensory Jar (5)

This easy project works on several skills: sorting, fine motor skills, plus a little bit of science when it comes to what will sink and what will float. But never mind all that – kids won’t even notice they’re learning; they’ll just love the process and seeing all the pretty fall-colored things in their final creation!

To start, gather any fall-themed or fall-colored bits that will fit in your water bottle. I had hoped to use foam shapes in the shapes of leaves, pumpkins etc., but wasn’t able to find any at the store. Instead, we had an assortment of little wooden craft leaves, paper leaves, and buttons and pom poms in autumnal colors. Bits of fall-hued ribbon would work well to!

To start, encourage your tot to sort the items by kind (or by color, if you prefer).

Fall Sensory Jar (1)

Travis was impatient with that step because he couldn’t wait to get his hands on the water bottle. Pour a little water from the top, leaving it mostly full, and begin adding your items.

Fall Sensory Jar (2)

Here is where we had fun guessing what would sink and what would float. Buttons made a quick descent to the bottom, whereas our pom poms and wooden leaves stayed near the top.

The narrow opening of the bottle also posed an interesting puzzle for Travis to work out. How could he fold our leaves so they fit inside?

Fall Sensory Jar (3)

Once the jars are filled, use a hot glue gun (grown-up step) to seal on the caps. Now your child can watch the items swirl back and forth!

Fall Sensory Jar (4)

Apple Theme Sensory Bin

Apple Sensory (4)

It might not officially be autumn yet, but back-to-school has us thinking of all things apple. I put together this little sensory bin to delight Travis in the afternoon when he returned from school.

Almost any assortment of apple-themed objects will work for a sensory bin like this, so use the suggestions below as a template. I filled a tub with a base of green split peas, then added in miniature apples and a rake, great for sensory digging and pouring.

Apple Sensory (5)

Add any cute finds you have at home, like this dollhouse barrel of apples!

Apple Sensory (6)

Cinnamon sticks made this bin a multi-sensory experience, bringing our sense of smell into play as well.

Apple Sensory

For the little trees, I glued leaf shapes cut from green felt onto old toilet paper tubes. Tiny red pom poms were the apples, and Travis could “pick” them from the trees, or stick back on again.

Apple Sensory (2)

A nice way to kick off the fall season!

Apple Sensory (9)

Vinegar, Baking Soda… and Balloon Eye Droppers

Vinegar Balloons (4)

I used to have pipettes (a.k.a. eye droppers) at home, but can’t find them anywhere these days! Cue this genius idea I spotted on Kiwi Co‘s KiwiCorner app. The perfect way to use up a few balloons we had in our craft box.

This game is pretty much a simplified version of my volcano for toddlers – a big bin of baking soda with vinegar to squirt on top. But the fizzy fun comes from the novelty of squirting out the vinegar through homemade eye droppers.

To prepare your eye droppers, fill uninflated balloons with white vinegar. Add a few drops of food coloring to each, so your explosions will be colorful as well.

VInegar Balloons (1)

I knotted off the balloons, after which they look like mini water balloons. Carefully poke a small hole in each (a pin or wooden pick both work fine).

Vinegar Balloons (2)

Travis dumped a container of baking soda into a tray, and then we let the fizzling begin!

Vinegar Balloons (3)

After the first few bubbles, he preferred to stir our mixture while I squirted additional vinegar from the “eye droppers.”

VInegar Balloons (5)

Overall, cute and messy fun, and a nice way to improvise when you can’t find real pipettes.

Ocean Sensory Tray

Ocean Tray (4)

What do you do on a summer day when you plan to go to the ocean, but the weather doesn’t cooperate? Bring the ocean to you of course!

Arguably the best part of this game for Travis was dyeing the water blue, so food coloring is a must. I set up a bin of water in the bathroom, and he loved dumping in the blue color, swirling it around until we had ocean water.

Ocean Tray (1)

Now it was time to add all our ocean toys!

If you have shells from a recent excursion to the shore, be sure to add those as well. Since we didn’t have any, large pasta shells worked in a pinch!

Ocean Tray (2)

Travis loved putting all our sea treasures in and out of the bin several times.

Ocean Tray (5)

He also loved filling a baster up with the ocean water and creating ocean storms and waves.

Ocean Tray (3)

Overall, this was a nice diversion indoors – and you could certainly play it outside on a hot day, too!

Dinosaur Dig Sensory Bin

Dino Dig (4)

We’ve been on a dinosaur kick this past week, which led to this new variation on the sensory bin!

To set up our archaeological dig, I used three kinds of dried beans as the base – pinto beans, black-eyed peas, and white beans. Hide various dinosaur toys or bones in the bottom of a bin, then cover with the beans.

Dino Dig (3)

Next, Travis and I gathered our tools – we needed shovels, rakes, and wooden craft sticks to sift through the layers of “soil”. He was so excited when he unearthed the T-Rex skull!


Dino Dig (2)

We also used test tubes to collect “soil samples” of the beans. Pouring the beans into the narrow tubes took great concentration, and was a nice test for fine motor skills.

Dino Dig (6)

Overall, Travis liked scooping the beans more than he was into the archaeological aspect of the bin, but it was still a great way to extend our play with dinosaur toys at home.

Dino Dig (5)


Paint with Your Feet

Paint Feet (4)

We enjoyed tactile foot play earlier in the week with foot sensory bins, and continued the theme yesterday evening. This game would no doubt be even better on a bigger piece of fabric outside on a sunny day, but we made do on a rainy day with the bathroom floor and a plain white t-shirt from the craft store!

First, Travis chose his colors, and we filled a big bin with a generous portion of each.

Paint Feet (2)

I started out painting his foot one color at a time, and then he would stamp on the white shirt.

Paint Feet (3)

After a while, he wanted to paint his feet himself – and then painted his knee as well, to which I could only shrug, ‘why not?’. Then of course he had to try standing in the paint! (Note: hold your child carefully, paint is slippery). I would lift him out and place him on the t-shirt to take a few steps each time before he climbed back in the bin.

Paint Feet (5)

In retrospect, I wish we’d done this to music so he could have danced around, but I still loved our final product.

Paint Feet (6)


Foot Sensory Bins

Foot Bins (1)

Why should hands have all the fun? We set up bins today to see how things felt with our feet instead!

For your mise en place, set out 3 separate bins. I used one each of: shaving cream, water beads, and sand. You can make your sand wet or dry, or start with it dry and then gradually add a little water.

Travis wanted to hop in the water beads first, which he declared very cool.

Foot Bins (2)

Quite quickly he was ready to see how the sand felt. It only took a moment before he requested we add some water beads to the sand, and he mixed it all together with his toes for a while.

Foot Bins (4)

He was very hesitant about the shaving cream, but I got him to sit on a stool and we dipped his feet in, after which he decided he liked how creamy it felt. Then he declared we needed water beads in here too.

Foot Bins (6)

When you’re done, dump any trash out and then rinse your buckets in the tub – which is half of the fun anyway!

Foot Bins (7)

Spray Bottle & Watercolor

Spray Bottle (8).JPG

Travis has recently loved using a spritz bottle to “clean” alongside me. I’ve set up safe zones in which he can do so without getting the whole house wet – bathtub tiles, his chalkboard – but thought he’d love it if I granted him permission to spritz from the spray bottle in a rather taboo way… With colored water!

To make our “paint” we added one pack of Kool-aid – in black cherry thank you very much – for a nice dark result.

Spray Bottle (1)

I set Travis up with paper and newspaper to spray to his heart’s content, but it quickly became apparent that neither was absorbent enough.

Spray Bottle (4)

A switch to watercolor paper saved the day! We loved exploring the ways the bottle could make small dots from further way, and big wet blobs when held close to the paper.

Spray Bottle (6)

As a bonus, your “paintings” will smell fantastic once finished, making this a nice project for the senses as well.

Spray Bottle (7)

Be forewarned: Kool-aid stains, so you need to be careful or things will get really messy. You might consider waiting and doing the activity outside in the warm weather!

Spring Sensory Bin

Spring Sensory Bin (7).JPG

Happy Spring! We’re kicking off the new season with this pastel-hued sensory bin. I made dyed rice once before on this blog, but this time I used Kool-Aid for more vibrant color; you can prepare batches exactly the same as for Kool-Aid Dyed Pasta.

Spring Sensory Bin (1)

After the rice dried, I set up with a bin with a few spring animals, a rake, and fake flowers, for a pretty pastel garden.

Spring Sensory Bin (2)

Travis immediately set to raking – he loves scooping through rice, no matter the theme! For this activity, we talked about how flowers grow in the spring, and he loved “planting” some in the rice. Then we decided we needed to fill up a watering can with the rice, which could then rain “April showers” down on the flowers. This went on for quite a while!

Spring Sensory Bin (6)

I also added plastic Easter eggs at one point, which were fun to scoop with, fill with rice to shake like maracas, and more.

Spring Sensory Bin (4)

Travis loved the way that the rice started out in 4 separate color piles, and then all mixed together.

Spring Sensory Bin (5)

Hopefully this helps make your first day of spring as joyful as ours was!

Spring Sensory Bin (3)