Mailbox

Mailbox (8)

Veronika is very into the mail truck lately, wanting to watch our postal worker deliver the mail every chance she gets. She even got to peek inside the back of the truck! So today we recycled an old toddler favorite, with a homemade mailbox. Now that she’s older, she understands the role play involved, too.

First was the arts & crafts portion of the game: we needed to decorate a mailbox! I set out stickers and construction paper, along with an old box. She loves glue sticks and happily smeared onto strips of colored paper, which we then stuck onto the box.

Mailbox (2)

I had ocean-themed stickers, which felt appropriate here in the summertime. What a beautiful mailbox!

Mailbox (3)

I cut a slit in the top with a craft knife, and then showed Veronika how to stuff old junk mail through the slit.

Mailbox (4)

Sometimes she had to turn a letter a little to make it fit…

Mailbox (5)

…or give it an extra push to slide all the way through…

Mailbox (10)

…but she was delighted with each success.

Mailbox (9)

Time to open up the mailbox and see what she received!

Mailbox (11)

One pamphlet just happened to have images of sheep and cows, and she was so happy. “Cow is in the mail!” She wanted to send and receive this “letter” over and over.

Mailbox (6)

She also loved being able to take the lid off and put it back on all by herself, a big important toddler feeling of accomplishment.

Mailbox (13)

We then decided to write a few of our own letters for big brother Travis. She loved scribbling with marker before adding her notes to the mailbox.

Mailbox (12)

I could tell she was so proud to have her very own mailbox today, and left it out so she could return to it over the course of the afternoon.


Craft Stick Chain Reaction

Chain Reaction Craft Sticks (2)

If you thought dominoes made for a great chain reaction, try this neat craft stick version! It’s sure to make kids (and grown-ups!) say wow.

The set up is definitely a little tricky, and best done with two sets of hands.

Cross two jumbo craft sticks into an X. Add a third stick, so that it is under one part of that first X and over the other. You have to keep your fingers on the cross of that first X, or the whole thing is going to jump apart!

Chain Reaction Craft Sticks (1)

Keep adding sticks in an X pattern, under one, and over the other. Once your start to move outwards, move your fingers forward by one X to hold it all steady.

Chain Reaction Craft Sticks (4)

As I mentioned, this gets tricky, and I needed Travis to lift the bottom craft stick so I had space to slide the new one under. You can literally feel the tension building in the sticks as your chain gets longer.

We only made a chain that was 4 X’s deep, but hypothetically you can keep going. Release and it pops apart! It all happens so quickly that it’s no surprise my picture is blurry.

Chain Reaction Craft Sticks (3)

You might want to set a slo-motion camera on a smartphone to really grasp what’s happening, but here at least is a fast video.

A fun one!

Levitating Slinky

Levitating Slinky (1)

Slinky play is such pure childhood fun. We have a new slinky from the dollar store, and mostly Travis just had a free-for-all with it today. But we threw in a tiny bit of science, too.

First Travis simply wanted to check out all the ways this toy can wobble, wiggle, and stretch. He loved turning it into a stretched-out U shape and calling it a smile.

Levitating Slinky (2)

And of course we gave it the classic try down the stairs.

But what’s really going on in a slinky? To investigate, we needed a smartphone with a slo-mo video camera. Stand in a clear space and hold the slinky still, then drop it.

Ideally, what you’ll capture is that the bottom coil doesn’t move until the upper ones catch up to it. That’s because the tension of the coils is holding them together, even as gravity is pushing the slinky down. This makes the slinky appear to levitate just for a moment before it falls to the ground.

Our slo-mo camera wasn’t great at capturing this. I’d love to hear your results in the comments if you get a great shot!

Bean Bag Toss Sight Word Game

SIght Word Bean Bag (1)

All you need to help prevent the summer slide is one great item: an alphabet mat! Today we pulled it out along with a few bean bags to do a quick review of Travis’s kindergarten sight words, because first grade is quickly sneaking up on us!

His class had a sight word song to the tune of Bingo, so we started with that. “There is a sight word of the day; the sight word is ‘my’. M, Y, My…” and so on.

SIght Word Bean Bag (2)

As he sang through each word, Travis’s task was to toss a bean bag onto each letter, and then remove it from the mat.

SIght Word Bean Bag (4)

To make things tricky, I didn’t arrange the letters in alphabetical order. He really had to seek them out!

SIght Word Bean Bag (5)

Then, he arranged the letters off to the side to spell out each word.

Next up was L-I-K-E, like!

SIght Word Bean Bag (8)

Travis tired out after a few words, but this was a fun way to do a sight word refresher, and we can work through his whole kindergarten list a few words at a time. You’ll notice little sister Veronika wanted in on the ABC mat action, too! Simplify this game for toddlers by tossing the bean bag on a letter and simply naming it.

SIght Word Bean Bag (7)

Spool Printing

Spool Printing (6)

Veronika loves cars and trucks and all things that go, so today we had fun making prints that look just like wheels, then turning the prints into little vehicles. The perfect tool for the job? Spools!

You can use empty thread spools, or wooden ones from the craft store. I set out a paper plate with a few different colors of paint, along with sheets of craft paper and some of the spools.

Spool Printing (1)

I showed Veronika how to dip the end of the cylindrical spool into the paint, then press onto paper.  At first she just loved that this was a way to make dot paintings.

Spool Printing (2)

Next I showed her that if we drew marker shapes around a few of the dots… they looked just like wheels!

Spool Printing (4)

We made a bus and lots of silly little cars.

Spool Printing (7)

She soon decided she wanted to use marker to draw more cars. What else might the circular spool prints turn into? Please share your toddler’s creation in the comments!

Spool Printing (5)

National Lighthouse Day

National Lighthouse Day (5)

Happy National Lighthouse Day! Yes that’s a thing, and it feels appropriate that the “holiday” falls in summer, when beaches and shorelines are on everyone’s mind. Here’s a cute craft that Travis put together to celebrate.

Use white tape (or any light-colored decorative tape), to make two rings around a red plastic cup. This will be the base of your lighthouse. Turn the cup upside down.

National Lighthouse Day (1)

Cut a door and windows from black construction paper and glue on to the cup.

Now place a battery-operated tea light on top. Cover with a small plastic cup (clear is probably best, but we had a yellow one that looked neat, too!). Your lighthouse is ready to shine.

National Lighthouse Day (3)

Another fun activity? Have your child climb onto a stool (carefully!) and rotate around, flashing a flashlight. This is especially neat after dark.

Of course you’ll want to make story time all about lighthouses. Try Hello, Lighthouse or The Lighthouse Cat.

And if you can, take a trip to a real lighthouse!

mattapoisett (13)

We visited one close to home for a day trip full of fun pics and salty sea air.

National Lighthouse Day (4)

Pulled String Paintings

Pulled String Painting (7)

Travis loved testing out this novel painting method; not only was the process new and different, but the final product is a truly beautiful work of art, worthy of framing and keeping around!

To set up, fill small plastic cups with a little bit of liquid watercolor.

Pulled String Painting (1)

Cut pieces of string, and dip them into the cups, one for each color, making sure the string is completely saturated.

Pulled String Painting (2)

Working with one string at a time, place on a piece of thick paper. Cover with tracing paper, then place a small (empty) picture frame on top.

Pulled String Painting (4)

Pull quickly on the end of the string that is dangling out, and the liquid watercolor will splash down in the frame.

Pulled String Painting (5)

Travis was captivated! We repeated with three more colors, and then he decided it was finished. He loved that our red looked like a funnel, and that we had just a hint of purple.

Pulled String Painting (6)


Japanese Travel Guide

Japan Travel Brochure (4)
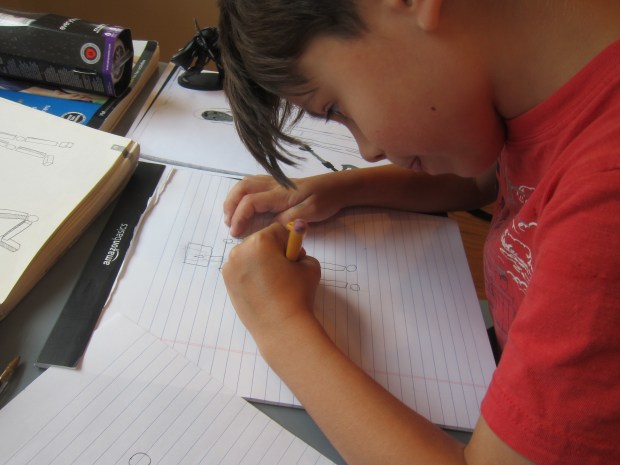
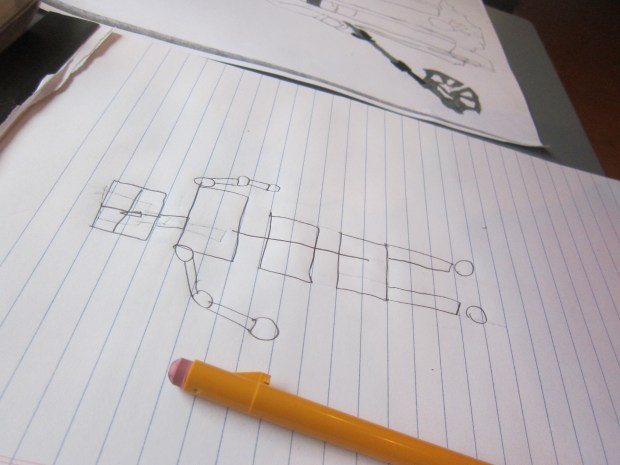
After preparing a Japanese meal for dinner, Travis got to learn more about Japanese culture today. This lesson plan from Raddish Kids was a fun extension to the culinary journey we’ll be on this month.

First up was locating Japan on a map. Once Travis pinpointed that it was an island, we discussed how geography can influence culture. Raddish provided talking points like how this has given Japan a strong sense of identity, and a unique culture.

Japan Travel Brochure (1)

Now it was time for fun videos; Travis loved one about the shinkansen (high speed trains) so much that he insisted on watching the full thing, even parts I thought might bore a 6 year old!

Japan Travel Brochure (2)

You can extend the lesson by looking at a map of the rail system, or even turn it into a math lesson for older kids by calculating costs or distances between stations on a pretend journey.

Next up was a video clip of Japanese baseball, and we discussed similarities and differences to games we’ve attended in the U.S.

Japan Travel Brochure (3)

Finally, we learned about the popular genre of anime. Travis picked one to watch before bed, and chose Pokemon! You might also consider renting a classic from your library like My Neighbor Totoro or Ponyo.

Or check out how-to books to draw your own anime!

Japan travel alt

I was so proud of Travis following along with one we checked out.

Japan travel var

Now it was time for Travis to pretend he was a travel writer explaining this country to another person, and he put together a travel brochure. He was so proud spelling out Japan on the cover. Inside, he drew high speed trains…

Japan Travel Brochure (6)

…baseball players (I thought this one resembled a Japanese calligraphy character!)…

Japan Travel Brochure (7)

…and lots of noodles of course.

Japan Travel Brochure (8)

Glue Printing

Glue Printing (8)

Caution: This project is messy! But toddlers love a mess and this catered right to Veronika’s impulse for arts & crafts this morning.

Instead of using an ink pad for stamps, the idea is to use glue as the “ink”. I gave Veronika a paper plate filled with white glue, and then I set out a few items that we could dip into it.

Glue Printing (1)

I included a fish-shaped sponge, a block wrapped in string, and a cut apple. The small block was by far the easiest for her to dip in the glue and lift up, then transfer onto paper and press down.

Glue Printing (3)

The larger items turned out to be tricky; they had a tendency to stick in the glue, and were tough for her to pull up without assistance!

Glue Printing (4)

Next time I would use much smaller objects, like a sponge cut into little squares, or slices of an apple. But with some mommy help, we managed to dip the items in our glue “ink” and then transfer to paper.

Glue Printing (5)

To make the prints more apparent, sprinkle with glitter. This was definitely Veronika’s favorite part, shaking a container of large glitter over the paper and watching it pour down on her creation.

Glue Printing (6)

Shake off any excess glitter and let dry. I confess you couldn’t really discern the shapes of the prints we’d made, but it was still a fun and colorful piece of toddler art.

Glue Printing (9)

Auditioning All Dolls

Auditioning All Dolls (2)

Veronika loves her doll toys and frequently plays with them solo, but today we devoted some time to focus on doll play together. Some of our games were familiar to her, but I threw in some new activities, too!

First I simply set out all the doll accessories around her, and encouraged her to play. She loves to dress the dolls (and undress them!)…

Auditioning All Dolls (5)

…and to do diaper changes and feed them. Beyond merely mirroring adults in their lives, children build empathy when they care for dolls or other toys in this way.

Auditioning All Dolls (6)

Now it was time for something new! I read her a favorite story (Sleeping Beauty), and after we read each page, I encouraged her to act it out with the dolls. She loved rocking the baby when Princess Aurora is born.

Auditioning All Dolls (7)

And dancing the babies at the ball.

Auditioning All Dolls (9)

And then rescuing them with a kiss!

Auditioning All Dolls (10)

Paper dolls are another great toy, in general, but Veronika is still too young for the regular version. The perfect toddler alternative? Magnet dress-up dolls! I showed her a new magnet set, featuring two dolls and lots of clothes and accessories that can be mixed and matched. She immediately loved playing fashionista.

Auditioning All Dolls (3)

Dolls were also great for talking about body parts. “Where is the girl’s arm?” I asked her. “Where is her hair?” And of course there will be lots of clothing vocabulary, too.

Auditioning All Dolls (1)

To tie it all together, I drew her the outline of a few fancy dresses from the Sleeping Beauty book.

Auditioning All Dolls (11)

She colored these in (with a little mommy help).

Auditioning All Dolls (12)

Then we dressed the magnet dolls in these cut-out dresses!

Auditioning All Dolls (13)