Cloud Dough with Vehicles

Cloud Dough Vehicles (3)

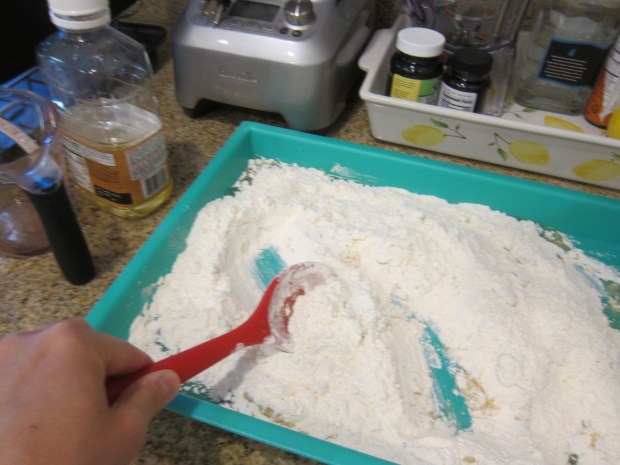
It’s been a long time since I made cloud dough, which is basically just a super soft play dough requiring only flour and oil. In the past I’ve made this with baby oil, but this time I used regular vegetable oil.

Cloud dough should be 8 parts flour to 1 part oil, so I used 4 cups flour and 1/2 cup oil. Mix with a spoon or your fingers until incorporated.

Cloud Dough Vehicles (1)

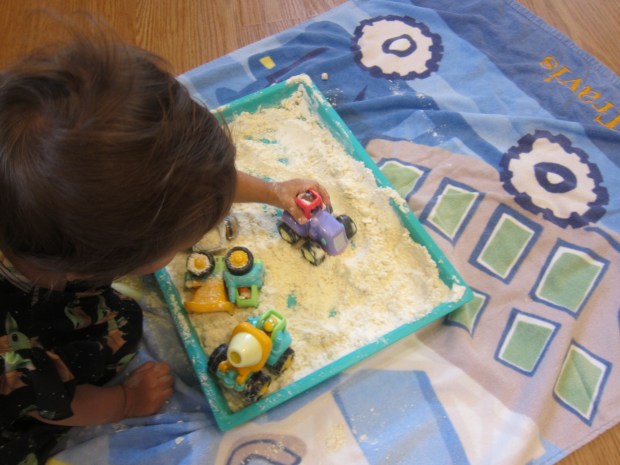
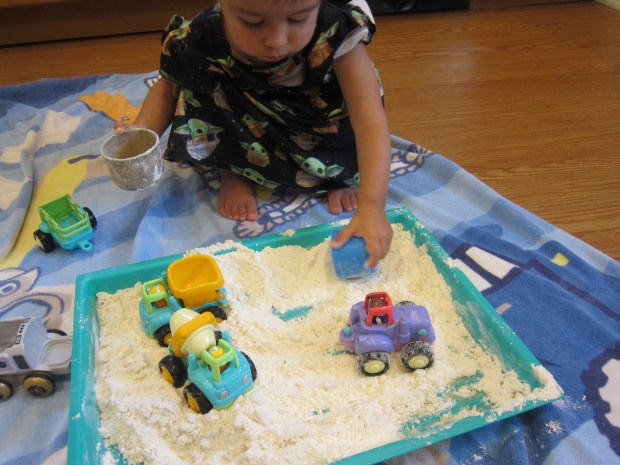
To add purpose to the play, we added Veronika’s construction vehicles. I also gave her two little cups that I thought we could use to mold sandcastles, but she preferred to use them for scooping, pouring, and filling up her trucks.

Cloud Dough Vehicles (4)

Or vice versa, using the trucks to fill up the cups!

Cloud Dough Vehicles (5)

It was fun to drive trucks through the dough and make tracks.

Cloud Dough Vehicles (8)

Or just to sift through with her fingers. This stuff is always so soft and fluffy.

Cloud Dough Vehicles (6)

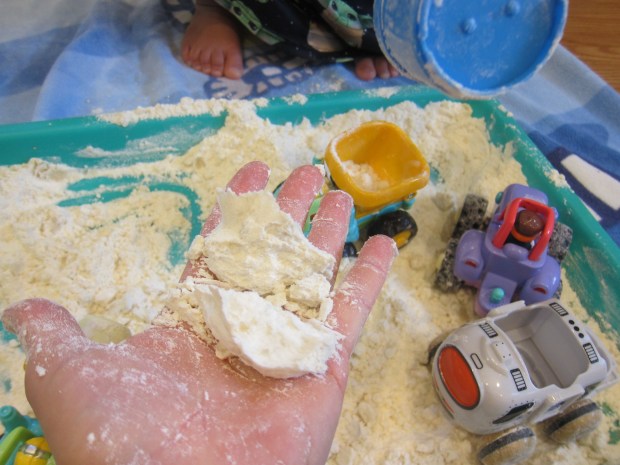
It’s also nice for play because it clumps together enough to momentarily hold a shape.

Cloud Dough Vehicles (2)

And when she tired of the game, a quick rinse of cold water got the vehicles clean!

“Cooking” with Flour

Cooking with Flour (10).JPG

Many parents I know resist flour play, saying it’s either too messy or too much of a hassle. But I love this sensory material for babies. First, it’s edible, so no worries if little fingers make it up to little mouths. Second, as long as you cover your surface, clean-up is a breeze. Set down an old shower curtain or plastic table cloth for this one, and you’ll be able to contain the mess.

I stripped Veronika down to just a onesie (go all the way to the diaper for even easier clean-up!), and gave her a few measuring spoons and cups. She was having fun already, and wondering about this interesting bag.

Cooking with Flour (1)

I sprinkled a little pile of flour in front of her. In went the hands right away!

Cooking with Flour (2)

There are so many ways to play with flour and your baby. Demonstrate how to make squiggles in it.

Cooking with Flour (7)

Use the spoons and cups to scoop and pour.

Cooking with Flour (8)

Sprinkle a little light dusting of flour over toes and hands for a tickly sensation.

Cooking with Flour (3)

And just get good and messy!

Cooking with Flour (4)

She loved wiggling her legs through the flour until her thighs were completely coated!

Cooking with Flour (9)

Basically she just had a blast, which gave me time to get a few other things done in the kitchen.

Cooking with Flour (6)

When we were done, I just plopped her right in the bath!

Cooking with Flour (5)

Making Moon Craters

Moon Crater (5).JPG

Some games are educational, some games are artistic – but for this one I confess we basically just wanted to take advantage of our new backyard and have some messy fun!

That said, the moon has been on our mind since the eclipse, so I asked Travis if he wanted to see an example of how asteroids and comets made craters on the moon. That was the extent of our “science lesson”, but older kids doing this project might want to look at videos of the moon or research craters a little further.

For our moon surface, I filled a bin with about 2 inches of white flour. A little cocoa powder sprinkled on top added contrast.

Moon Crater (1).JPG

Three “asteroids” of dried clay made the perfect asteroids. Hold them at about chin level, then drop down onto your moon surface.

Moon Crater (6)

There was a very satisfying puff of flour and cocoa with each impact!

Moon Crater (3)

And very neat holes left behind.

Moon Crater (4)

Because this activity was so action-based, here’s a quick video!