Red, White, and Blue Berry Shortcakes

Red White Shortcake (6)

It’s not Independence Day until we make a flag-colored recipe from High 5 magazine! To wit, see our recipes in the past for Flags for Breakfast or Red, White, and Blue Nachos.

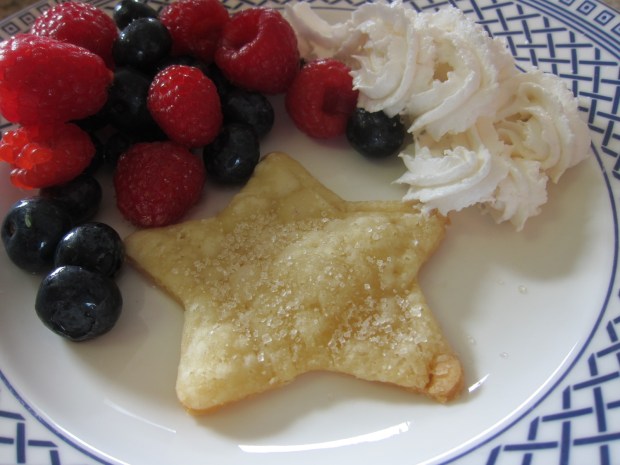
This year’s candidate: easy shortcakes in the colors of the American flag. We made a few vegan substitutions from High 5’s original recipe, but stayed true to the spirit of the dish.

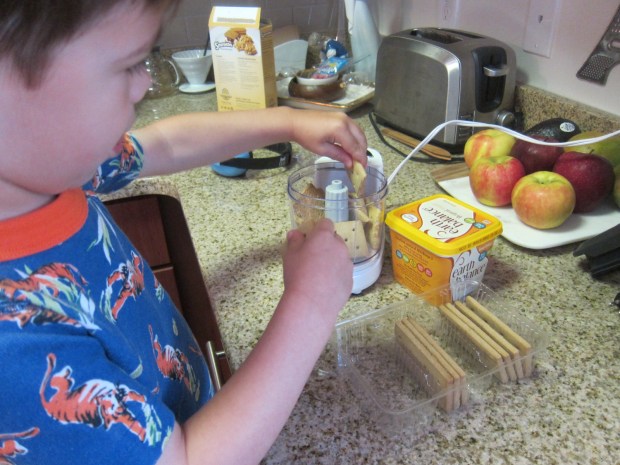
Instead of refrigerated biscuit dough, purchase frozen pie shells (such as Wholly Wholesome) or make your favorite pie dough recipe. Use a star-shaped cookie cutter to make 12 stars from the crust (you’ll have to re-roll your scraps a few times to have enough dough).

Red White Shortcake (1)

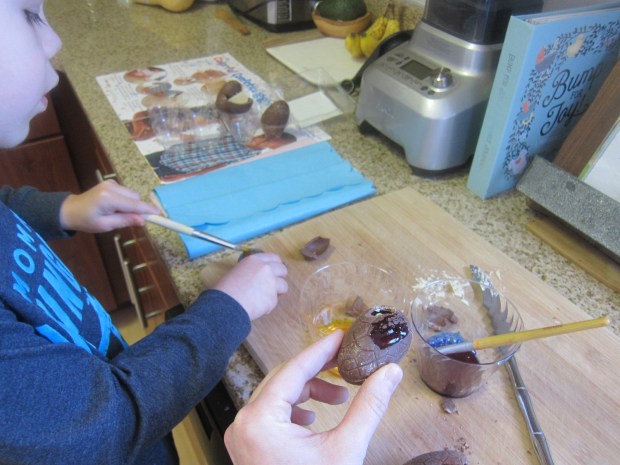
Travis loved playing with extra dough!

Red White SHortcake (2)

Place the stars on a baking sheet, brush with about 1 tablespoon Earth Balance butter, and sprinkle with sugar. Bake at 400 degrees for 5 minutes; cool completely.

Red White SHortcake (4)

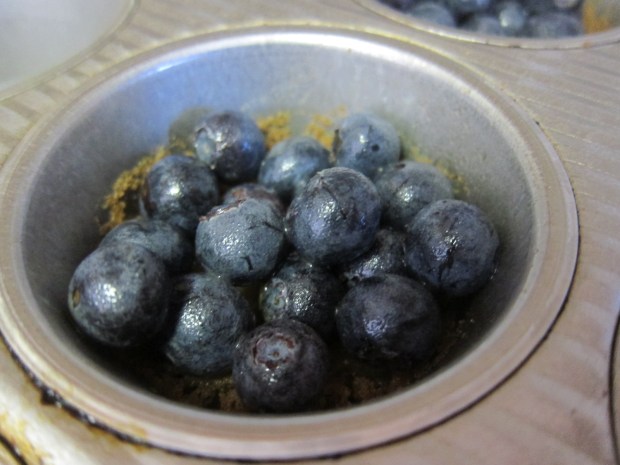
Meanwhile, combine 2 cups blueberries, 2 cups raspberries, and 2 tablespoons agave nectar in a bowl. Set aside.

Red White Shortcake (3)

Rather than make our own yogurt cream from scratch, we purchased a can of SoyaToo whipped cream. (Note: there are vegan substitutes that whip up like dairy cream, but I didn’t have enough time to plan in advance and order online).

To assemble each dessert, place one star on a plate, along with a heaping spoonful of berries.

Red White Shortcake (5)

Add a dollop of whipped cream to taste, and enjoy!

Red White Shortcake (7)


Mini Blueberry Pies

Mini Blue Pies (7)

What is it about miniature foods that just makes them taste so much better? Kids will love getting hands-on with this mini pie recipe from High Five magazine.

We had to do an extra step since there aren’t any mini vegan graham cracker pie crusts on the market (that I know of). You could purchase the graham cracker crust from Wholly Wholesome and make one big blueberry pie, but that defeats the whole point, now doesn’t it?

Mini Blue Pies (1)

To make our crusts, we combined the following in a large bowl:

1 and 1/2 cup graham cracker crumbs (such as Kinnikinnick S’moreables)

1/3 cup sugar

6 tablespoons melted Earth Balance butter

1/2 teaspoon cinnamon

Press the mixture into muffin cups and bake at 375 degrees for 5 minutes, until set. Set aside.

To prepare the filling, we turned back to our High Five. First, we measured together the following:

1 teaspoon flour

1 tablespoon brown sugar

1 tablespoon fresh-squeezed orange juice

1 cup fresh blueberries

Squeezing the orange juice was especially fun!

Mini Blue Pies (3)

Spoon the blueberry filling over the crusts.

Mini Blue Pies (5)

To prepare the topping, combine the following:

2 tablespoons old-fashioned oats

2 tablespoons flour

2 tablespoons brown sugar

1/4 teaspoon cinnamon

1 tablespoon melted Earth Balance butter

Sprinkle the topping evenly over the blueberry filling. Bake at 350 degrees F for 20 minutes. Let cool for about 10 minutes before serving.

Mini Blue Pies (6)

Scoop out your mini pies and transfer to plates to serve. Or – why not! – just dig in with a big spoon and have a snack right out of the pan!

Mini Blue Pies (8)

Bird Cafe


Bird Cafe (7)

Our latest project (from High Five magazine) wasn’t as big a hit as past crafts, perhaps because Travis and I have made bird feeders before and it felt a bit ho-hum to him. But there’s never anything wrong with learning a new way to feed our feathered friends, and this one is easy to put together!

Save any clear plastic food container; shallow is better, like the kind used for nuts or dried fruit. Rinse and dry.

Cut a rectangle from the center of an 8×5-inch piece of craft foam. This step was a bit tricky for Travis, but he loved cutting separate pieces of craft foam into free-form shapes while I worked.

Bird Cafe (1)

Tape the foam around your container, then wrap the top of the craft foam around the lid and tape in place. The craft foam now acts as the “wall” connecting the bottom and the lid roof.

BIrd Cafe (4)

Hole punch the foam near the lid on each side, and thread through yarn or string to hang your feeder.

BIrd Cafe (5)

As the final touch, tape on a second sheet of craft foam bent into a “roof”.

Bird Cafe (6)

We’re hoping to get many a summer visitor!


Juicy Blueberry Smoothie

Blueberry Smoothie (5)

This month’s recipe offering from High Five magazine involved lots of fun equipment. Juicers and blenders and spoons, oh my!

Ingredients:

  • 1 orange
  • 2 cups fresh blueberries
  • 1 cup white grape juice
  • 1 cup water
  • 1 teaspoon ground cinnamon
  • Plain non-dairy yogurt
  1. Adults, cut the orange in half, and then help your child squeeze on a juicer to extract 1/4 cup fresh orange juice – definitely my son’s favorite step!Blueberry Smoothie (1)
  2. Combine the orange juice in a blender with the blueberries, white grape juice, water, and cinnamon. Process until blended.Blueberry Smoothie (3)
  3. Pour the smoothie into cups. If desired, spoon a dollop of non-dairy yogurt on top just before serving.

Blueberry Smoothie (4)

Colorful Confetti Eggs

confetti eggs (5)

We love creating our monthly craft from High Five magazine… so I was a bit dismayed when we saw that this month’s project was decidedly not vegan. Cascarones are confetti-filled eggs, traditionally made in Mexico during Easter and crushed over a friend’s head as a surprise. Although it’s easy to paint or dye wooden eggs for vegan kids, how were we going to make a vegan egg that could crack? With a little advanced planning and some ingenuity, we made it work!

First, I searched online for hollow vegan chocolate eggs, and was rewarded with Peek-a-Boos from No Whey Chocolates. This actually have a little white chocolate chick inside, but still plenty of room for confetti!

confetti eggs (1)

It took a few tries before we learned how much pressure was needed to crack the eggs with a butter knife, but we got a small hole in a few of them. Don’t make the hole right at the apex of the oval, or the chocolate egg will cleave in half.

confetti eggs (2)

Travis of course needed to do a taste test at this point! I recommend setting aside a few of the eggs for eating, since the ones you’re about to use for the rest of the project won’t remain edible.

Next up we painted our eggs. Since we were painting on chocolate, we used food coloring.

confetti eggs (3)

Roll a piece of paper into a funnel, and insert into the opening you’ve made in each egg. Carefully pour in confetti through the funnel.

confetti eggs (4)

Finally, we glued a colored piece of tissue paper (pastel, in keeping with the Easter theme!) over the hole we’d made in each egg. Set aside to dry.

confetti eggs (6)

Now of course you won’t really want to crush these over a friend’s head – unless you enjoy shampooing chocolate out of your hair!

Instead, I set up a large surface area covered with newspaper and gave Travis a mallet and let him go to town crushing the eggs. Perhaps they weren’t exactly cascarones, but I’m glad we were able to capture the spirit of the craft!

confetti eggs (8)

We’ll be hopping toward Easter with a few other crafts this week, so stay tuned!

confetti eggs (7)

Noodle-y Kugel

Kugel (7)

To be frank, I’ve never seen a recipe quite like this in my life! It came to us care of Travis’s March issue of High Five magazine, and has multiple steps that are sure to delight your sous-chef in the kitchen. Pineapple with noodles? Yes, apparently this is a thing.

Kugel (1)

You can find eggless egg noodles, but I was unable to this time around. Instead, I chose a bag of curly pasta, both because the curls are reminiscent of the way wide noodles loop after they cook, and because it came in the right kind of bag instead of a box (more on that below!). Curly noodles also have the advantage that you won’t need to cut them into much smaller pieces for young eaters.

Ingredients:

For the noodles:

  • 1 (16-ounce) package eggless wide noodles or curly pasta
  • 6 tablespoons Earth Balance butter
  • 4 Ener-G eggs
  • 1 cup plain unsweetened non-dairy milk
  • 1/2 cup sugar
  • 1 (12-ounce) container non-dairy sour cream
  • 1 recipe vegan cottage cheese*
  • 1 (20-ounce) can crushed pineapple, drained

For the topping:

  • 2 cups organic corn flake cereal
  • 2 tablespoons sugar
  • 1/2 teaspoon cinnamon
  • 2 teaspoons Earth Balance butter
  1. Adults: cook the pasta according to package directions in a large pot; drain and set aside. Make sure to reserve the pasta packaging for step 6!
  2. Cut the butter into small pieces and have your child add the butter pieces to the warm pasta. Travis was very interested to see how quickly the butter melted!Kugel (2)
  3. In a bowl, whisk together the Ener-G eggs, milk, and sugar.
  4. Stir in the sour cream, prepared cottage cheese, and pineapple. Travis insisted on stirring all by himself.Kugel (3)
  5. Add the pineapple mixture to the noodles and stir to coat, then transfer the mixture to 13×9-inch glass baking dish coated with cooking spray.
  6.  To prepare the topping, place the corn flakes in the empty pasta bag, and seal; crush with your hands. This was – hands down! – Travis’s favorite part.Kugel (4)
  7. Add the sugar and cinnamon; seal and shake to coat.
  8. Sprinkle the topping evenly over the noodles, and add the remaining butter, cut into small pieces.Kugel (5)
  9. Bake at 350 degrees F for 45 minutes, until browned at the edges. Let stand at least 5 minutes before serving.

Kugel (8)

*To make a quick vegan “cottage cheese”, combine 1 package firm tofu and 1 tablespoon lemon juice in a bowl. Mash with a fork until the mixture resembles cottage cheese curds. Refrigerate until ready to use.

Make a Speedy Bobsled

Bobsled (6)I love how timely the craft in our monthly issue of High Five always is. This month, Travis learned how to make a bobsled just in time for the start of the Olympics!

Of course it made no sense to put together a bobsled when Travis had no reference point, so first we watched a few videos of past teams. He was then super revved up to create one at home.

All you need is an empty toilet paper tube to be the bobsled, and a long piece of cardboard for the track. Ideally use a three foot long piece of cardboard as your track; I only had two feet in length, which worked just fine, but it meant our bobsled couldn’t race as far downhill.

Cut the tube open along one side, and then paint.

Bobsled (1)

I asked Travis if he wanted to paint his sled in the colors of a particular country. Actually, the red white and blue here isn’t America but Australia – he’s big into an Australia phase.

Bobsled (2)

I suggested making the track white for ice, but Travis wanted an Australian-flag colored track as well.

Bobsled (3)

We left the track and bobsled to dry while he was at school, and returned to an afternoon of Olympic fun!

To finish the sled, simply tape two plastic straws on the bottom (decorative washi tape was pretty, though not a must), with the bent parts of the straw pointing upwards like sled runners.

Bobsled (5)

Woosh! Action shot!

Bobsled (7)

We took turns launching the bobsled and rating its runs on a scale of 1 to 10. We give a gold medal to this craft, thanks High Five!

Bobsled (8).JPG


Great Green Guacamole

Great Guac (5)

At a recent hotel stay, Travis’s favorite channel on the room’s TV was… Food Network! A boy after his mama’s heart. So when we got home, we staged our own “Food Network kitchen” and whipped up this recipe, care of High Five magazine.

Adults, first cut an avocado in half and remove the pit. Let your child scoop the flesh into a bowl and mash with a potato masher. Travis loved this tool!

Great Guac (1)

Next he added 1/4 cup jarred salsa:

Great Guac (3)

1 tablespoon fresh-squeezed lime juice, 1/4 teaspoon salt, 1/4 teaspoon black pepper, and 1/2 teaspoon minced garlic (adults can do the mincing ahead of time; Travis loved the way the cloves of garlic smelled!)

Great Guac (2)

We served our “test kitchen” masterpiece with cut up cucumbers, orange and red bell pepper strips, and bean tortilla chips.

Great Guac (6)

Science… Meets Art

Science Meets Art (3)

This project (from our latest High Five issue) exemplifies the STEAM acronym: a little bit of scientific discovery paired with a nifty art creation at the end. You can do both components of the project, or just the science part, or just the art part… but I recommend the whole thing because we enjoyed it from start to finish!

First up, use some science (the S part of STEAM) to make at-home paints. Fill 6 large muffin cups with 1/4 cup baking soda each.

Science Meets Art (1)

Next, add about 15 drops of food coloring to each muffin cup. We only had powdered food coloring at home (from Color Kitchen), so sprinkled about a 1/2 packet of powder per compartment.

Science Meets Art (2)

Now you’re going to quickly pour vinegar into each muffin cup, and watch the colorful explosion!

Science Meets Art (4)

Of course this is similar to many baking soda and vinegar projects we’ve done in the past, talking about how the gas created when the two substances touch makes all that foam and bubbles. But this time, we were left with a new product… paint!

Science Meets Art (5)

Now it was time to use the paint for the A part of STEAM. We painted white coffee filters, and Travis had a blast, mixing colors and stirring each paint very carefully – a petit artiste!

Science Meets Art (7)

Set the filters aside to dry; these are going to be your flower blossoms.

Science Meets Art (8)

As a small gripe, you’re going to have undissolved baking soda left in each paint mixture, which leaves the coffee filters a bit grainy after they dry. I found it helpful to rub off the excess baking soda over the trash can before Travis and I moved on to the final steps of the project.

Meanwhile, make the flower stems by painting jumbo craft sticks green. The only green paint we had in the house was a dot marker, but this worked in a pinch. Let dry.

Science Meets Art (9)

To finish the flowers, wrap each painted filter around a medium-sized Styrofoam ball. Poke one of the green “stems” up through the filter and into the Styrofoam.

Science Meets Art (12)

Glue the tips of the filter together so the ball inside is no longer visible and voila – flowers!

Science Meets Art (11)

We set them in a vase, where we got to enjoy the fruits of our labor: beautiful flowers in the middle of a snowy winter.

Science Meets Art (13)

Thanks High Five!

Science Meets Art (6)

Missing-Mitten Puppets

Mitten Puppets (7)

We loved this suggestion from our December issue of High Five magazine! What parent of small children doesn’t have an odd mitten or two lying around? Kids always seem to be losing just one of a pair. To prolong the fun, I also purchased a cheap three pack of gloves, so our imaginations could run wild with puppet making. Although mittens would have been ideal, gloves worked just as well for our new puppet friends.

First, we followed the two suggestions from High Five. An old yellow glove received orange thread as a mane, which Travis loved gluing to the fingertips.

Mitten Puppets (1)

We added googly eyes and felt pieces for the nose and mouth. Black thread was perfect for little whiskers.

Mitten Puppets (2)

Felt ears (in pink and blue), a blue felt nose, more googly eyes, and more black thread as whiskers turned an odd blue glove into a mouse. Squeak!

From there, I left Travis’s imagination take over. We had a very abstract elephant covered in orange thread and yellow felt, shown here in the foreground:

Mitten Puppets (9)

He next asked to make a porcupine, so I got out “quills” from brown felt and Travis added a pom pom nose.

Mitten Puppets (5)

Then he decided we needed a black cat, with pink felt ears and facial features. Travis insisted that the cat needed a sparkly pom pom, too.

Mitten Puppets (6)

Then of course it’s time for a puppet show!

Mitten Puppets (11)

What color mittens do you have on hand to turn into animals? Please share ideas in the comments!

Mitten Puppets (8)