Symmetry Kiwi Crate

Kiwi Symmetry (9)

Kiwi Co dubs Travis’s latest kit the Kaleidoscope Puzzles crate, but more broadly, it was all about symmetry. It was more helpful for me to present it to Travis that way, and he loved the projects and lessons involved!

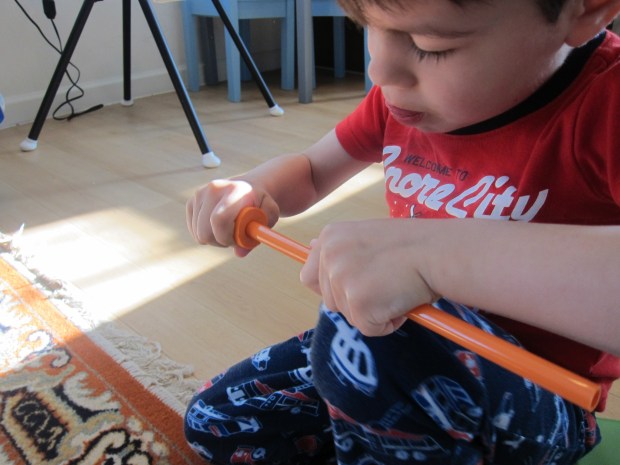
First, there were two versions of a kaleidoscope to make (which, I explained to him, is a devise that reflects materials in a pattern). The standard Spinning Kaleidoscope was up first. Travis peeled the backing from the rectangular mirrors, folded up the provided cardboard tube, and inserted the mirrors.

Kiwi Symmetry (1)

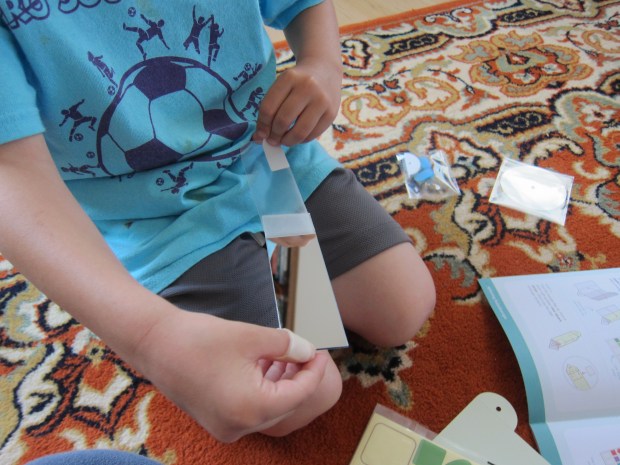
I helped him to make sure that the three mirrors were angled the right way and he peeked inside – it already had a cool effect!

Kiwi Symmetry (3)

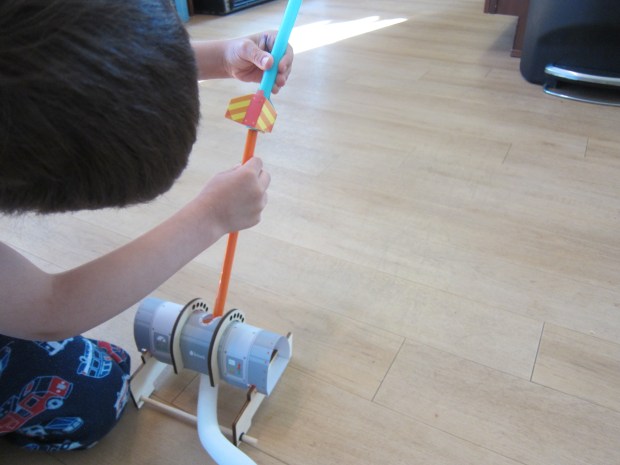
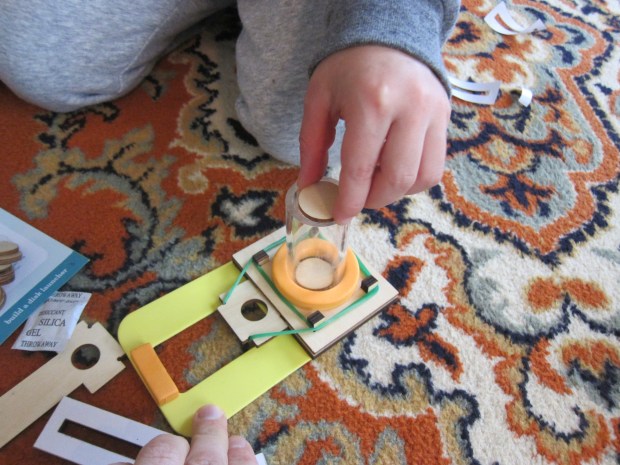
Next we covered the provided clear wheels with stickers, and saved a few stickers to decorate the outside of the tube.

Kiwi Symmetry (5)

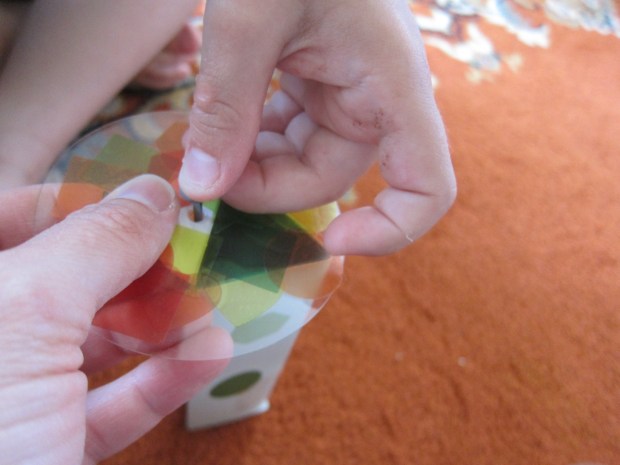
Line up one of the sticker-covered circles with the hole in the viewing tube, then insert a brad and a foam bumper to hold it all together.

Kiwi Symmetry (7)

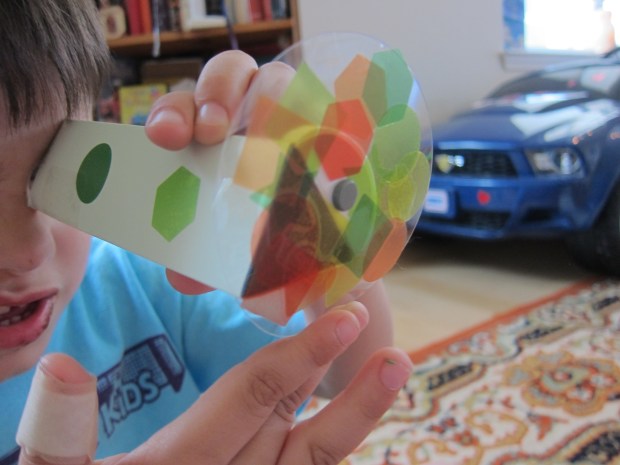
Travis peeked inside and was awe struck!

Kiwi Symmetry (8)

We had fun spinning it and handing it to each other for quite some time. “Look at this pattern, Mom!” he said in excitement, handing it over. Because the brad easily unfastens, you can switch back and forth between your two sticker-covered wheels.

Kiwi Symmetry (6)

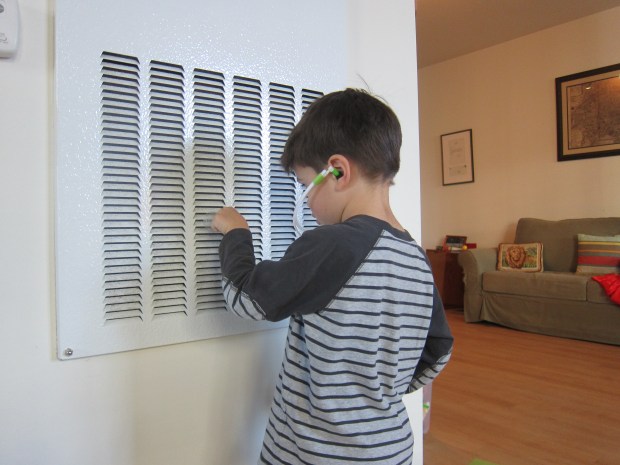
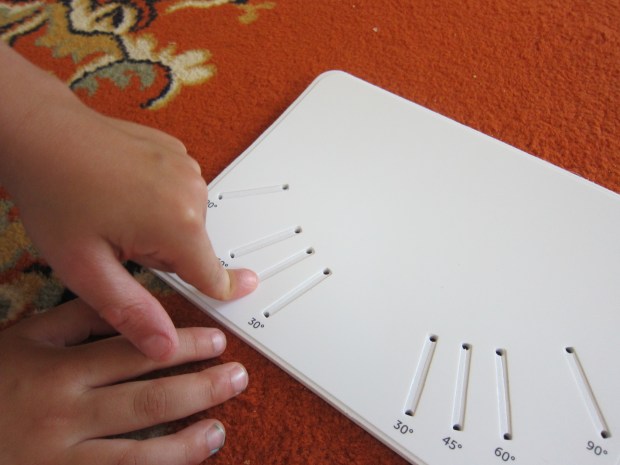
Next we tackled the Standing Kaleidoscope. This relies on a mirror placed at different angles to make patterns from whatever is reflected below. Travis again peeled the backing from the mirrors (square ones this time) and inserted them into the mirror book.

Kiwi Symmetry a

This book then slots into the mirror base, which is helpfully labeled with the number of the angle – good math practice!

Kiwi Symmetry b

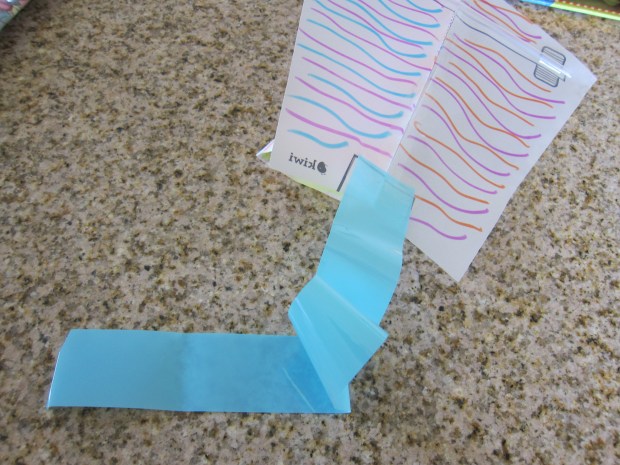
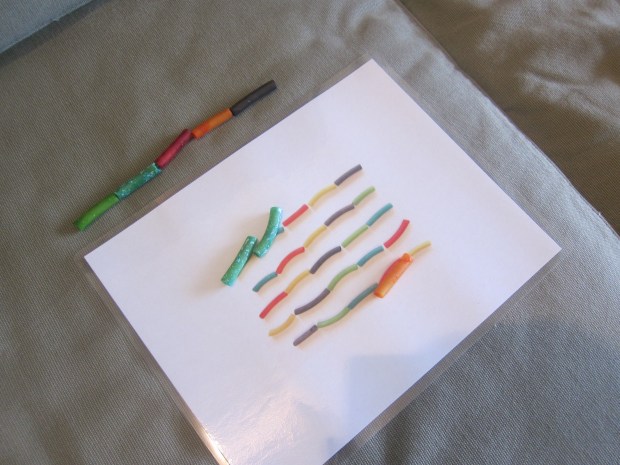
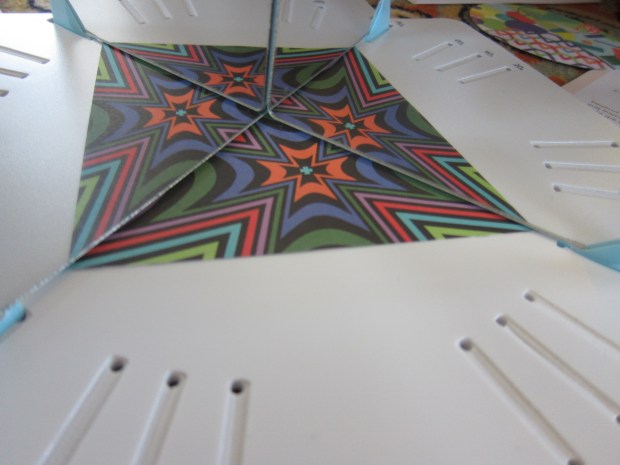
We slipped one of the provided pieces of patterned paper under the mirror book and immediately saw that it turned into a six-figured reflection.

Kiwi Symmetry c

Moving it out to 90 degree angle meant we only saw the pattern repeat 4 times – neat!

Kiwi Symmetry e

We tried it with a toy just for fun. “There are three cars!” Travis laughed with delight.

Kiwi Symmetry g

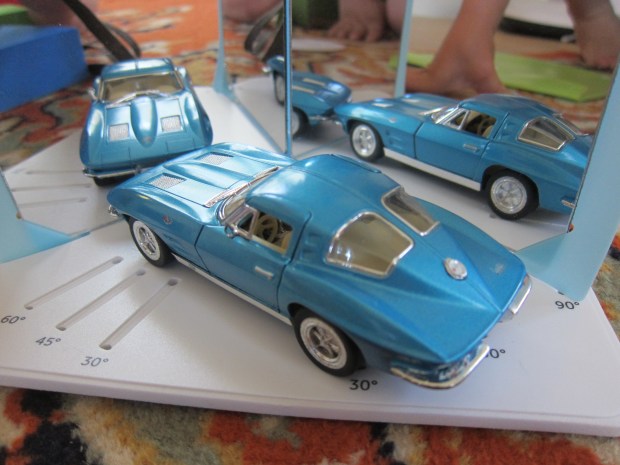
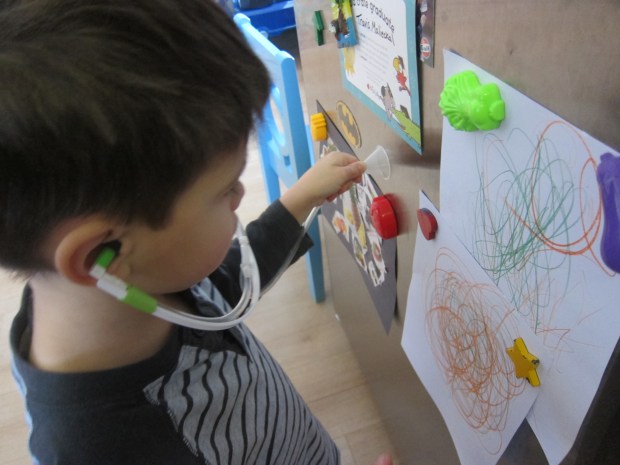
Your child might enjoy doing this with any number of small toys or coins, and playing around with various angles. The kit also includes lots of extra paper to color in your own patterns, which kept Travis happy for quite some time.

Kiwi Symmetry f

I reminded him to use lots of color for maximum effect.

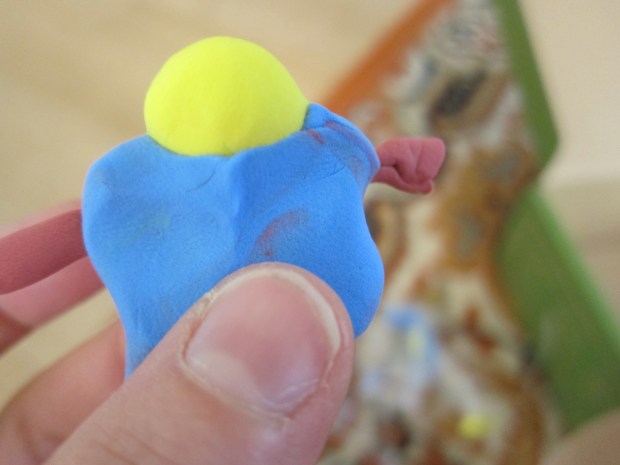
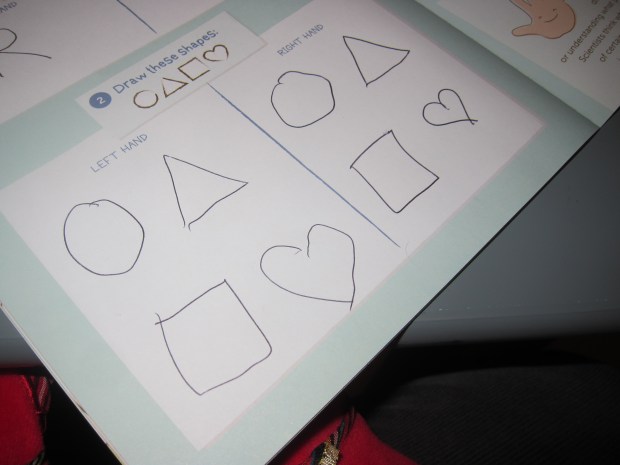
The third project was to put it all together in Kaleidoscope Puzzle Games. The kit included foam shapes and puzzle cards, with the challenge to match the design on the card.

Kiwi Symmetry h

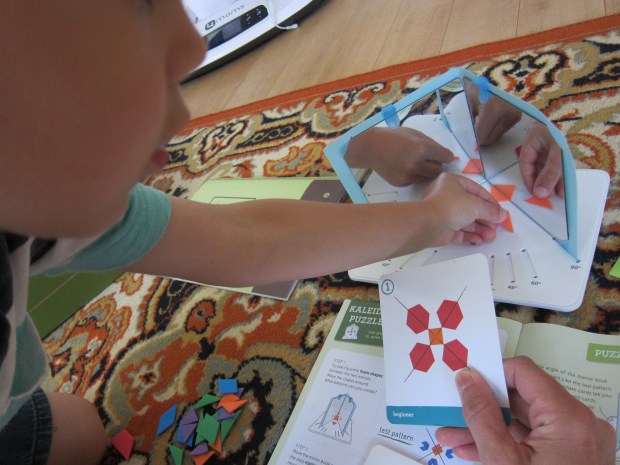
Travis being on the very young age-range for Kiwi Crate needed my assistance with this, but he definitely got the concept. It was easiest for him to think in terms of color, since the shapes were doubled on the puzzle cards (a triangle becomes a diamond, a trapezoid becomes a hexagon etc). But if I prompted him by color, he realized where he needed to lay down an orange piece, a blue piece, etc.

Kiwi Symmetry i

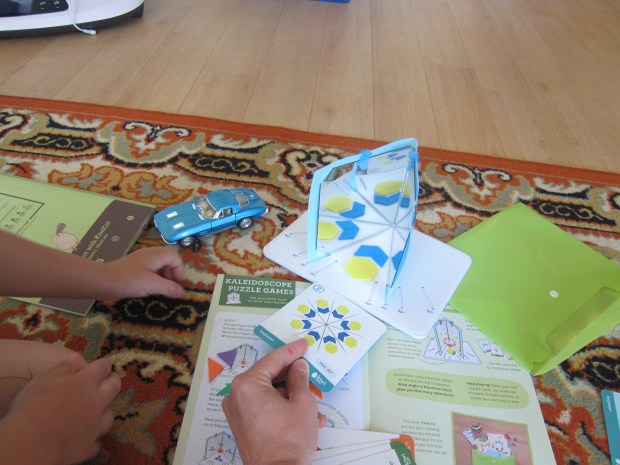
He was thrilled each time we flipped over the card to reveal the solution. Parents take note: some of these are tricky even for grown-ups!

Kiwi Symmetry j

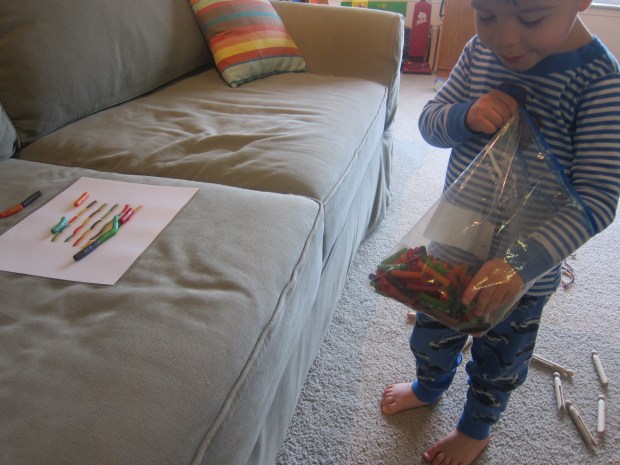
Finally, there is a handy travel pouch to store all the pieces, meaning this would make a great game for car trips or vacations! The Explore magazine was full of fascinating tidbits about symmetry in nature (butterflies, zebra stripes).

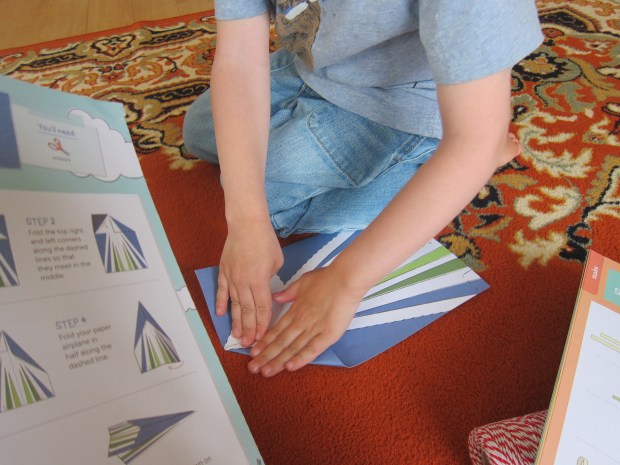
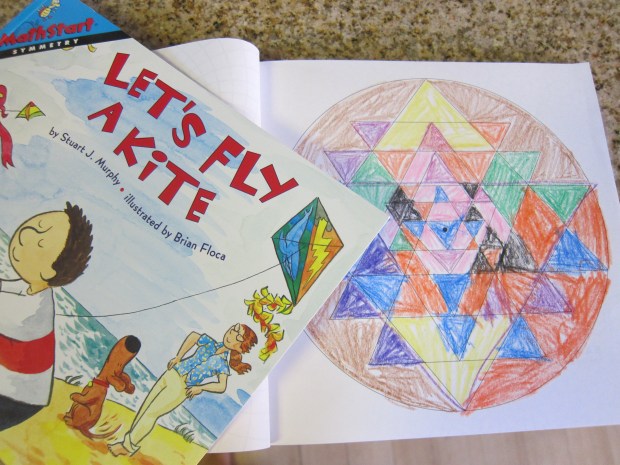
We also checked out the suggested books, Let’s Fly a Kite by Stuart J. Murphy, and a coloring book on math and patterns (Patterns of the Universe) that he has been incredibly into, insisting we color one page before bed each night!

Kiwi Symmetry books.JPG

I was so proud of Travis tackling this intro to a tricky math concept.

Kiwi Symmetry k

Fun with Flight Kiwi Crate

Kiwi Flight (12)

Travis’s latest from Kiwi Co was the Fun with Flight Crate, featuring projects that delved into the multitude of ways humans have devised to fly. I will start by saying that this one was frustrating for a five year old. The projects weren’t hard to put together, but they didn’t stay together that well. It led to frustration and disappointment, so do be prepared if your children are also on the young side.

First up, he got to Build a Rocket Launcher. The mechanics involved folding a cardboard launcher base and inserting it onto wooden legs (the base clicks into place).

Kiwi Flight (4)

Travis helped push a dowel through, slide elastics onto the dowel, and insert a foam tip into the launcher tube.

Kiwi Flight (6)

This tube then attached to the provided air pump and hose. Whew! Confused yet?

Kiwi Flight (7)

Note: This pump did not stay attached to the launching tube well at all, which was vexing for both five-year-olds and grown-ups! I’m not sure if this was a flaw in Kiwi’s design, or an error on our part.

But now we needed to Build and Launch Rockets. Travis accordion-folded the provided tail fins.

Kiwi Flight (9)

This fin is supposed to attach to the “rockets” (wide straws) with stickers, but the stickers were not very sticky and each rocket really only got one or two trips before it all starts to fall apart.

Kiwi Flight (11)

Still, there was a moment of pure joy. These things flew high, as you can see in a quick video.

Alas, our rockets fell apart before we had time to play around with experiments, like adjusting the angle of our launching tube.

Next up it was time to Fly a Kite. Travis was so proud coloring his in, selecting which color should go where.

Kiwi Flight (2)

I colored the second template. Fold these along the dotted lines, until the two dotted line parts are touching (hopefully this visual helps).

Kiwi Flight (27)

We secured with the provided clear stickers in our kit.

Kiwi Flight (13)

Use clear stickers to add a straw along the top, and then attach one of the provided ribbon tails with more clear stickers.

Kiwi Flight (14)

Finally, thread the provided string through the hole in the bottom of the kite.

Kiwi Flight (15)

It turns out, there’s no need for wind with this kite. In fact, although it was beautiful when we took it outside on a windy day, the kite didn’t fare so well, and was quickly buffeted and tossed about.

Kiwi Flight (17)

Inside, though, we could do more precise experiments. First, simply run with it! A faster run = a higher kite, but this was tough for my little guy. The kite flies straight because the tail weights it down. We played around by varying the length of the tail; it was more wobbly if we flew it with a shorter tail, and did spins all around if we took the tail off entirely.

Kiwi Flight (16)

There were four additional ways to experiment with flight in the Explore magazine. To make a “helicopter,” we cut a rectangle from paper then cut a slit to the middle.

Kiwi Flight (20)

Cut about an inch in toward the center in the top portion, on either side; fold in and secure with a paper clip. Fold down the two pieces in the other half of the paper, in opposite directions.

Kiwi Flight (21)

Now toss in the air as high as you can; it whirls like a helicopter rotor!

To demonstrate the lift of an airplane wing, all you need to do is cut a long rectangle and place it against your lower lip. Blow and watch the end lift up…

Kiwi Flight (26)

Next up: a flying straw! Cut two rectangles, one long and one short. Tape these into circles, and tape to either end of a straw.

Kiwi Flight (23)

Hold the straw with the small circle in the front and launch.

Kiwi Flight (22)

The circles catch the wind and create lift. For a fun comparison, we threw a plain old straw next to it, which immediately sinks to the ground.

Travis’s favorite by far was the balloon “rocket.” Cut a piece of string that can stretch between two walls, and tape on securely. Thread a straw onto the string.

Kiwi Flight (29)

Blow up a balloon but don’t knot it! Travis held the balloon tightly closed while I taped it to our straw securely. Release and watch the “rocket” zoom along the string.

Kiwi Flight (30)

This one needed quite a few repeats for my boy!

Finally, there was a tear-out paper airplane.

Kiwi Flight (24)

Because Kiwi thinks of everything, there are flaps in the back of the plane that demonstrate how a real pilot uses flaps to control lift. Fold these down and… Boink! the paper airplane nose dives.

Kiwi Flight (25)

Fold them up, and it flies higher and longer – wow!

Finally, we read two suggested books: How to Make a Plane by Martin Sodomka, and Flight School by Lita Judge.

In sum, there was great stuff in this kit, both artistic and scientific, but the kite and rockets didn’t hold up well after only a few flights.

Inertia Kiwi Crate

Kiwi Inertia (7)

Although Kiwi Co. titled Travis’s crate this month as the “Disk Launchers” crate, really it’s all about inertia, so that’s how I’m styling it here. Nomenclature aside, what fun we had with this one!

First Travis had to Build a Disk Launcher. As always, the step-by-step here is more complicated than in a Koala Crate, so I will simplify. It was great to sit back and let Travis deal with the fine motor skills of attaching sticky-backed foam pieces to the wooden pieces in the right order.

Kiwi Inertia (1)

Elastics help hold it together.

Kiwi Inertia (2)

And then a tube slots into place.

Kiwi Inertia (5)

Fill the tube with the provided disks (which look like wooden tiddlywinks). Pull back on the pin and – zing! A disk launches out. Travis was unsure what we had been building up toward, and looked so astonished and delighted when he realized how the launcher worked!

Kiwi Inertia (6)

Needless to say, soon some ninja turtles were lined up to be our targets.

Kiwi Inertia (8)

Next we needed to Create Clay Obstacles from the provided air-dry clay. These will become props in games in a moment, so the instruction manual suggested figures like goal posts or even little goalie people.

Kiwi Inertia (12)

There were also tips on how to make specific artistic touches. We mashed together the blue and yellow clay and made a green clay! Then we tried twisting two colors together for a braided look.

Kiwi Inertia (10)

Three colors rolled together made stripes.

Kiwi Inertia (11)

Travis was mostly content to go his own artistic way with this one, making little blobs. But we especially liked rolling circles that looked like marbles or little planets.

Kiwi Inertia (13)

Leave the clay out to air dry, preferably overnight.

Kiwi Inertia (14)

Now it was time to play Disk Launcher Games.

For the first, we unrolled the provided mat for a spin on “curling.” Secure the mat between your Kiwi Crate box and a book.

Kiwi Inertia (15)

Take turns aiming at the target with your launchers, and see who gets the most points!

Kiwi Inertia (16)

Then we tried bowling.

Kiwi Inertia (17)

Travis was thrilled seeing the provided pins get knocked down.

Kiwi Inertia (18)

Now it was time for the final challenge: create your own game! We just went wild, putting up all our clay figures and the bowling pins and seeing if we could knock everything down.

Kiwi Inertia (19)

Older kids may want to get more sophisticated in their game rules, such as actually scoring through one of the clay goal posts, or knocking over a specific type of target. But Travis loved our mayhem, and we needed to play many rounds.

Kiwi Inertia (20)

To bring it back to the science of inertia for a moment, I showed him a quick Disk Physics Experiment: Set up three disks (touching each other) between a set of books and then launch another disk at them. Have your child guess which disk is going to move forward!

Kiwi Inertia (21)

The answer is the furthest disk, which Travis correctly surmised.

Kiwi Inertia (22)

We talked about how the energy transferred from the launched disk all the way to the furthest one. He thought this idea was neat.

To cap it all off, we explored further with two suggested books: Newton and Me by Lynne Mayer, and Oscar and the Cricket by Geoff Waring.

Secret Agent Kiwi Crate

Kiwi Agent (11).JPG

Travis’s current favorite show (Odd Squad), is about a team of kids who solve odd cases. So he couldn’t have been more thrilled than when he discovered his latest Kiwi Crate was all about being a secret agent. Needless to say, I barely had time to glance at the parent manual before we dove right in!

First, every secret agent needs a gadget, so Travis got to Build Your Periscope. This was a matter of folding the provided cardboard base…

Kiwi Agent (12)

…peeling stickers from each of the two mirrors to attach

Kiwi Agent (13)

…and securing it all with rubber bands.

Kiwi Agent (14)

He loved peeking around corners! For a quick STEM lesson, explain to your budding agent how they are seeing the reflection of a reflection, as opposed to a simple mirror reflection straight on. You can also flip one periscope piece to see things upside down, or make it longer or shorter by sliding the pieces together.

Kiwi Agent (15)

Next up, we got to Explore Secret Messages. There are two folders labeled “top secret”, one containing patterned paper and one with blank white paper. Use the provided markers to write messages on the patterned paper. The secret agent spy glasses (with red lenses) will cancel out the red lines that obscure the page so that messages can be detected.

Kiwi Agent (4)

This was a bit tough to illustrate to a non-reader, but I helped him understand which colors showed up best by drawing a series of lines with the markers, then giving him the glasses.

Kiwi Agent (5)

Next we took turns drawing pictures with the provided invisible ink and UV pen. The latter turns on with a switch, and was by far his favorite item in the kit.

Kiwi Agent (7)

Our booklet recommended making an invisible map, so I sent him off on a hunt around the house. A real secret agent on the move! He soon proudly designed a map for me, leading to a “villain” we had to catch.

Kiwi Agent (9)

Finally, every agent needs to Pack Your Briefcase. Travis helped insert brads and elastics as the clasp, and to set up a cardboard insert with elastic fasteners to hold his agent supplies.

Kiwi Agent (2)

Now your little detective can store their markers (regular and UV!), as well as all the Top Secret folders and spy glasses.

Kiwi Agent (3)

Travis paraded around with this briefcase the entire rest of the day, filling it with other items he deemed necessary for an agent. What fantastic imaginative play it prompted!

Kiwi Agent (16)

We then delved into Explore magazine, which had us learning about other codes and doing fun find-it pages. Next we explored other ways to leave a secret message. First up was white crayon. Because Travis can’t read, this was most easily illustrated for him using his name. We wrote with white crayon on white paper, then painted over it with watercolor for the big reveal.

Kiwi Agent (18)

You can also color over your white crayon with colored pencils.

Kiwi Agent (19)

One neat idea is to send a hidden message to a friend. Wrap up a happy birthday message and give it to a friend with colored pencils so they can uncover the secret.

Kiwi Agent (22)

Travis’s next code was made with lemon juice. First, squeeze a lemon – always fun!

Kiwi Agent (20)

Dip a paintbrush in the lemon juice and write out your message. Once it dries, place a second sheet of paper on top and go over it with a hot iron (grown-up step).

Kiwi Agent (28)

All will be revealed! We had fun making this a secret message for daddy.

Kiwi Agent (21)

Finally, the booklet gave a lesson on fingerprints and the ways that secret agents use them. Travis was quite intrigued, and tested leaving his prints on our window.

Kiwi Agent (24)

He copied the suggested fingerprint art, checking out his unique whirls and swirls.

Kiwi Agent (25)

Then it was time to get creative – this print turned into a long-legged spider!

Kiwi Agent (26)

In sum, Kiwi Co hit it out of the park with this one!


Baleen Whale Kiwi Crate

Kiwi Whale (17).JPG

Travis received his second box from Kiwi Co today, and literally asked to start the moment we got the box inside the house. Kiwi actually terms this one the “mechanical sweeper” crate, but the term was so opaque I found it completely unhelpful as the adult assistant. Rather, the material inside is all about baleen whales, and the way their baleen “sweeps” the ocean; this explanation made Travis quite excited since he’s been learning about whales at school

First up was to Create Watercolor Whales, the crafty component before we moved on to the science of baleen. I sat back and completely let Travis pick colors and dictate how to paint.

Kiwi Whale (1)

As he worked, he had a game going in his head; it was a humpback whale, but he could change colors and camouflage. Neat!

Kiwi Whale (2)

He loved the wax-resist element along the whale’s jawline; the beads of water ran away from the waxed parts, leaving stripes of color behind. We wiped these clean with a paper towel, as the instructions suggested, for a streamlined look.

Kiwi Whale (4)

For the second whale, we used an extra coat of water and then sprinkled on the provided salt.

Kiwi Whale (5)

After the whales dry, your child can see the difference between the two paintings. Where you shake off the excess salt, you’ll see spotty patterns (more on this idea later).

Kiwi Whale (16)

Now was the moment he’d been waiting for: to Build a Mechanical Sweeper. The idea is to illustrate how baleen whales “sweep” the sea with their mouths, thus capturing more food than they’d be able to with teeth. (Note: the Explore booklet has a cute story explaining this idea further).

I won’t go step-by-step through the sweeper here, but do note that it’s complicated, and took mom and boy a good twenty minutes of concentration. But wow did I love watching his fine motor skills, trying mostly to sit by and let him do the work. He slipped the foam sweeper tabs into the foam sweeper bars…

Kiwi Whale (8)

Added tiny rubber bands to hold things in place…

Kiwi Whale (13)

Slid dowels through the proper holes…

Kiwi Whale (11)

Used stickers to hold things in place…

Kiwi Whale (12)

And more.

At last, our sweeper was ready. We sprinkled the provided pom poms on the rug (the krill, of course), and munch munch munch – our “whale” ate them all.

Kiwi Whale (15)

We then attached our dried watercolor whales to the sides for a finished look.

Kiwi Whale (18)

Travis was thrilled, and needed to experiment immediately. What else could his whale eat? Was anything too small? After testing out tiny Legos, we decided the answer was no.

Kiwi Whale (22)

Was anything too big? Only if an item was wider than the distance between sweeper blades, but this hot wheels car got through…

Kiwi Whale (21)

…as did loads of Playmobil.

Kiwi Whale (19)

I have a feeling it won’t be a chore the next time I ask him to pick up Lego pieces from all over the rug!

Finally, we made Watercolor & Salt Paintings with the provided extra paper, for a clearer salt-and-water experiment. Because Travis had loved the wax-resist on the original whales, I knew just how to add in this element for him – wax crayons.

Kiwi Whale (23)

Once he’d painted, we sprinkled on big piles of salt this time.

Kiwi Whale (24)

This allowed him to see better how the salt sucks some of the water up. You can explain to your kids that the salt and water molecules are attracted to each other, hence why the water gets pulled up, and creates that mottled final look.

Kiwi Whale (26)

My overall opinion of this crate, aside from the very confusing name, is that it was a really digestible way for kids to understand baleen, to learn about these amazing giants of the sea, and to build a very cool STEM project in the process.


Yummy Bones

yummy bones (6)

After a fantastic time with his first Kiwi Crate, Travis enjoyed playing doctor again to make… edible bones!

The recipe from his Kiwi Explore magazine was very loose, with no precise measurements. So let your surgeon work with the ingredients to his or her taste.

First, you’ll need a tube of breadstick dough. This can be hard to find pre-made and vegan, so I purchased a roll of pizza dough. If you have breadstick dough, check the heating and baking instructions on the package.

yummt bones (1)

For our dough, we first rolled into “bones” (the same way that you roll clay or playdough into snakes).  Travis loved deciding what was a leg bone, an arm bone etc. Squeeze the middle, so the ends are slightly thicker.

yummy bones (2)

Use kitchen shears to snip the ends of each snake, dividing them outward into a bone shape. Travis was so proud to do this step, with a little grown-up help.

yummy bones (3)

Now brush with a little melted butter (we used Earth Balance) and sprinkle with a little vegan Parmesan (we used Go Veggie).

yummy bones (4)

After 12 minutes at 425 degrees F, these bones were ready to eat!

yummy bones (5)

They’re great plain, or we discovered we also liked them dipped in marinara sauce.


My Body & Me Kiwi Crate

kiwi body (28)

Travis is officially a Koala Crate graduate! I loved that there was even a certificate in the first Kiwi Crate he received, moving him up to this kit intended for ages 5 to 8. We can’t wait to start blogging his journey.

kiwi body (1)

At four and a half, Travis is on the young side for Kiwi, but I knew he was ready – he’s been bored of his final few Koalas, either unimpressed or not challenged by the crate’s topics. His glee for this first Kiwi box spoke for itself!

We opened it up to find a kit all about the body and anatomy – big topics for my big boy – and the projects did not disappoint.

kiwi body (2)

He couldn’t wait to get started on the first activity: Make Plush Organs. “Is this what my brain looks like?” he asked, pulling out the pink felt shapes. I explained it was the right shape, yes, and he wanted to know what the lines represented which got us talking about the folds of the brain, the brain’s functions, and more. Exciting stuff! There was also a felt template for a heart and a stomach.

kiwi body (3)

To make the organs, we’d need to lace them together. The lacing holes are much smaller and closer together than in a Koala kit, but to my great delight, my boy not only was able to do it with hardly any assistance, but stuck with it through all three organs.

As we laced, we pretended he was a surgeon. “Is this really what surgeons do?” he asked, and I pointed out the very real similarities: patching up people’s organs, and stitching them up at the end.

When you have only about 4 or 5 holes left in each organ, take time to stuff in the provided roving. I asked Travis to divide our pile of roving into three roughly equal piles at the outset, so he’d know he had a enough. A good quick math lesson.

kiwi body (4)

Now we unfolded the huge anatomy poster that came with the kit – whoa!

kiwi body (13)

There was an outlined space for each organ we’d made. Velcro dots adhered them to the poster, for easy removal at any time.

kiwi body (5)

We also added smiles and stick-on googly eyes.

kiwi body (6)

I let Travis decide where the smile and eyes should go on each, ceding the project to him more completely than I ever did with Koala.

kiwi body (12)

Now on to the next project: Create X-Rays.

The kit contained a clear sheet that could go over any bone on the anatomy poster, oto which your child sticks reusable bone stickers.

kiwi body (7)

None of these line up with the bones exactly, but any extra space can be filled in with a provided erasable marker. This of course leaves your child free to make “breaks” in the bones.

kiwi body (8)

To make the x-ray come through, place the sticker-covered sheet over specially-provided glow paper. Make sure the clear sheet goes on the rough side of the paper. Now place it in a sunny spot or directly under a lamp with the bones on top. Within 5 minutes, you’ll have a faint x-ray that shows up in a dark room.

kiwi body (10)

Travis was thrilled, setting up multiple x-rays and proudly giving his doctor’s diagnosis to each.

An indication that this kit really is for bigger kids: there were many tiny metatarsal stickers for doing an x-ray of the hand, but Travis was undaunted, and needed just a bit of mommy help.

kiwi body (9)

We had fun designing breaks, as well as using the clear sheet over other organs on our anatomy poster for tracing. And of course your child can draw any picture they like on the sheet, which erases in a pinch.

kiwi body (11)

Finally, we experimented with other items on the sheet. Note: this is just like making sun prints, but much faster; I’m quite curious to know what is in the special glow paper!  We used buttons, a key, and toys for neat shadows.

kiwi body (23)

Finally it was time to Build a Stethoscope:

This project involved a lot of fine fingerwork, using three plastic tubes (two short, one long), T and L connectors (I had him look at these and tell me why they were named thus!), a funnel, and soft earbuds.

kiwi body (15)

I helped Travis push the tubes onto the connectors in the proper order, then we slipped on the ear buds.

kiwi body (14)

Now it was time to check our heart beats!

kiwi body (16)

Travis looked so happy when he could hear his own.

kiwi body (17)

Then we tried it out in funny places around the apartment like the air vent…

kiwi body (18)

…and the fridge.

kiwi body (19)

Travis was frustrated when he couldn’t really hear my heartbeat, but he did love giving mock check ups. Kids will love that they can dry-ease the exam card after each “patient.” You can also get silly and use the stethoscope to listen to a tummy after a snack, and catch any stomach grumbles.

Koala came with an Imagine magazine, and now with Kiwi we have Explore magazine. It was fun to have a whole new format to check out together, with new characters in the stories.

We read the magazine together, and I helped Travis with its explanation of handedness. I challenged Travis to write and draw with both hands.

kiwi body (25)

He was a bit frustrated, so I showed him my own left versus right handwriting in the booklet, and he practiced on a tablet.

kiwi body (26)

Turns out he has a dominant eye, too, which the booklet explains is really a thing!

Overall, we loved this kit. We’ll be checking out the two suggested reading books: My Amazing Body by Ruth Martin and Parts by Ted Arnold. Can’t wait for the next crate to arrive!


Pasta Bead Sequencing

Pasta Bead (4)

Here’s another fantastic activity for the Kool-Aid dyed pasta we made a few weeks back. We’ve already strung together bracelets with our pasta beads, but this time I used the pasta for a slightly more educational purpose.

Using the template available from Kiwi Crate, I printed out pictures of the pasta beads arranged by color, and then had them laminated. You can skip the lamination, but doing so means you can do this activity again and again!

Pasta Bead (5)

Encourage your child to line up the beads in the order that’s shown on the card. As an alternative, give him or her a pipe cleaner, to thread the pasta in order.

Pasta Bead (6)

Travis is a little young to accomplish a task like this from start to finish still, but he loved selecting a pasta piece from his bag and placing it on the correct color. We’ll work up to completing the whole sequence on pipe cleaners as he gets older!

Pasta Bead (3)

This activity would be perfect for on-the-go moments when you need to keep your kiddo occupied, like a restaurant or waiting room.

Pasta Bead (1)

Update: At closer to 3, Travis now loves doing this activity directly onto a pipe cleaner!

kool aid update.JPG