Osmosis vs. Diffusion

Osmosis (11).JPG

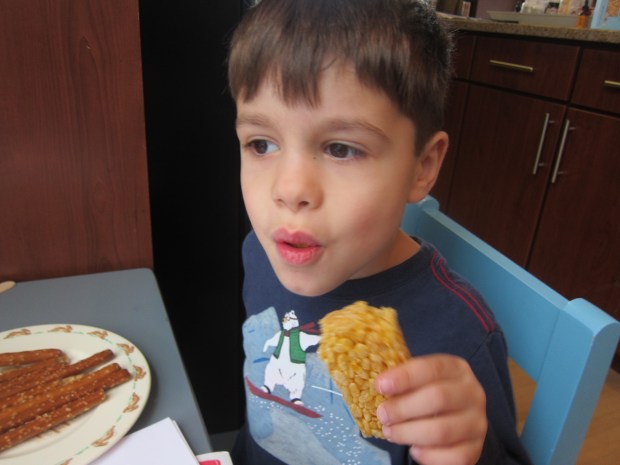
The final lesson plan to go with Travis’s Backyard BBQ Raddish Kids kit was quite scientific and a little over a five-year-old’s head. But thanks to two yummy experiments, even my kindergartner could keep up with the concepts involved.

First, I came to the table with a cup of clear hot water and a tea bag. I put the tea in the cup and asked Travis what he observed happening. “It’s turning golden,” he noticed.

Osmosis (1)

I agreed, and more specifically told him he was seeing diffusion: molecules moving from an area of high concentration (close together) to low concentration (further apart). This actually wasn’t too foreign an idea for him, since he loves a book about Albert Einstein pondering molecules.

Explain to your child that osmosis is a specific case of diffusion, having to do with the movement of water molecules. Two suggested clips on diffusion and osmosis helped Travis understand a bit better, though to be honest, this part was over his head. To make it more accessible, you can give examples of each. Diffusion might mean:

the aroma you smell from a cake baking

food coloring dispersing in water

Osmosis might be:

wrinkled fingers in a bathtub

rehydrated dried fruit

Now it was time to experiment! For diffusion, I asked him what he thought would happen to a scent if we trapped it inside a balloon. Would we be able to smell it? His hypothesis was yes! We carefully added a few drops of vanilla extract to a balloon.

Osmosis (2)

Inflate the balloon and tie the end into a knot. Place it in a closed box and let rest for 10 minutes or so.

Osmosis (3)

When we lifted it out, the box smelled a bit like vanilla; in other words, the scent had diffused. The result was subtle, which I think underwhelmed Travis.

Osmosis (9)

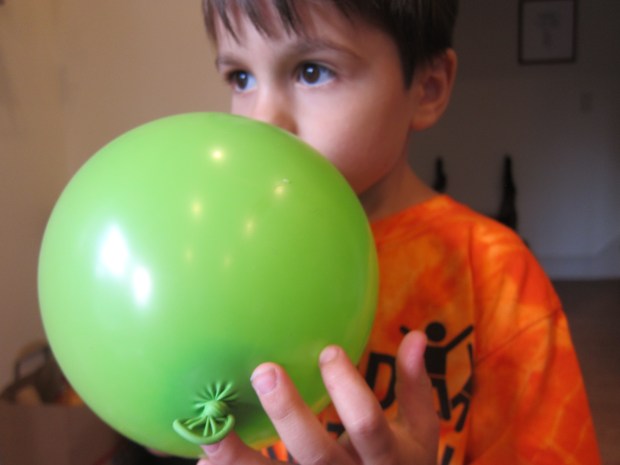
You may want to leave your balloon inside longer, or put more vanilla in it, to wow your kids with the results.

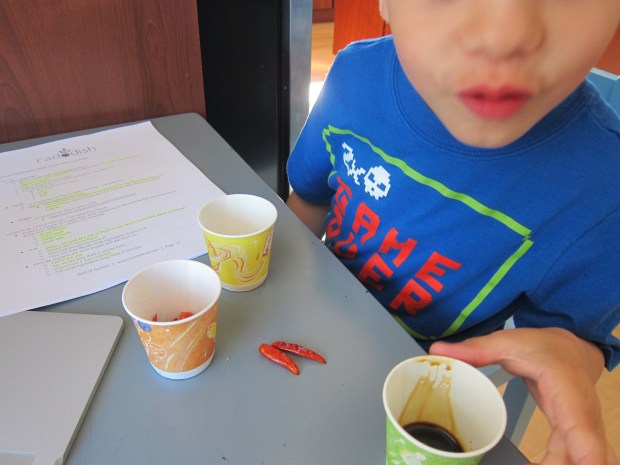
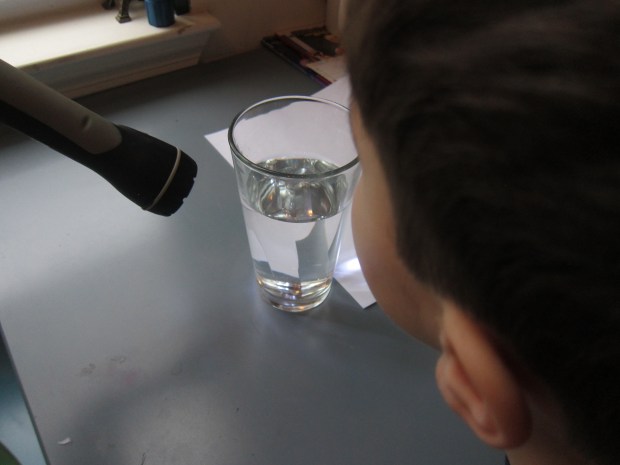
Next up: osmosis! For this one, we tested out the affect on gummy bears of being in plain water, salt water, and no water.

Osmosis (5)

We filled out the provided chart with his guess for the results. After some prompting about those plump rehydrated raisins, he was able to surmise what might happen.

Osmosis (6)

Big kids can really get scientific with this, filling in measurements before and after for color, length, width, thickness, and mass.

Osmosis (8)

For the set up, you’ll need three clear jars. The first simply received a gummy bear. The second had the bear plus 1/2 cup plain water. The third had the gummy in a saturated salt solution; add 1 teaspoon salt at a time to 1/2 cup water until no more will dissolve.

Osmosis (7)

We left them overnight, then checked in on the bears the next morning! Again, the results were a bit underwhelming, which may have been the vegan gummy bears we were using. But our plain water one looked a bit more plump, and our salt one looked a bit scrunched.

Osmosis (10)

Well, if all else fails, you can watch this osmosis rap video!

Fun with Idioms

Idioms alt.JPG

Many Raddish lesson plans that accompany their recipes are quite involved, but this one was fairly straightforward. But it got lots of giggles and introduced my kindergartner to a new term and concept.

I sat Travis down and read through the silly poem “Losing Pieces” by Shel Silverstein, in which he talks about talking off his head, crying his eyes out, and singing his heart out. It concludes:

There’s really not much

left of me.

Travis giggled at the last line but I asked him what was going on here. Had the author really lost his head? Walked his feet off?

Idioms (1)

Hmm… We needed more exploration. Travis is familiar with the book Parts by Tedd Arnold, but we hadn’t known there was a More Parts sequel. I showed Travis an online read-through, again producing giggles.

Idioms (2)

Once the read-through was complete, I told Travis he’d been listening to idioms. In other words: a group of words that mean something different from what the words actually say.

Raddish also suggested a great clip with illustrations by children showing the literal meaning of an idiom (like ‘holy cow or ‘cat got your tongue’) and then a child steps in to explain what it really means.

Idioms (3)

So now it was Travis’s turn! Check out the list of idioms here if your child needs help thinking of one to illustrate. Travis laughed when we got to “chip on one’s shoulder” so we stopped there.

Idioms (4)

He drew a person and positioned a little yellow chip right on the shoulder. For fun, show your drawing to friends or family members and see if they can guess which idiom is pictured!

Idioms (5)

History of the Flag

History of the Flag (1)

In anticipation of the 4th of July, Travis and I had a lesson about the American flag today, thanks to our Backyard BBQ unit from Raddish Kids. Recipes will follow soon, but for today, we had fun learning about the flag’s history and getting creative. Read on!

First I gave Travis a riddle: “I’m red, white, and blue, and starry too. What am I?” He had peeked (little cheater!) so knew I meant the flag. It’s fun at this point if you have a little flag that your child can examine and hold.

We made a chart known as a K/W/L graph with three columns: Things I Know; Things I Want to Know; What I Learned.

I asked him what he knew for starters, and he rattled off facts: the colors, the inclusion of stars and stripes, and that it’s our American flag, not another country’s.

History of the Flag (2)

Then we discussed what he wanted to know. I encouraged him to go deeper: why are there thirteen stripes or fifty stars, for example; why do we fly the flag. Now it was time for videos suggested by Raddish!

IMG_0001

We looked through a few flag books, as well, for further facts. It was useful to have a world map handy so I could point out where other flags were from.

IMG_0002

Now he could fill in the final L column. I was so proud that Travis had learned about the thirteen colonies, for example, or nicknames for the flag like Old Glory.

History of the Flag (3)

So now for the crafty part: designing his own country flag. Being only 5 years old, Travis’s grasp of the project was limited; his was a very fantastical flag for a “snake country.”

History of the Flag (4)

We used cardstock as the background, and of course a coiled yarn snake needed to be in the center. Using stencils was an artistic way to add “symbols”. Big kids can go more in depth into which symbols exist on real flags, and why.

History of the Flag (5)

A tin foil canton (vocab word)!) in the top corner added shine, though soon this was embellished with an old train ticket and construction paper.

History of the Flag (7)

I loved watching his creativity even though his final result was quite busy for a flag. Please share about your own kids’ creations in the comments!

History of the Flag (6)

Edible Parts of the Plant

Parts of Plant (13)

To complement a recent Strawberry Shortcake recipe from Raddish Kids, Travis and I had fun with this homeschooling lesson on the various edible parts of a plant.

Ahead of time, I gathered two examples of each of these six plant categories:

  • Roots: carrot and potato
  • Stems: asparagus and celery
  • Flowers: broccoli and flowers
  • Seeds: peas and pinto beans
  • Leaves: spinach and lettuce
  • Fruit: tomato and apple

I hid all of these under a blanket, and called Travis over.

Parts of Plant (2)

He was immediately intrigued, of course, checking out the blanket with his hands and using his nose, too, when I invited him to use all his senses. Could he guess what was underneath? Tada! The big reveal.

Parts of Plant (3)

I challenged him to put the items into pairs, using whatever criteria made sense to him. This confused him a bit, but he began to match them up. Some he got correct without understanding why; it was easy to see that the spinach and lettuce leaves were similar, for example, or that the tomato and apple were both big and round.

Parts of Plant (4)

When he was finished, I shifted his answers around slightly. Aha, the asparagus and celery went together… because they were both the stems of plants. Same for the potato and carrot – both roots!

Parts of Plant (6)

I ran through a quick definition of each of the six parts. As a bonus, I asked him why the mushroom was leftover. Aha – a fungus!

Parts of Plant (7)

Big kids may want to pause here and make a chart and then brainstorm other foods that fit each of the six categories. But Travis and I hopped right along to the next activity: artwork! We used all of the items to make a picture. I gave him complete free reign, which meant that at first he wasn’t depicting anything, just enjoying the materials. He discovered, for example, that you can pull strings from the celery that glued down nicely.

Parts of Plant (8)

Then he got a bit more purposeful. There was a flower rimmed in pinto beans with a celery stem and mushroom center. And orange carrot curls for a sun.

Parts of Plant (11)

This, he proudly informed me, was a whale.

Parts of Plant (14)

Big kids may want to make a plant with their plants, or perhaps a funny plant person!

Parts of Plant (12)

We next checked out a few of Raddish’s suggested links, including a read-aloud of the very funny Tops and Bottoms. As he watched an informative clip about plants, Travis kept running over with tidbits. “Did you know rice is a seed??” I love seeing him so excited about learning!

We next made an art collage of the six plant parts using a grocery store flyer.

Parts of Plant (15)

After he cut out all the pictures of fruits and veggies, we talked through where on our collage each item belonged.

Parts of Plant (16)

This was also great for sightreading words!

Parts of Plant (17)

As a bonus activity, we tested out Raddish’s suggested Kitchen Garden Experiment to regrow food scraps. We read about how plants can stockpile nutrients to keep growing for a short time, provided with water and sunlight, even if they no longer have soil.

I set out three different vegetable scraps for Travis: green onion bulbs, the bottom of a head of celery, and the bottom of a head of romaine lettuce.

Regrow Food (1)

We placed each in a container filled with water and set them on the windowsill. Travis’s hypothesis was that celery would grow fastest.

Regrow Food (3)

Each day we changed the water and observed. It was immediately apparent that green onion grew far faster than the other two.

Regrow Food (4)

After a couple of days, we measured the progress.

Regrow Food (8)

We also drew a picture of what he had observed. Then Travis wanted to eat the green onion, so that was the end of our scientific method!

Regrow Food (10)

There is so much more that older kids can do to learn about plants. Consider cooking a recipe that uses all 6 parts of a plant, or perhaps sprouting seeds.

Carbon Footprint Pledge

Carbon Footprint (10)

To go with our Farmer’s Flatbread and focus more keenly on why families might choose to eat food from a local farmers’ market, the paired lesson from Raddish Kids was about carbon footprints. I’ve long wanted to explore the idea of global warming with my kindergartner and this lesson plan made it so approachable for him.

First, I set out four items for Travis to gather, simply telling him they were needed for a “project”. But here was the catch: as he walked between each item and picked it up, he had to mark his trail with dried beans.

Carbon Footprint (1)

Well he just loved this!

Carbon Footprint (3)

Between the final two items, he exclaimed, “Oh no, Mom, some spilled!” What a teachable moment this was, akin to an “oil spill.” “That’s a really interesting accident,” I told him, and promised to explain why later. Even better, he decided he could use the beans from his spill, spread them out, and reach the final item. He cleaned up his own oil spill before I’d even imparted the lesson!

Carbon Footprint (4)

He carried the four items over and I broke the secret. We weren’t really making anything (with yarn, glue, straws, and newspaper); we were noticing the impact and trail we’d left behind. I explained how it represented the way that everything we use leaves an impact, or a carbon footprint.

Next up we watched a video clip of a Magic Bus and the Climate Challenge read-aloud. This video was 14 minutes long, but Travis was captivated… and full of questions. Would our home be under water some day? (I answered honestly – quite possibly, but while we have the ability to move, many people in the world didn’t have that choice). Did being vegan lower our carbon footprint? For this one, I could happily report yes!

After what I worried might seem a scary concept, the key to the lesson plan was to have kids walk away empowered, so it was time to talk about what we could do.

We checked out the Rainforest Alliance and their list of 10 things kids can do to help the rainforest. This led to coloring in a picture of rainforest animals, which Travis took so seriously, and reading a few online profiles of children who live near the rainforest.

Carbon Footprint (9)

He made me promise to buy only ethically sourced coffee beans and bananas, which luckily we already do!

Of all the suggested activities from Raddish for extension, the easiest for kindergartners is to make a pledge and spread the word to friends and family. Travis immediately wanted our poster to be about not leaving the fridge open and turning the a/c up one degree. The poster required stamps and glitter (of course!).

Carbon Footprint (6)

It was his project, and other than writing the words, I loved watching him decide what the poster needed.

Carbon Footprint (7)

There’s a lot more here for bigger kids: writing to congress members; planting trees; and a fantastic booklet of activities from PBS Kids that I want to explore when Travis is older. I’m thankful to Raddish for giving me the words to begin this important conversation with my son. Hopefully it’s the big beginning of our family making a small footprint.

Carbon Footprint (8)

Homemade Butterfly Feeder

Butterfly Feeder (5)
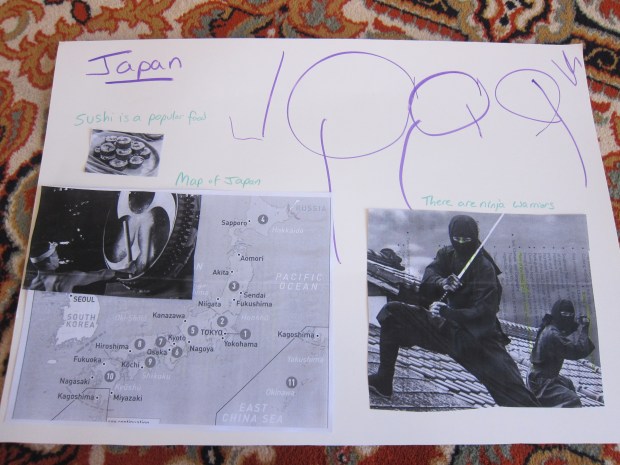
Travis and I have made bird feeders before… but never a butterfly feeder! So we were delighted to make this simple little craft, connected to his Garden Party Raddish Kids crate.

Bring 1 cup water to a boil in a saucepan. Stir in 1/4 cup sugar; reduce heat and simmer for 2 minutes, until the sugar dissolves. Cool completely.

Butterfly Feeder (1)

Use a pen or pencil to punch a hole near the top of a sponge. Travis loved this part! Thread twine or string through the hole.

Butterfly Feeder (2)

Carefully submerge the sponge in the sugar syrup. We found that it helped to use a stick to push the sponge down, so our fingers didn’t get sticky.

Butterfly Feeder (3)

Hold the sponge over the bowl to let any excess drip off, then hang some place that will attract butterflies outside.

Butterfly Feeder alt

The craft was beautiful already, even without any visitors. I will post an update picture if a butterfly comes calling!

Be a Food Historian

Food Historian (8)

Of all the lessons that have accompanied Travis’s Raddish Kids recipes so far, this one was the least accessible to a preschooler. I did my best to adapt it for Travis and it turned out to be sort of his first social studies project!

First, I set out some of the Thai ingredients we had used in our recipes and grocery store hunt, and invited Travis to test them out with all his senses. He was almost scared by the smell of little bird chiles!

Food Historian (2)

And incidentally loves soy sauce plain. Invite your child to taste, smell, and touch if appropriate, and add items like lemongrass, sugar, lime juice, or ginger.

Food Historian (3)

Big kids can go in depth here into the history of Thai food and learn that being a food historian is a real job; however, the suggested links from Raddish were heavy on text rather than video.

Instead, I showed Travis images of a few other iconic food/country pairs, including:

  • Tacos & Mexico
  • Baguettes & France
  • Sushi & Japan
  • Pizza & Italy

Food Historian (4)

I then asked him which he wanted to explore more in-depth. He’s been very into Japan lately (ninjas, in particular), so chose that pairing. Again, there were many suggested links to web resources for big kids, but these were text-heavy and not of interest to my preschooler.
Instead, we located Japan on a world map. We then thought of a few things he knew about the country and printed out pictures of each.

Food Historian (6)

He helped write the word ‘Japan’ across the top, and we glued down the pictures.

Food Historian (7)

Voila! His first social studies project. I was proud he stuck with me for this lesson, which ultimately ended up being quite cute.

Food Historian (9)


Carved Fruit Swan

Thai Fruit (6).JPG

As a fun bonus to compliment his Taste of Thai recipes, Travis learned to make a fruit sculpture today, a popular activity with a rich history in Thailand!

To start, juice one lemon.

Thai Fruit

Add the lemon juice to a measuring cup and fill with water to equal 1 cup. This will prevent your apple slices from browning as you work – be sure to dip each slice in the mixture before adding to the “swan”.

Cut an apple into three pieces vertically, so you have two rounded sides and the core.

Make two slits in the core piece to resemble the shape of a swan’s neck, as shown; discard the rest of the core, but save two seeds for the eyes!

Thai Fruit (2)

Now cut the round edge from one side piece, so it sits flat.

Thai Fruit (3)

Add the swan neck, securing with a toothpick. The toothpicks were Travis’s favorite part, and when our actual sculpting was complete, he loved adding a few more toothpicks just for fun!

Thai Fruit (4)

Thinly slice the remaining side piece of apple. Start adding to the base of the swan, using the largest pieces first and ending with the smallest.

Thai Fruit (5)

This was not only a great craft, but a fantastic snack as well. There was something about tearing apart a sculpture before eating that greatly appealed to Travis, too – go figure!

Thai Fruit (7)

Rainbow Science

Make a Rainbow (8).JPG

With all the talk about rainbows this month, whether cooking or crafting, it was time to get scientific. What exactly makes a rainbow appear? Today Travis and I answered the question in two ways, one more scientific, and one more artsy!

First, following the lesson plan provided by Raddish Kids, we did a visualization exercise. This was a first for Travis, but with a few prompts he got the idea. I told him to close his eyes and imagine and rainbow. He said he could see his rainbow through the trees in the morning, and it was star-shaped! Guide your child through this: what does the air feel like? Where is the rainbow? What time of day is it?

Next we did the quick run-down on the science. Raddish Kids provided two great video links to add some visual fun to hte science.

Make a Rainbow (1).JPG

We watched a few suggested video clips, to understand the science behind refraction. Raddish provides a very detailed write-up that older children can study, too.

Make a Rainbow (2)

Next up was a challenge: Could Travis make a visual of a rainbow that not only showed all the colors, but also showed how the rainbow is formed? It turns out this is called process art, and I laid down lots of material for Travis to choose from but provided little direction beyond that.

Make a Rainbow (3)

He decided he wanted a ribbon rainbow, so used lots of glue to adhere the lengths.

Make a Rainbow (4)

I was so proud when he realized he was gluing in the wrong order, and fixed things with his red placed first!

Make a Rainbow (5)

Next he needed to add the science part. He chose to use marker for sun and rain drops, and cotton balls for clouds. Now he had all the ingredients necessary for a rainbow to form!

Make a Rainbow (7)

I made a second version alongside him to show him how open-ended this project is: cotton ball clouds, tin foil raindrops, and pom poms for my sun and rainbow.

Make a Rainbow (6)

Finally, we formed a rainbow with science! Place a prism in a glass of water. Shine a flashlight or other light source on it.

Make a Rainbow (9)

Hold up a piece of white paper behind the glass, and you should see a rainbow reflected on the paper. It’s a bit tough to see in the photograph, but it was there!

Make a Rainbow (10)


Write Your Own Storycube Myth

Myths (6).JPG

This DIY storycube idea is a cute way to help kids understand what a myth is, and then write their own! You can purchase storycubes, but we had fun making our own simply using slips of paper with little pictures.

First, Travis and I played a game of telephone. I whispered a word to him, and he whispered back what he heard. Obviously “telephone” works best with multiple people, but even in our phone call for two, we went from “Firetruck” to “A truck.” It set the stage perfectly to talk about myths: how they are stories told from person to person, but ones that get changed or garbled over time!

We ran through the four basic types of myths:

  • Creation myths
  • Nature myths
  • Hero myths
  • Gods and goddesses myths

Then we talked about some purposes of myths:

  • Explaining the origin of something
  • Teaching a moral lesson
  • Explaining a historical event
  • Revealing common feelings or hopes

For an example, you can watch a read of Anansi the Spider on YouTube!

Myths (2)

Now it was time to write our own myth. I set out slips with simple pictures for Travis. We had 18 strips, which I numbered 1 through 6 (so there were three slips corresponding to each number). Then we divided a piece of paper into three parts, and I had Travis talk me through the basic parts of a story: beginning, middle, and end.

He rolled a dice for the beginning, getting a number 1. We taped on the three slips with the number one. Repeat for the middle and end of the story.

Myths (4)

Now it was time to write our myth. Our 1s were: a magnifying glass, scissors, and a map. I was so proud of Travis leaping in. He told a story of how someone use the scissors to cut the map and so the pieces were lost! Already we had intrigue and a problem to solve.

It did get a little sillier from there (working in characters from his most recent favorite cartoon movie), but for a 4 year old, I was impressed he picked up on the nuance of what we were doing. Big kids can really have fun with these myths, or even complete each other’s stories to highlight the way myths change over time.

Myths (5)

All of this was in connection with a Raddish Kids recipe about the pot of gold at the end of the rainbow – a timely myth, since we’re on the lookout for rainbows this rainy April! We finished up the lesson with a few myths from the library, which made for great bedtime stories.

Myths.JPG