Coral Reef Kiwi Crate

Kiwi Coral Reef (9)

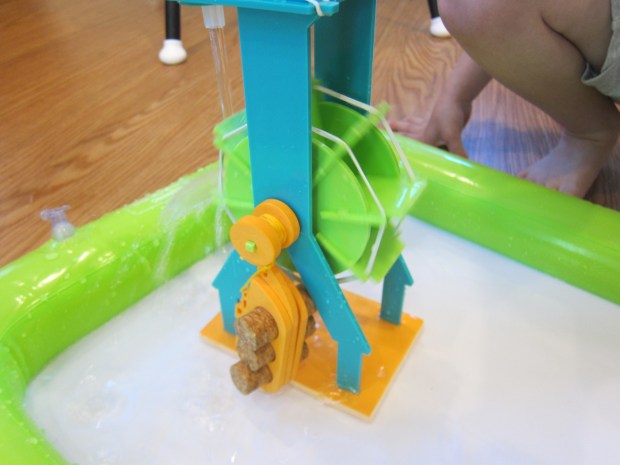
Travis kit from Kiwi Co this month was all about Coral Reefs. The focus was primarily on the science of a coral reef’s ecosystem, with a little bit of art and engineering (ratchets!) thrown in for good measure.

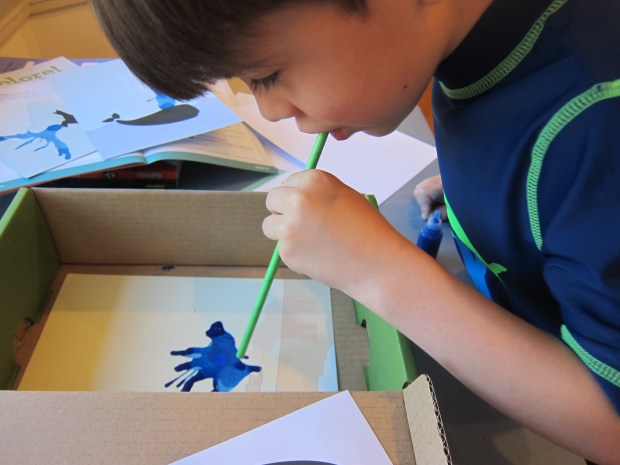
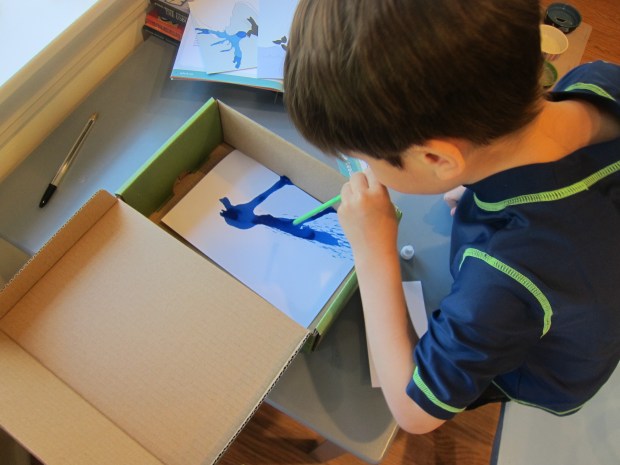
First up was the art component: to color in a Reef Scene.

Kiwi Coral Reef (1)

Travis loved the pastels that came with the kit for this step. There was also a blending stick to mix colors or make scratch-art, so kids can really have fun with this step if they’re feeling artsy.

Kiwi Coral Reef (3)

Next up he needed to Assemble the Jellyfish. The pastels are used again, this time to color the tentacles of the provided jellyfish shapes. Fold down these tabs of paper, then add strings as additional tentacles for wonderfully wavy creatures.

Kiwi Coral Reef (5)

A plastic cap (which looks like the top of an Easter egg) sits on top as the jellyfish’s bell. Thread a pipe cleaner through the holes in the plastic head and twist to make a loop. Wiggle eyes completed each wiggly fellow.

Kiwi Coral Reef (6)

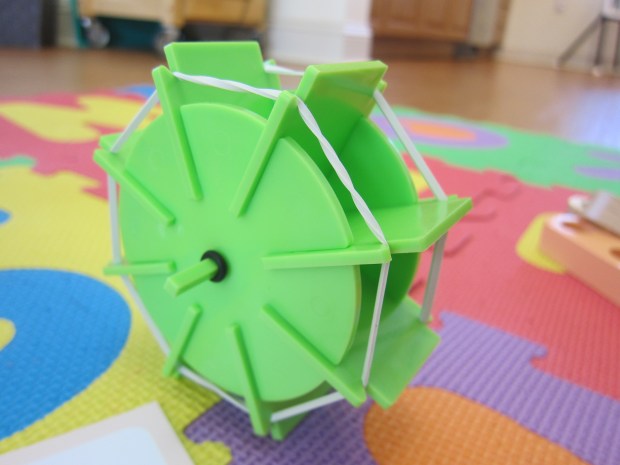
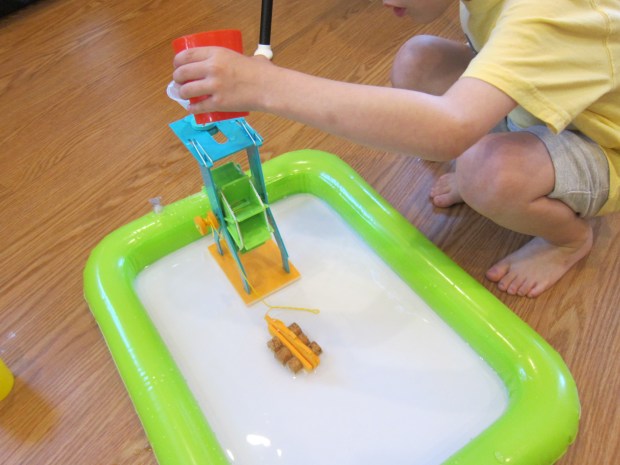
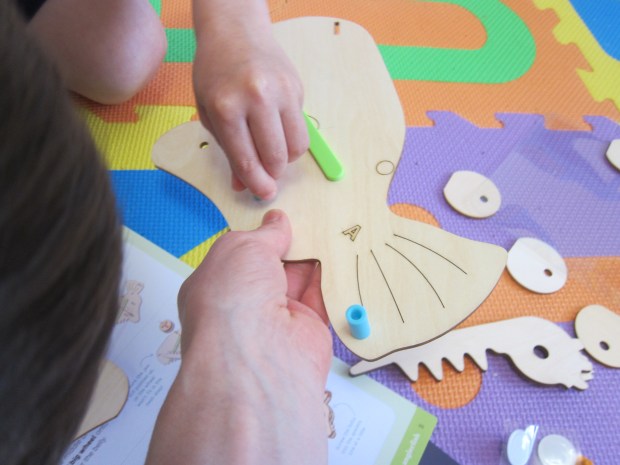
Finally, it was time Build the Race Frame. Kids add a disc and ratchet to each of two bolts, which then screw into a spool on either side of the wooden race frame.

Kiwi Coral Reef (7)

When we came to the next step, it turned out we were missing the long strings to thread through the spool and onto the pipe cleaner loop of each jellyfish. Luckily this was an easy material to replace, and I grabbed twine from the craft bin.

Travis then attached the handles (pieces of wood which will hitch onto the teeth of the jagged ratchet). As we raced our jellyfish, we learned that whether you push or pull on a ratchet, it will always turn in only one direction; the left side grabs when you push, and the right side grabs when you pull . Once Travis got the hang of it, he loved having jellyfish races with me!

Kiwi Coral Reef (8)

For some final fun, Travis read facts in Explore magazine, solved a brain coral maze, and then made a quick Pet Jellyfish:

Cut a circle from a plastic bag and gather the center of the plastic to form a head; tie loosely with string. Snip the edges of the circle to make the tentacles.

Pet Jellyfish (2)

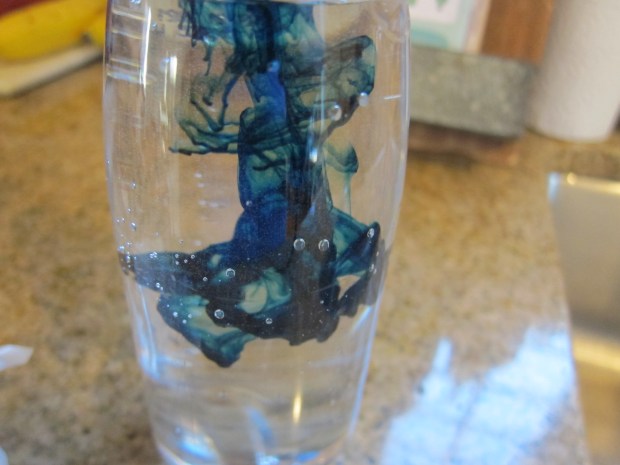
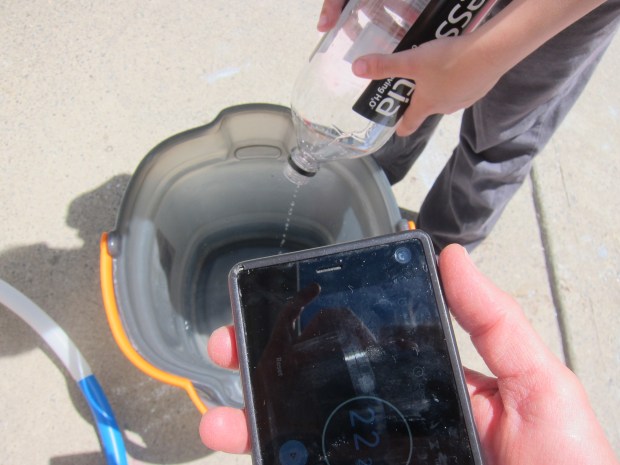
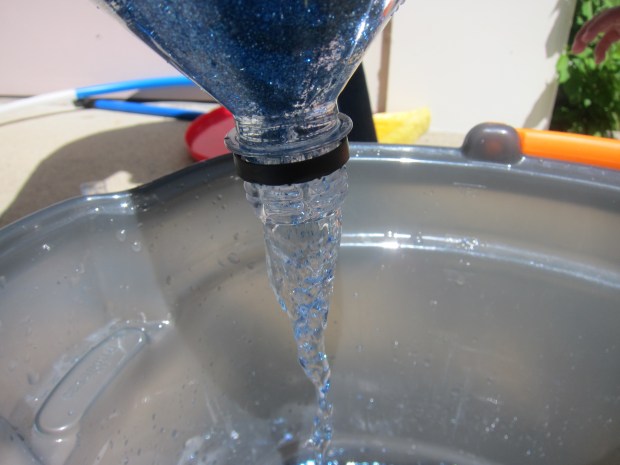
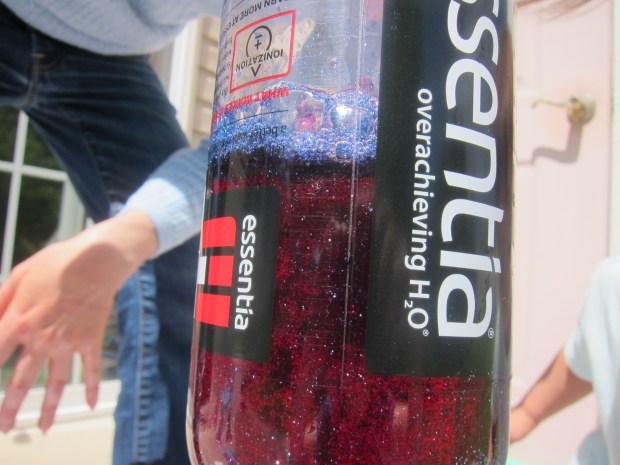
Fill a clear plastic water bottle with water and add a few drops of food coloring to turn it into a blue ocean.

Now fill the jellyfish’s head about halfway with water; you need enough room for an air bubble to form as well. Insert into the bottle and tilt it back and forth to watch your new “pet” swim.

Pet Jellyfish (3)

This didn’t work perfectly for us, but the kids liked the wavy tentacles in the bottle!

Pet Jellyfish (4)

Science of Air Kiwi Crate

Kiwi Air (10)

Travis latest crate from Kiwi Co. focused on the science of air, using a game of homemade air hockey to illustrate that air has matter, weight, can push things around, and more. This kit earns high marks for both the Science and Art components of the STEAM acronym.

First, we made the various parts of Balloon-Powered Air Hockey. The mallets are a simple matter of attaching felt to the bottom of provided cardboard circles, with a foam donut on top as the handle.

Kiwi Air (1)

The puck was a touch complicated to rig together, with a balloon stretched over a tube on top of a smooth clear disk. There is a hole to insert the provided air pump and inflate the balloon. Travis loved doing this and wanted to practice over and over, before we even set it down on a table.

Once on a table, the air is released from the balloon, which then propels the disk forward.

Kiwi Air (2)

To make Spray-Art Scoreboards, we again needed to use the crate’s air pump. Now, it attaches to the lid of the Kiwi Crate (or any shoebox) with a sticky foam piece. Attach a provided ink marker just below where the air will come out.

Kiwi Air (4)

We then affixed number stencils to the paper on the provided scorecard pads. When you squeeze the air pump (hard!), it blows on the marker so forcefully that ink sprays down onto the paper around the stencil.

Kiwi Air (5)

This had definite wow factor. You do need to pump the air quite hard, so some grown-up assistance was required. Repeat until you’ve covered all the scorecards, then remove the number stencils.

Kiwi Air (6)

Now it was time play! We rigged our regular table into an air hickey table which form the alleyways on either side that will stop the puck from flying off sideways.

Kiwi Air (8)

Pump up the balloon and play!

Kiwi Air (9)

I do have a few small quibbles with this crate. It comes with two balloons, but both had an air leak after only one round of air hockey. Also, because the balloon puck lasts under a minute each time you inflate it, you really can’t get into a rhythm of playing the game.

But in terms of illustrating the science of air, it made its point. And my 6 year old liked beating mommy at the game!

We turned to the Explore magazine for a few final experiments. First up was an oldie-but-goodie (a Coat Hanger Balance), that gives an easy visualization that air has weight. Attach two balloons to either end of a hanger, one inflated and one not. Suspend the hanger from a pencil and notice the slight tilt.

Kiwi Air (11)

Then we made a Marshmallow Squasher! Add mini marshmallows to an empty plastic water bottle until it is about half full. Insert the air pump into the bottle, sealing around the top of the bottle with play dough so no air can escape.

Kiwi Air (13)

Hold the play dough firmly with one hand and squeeze the pump with the other… and watch the marshmallows squish down!

Kiwi Air (14)

Water Wheel Kiwi Crate

Kiwi Water Wheel (12)

One of my favorite memories with Travis is a trip we took to an old saw mill when he was in preschool. I reminded him of the moment when his latest kit from Kiwi CoKiwi CoKiwi Coarrived, all about the Water Wheel! There was great STEM learning here about the power of water, all of which led to great play.

First up: the Water Wheel and Boat. To make the wheel involved slotting plastic paddles into the circular side pieces and holding it all in place with elastics. More and more with each crate, I sit back and let Travis handle the dexterity of all this.

Kiwi Water Wheel (1)

We then inserted the frame pieces into a foam base and again held it all together with elastics. A funnel goes on top, and can slide along on a foam donut.

Kiwi Water Wheel (2)

To make the “boat” simply involved inserting three corks into a foam frame, a good refresher on buoyancy and how cork is a material that floats.

Kiwi Water Wheel (3)

We inflated the provided water basin and placed the boat and water wheel inside.

Kiwi Water Wheel (5)

As Travis poured water into the funnel, the rope tugs the boat a little closer to the wheel each time. It required a little trial and error, but eventually our boat was taut against the wheel.

Kiwi Water Wheel (7)

We took our Water Wheel outside for a few additional experiments. First, we tested what would happen if the boat dangled over an edge, rather than floating in water. Even against the power of gravity, the boat rose upward!

walden (2)

Then Travis tested filling the funnel with sand instead of water; I think ideally this would have worked, but he poured the sand in so fast that the funnel clogged, and we didn’t have great results.

walden (3)

His Explore magazine also suggested testing the boat out in soapy water, though I’m unclear why. Was the soap supposed to hinder or help? In our results, it worked better, the fastest wind-up yet. Then we untied the boat and just had fun playing with the wheel as a water toy. Travis could test the power of the current that the wheel generates by floating other bath toys around it.

Kiwi Water Wheel (14)

The final project in this crate was Splash Art. Travis used the provided penguin background for his first try.  Add a generous squirt of the provided blue paint, then use the provided straw to blow.

Kiwi Water Wheel (10)

He was nervous at first that he would inhale the paint, so we practiced blowing air against our palms.

Kiwi Water Wheel (11)

Now he was brave enough, and I was so proud of him! There’s enough extra paper to make a few designs of your child’s own, and Travis loved adding lots of blue paint to these and blowing all over the surface.

Kiwi Water Wheel (13)

Have fun varying your method, including blowing hard or soft, or varying the angle of the straw. Just be careful: this one is messy!

Before wrapping up, we did a quick experiment to test the power of a vortex. First, fill an empty 2 litre bottle with water and pour it out normally over a bucket. Set a timer and see how long it takes! Ours emptied in 16 seconds.

Kiwi Water Wheel (17)

Refill it, but this time place your hand over the opening, turn the bottle upside down, and begin spinning in a circular motion; you’re creating a vortex. When you remove your hand, the water will whoosh out! I’d estimate it emptied in half the time.

Kiwi Water Wheel (18)

To make this more visible, first we added red food coloring, and then glitter. Travis was in charge of the camera, so unfortunately the pictures didn’t come out great!

Kiwi Water Wheel (19)

We ended the fun with two reads about water: Hi, Water by Antoinette Portis and National Geographic Kids’ Water.

Deep-Sea Discovery Kiwi Crate

Kiwi Deep Sea (4)

Travis’s subscription to Kiwi Crate is more welcome then ever these days, providing doses of science and art to our home school lessons. Travis couldn’t wait to dive into his deep-sea discovery crate.

First up was to make the Chomping Anglerfish. Travis has learned about these deep-sea fish before, with their fascinating attached lantern, and this project was big on engineering. He helped work through the steps of assembling a wooden wheel then attaching this to the frame of a wooden fish with bolts and screws.

Kiwi Deep Sea (1)

He felt absolute glee when he realized the jaw could move (thanks to the cogs lining up with those in the wooden wheel), and even more so when he realized this meant the jaw could now eat…

Kiwi Deep Sea (2)

…the prey. Activity number two, to Make the Prey was very simple, just adhering stickers to wooden disks with a peg in between. The wooden jaw hooks onto these pegs so that as the fish scoots along the floor, the jaw lifts up and “swallows” the prey. Just as a cautionary note, the whole apparatus is a bit temperamental and won’t work if the wheel isn’t properly rolling along the floor or if the jaw gets slightly stuck.

Kiwi Deep Sea (3)

But needless to say, it soon turned into a game of chomping up other toys around the house, like Legos!

The third project was a Submarine Seek-and-Find. Using the provided stencil, Travis colored in fish shapes onto the provided plastic sheet. A paper “flashlight” then uncovers these creatures lurking behind the dark submarine window.

Kiwi Deep Sea (5)

We had fun “hiding” fish for each other among drawings of bubbles, or making up our own creatures. Travis was so proud surprising me with a giant sea monster. The booklet explains the science of how the finder works, when the white light of the “flashlight” makes your drawings appear even under the dark window.

Kiwi Deep Sea (7)

For some final fun, Travis dressed up as an anglerfish for a game of “hide-and-glow seek”! To make the costume, twist a black pipe cleaner onto a glow stick, and attach to any dark-colored baseball cape with masking tape. Have your child dress in dark clothing and don the cap, and they are ready to be a lurking deep-sea fish!

Hide and Glow Seek (3)

We cracked additional small glow sticks to be the “prey” and took turns hiding these around the house. Travis got quite creative with his hiding places! The goal is to find all the sticks in the dark before the “anglerfish” tags the other player.

Hide and Glow Seek alt

Obviously this game will work best after full dark, as you can see from Travis in the picture above, although we did also play a round before the sun went down.

Hide and Glow Seek (5)

If you want to extend the learning, check out two fun books: How Deep is the Sea from Usborne Books or Super Submarines, by Tony Mitton.

Shadow Chalk Experiment

Shadow Chalk Experiment (5)

Travis has made sundials before, but never before has he used his whole body for the activity! This might be the coolest version we’ve tried yet.

Okay, so it wasn’t as precise as past versions, since the measurement (your body!) is big and you have to remember to pop outside. But at 9 a.m., 1 p.m., and 4 p.m. intervals, Travis stood with his feet in the same spot on our patio. He held a big stick for extra effect and struck a dramatic pose.

Shadow Chalk Experiment (1)

Each time, I traced his outline and marked the time.

Shadow Chalk Experiment (2)

Sure enough, it was long and aimed to the south in the morning, short and stubby at 1 p.m, and long and to the north by late afternoon.

Shadow Chalk Experiment (4)

If your kids want to, have them color in their shape each time with fun patterns or colors! Travis preferred to leave his blank, but we still had a neat record of the sun’s passing by the end of the day.

Shadow Chalk Experiment (6)

Muscle Machine

Muscle Machine (5)

For a little STEM to our home school day, I showed Travis a demonstration of how muscles work in opposing pairs. This craft was also a great way to upcycle his latest Kiwi Crate box. Here’s Travis flexing his muscles to get started!

Muscle Machine (1)

To start, we printed out a printable with shapes of the shoulder, upper arm, and forearm. Place the paper shapes on cardboard and use push pins to mark anywhere that circles are shown. Remove the push pins and cut out the cardboard. Widen each push pin hole with a brad.

Muscle Machine (2)

Use double-sided tape to attach the bicep and tricep muscle shapes to the upper arm. Insert two brads about half way in the two outside holes (these will act more like bobbins; alternatively, you can use real bobbins if you have them). Push a third brad through the middle hole, inserting it fully, and attach to the shoulder piece.

Muscle Machine (3)

Insert two brads into the outer two holes of the forearm. Cut two pieces of string 18 inches long and knot around these two lowest brads. Add a center brad on the forearm to attach it securely to the middle arm. You now have something roughly like this:

Muscle Machine (4)

Loop the top string clockwise over the brads that align with the bicep.

Loop the lower string clockwise around the brads that align with the tricep. Pulling the strings can now allow the arm to flex upwards or downwards, depending which you pull.

Muscle Machine (6)

For added stability, you can zip-tie the whole apparatus to an empty plastic bottle, but we skipped this step and pulled it more like a marionette’s strings. Have fun having your child see which other muscles move in pairs, like bending a wrist up or down, or bending back and forth at the waist.

Little Passports: France

LP France (13)

I’ve never been so glad to have a Little Passports subscription as I am now, perfect during this era of home schooling. Travis’s latest package took him to France. The booklet felt a little too advanced this time, reminding me that Travis is on the youngest end of the age spectrum for World Edition. The maze was hard (even for mommy!) and activities like being an art critic and following a landmark hunt involved lots of reading that was too advanced.

LP France (11)

Still, he enjoyed the extras on the web like seeing vibrant pictures of monuments and landscapes in France, learning a few French words, and selecting his favorite French dessert. And he proudly added the flag to his passport and the “push pin” to his map.

LP France (3)

Souvenir:

The mini easel and watercolor palette, complete with two tiny canvases, was a huge hit!

LP France (1)

Travis was immediately making masterpieces after we looked at a few examples from Monet and Matisse for inspiration. He even corrected me, pointing out that one of his canvases was meant to be viewed horizontally and the other vertically.

LP France (2)

Activities:

We opened this package on April 1 which turned out to be perfect because one activity was to color in a fish for the “poisson d’avril“.

LP France (5)

This French variation on April Fool’s Day is to tape the fish to the back of a friend or family member and declare that person the “Fish of April!” Travis got a big kick out of doing this to daddy.

LP France (6)

Next up was making an Eiffel Tower out of Dandies marshmallows and dry spaghetti!

LP France (7)

This was STEM at its best: thinking spatially about how to engineer the tower; using shapes (rectangles, triangles); dividing spaghetti pieces into halves or quarters; and of course eating marshmallows along the way for sticky fingers and lots of laughs.

LP France (8)

Look how it turned out!

LP France (9)

I had also purchased the optional add-on, an Aquarellum Parisian Painting Kit. This included 9 watercolors and three scenes of Paris on absorbent paper. Travis loved that he could use the provided eye dropper to mix colors.

LP France (10)

The scenes turned out beautiful. My petite artiste!

LP France (12)

Finally, we colored in the French flag to add to our garland.

Recipe:

Of course we weren’t done until we’d taken our culinary voyage. This time we turned our kitchen into a French bakery, plus learned a little cultural background for the galette des rois (Kings Cake).

Galette des Rois (3)

We had to improvise a little, since the recipe called for puff pastry which is hard to find vegan. We used store-bought pie crusts instead, which means our cake didn’t puff up like a traditional version, but it sure still came out yummy!

Ingredients:

  • 1/2 cup sugar
  • 1/2 cup ground almonds
  • 1 teaspoon almond extract
  • 1/2 cup Earth Balance butter, softened
  • 1 tablespoon ground flaxseed
  • 3 tablespoons water
  • 2 (9-inch) pie crusts
  • 1 tablespoon melted Earth Balance butter
  1. To prepare the filling, mix together the sugar, almonds, almond extract, and 1/2 cup butter.
  2. Whisk the flaxseed into the water to make 1 flax egg. Add to the sugar mixture and stir until mixed. Chill in the fridge.
  3. Meanwhile, turn one dough circle out onto a baking sheet lined with foil. Spread the chilled filling evenly over the dough, leaving a 1-inch border.
  4. Top with the remaining dough circle, pressing the edges of the dough to seal. Brush with the melted butter. Bake at 450 degrees F for 15 minutes, then reduce heat to 350 degrees F and bake an additional 20 minutes.

Galette des Rois (4)

Note: If your kids want to, hide a dried bean inside in keeping with the French tradition of this cake around Epiphany.

Galette des Rois (1)

Whoever finds the bean or a toy figurine in their slice is the king for the day and gets good luck! Skip that step if you are worried about choking hazards.

Galette des Rois (2)

Circuit Science Kiwi Crate

Kiwi Circuits (9)

Travis’s Kiwi Crate has never been so welcome as during this period of home school and social distancing, particularly on a rainy day when we couldn’t get outside for a spring nature walk. The package literally saved the day! Sometimes Travis wants to spread out the projects, but this time he insisted we dive into the crate right away and do all three projects start to finish.

The big concept this month was electric circuits, which Travis has grown to understand recently from a few at-home projects, so I was glad the concept wasn’t foreign to him.

First up was the Lamp: A simple set-up involved attaching a lamp base and LED light holder onto a cardboard base, then inserting batteries into the provided battery pack. Travis connected red wire to red wire and black to black, and his lamp turned on!

Kiwi Circuits (1)

The second project, the Lampshade, was really the only “A” component of STEAM for this crate.

Kiwi Circuits (3)

Travis loved punching the holes along the lines of a Steve the Kiwi template, with a sheet of black paper underneath, since it was similar to punch art he does at school.

Kiwi Circuits (2)

The black paper then slips easily inside the lamp, and Steve glows!

Kiwi Circuits (4)

We put it all together with the Electric Bowler Game. This was definitely complicated, but Travis was determined to put together a circuit board that involved four brads against a wooden plate and wires that slip over the outer brads.

Kiwi Circuits (5)

He slotted the wooden frame together and held it all together with provided rubber bands.

Kiwi Circuits (7)

A wooden dowel in the middle is the switch to deactivate the circuit when needed. 3 silver balls then trigger the circuit; these need to be scuffed with scratchy pads first, although to our disappointment, the booklet did not explain why.

Kiwi Circuits (10)

To complete the game, a wooden board sits on top with a foam bumper. Take turns rolling the three metal balls towards the holes at the end. Once all three metal balls fall into place between the brads on the circuit board below, the circuit is complete, and the lantern turns on!

Kiwi Circuits (11)

Definitely play in a dim room, for the best effect.

Kiwi Circuits (13)

Travis enjoyed the Explore magazine that delved deeper, including an experiment called Let It Flow. What else could complete the circuit in our set-up, other than the three metal balls?

Kiwi Circuits (14)

Three plastic beads failed, as did three marbles. But three strips of aluminum foil did the trick!

Kiwi Circuits (15)

There was no suggested further reading this month, but I recommend Oscar and the Bird: A Book About Electricity.

Kiwi Circuits alt

We also plan to check out I Am Benjamin Franklin when the title is released in October, as there’s sure to be some fun bits about electricity in there!

Holiday Card Circuits

Holiday Card (4)

Need to celebrate a birthday with someone from afar during COVID-19? Or planning on sending cards for Passover or Easter (or whatever the closest holiday might be?). In this age of social distancing, here’s a card that will literally shine through, even over Zoom!

This card works on the exact same circuit principle as the graphite circuit Travis made recently. But first we needed to make a pretty card! Since ours was a birthday card, we chose heart-print scrapbook paper and glued a felt heart to the front. Make sure you cut a hole where your LED light will shine through.

Holiday Card (1)

Of course you could go in so many directions with this card, whether one for Easter (a light-up chick or egg?) or just a fun theme to say hello like a UFO beam or fire truck siren. You can use stickers or cardstock cut-outs for the decorations.

Inside, make a rectangle from three strips of aluminum foil and tape down, leaving one corner that still flaps open. Also leave a gap at the top where the LED light will go. Tape down the legs of the LED, one to each side, making note of where the positive and negative sides are (Hint: the positive leg is longer).

Holiday Card (2)

Now tape down a 3V battery in the corner where you’ve left the foil loose. When the flap of aluminum foil folds down, the circuit is complete and the card lights up!

Holiday Card (3)

Here’s mom’s amazement, even if it was a little old-hat for Travis.

Baking Soda and Vinegar with Color Fun

Baking Soda Colors (8)

This activity was intended for my toddler, but it turned out to be my kindergartner’s favorite part of the day. Since there’s some STEM involved, keep it in mind if you find yourself home schooling!

For set up, I wanted Veronika to have the option of color mixing, so I filled three cups with vinegar. I left one clear, added yellow food coloring to the second, and blue food coloring to the third.

Baking Soda Colors (1)

I then sprinkled a box of baking soda into a shallow tray. Veronika instantly liked making lines through it with the pipettes I had left out. It was sort of like an indoor sandbox for a moment.

Baking Soda Colors (2)

Then it was time to start squeezing in vinegar! I used the clear cup first, knowing the bubbly reaction was enough to get a “wow” even before we added color.

Baking Soda Colors (4)

Then we started piping in the colored vinegar. I had hoped Veronika might get in some fine motor practice with the pipettes, but that was too much for 16-month-old fingers. Big brother Travis loved using a pipette and baster, though! Then the kids poured the cups of vinegar instead, for even bigger reactions.

Baking Soda Colors (5)

The blue and yellow turned into a nice green, of course, which I’d also hoped to demonstrate.

Baking Soda Colors (9)

After that we just had a big pile of green bubbly “lava” that the kids loved scooping through with pipettes and cups for ages.

Baking Soda Colors (7)

Eventually they wanted to drip in other colors from the food coloring set, which was fine, although it didn’t look so pretty.

Baking Soda Colors (10)

A great afternoon activity!

Baking Soda Colors (6)