Height H

Height H (6).JPG

Travis and I focused on the letter H today; it’s one of the first that he mastered, so tracing was a no-brainer for this one. But then we played around with the concept of  an h word (“height”) to form both the upper case and lower case.

Heigh H (2)

First, I set out a variety of Legos in different heights for him. It was up to him to decide how they needed to be combined to form an H, using two longer and one shorter. Hmm, not quite right…

Height H (1)

Tada!

Height H (3)

Next, we played up the concept of height even more by using a ruler for the line of lower case h.

Height H (4)

A sock makes the curve, for a fun final result. He needed no help from me on this one!

Height H (5)

Green G


Grape G (6).JPG

Today’s letter for tracing was G. Travis has a hard time with both the upper and lower case of this letter, so I made sure to sit us down when he was well-rested and focused.

He made great progress, and was delighted with the materials I pulled out to make our 3-D versions of the letter.

First up: green clay. “How can this be a G?” he asked, looking at a short blob of clay.

Grape G (1)

“Look, a G” he said a moment later, inadvertently making as smooshed one.

Grape G (2)

To be more precise, we rolled out long coils of clay.

Grape G (3)

With this, we could first loop it into a C and then add the line inwards for a G. Tada!

Grape G (5)

Next up: grapes! (If only they had been green grapes, but red worked in a pinch).

Grape G (7)

Travis worked carefully to form the circle of lower case g, but then needed a little help understanding how to make the rest of the grapes march down in a line for the final flourish.

Grape G (8)

After that, the g got gobbled up too quickly for me to snap a picture!

Fishy F

Fishy F alt

Today Travis and I focused on the letter F, tracing it first and then making it 3-D in two ways.

For the first, we raided daddy’s non-vegan pantry of snack foods, and used fish (goldfish crackers, that is). I drew lower case f on construction paper, and Travis loved making a big line of glue and sticking on the fishy friends.

Fishy F (1)

We used blue paper and I encouraged him to color in an ocean scene behind the fish, but he decided he didn’t want to.

Fishy F (2)

For upper case F, we used a few forest finds from a walk. Once we were home, I laid out two short sticks and one long.

Fishy F (3)

“I can do this!” he declared with confidence, and in no time had formed an F.

Fishy F (4)See you soon for G!

Easy E

Easy E (5)

For lack of a better title, today Travis and I made Es with two easy materials (straws and string)… But it turns out they were quite tricky to master!

First we traced big E and little e, and then I presented him with 4 straws; 3 were short, and 1 was long.

Easy E (1)

At first, he added the short straws to the long one in a rather slapdash way.

Easy E (2)

He traces E this way sometimes, too, so I challenged him to look closer at the E in his tracing book. Aha! One short line comes from the top, one from the bottom, and one from the middle.

Easy E (3)

Making little e with another easy material (string) was even harder. He got frustrated figuring out how to twist it in just the right way, until I provided direction.

Easy E (4)

What material would you make an E? Please share in the comments!

Design a D

Design D (6)

Our summer letter of the day for tracing and writing was D. Travis doesn’t struggle with the upper case, but still sometimes confuses his little d with little b. Working slowly through a worksheet helped him focus on which direction the line and circle needed to go.

To think about it spatially, we then designed D in two ways. First I gave him a pencil and string; could he make an upper case D?

Design D (1)

At first he was confused, but kept a good attitude about it!

Design D (2)

I helped him make the loop of the D with the string. Now could he see where the pencil needed to go?

Design D (3)

Tada!

Design D (4)

Next we made a lower case d with our hands. He remembered cupping his hand into a c from yesterday, which worked the same for the loop, here. His other hand went straight against it, for a delightful d!

Design D (5)

Cotton Ball C

Chalk c (4)

Today Travis practiced tracing C – an easy one! – but after the tracing, I challenged his dexterity to form a C in three ways.

First, have your child cup their hand (make sure to use the left) to form the letter. Travis had to think hard about this, but was so proud when he got it right!

Chalk c (1)

Next we headed outside to draw c’s with chalk. This was a great chance to make sure his form was correct, since there was no line for him to trace outdoors!

Chalk c (2)

I noticed that his C’s were a little short, and encouraged him to extend the line for a curvier final result.

Chalk c (3)

Finally, back inside, I drew a C for him on construction paper and we filled it with cotton balls.

Chalk c (5)

Travis wanted to do his own glue, following perfectly along the line I’d drawn.

Chalk c (6)

And he was completely in charge of placing each cotton ball, too! Again, what a difference in dexterity and patience.

Chalk c (7)

Button B

Button b (6)

Today’s summer letter of the day was B! After tracing, I helped Travis draw two very careful Bs using white crayon on black paper (a fun chance to use white, sadly always the most underutilized crayon in the box).

Button b (2)

Travis made dots of glue on each B, and filled the upper case with buttons

Button b (3)

…and the lower case with breakfast cereal.

Button b (5)

He was so careful applying each piece along the lines; I sat back and marveled at how his fine motor skills (and patience!) have changed over the course of pre-k.

Button b (4)

Even better, he enjoyed the button art so much that he asked for a second piece of paper and a glue stick to continue the fun once our Bs were complete – what could be better than that? If you don’t have buttons, beads would also work great for this project.

Button b (7)

Aluminum A

Aluminum a (4)

Travis is a pre-k grad, and although we intend to have lots of fun this summer, I also want him to avoid the “summer slide.” To keep him fresh, we’ll be working on the alphabet. This took me back to our journey through the alphabet when he was a toddler! But now the emphasis is different; he knows his letters and phonemes, but needs to work on the fine motor skills of tracing and writing.

After tracing the letter A, both upper and lower case, we designed one from a material that started with a – aluminum foil.

I showed Travis how to roll a sheet of foil into a coiled rope – fun!

Aluminum a (2)

We looked at the “a” in his workbook, and he thought hard about how to shape his foil. For the majority of it, we twisted one coil until it made a circle.

Aluminum a (1)

The second, shorter coil would be the line on the end. Travis has a habit of putting this line closer to the middle of the a’s bottom, but this “close reading” helped him pinpoint that it should go on the side.

Aluminum a (3)

Next we made an Artistic upper case A, using a favorite art medium: crayons.

I presented him with three crayons – two long and one short – and challenged him to decide which should go where.

Aluminum a (6)

After initially making what looked more like an H, he was quite proud when he tilted the two long crayons to make an A.

Aluminum a (7)

One down, 25 to go!

Aluminum a (8)

Leprechaun Lollipops and St. Patrick’s Day Fun

Leprechaun Lolly (4).JPG

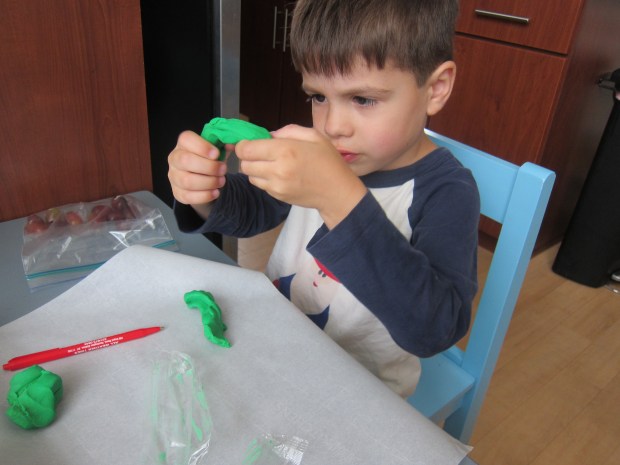
We’re getting in the mood for all things green here in honor of St. Paddy’s Day. Confession: I have not a drop of Irish blood in me, but I’m obsessed with Ireland, so I love making this holiday special for Travis.

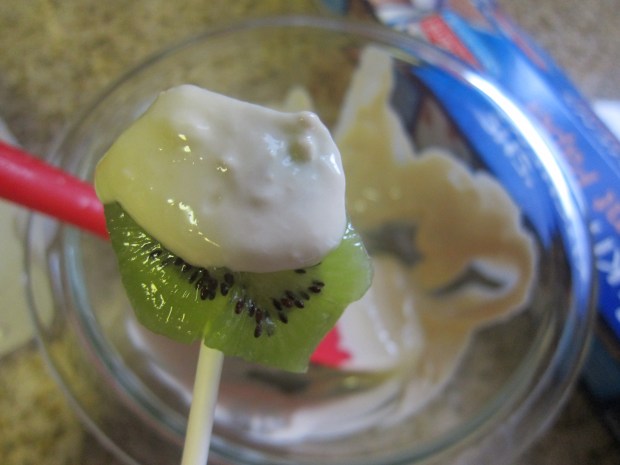
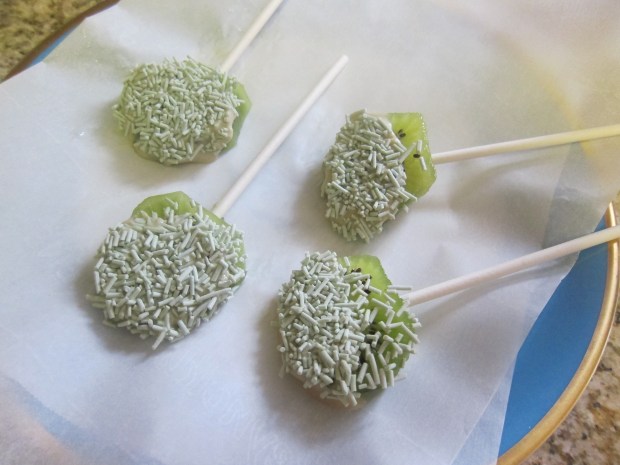
This year, we had so much fun with this lollipop idea from Parents magazine. First, insert lollipop sticks into kiwi slices.

Leprechaun Lolly (1)

Place 1 bar of vegan white chocolate (such as Charm School Chocolate) in the microwave for about 30 seconds, until melted.

Dip each kiwi slice in the white chocolate, then press into a dish of green sprinkles.  Alternatively, try yellow (gold) sprinkles or rainbow color, which also fit with this holiday theme!

Leprechaun Lolly (3)

Transfer to a plate lined with parchment paper and chill in the fridge for about 5 hours, or until set.

Leprechaun Lolly (2)

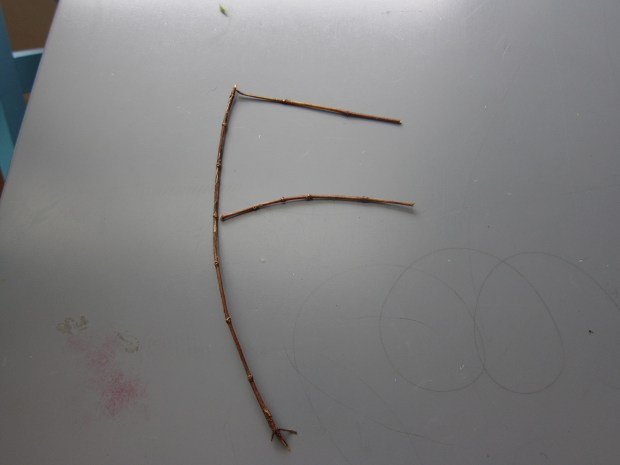
While we enjoyed this Emerald Isle treat, we also did a little learning! Travis’s class has been working a lot on tracing letters at school, so we did a St. Patrick’s-themed word trace.

Leprechaun Lolly (7)

Writing and spelling is so much fun with this St. Patrick’s Day Word Tracer worksheet! For more educational resources, visit Education.com!

Leprechaun Lolly (10)

Travis was so proud of his ability to follow along, since the letters were smaller than his school worksheets. He loved discovering that this word spelled “luck!”

Leprechaun Lolly (8)

Finish off the St Paddy’s snack with a video clip of Irish dancing or a quick rundown of Irish symbols like the shamrock or the pot of gold.

Leprechaun Lolly (9)

Custom Kicks

Custom Kicks (6)

Kids take great pride in things they’ve made, and that goes for clothing as well as crafts. Give them a little extra kick in their step by customizing sneakers for school this fall!

You’ll need to start with blank canvas sneakers; the ones from Kikiz Kids are made of non-animal materials, and inexpensive enough that you won’t mind unleashing your mini Picasso on them.

Custom Kicks (1)

If you want to make the project into a bit of a lesson, try stenciling in lines with a pencil first, and encouraging your child to trace along the lines. We used glitter pens, but you can also use paint pens for the project.

Custom Kicks (2)

Travis had his own plans, and soon his shoes were a riot of colors.

Custom Kicks (4)

We also liked practicing our tracing around the eyelet holes!

Custom Kicks (3)

Now those are some kool kicks:

CUstom Kicks (5)