DVD Case Towers

DVD Towers (3)

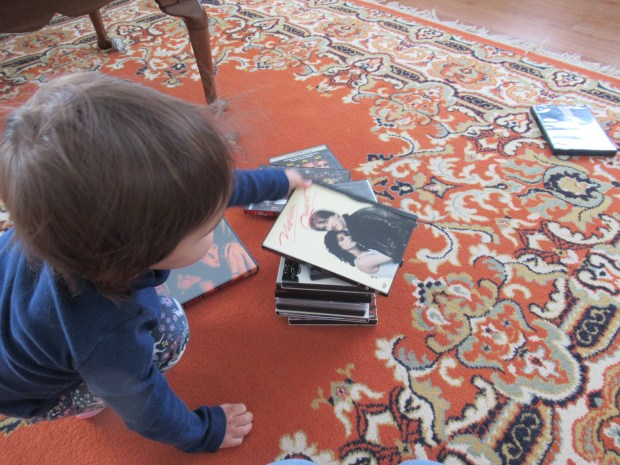
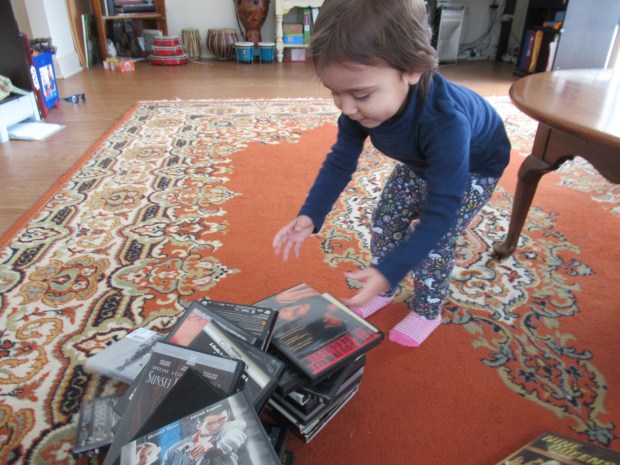
I had an hour long Zoom this morning and needed a quick way to occupy Veronika. That meant I also needed a material that wouldn’t make a mess. Looking quickly around the room, I pulled out all our old DVD cases!

I had forgotten how much my son loved to play with these cases as a toddler, but we almost never think of them anymore (thanks, streaming TV). There are lots of ways toddlers can play with them! Opening and closing the cases is great for fine motor skills, and no doubt the shiny discs inside will capture attention.

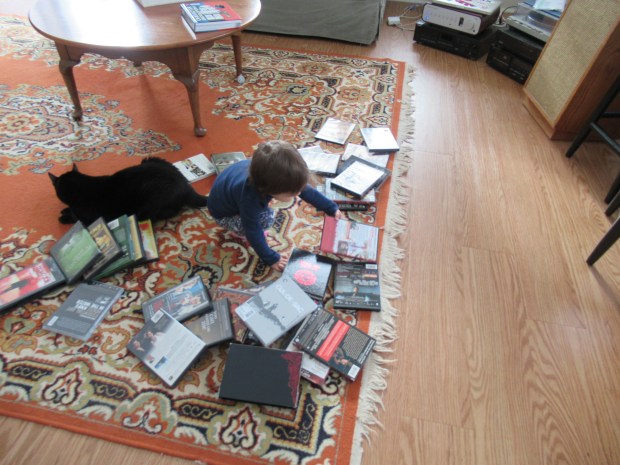
But Veronika’s favorite way to play was to build towers. First I showed her that if she opened up the cases, they stood up on a more stable base and she could build the tower quite tall.

DVD Towers (1)

This was admittedly tricky for her though, and she mostly loved knocking down the towers. The higher I made them, the bigger her delight!

DVD Towers (2)

Much easier for her was stacking them lying one atop another. She delighted in seeing how tall she could make this stack grow by herself.

DVD Towers (4)

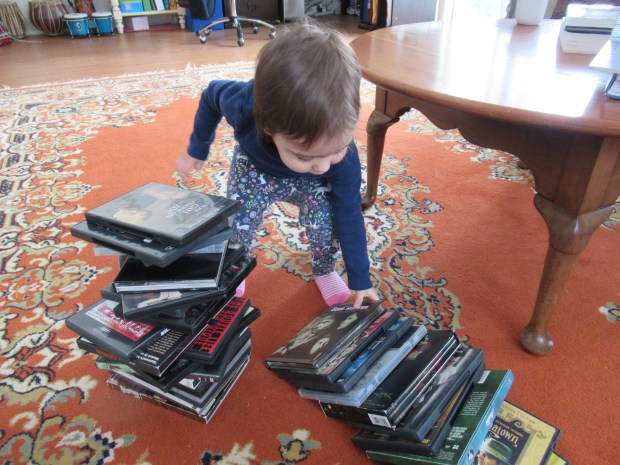
Probably it would have reached her shoulders, but inevitably the temptation to push the stack over was too strong.

DVD Towers (6)

Then she turned the DVD cases into slides for her toys!

DVD Towers (7)

How does your toddler play with DVD cases (or other old media equipment)? Please share in the comments!

Valentine’s Day Soapy Sensory Foam

VDay Soapy Sensory Foam (3)

Soapy sensory foam is an idea we first found at Hands on As We Grow when Travis was a toddler, and it’s one of those easy activities you can return to over and over. You can switch it up for just about any holiday simply by adding that season’s colors with food coloring. To wit, today Veronika and I turned the foam pink!

I added about 2 tablespoons of water and a squirt of dish soap to a blender, along with a few drops of red food coloring. Run the blender for just a moment and you’ll get a thick foam that’s ready for play!

VDay Soapy Sensory Foam (2)

I spooned the mixture onto a tray for Veronika and set out kitchen utensils such as a whisk, spoon, and a few measuring cups. Let the soapy, foamy bakery begin!

VDay Soapy Sensory Foam (8)

Veronika told me that she was adding cups of “flour” very seriously as she scooped the foam into a loaf pan.

VDay Soapy Sensory Foam (5)

She also loved using one measuring cup to fill another.

VDay Soapy Sensory Foam (7)

The whisk was great for stirring it around!

VDay Soapy Sensory Foam (4)

This activity kept her busy for quite a while. And while it looks like messy play, don’t forget that you literally just have soap in all those containers. It rinses off in a moment and everything is sparkly clean.

Hunt for Love Bags

Hunt for Love (10)

Here’s an adorable way to teach even young toddlers about the connection between Valentine’s Day and love (both in terms of the emotion and in terms of things they love).

First, Veronika and I decorated bags for the upcoming love hunt, and I thought edible paint would make the project even more fun (not to mention delicious!). I poured some coconut yogurt into containers and we tinted one pink and one purple.

Hunt for Love (2)

Veronika was almost too busy eating (she particularly loved the purple!) to paint, but eventually we had smeared three white treat bags with the yogurt paint.

Hunt for Love (3)

We tried adding glitter in the middle using a heart cookie cutter as a stencil. Veronika requested a butterfly, too!

Hunt for Love (4)

Unfortunately once I stood the bags upright to dry, the glitter sprinkled right off – whoops! I left them to dry lying down but propped open slightly by old paper towel tubes (newspaper would work, too), since the yogurt paint is so thick and messy.

Hunt for Love (12)

It became quite clear, though, that this paint was going to take forever to dry. So when Veronika was impatient for the next part of the activity, we quickly made a plan B and decorated a few more treat bags with heart stickers.

Hunt for Love (5)

No drying time required now! As we put on the heart stickers, I talked to her about how hearts represent love, and we were going to hunt around the house for things she loves. I put in one of her favorite toys as an example. “You love penguin. Penguin goes in the bag!”

Hunt for Love (6)

I was amazed at how quickly she understood the concept! She filled the bag with favorite toys and began talking about how much she loves them.

Hunt for Love (7)

This is not a term she normally uses in her play, so I knew she was making the connection for the first time. Don’t be surprised if your toddler wants to add loved items that don’t fit in the bag. That’s just fine, and serves as a quick lesson on relative sizes! Baby doll didn’t fit, but Veronika can still love her.

Hunt for Love (11)

Once the bag was full, she was delighted with her little bag. “I got anything I love!” she said. And then when I asked her what big brother Travis might put in his bag, she said without any prompting, “Travis will put in all his Lego guys!”

Hunt for Love (9)

She really understood! Note: Eventually the yogurt painted bags did dry, so we might keep these on hand to fill with Valentine’s goodies as the holiday approaches.

Moist Yogurt Pancakes with Strawberry Topping

Moist Yogurt Pancakes (2)

Special snow days off from school call for special breakfasts, and these decadent pancakes fit the bill! Note: you can grind your own oat flour from regular rolled oats, which is a cinch to do if you don’t want to purchase an entire bag of oat flour at the store.

Ingredients:

For the Strawberry Topping:

  • 1 cup chopped strawberries
  • 1/4 cup water

For the Pancakes:

  • 1 and 1/2 cups flour
  • 1/2 cup oat flour
  • 2 teaspoons + 1/2 teaspoon baking powder, divided
  • 2 teaspoons baking soda
  • 1/4 teaspoon salt
  • 1/2 cup applesauce
  • 1/2 cup apple juice
  • 2 cups plain non-dairy yogurt
  • 2 tablespoons melted Earth Balance butter
  • 1 teaspoon vanilla extract
  • Cooking spray
  1. To prepare the strawberry topping, combine the strawberries and water in a small saucepan. Cook over medium heat for about 10 minutes, until you can easily break the strawberries up with the back of a spoon. Set aside.
  2. Meanwhile, prepare the pancakes: combine the flour, oat flour, 2 teaspoons baking powder, baking soda, and salt in a bowl.
  3. In a large bowl, whisk together the applesauce and remaining 1/2 teaspoon baking powder. Add the apple juice, yogurt, vanilla, and melted butter.
  4. Add the dry ingredients to the wet ingredients, stirring just until combined.
  5. Heat a griddle coated with cooking spray over medium-high heat. Drop the batter on the surface and cook until bubbles appear, then flip and cook an additional 2 minutes or so on the other side.
  6. Top with the strawberry mixture to serve!

Lasagna Noodle Painting

Lasagna Noodle Painting (6)

We love finding new “canvases” for painting, but today’s choice was one of the most unusual yet! I had a box of lasagna noodles in the pantry, so simply placed a few of them on a craft tray for Veronika. The long rectangles are practically begging to be painted!

Veronika picked out her colors of paint, opting for a mix of neon orange, green, and purple.

Lasagna Noodle Painting (1)

At first I just let her smear the noodles with the paint any which way. After she had painted a few noodles, I showed her that she could also create circles, wiggly lines, or dots.

Lasagna Noodle Painting (3)

She particularly loved dotting with her paintbrush after that!

Lasagna Noodle Painting (5)

We also had one wide-bristle brush which could coat a whole lasagna noodle in one swipe. I showed her how to do this, but she asked for her smaller brush back. If your child wants to finish the noodles with a sprinkle of glitter, that would look great, too.

Lasagna Noodle Painting (4)

As the noodles were drying, I decided to add Veronika and Travis’s names with puffy paint. Once the paint dried, I attached them to colored construction paper with hot glue.

Lasagna Noodle Painting (7)

Now they made beautiful labels for the playroom! We’ll see how long our lasagna plaques last. 

Lasagna Noodle Painting (8)

Cookie Cutter Painting for Valentine’s Day

Cookie Cutter Valentines (7)

It’s February, which means we’re starting to think about all things Valentine’s Day, especially with regards to crafts. Cookie cutters are a great medium for toddlers because your child will delight in creating a recognizable shape on paper, even before he or she is able to draw shapes by hand.

I set out a tray for Veronika with two shades of pink paint and heart cookie cutters in various sizes.

Cookie Cutter Valentines (1)

Veronika loved seeing all the hearts! She quickly had a knack for dipping a heart in the paint, transferring to the paper, and then turning back to dip again. “I made a heart!” she said proudly.

Cookie Cutter Valentines (4)

Because we happen to have several heart cutters, this was also a great moment to talk about size. I had her point out to me which was the big heart, which was the small, and – the tricky one! – the medium.

Cookie Cutter Valentines (5)

I love that cookie cutter crafts like this result in fool-proof art even for toddlers, meaning you wind up with great art to send to relatives or friends. Folded in half, the resulting heart paintings would make lovely Valentine’s Day cards.

Cookie Cutter Valentines (6)

Snowball Showdown

Snowman Showdown (3)

Here’s a fun twist on a snowball fight the next time you get a big snowfall!

We had nearly two feet of snow last night, so I shoveled out an area on our patio where Travis and I could make fort walls. Each of us then lined up mini snowmen along our side of the fort. Okay, the snowmen were basically just snowballs, because we didn’t have great packing snow that allowed us to make snow figures with a separate ball for the body and head. Still, they made cute targets!

Snowman Showdown (1)

Now, we took turns trying to knock each other’s “snowmen” over!

Snowman Showdown (4)

Depending how competitive your kids want to get with this, everyone can design their own full fort to defend with the snowmen sitting atop the walls, on opposite sides of a yard or patio. If you have enough family members for teams, then a player who gets hit by the opposite team’s snowball has to join that side. If your kids have a snowman showdown, we’d love to hear about it in the comments!

Veggie Burritos

Veggie Burrito (2)

Homemade refried beans add a nice touch to these veggie burritos. You can prepare the recipe just before serving, or make in advance and wrap up for a lunchbox.

Ingredients:

  • 1 tablespoon olive oil
  • 1/4 cup chopped onion
  • 1 (15-ounce) pinto beans, drained and rinsed
  • 1/4 cup water
  • 2 burrito-sized flour tortillas
  • 2 slice vegan cheddar
  • 1/2 cup cooked rice
  • 1/4 cup shredded carrot
  • 1/4 cup sliced or mashed avocado
  1. To prepare the refried beans, heat the olive oil in a saucepan over medium heat. Add the onion and cook for 10 minutes, until very tender.
  2. Add the pinto beans and water. Remove from heat and mash with a fork or potato masher to desired consistency. Set aside.
  3. To prepare the burritos, place a slice of cheddar down the middle of each tortilla. Cover each serving with 1/4 cup refried beans (refrigerate any leftover), 1/4 cup rice, 2 tablespoons carrot, and 2 tablespoons avocado. Wrap up tightly and cut in half to serve.

Veggie Burrito (1)

Camping Pretend Play

Camping Pretend Play (8)

I have literally been saving this activity for a rainy day (okay, a snowy one, but basically I was waiting for any form of precipitation). I had a never-used camping play set in the closet that included a pop-up tent, fake campfire with plastic s’mores, a lantern, and binoculars. This make-believe camping is the perfect thing to occupy the kids when you have a day too blustery to get outside and camp for real!

I pulled out the set, and from here the idea really was just to let the kids engage in imaginative play. Of course they wanted to climb into the tent right away.

Camping Pretend Play (4)

I wonder what nature treasures Veronika can see through the binoculars!

Camping Pretend Play (3)

The campfire was a big hit, as was the pretend food. Veronika loved slicing at the various sausages and veggies and the kids “roasted” their marshmallows.

Camping Pretend Play (2)

For a little arts & crafts, I printed out camping templates to color in. These featured signs of hikers, a tent label for our “campsite”, and a fire danger warning sign (you can even do a quick review of Smokey Bear while the kids color this one!).

Camping Pretend Play (5)

As a side note, there’s no need purchase a camping set for your kids to enjoy this activity; it just happened to be something in the closet. But any tent (or blankets over chairs!) can be your campsite. For a campfire, use paper towel tubes as the logs and red or orange tissue paper as the flames (tea lights add to the authenticity!).

Camping Pretend alt

Real sticks with cotton balls on the end can be used for s’mores, and two toilet paper tubes taped together become binoculars in an instant.

Camping Pretend Play (1)

Needless to say, this was a great way to imagine we were in the warm camping days of summer while a blizzard raged outside!

Camping Pretend Play (6)

Rice Art

Rice Art (4)

This easy colored rice not only serves as the base material for a pretty craft, but doubles as a sensory material for toddlers!

You’ll need to prepare the batches of rice the night before. For each color, spoon 1 cup uncooked rice into a small zip-top plastic bag, then add 3 tablespoons white vinegar and 5 to 10 drops of food coloring, depending how saturated you want the color to be. I would have made a full rainbow of 6 colors but only had 5 cups of rice, so we skipped orange!

Rice Art (8)

Spoon each color onto a paper plate and let dry overnight.

In the morning, Veronika spotted the rice and instantly wanted to play. I spooned it onto a craft tray, where the rows of colors were almost pretty enough to be a game in their own right!

Rice Art (2)

But we had other plans for this particular rice. I set out pieces of cardboard to be Veronika’s canvas, because you’ll need a sturdy background for this particular art medium. We dumped on big pools of white glue and I showed her how to sprinkle the rice down to make pretty colored designs.

Rice Art (3)

Veronika loved choosing which colors to add where. As a two-year-old, her design was obviously very abstract, but older kids can make deliberate pictures with the glue before covering with rice. Sunny skies, rainbows, or flowers would all be beautiful made from the rice!

Rice Art (6)

Whenever you need to, pat the rice onto the glue and then tilt the cardboard over the tray to dump off any excess. Keep working until the design comes out to your child’s satisfaction.

Rice Art (5)

And of course, when the artwork was done, the leftover rice was a delight for Veronika to scoop through. She loved seeing the beautiful colored grains on her fingers!

Rice Art (7)