Coffee Filter Globes

Coffee Globes (6)

Earth Day is tomorrow, April 22! I wanted to help Travis start to understand what protecting our planet is all about, so we made this craft today in anticipation of the holiday. You’ll celebrate Earth Day while teaching your little ones how they can help!

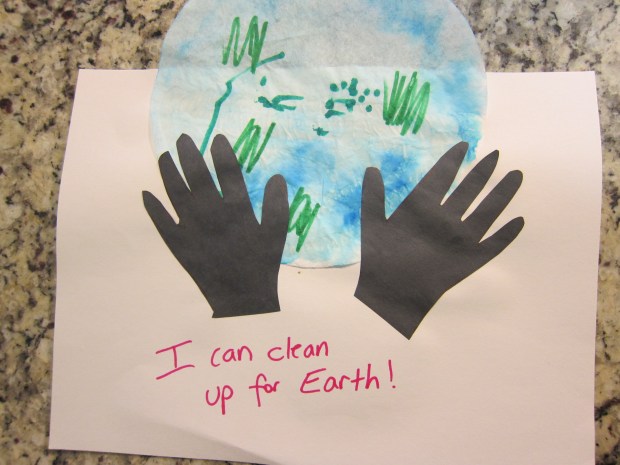
First, make your Earth. We scribbled in green and blue marker on a plain coffee filter, and as Travis worked I talked about how the Earth contained more water than land, so we needed more blue.

Coffee Globes (2)

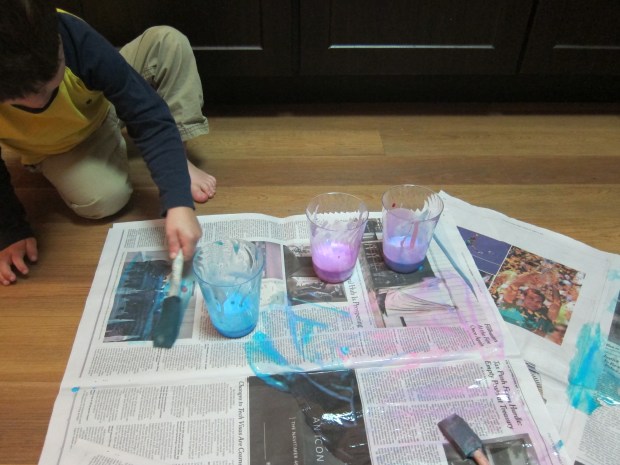
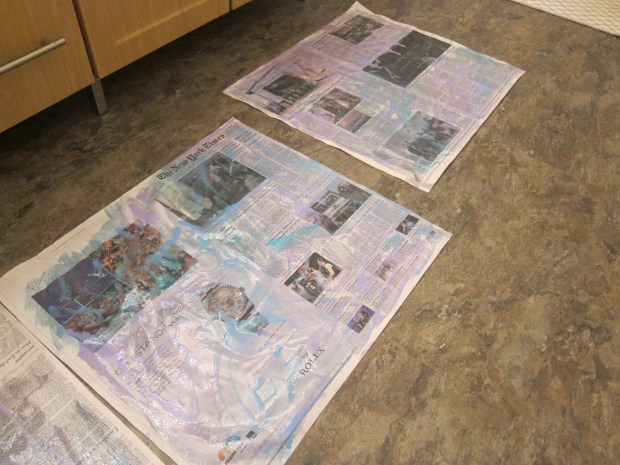
Then came his favorite part – spritzing his globe with water to bleed the colors! From there we left it to dry overnight.

Coffee Globes (3).JPG

The next morning, I traced Travis’s hands on black construction paper.

Coffee Globes (4)

We glued the coffee filter to a piece of paper, leaving half of it above the sheet. Glue the hands below, and now your child is helping to “hold up the Earth.”

Coffee Globes (5)

As a final touch, you can talk about simple gestures even kids can do (not wasting water, helping to pick up trash…) and brainstorm a sentence to add to the blank part of your paper.

Shoes for Sale

Shoe Shop (2)

This idea from High Five magazine was too adorable not to play! Use any blocks or boxes you have on hand to create the racks for your shoe store – ideally, I wish we’d had bigger blocks to utilize!

Once we had our “shelves” arrayed, I asked Travis to help gather shoes, and he was so excited to bring pair after pair from his closet. The game became even more exciting when we added in mommy and daddy shoes.

Shoe Shop (3)

Now all you need is a little imagination (though a toy register helps too!). Travis loved “beeping” shoes at checkout, and helping me try on pairs before we reversed roles.

Shoe Shop (1)

What would you construct your shoe store out of? Please share in the comments!

Foot Sensory Bins

Foot Bins (1)

Why should hands have all the fun? We set up bins today to see how things felt with our feet instead!

For your mise en place, set out 3 separate bins. I used one each of: shaving cream, water beads, and sand. You can make your sand wet or dry, or start with it dry and then gradually add a little water.

Travis wanted to hop in the water beads first, which he declared very cool.

Foot Bins (2)

Quite quickly he was ready to see how the sand felt. It only took a moment before he requested we add some water beads to the sand, and he mixed it all together with his toes for a while.

Foot Bins (4)

He was very hesitant about the shaving cream, but I got him to sit on a stool and we dipped his feet in, after which he decided he liked how creamy it felt. Then he declared we needed water beads in here too.

Foot Bins (6)

When you’re done, dump any trash out and then rinse your buckets in the tub – which is half of the fun anyway!

Foot Bins (7)

Four Seasons Tree Pictures

Tissue Paper Tree (6)

The buds are on the trees, and we’re discussing the annual cycle of a tree and the seasons a lot this week! It was the perfect time to make a beautiful picture showing all the stages of a tree throughout the year.

To set things up, I cut 4 trunks from brown construction paper (preschoolers can help with this step!) and glued them down to poster board.

Tissue Paper Tree (3)

Then it was time to rip up tissue paper for our 4 different trees – Travis was an eager participant for this part! We used pink for spring flowers, green for summer leaves, and orange and yellow for the fall. I had intended to use white tissue paper for winter snow, but we decided cotton balls would be more fun!

Tissue Paper Tree (1)

I set out a dish of glue, and showed Travis how to wad up each piece of tissue paper, dip in the glue, and then apply. So he wouldn’t get confused, we worked on one season at a time, starting with bright pink flowers for spring.

Tissue Paper Tree (5)

He was definitely proud to determine where each leaf or flower should go, and very seriously told me, “I’m all done!” when finished with one season and moving on to the next. A very cute way to talk about the seasons.

Tissue Paper Tree (7)

Sink or Float? Nature Experiment

Sink Float (4)

Spring is finally here, and we are getting outdoors as much as we can! Yesterday we turned it into a treasure hunt, and I posed a question to Travis… what did he think would sink or float, once we returned home?

Sink Float (1)

We returned with our bag of treasures and he couldn’t wait to find out, so I drew a tub of very full water in the middle of the afternoon. This in and of itself was super exciting!

Sink Float (2)

Now it was time to start tossing in our items one by one. Floating pinecones and bark were a big hit…

Sink Float (7)

…as were flowers, pine needles, and bits of grass.

SInk Float (3)

While we collected things, Travis was very into teeny tiny pebbles, and he was quite surprised that these sank! This was a great way to talk about how floating didn’t depend on the size of something, but on its density compared to that of water.

Sink Float (5)

Once all the items were in the tub, it was time to swish them about with a rake for a while. The play only ended once his shirt was soaked! All in all, great fun.

Sink Float (6)

Play Dough Cupcake Shop

Cupcake Shop (1)

With leftover play dough from a goodie bag, we decided to open up our own birthday cupcake shop this morning! All you need are cupcake wrappers, a few jeweled embellishments, and your imagination.

I shaped our play dough into cupcakes and added to the liners to get Travis started, after which he loved pressing in star beads and jeweled stickers from our craft bin as the “frosting.”

Cupcake Shop (5)

Of course we needed to add a few candles for authenticity!

Cupcake Shop (4)

After a while he wanted to bake his cupcakes, so I pulled out his play oven.

Cupcake Shop (6)

When the cupcakes were finished, he decided they were for daddy, so that got to be dad’s morning surprise!

Cupcake Shop (3)

What imaginative food play have you tried with your play dough? Please share in the comments!

Heart Crowns

Heart Crowns (3)

These adorable homemade crowns will turn your son or daughter into a king or queen in dress-up play!

First, have your child paint on a blank sheet of paper and let dry – Travis chose predominantly brown tones for his painting.

Heart Crowns (1)

Once dry, I cut hearts from the painting. Glue two pieces of construction paper together to be the base of the crown, and glue on the hearts at intervals; let dry again.

Heart Crowns (2)

I traced the zig zag of a crown about halfway up the paper, and then cut out. Glue the two ends of the crown together and let dry one final time.

Heart Crowns (5)

It’s time for make believe!

Heart Crowns (4)

Hummus Four Ways

Hummus (2)

My son loves hummus. A classic recipe is always a hit, but it’s also easy to add a few extra ingredients to introduce your child to new tastes. Start with the basic hummus recipe below, (thanks High Five magazine!), and then test out the variations with your sous-chef. Kids can help with most of the steps, including squeezing the lemon and pouring in other ingredients.

Hummus (1)

Ingredients:

  • 1 lemon
  • 1 (15-ounce) can chickpeas, rinsed and drained
  • 1/2 cup tahini
  • 1/4 cup water
  • 1/3 cup olive oil
  • 1/2 teaspoon salt
  1. Cut the lemon in half and squeeze the juice into a food processor.
  2. Add the remaining ingredients to the food processor and process until smooth and creamy.

Hummus (5)

Olive Hummus variation: Count out 15 pitted kalamata olives and add them to the food processor before blending.

Hummus (4)

Travis loved helping count along, and ate a few along the way!

Pesto Hummus variation: Stir in 4 tablespoons homemade or jarred vegan pesto.

Hummus Way 3.JPG

Spinach Hummus variation: Add 1/2 cup baby spinach to the food processor before blending.

Hummus 4 (a)

If you have access to a good vegan feta, either store-bought or homemade), stir in 2 tablespoons of that as well.

Hummus 4 (b)

Which was your favorite? Please share in the comments below!

Hummus (3)

Carnations + Food Color

OW science

Here’s a fantastic nature and science lesson… the science of which was new even to me as an adult!

Have you ever heard the term “transpiration”? It’s the process through which moisture is carried in a plant from the stem to the leaves and petals. Well, if you add color to that moisture, what happens to the petals?

All you need to find out are white carnations (or a similar white flower; we used what I think were daisies to start) and food coloring. It helps to have kid-safe (i.e. plastic) test tubes with a holder, so you can set up the project without unsafe glass vases. Travis helped place one white flower in each of four test tubes.

OW science (2)

We added food coloring to three of the tubes – be generous with the amount you use, about 10 to 12 drops! – and left the fourth one empty as a “control.”

OW science (3)

Imagine our surprise when a mere hour later, the color was starting to creep into our petals. Blue was the most immediate, for whatever reason, with a truly stunning effect.


OW science (6).JPG

Green and red were a bit slower, but by morning, we had gorgeously tinged flowers. I will have to keep this in mind for holidays like St. Patrick’s Day!

If you have enough food coloring, consider setting up a full rainbow from red through purple… Alas, we were missing a few colors, and I was also too nervous to leave the rainbow assortment on a window sill where cat or toddler could knock them over. But we did like the results so much that we purchased a second batch of white flowers (Are these ones carnations, anyone?) and added orange into the mix.

OW science (8)

We also had a more vibrant green the second time around. All in all, great fun!

OW science (9)

Newspaper Flowers

Newspaper Flowers (9)

Here’s another pretty addition to our spring flower play! This time we used a rather interesting concoction of homemade paint to make flowers from newspaper.

Travis loved the painting process. In cups, combine equal parts white glue and water, then add a few drops of liquid watercolor to each. The mixture is best applied with a foam brush.

Newspaper Flowers (1)

Travis was very deliberate deciding which color should go where!

Newspaper Flowers (2)

Our goopy newspaper then needed to dry overnight in the bathroom.

Newspaper Flowers (4)

The next morning the paper is very stiff – a bit like papier-mache. I cut it into flower petals, while Travis got in great cutting practice alongside me, using his safety scissors.

Newspaper Flowers (5)

Glue 5 or 6 petals together in a spiral. Travis had sort of lost interest, so I did this step solo.

Newspaper Flowers (6)

Once the glue dried, we attached a green pipe cleaner stem to the back of each flower with tape.

Newspaper Flowers (7)

Play with the flowers any way your like…

Newspaper Flowers (8)

Or they even make a fantastic addition to a real flower display!

Newspaper Flowers alt