Indoor Fishing

indoor-fishing-4

We took home a cool magnetic wand (a small magnet glued to a craft stick) from a workshop recently, so I wanted to continue the magnet play at home. Did you know pipe cleaners are magnetic? The outside is fuzzy, of course, but don’t forget that filament of metal in the middle! To play with the idea, we twisted colorful pipe cleaners into a school of fish.

Cut pipe cleaners in half, and simply twist the ends so each has a tail. You can also make large fish by not cutting the pipe cleaners in half first.

To make a fishing rod, we found a beautiful stick outside – the snow melted just in time! I attached the magnetic wand to the stick with a piece of string. Note: You could also skip the craft stick, and simply glue a magnet to the end of the string. Now we had our fishing pole – although around here, I tell Travis we are “rescuing” the fish with our fishing pole instead of “catching” them!

indoor-fishing-2

I set up our pipe cleaner fish on a piece of blue craft foam for a pond, and Travis loved this imaginative element to the game. He tried picking up some fish while standing with the full rod…

indoor-fishing-6

…but then preferred to hold the craft stick and pick up the fish more easily from the ground.

indoor-fishing-7

We then had fun pairing up the mama and baby fish (i.e. big and small) of each color, which was a cute exercise in size and colors.

indoor-fishing-8

What else can you find around the house that is magnetic and adheres to your wand or rod? Please share fun ideas in the comments!

Pasta & Beads Bracelets

pasta-bracelets-12

Using that big batch of Kool-Aid dyed pasta we made, Travis helped put together beautiful food art jewelry over the weekend!

When our batch of pasta was first dry, he simply loved stirring through it with his hands, so I let him have fun that way for some time before even introducing the notion of bracelet making.

pasta-bracelets-3

When the novelty wore off, I asked if he wanted to thread the pasta onto pipe cleaners. I made a small loop on one end of each pipe cleaner so the pasta wouldn’t slip off.

pasta-bracelets-2

To my surprise, he was very deliberate about choosing which items to use. Our blue pasta came out a little funny (the Kool-Aid powder sort of clumped together), but that turned out to be Travis’s favorite, so he wanted to make an all-blue bracelet!

pasta-bracelets-5

He loved threading the pasta so much that he wasn’t that interested in the beads I had laid out until the very end; your jewelry maker can alternate pasta and beads as much as they like!

pasta-bracelets-11

When the bracelets are done, simply twist the end of the pipe cleaner around the loop you created to start (you can tuck the pokey bit inside a ziti tube to avoid any metal pricks for the wearer).

pasta-bracelets-9

Travis also made up his very own creation – a “headband”!

pasta-bracelets-10

Overall, this kept us busy for quite some time – a great weekend family project.

pasta-bracelets-8


Kool-Aid Dyed Pasta

kool-aid-pasta-4

We don’t drink the stuff, but I did purchase little packets of Kool-Aid powder to make this vibrantly hued pasta. The dyed pasta is fun all on its own for sensory play, but for even more games featuring our creation, stay tuned for blog posts in the coming days!

Kids will love helping mix up the dye. First, pour about 1 cup of ziti into each of 5 zip-top plastic bags (or more, depending how many colors you want to make, but I find that one box of pasta divides nicely into 5 portions).

kool-aid-pasta-1

Next, Travis helped sprinkle a powder packet over the pasta in each bag. We used one each of red, orange, green, blue, and purple.

kool-aid-pasta-2

The next step (just for grown-ups!) is to add 1 tablespoon of rubbing alcohol to each bag. Now seal and smoosh it all about with your hands to coat the pasta evenly.

kool-aid-pasta-3

Let the mixture sit for at least 20 minutes, before transferring to a pan to dry overnight. To contain any mess, make little packets of aluminum foil for each separate color.

100-happy-48

When the pasta dries, it makes for great sensory play just to mess about with in a bin. Or you could use it for a sorting game by color! As mentioned, stay tuned for future posts with even more ideas.

Ice Excavation

ice-excavate-4

This morning we had some fun with a little dinosaur skull we recently purchased. Ahead of time, I put the skull into a dixie cup and filled the cup with water, then left it in the freezer overnight. I did the same with a rock to be a “fossil” and a little plastic lizard, for lack of any other dinosaur “bones”!

In the morning, I asked Travis if he wanted to be a paleontologist and excavate dinosaurs from the ice. How, I asked him, would we get them out?

ice-excavate-1

He loved the puzzle behind this game more than I thought, asking me which tools we could use. I gave him cups of warm water, a spoon, an eye dropper, and a little (child-safe) chisel.

ice-excavate-5

I was so proud of how patient he was with our “excavation! I thought he might just pour the warm water onto the ice, but he loved spooning it carefully, and watching the toys be freed little by little.

ice-excavate-3

The best was when our T-rex was nearly out, but a final chunk of ice remained in its jaws – Travis loved reaching in to pull it out.

ice-excavate-7

A cute game for the imagination and for a tiny intro to archaeology.

V Week!

V week (15).JPG

During our Letter of the Week journey, I put V week on hold long ago so that it could overlap with Valentine’s Day. We sure fit in a lot of Valentine’s crafts, but that’s not all! Here’s what else filled our week.

v-week-11

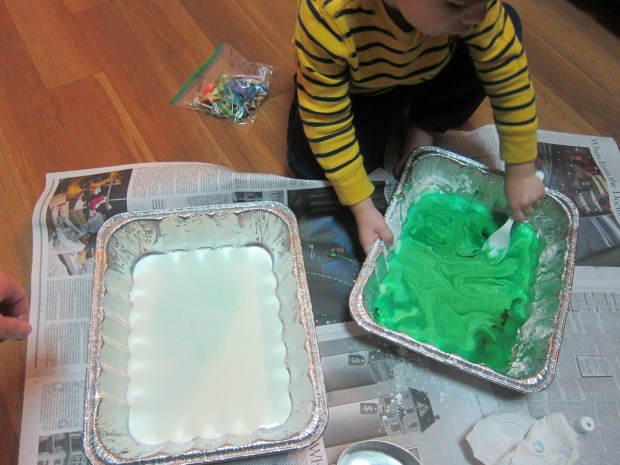
Volcano: Easily the biggest hit of the week, I started off Monday morning with a bang. To help Travis understand the experiment, we first watched YouTube clips of volcanoes exploding, and I asked if he wanted to make our own at home. Check out the full details in my separate blog post!

volcano-5

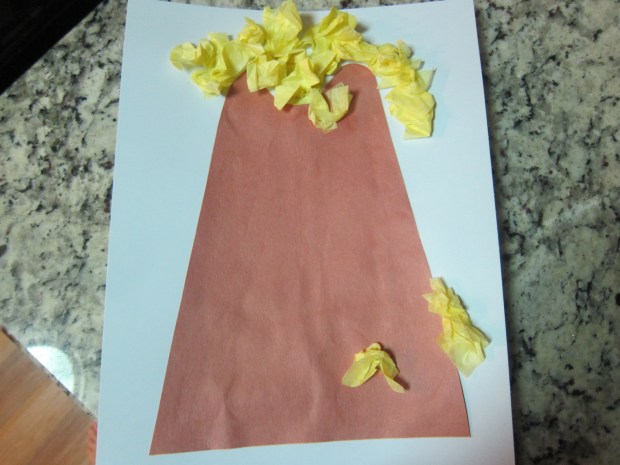
We also made a simpler volcano from brown construction paper with tissue paper for the lava.

v-week-8

Vroom: A great action word for the week, you can vroom toy cars, let your child vroom across the room on tot-sized trikes, or pretend your whole body is the car with a round of red light/green light; hold a ball as your steering wheel and vroom when the green sign is up, and freeze when it turns red. Travis liked being the one to hold the signs, too.

v-weeks

Vacuum: Travis is obsessed with my vacuum, so his Valentine’s Day gift was – believe it or not – his very own vacuum to play with! Kids seem to universally love popper vacuums, or if you don’t have an actual vacuum toy, just engage the imagination! Around here, a wiffle ball bat, excavator truck, and hose have all been Travis’s “vacuums” in pretend play.

v-week-1

Vest: For nice practice with zippers or other closures, take out all your child’s vests and try them on your stuffed animal friends!

v-week-4

Volume: It was a fun week to play with dynamics in music. Whatever instrument we chose – drums, sticks, bells – we would first do “volume up!” for loud and then “volume down” for very quiet. And of course, you can apply this game to your singing voices.

v-week

Van: The suggestion on Letter of the Week was to take a ride in a van, to which I had to laugh. Without access to a van, we played a game of “find the van for v week!” every time we got in the car. Travis got the giggles out of our search, and it was a great way to talk about colors, too, as in: “I spy a gray van!”

And now our extras…

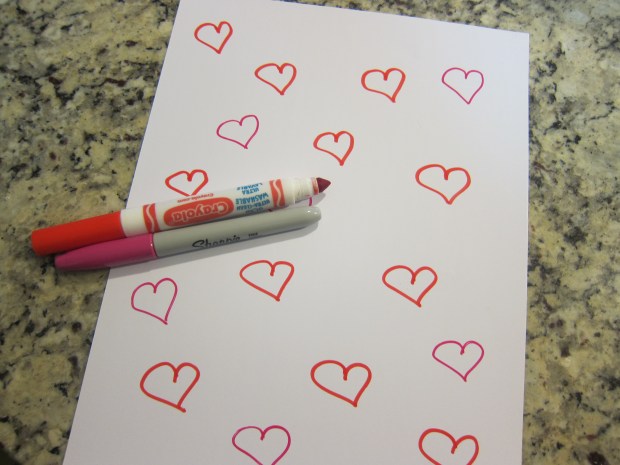
Fine arts: What didn’t we craft this Valentine’s Day? Check out my blog posts for Handprint and Footprint Hearts, Send a Hug, I Heart You Stickers, “Be Mine” Fro-Yo Bark, and a Valentine’s Garland.

i-heart-stickers-2

Food: Eat your vegetables this week folks! Travis had vegetable soup, veggie chips, and of course fresh veggies.

v-week-10

Books: Look for Valentine’s Day titles at your local library. Travis’s favorite was Little Bear’s Valentine by Else Holmelund Minarik.

v-week-5

Songs: I couldn’t think of any children’s songs with a V in the title, but we did listen to clips online of the violin. If you think your child won’t be interested, just search for D Sharp playing any song on his blue violin.

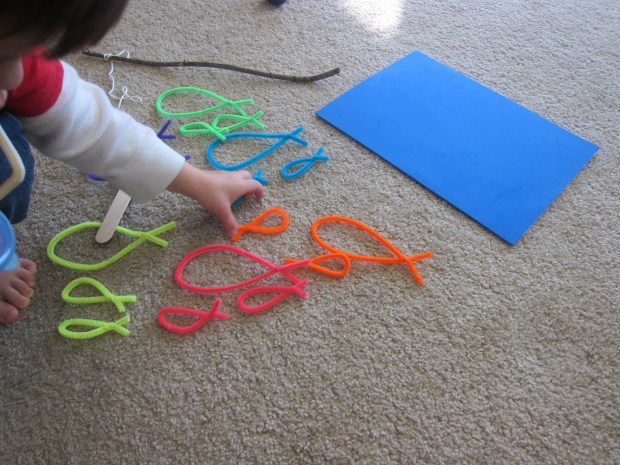
Math: I gave Travis a very brief into to the word “vertical” and showed him the difference between vertical and horizontal lines. He scribbled a few tries of his own before losing interest.

v-week-3

Needless to say, we were very busy. I’ll be back next time returning to where we were in alphabet order – E week!

Ooblek Two Ways

ooblek-5

Ooblek comes from a Dr. Seuss book published in 1949, which I confess I’ve never read! But you don’t need to know the story to have fun with this mysterious substance – part liquid, part solid. They key lies in achieving the right ratio of cornstarch to water.

There are two ways I’ve found to do this: being precise, or just winging it.

If you want to do the former, enlist your child to help you pour 1/2 cup water into a large container (a disposable aluminum pan works perfectly). Add 1 cup cornstarch, then use your hands or a spoon to stir the mixture.

ooblek-1

Travis prefers this method, because he enjoys measuring out recipes. Once we had our ooblek, he insisted on adding food coloring, so we made it green. This turned out to make the perfect neon green ooze.

ooblek-2

For the “winging it” method, I dumped cornstarch into a tray first, and then had Travis help me add water until the ratio seemed right. This can be a fun way for kids to tinker with figuring out how and why the mixture works; we discussed solid versus liquid as two states of matter while we played, and how ooblek is a little bit of both.

ooblek-4

Eventually Travis decided that this batch should be purple, but you can have fun with it plain white, of course!

ooblek-6

Kids will likely find all sorts of ways to play with ooblek, including adding objects to the pan, pressing on it, stirring it – and of course dipping in their hands.

ooblek-7

Have fun squeezing it and seeing what happens!

ooblek-8


Pudding Paint

pudding-paint-2

Travis has surprised me recently, more into messy, hands-on activities than educational ones, but I’m more than happy to indulge him. What could be a better, more rewarding mess for tots than pudding paint? When you’re done playing, you’ll have a portion left over for a tasty snack!

I made vanilla pudding from European Gourmet Organic’s mix. It was easy to whip up in the evening, and then I let it chill overnight.

When we were ready to play, Travis helped me divide the pudding into 4 containers – 3 to color and 1 to set aside for snack time! He was practically shaking with excitement when I asked him to help me add food coloring – we used the yellow, red, and green from Color Kitchen.

pudding-paint-1

To my surprise, he was way more into just playing with the pudding than painting with it, even though I laid down paintbrushes and paper.

pudding-paint-3

Instead, he loved pouring the pudding from one cup to the other and seeing what colors he made, scooping it out with a teaspoon, and stirring it.

pudding-paint-5

Inevitably, he also dipped his fingers in!

pudding-paint-6

When this led to clean-up in the bath, we decided why not… and brought in the remainder of the pudding paint to paint the tub. It was easy to rinse off with water and a quick wipe after!

Finally, it was time to enjoy the final pudding portion as a snack, resulting in huge smiles. A great activity all around. If we do it again, I’ll be curious to see if he’s more into the painting itself!

pudding-paint-4

What does your child like to do with pudding paint? Please share in the comments!

Tea-Stained Treasure Map

tea-map-10

Every morning my husband brews a cup of tea, an endless point of fascination for Travis. So today, I set up a game that would give him ample time to play with tea!

First, I gathered all the different teas in the house and brewed a small cup of each – as luck would have it, we had quite a variety, from black tea to turmeric tea to chamomile, which made for a nice variety of colors.

tea-map-1

Once the cups had cooled enough, I removed the tea bags and set Travis up with heavy paper. First we squeezed the tea bags directly over the paper to observe what happened…

tea-map-2

But then he much preferred to spoon on the tea liquid. This went on for quite some time!

tea-map-3

I offered him an eye dropper, thinking it might be nice practice, but the spoon was the definite favorite.

tea-map-4

Towards the end, we returned to rubbing the bags directly on the paper, resulting in little flakes of tea leaf left behind, which gave it a cool look!

tea-map-6

I set the paper aside to dry, but the fun didn’t end there! Travis wanted to play with the leftover tea water and tea leaves for a while. We talked a lot about what we could smell, and why some of the teas were a lighter color than others.

tea-map-9

My favorite look was the slightly yellowed-paper effect from the turmeric tea.

tea-map-8

After our “maps” had dried, I drew a sample treasure map for Travis, and explained to him what maps are used for, and he decorated another.

tea-map-11

If you want, make your map lead to real treasure, like a little toy or snack hidden around the house! We would definitely do this activity again.

tea-map-5

Shaving Cream Polar Bear

Shaving Cream Polar Bear (6).JPG

We’ve just come through a blizzard and we were snowed in for a couple of days. So what better animal to make than a snowy white polar bear? I decided we needed sensory paint for this one, not boring old regular paint.

I wish I could tell you what ratio of shaving cream to glue we used, but to be honest I just let Travis have a blast squeezing both ingredients into a foil pie plate.

shaving-cream-polar-bear-1

My guess would be a roughly 1:1 ratio. Mix together until you have a creamy sticky paint.

shaving-cream-polar-bear-2

I didn’t even tell Travis to start painting – he just began glopping the mixture onto the paper plate that I had set out for the polar bear’s face.

shaving-cream-polar-bear-3

Travis being a toddler, it wasn’t long before he discovered how awesome the mixture felt on his hands, too!

shaving-cream-polar-bear-4

I loved how this paint made a nice imitation of fluffy polar bear. We set the plate aside to dry overnight.

shaving-cream-polar-bear-5

In the meantime, I cut one cup from a recycled egg carton and we painted it black for the nose. Set that aside to dry, too.

Travis had sort of lost interest in the polar bear by the next morning, so I was a solo act to glue on two googly eyes, white cotton pads for ears, and our black nose.

shaving-cream-polar-bear-7

Once he saw the face, though, he loved the new friendly polar bear in our house, and carried him around for quite some time. He also loved that it smelled like his dad’s shaving cream!

Be careful, that black nose will be hard for toddlers to resist pulling off…

I Heart You Stickers

i-heart-stickers-8We always love the craft ideas that come in our High Five magazine, and this month’s was perfect for Valentine’s Day! Before you begin, you’ll need to buy sticker paper, which can be found at any craft store.

On the sticker paper, I drew the outlines of several hearts.

i-heart-stickers-1

Now it was up to Travis to color them in with pink and red crayons or colored pencils. This was great practice for coloring inside the lines!

i-heart-stickers-3

(Note: Big kids can not only color in their hearts, but draw the outline of the shape as well).

i-heart-stickers-2

I cut out the heart stickers, and Travis helped peel off the backing to attach to index cards, which I had folded in half. We added extra heart stickers from the store as well – the more the merrier.

i-heart-stickers-5

On the inside of the index card, we wrote Valentine’s notes to all of his cousins. Travis grabbed a colored pencil and told me he was writing “Love Travis.”

i-heart-stickers-6

Although I filled in most of the actual detail on these cards – the words, adding enough stickers to each – I could tell Travis was so proud to be making something special for his loved ones, and that’s part of what I wanted to teach him as to what Valentine’s Day is all about.

i-heart-stickers-7

Don’t forget a special trip to the post office to send your Valentine’s cards on their way!