More Fall Leaf Fun

Fall Fun (5)

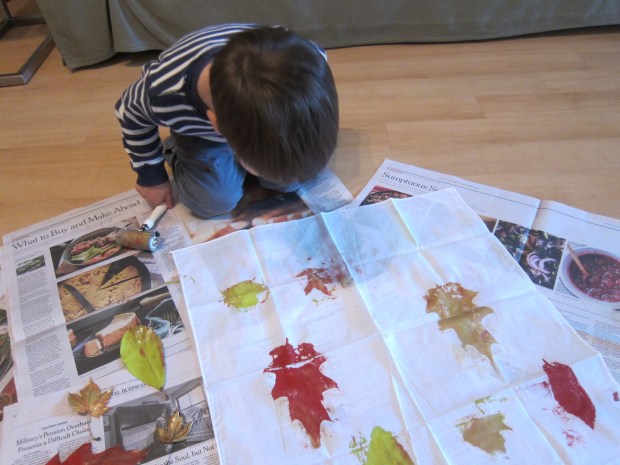
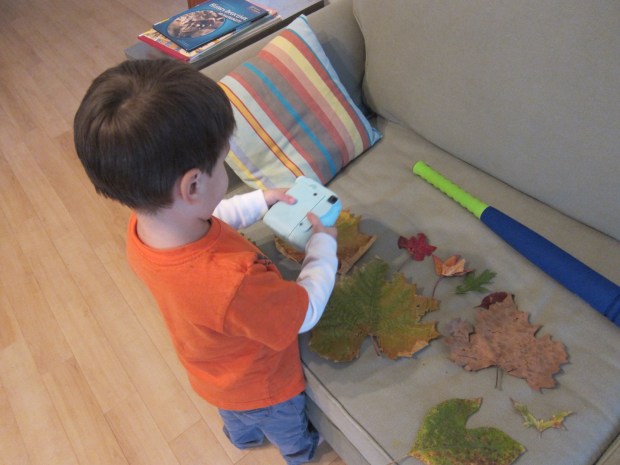
I posted about our Fall Find It walk a few weeks back, but now the fall colors are even more vibrant so we set off in the woods again. Forty degrees felt warm after an early arctic blast, making us doubly sure to get out into the sunshine. We added in a few suggestions from Parents magazine to add novelty to this particular walk!

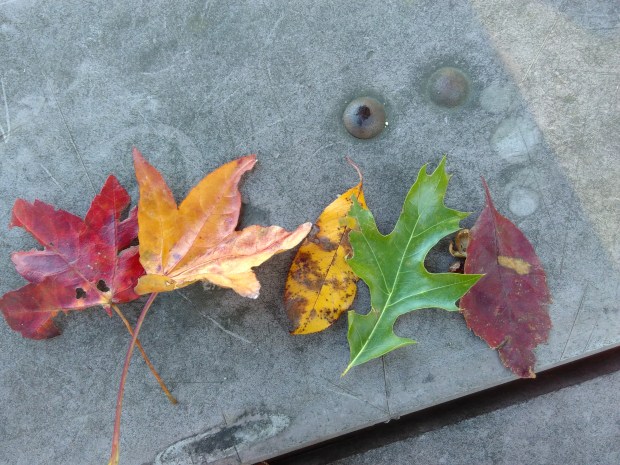
First, we decided to see if we could find the whole rainbow, ROYGBIV, that is. Blue proved to be elusive, but we did wind up with this neat line-up. Finding a purple shade was a particular triumph.

Fall Fun (1)

Then we searched for the biggest leaf, and kept dropping contenders whenever we spotted one that was even bigger. We were impressed to bring home this one at 9.5 inches… until reading about a record-setting maple leaf that was 20 inches!

Fall Fun (4)

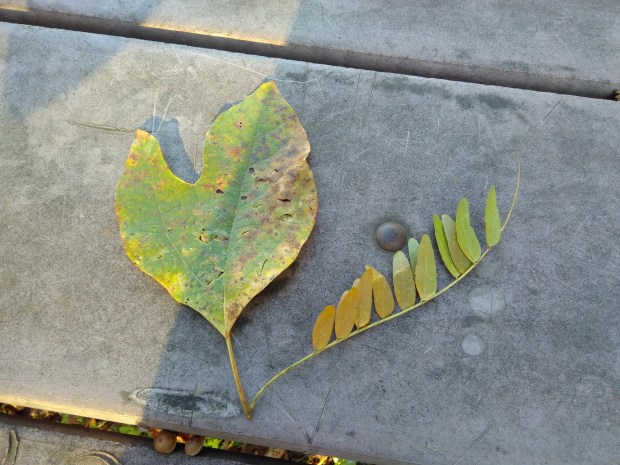
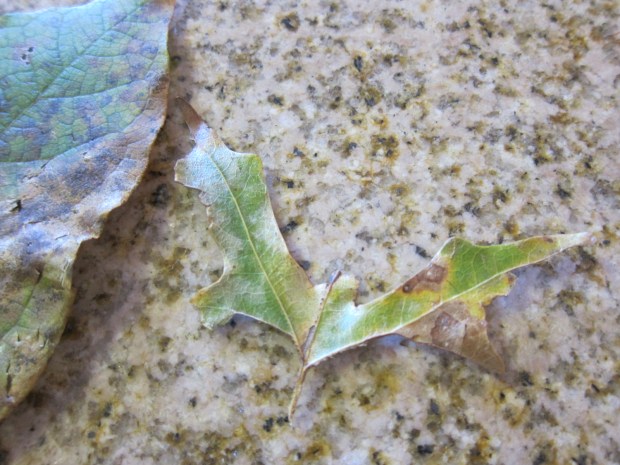
Perhaps the most fun suggestion was to find shapes in the leaves, similar to the game you’ve most likely played identifying shapes in the clouds, but with an eye to the ground this time. We spotted this little fellow that looked like a bat.

Fall Fun (3)

I found one that I thought looked like a rooster, and Travis decided the frilly one looked like a caterpillar! All in all, some simple and good fun that I recommend for your next nature expedition. What other leaf games do you and your family play? Please share in the comments!

Fall Fun (2)

Birch Tree Tape Resist Picture

Birch Tree (8).JPG

We haven’t done tape resist art in a long time, so it seemed like the right moment to return to an old idea in a new form. A cold winter blast has me thinking of lovely winter birch trees, always my favorite, and tape resist is the perfect way to create these white tree trunks.

First, create the outline of trunks and branches on white paper by covering with tape. Any masking tape or patterned washi tape will work fine – you’re going to remove it at the end. Travis was surprised when we made our trees blue to start (but shh, don’t spoil the surprise for your child yet!).

Birch Tree (1)

Next we painted over the tape and the rest of the paper for a blue sky background. We used tempera paint, but you’ll get a more wintery, softer feel if you use watercolors.

Birch Tree (2)

Let the paint dry, then it’s time to peel back the tape for the big surprise – white-trunked trees!

Birch Tree (3)

Travis was so excited to see our birches, and helped sketch on little black lines in the bark.

BIrch Tree (4)

As the finishing touch, decorate your trees – we used buttons and little leaf cutouts.

BIrch Tree (6)

He told me the first picture was done, but then got more impish with the second, layering on big piles of glue and buttons… Love watching this kiddo’s creativity!

Birch Tree (7)

Bird-Beak Buffet

Bird Buffet (7)

Some recent fun with a homemade bird feeder has us talking about birds, the various things they eat, and why some birds’ beaks look very different from others. It was the perfect opportunity to pull out this cute game from our Barefoot Books’ Kids Garden kit!

I recommend gathering all your materials ahead of time so you can lay all of the following items in front of your child at once. Otherwise, there is bound to be some curious exploration and possible trouble! First, you’ll need 4 beaks:

  • 1 pair of chopsticks (“Heron Beak”)
  • 1 eyedropper (“Hummingbird Beak”)
  • 1 slotted spoon (“Pelican Beak”)
  • 1 pair of tweezers (“Sparrow Beak”)

BIrd Buffet (1)

Then set out 4 bowls of bird “food:

  • 1 plate of unshelled nuts as pretend field mice for the Heron
  • 1 tall bottle with a narrow top filled with water as flower nectar for the Hummingbird
  • 1 bowl of ping pong balls floating in water as fish in water for the Pelican
  • 1 bowl of sesame seeds and grass clippings as seeds in the grass for the Sparrow

Bird Buffet (2)

I recommend having a towel under your play area, since two of these bird meals involve water! Now let your child experiment with which “beak” is best suited for each food. The ladle and ping pong balls were an easy first guess, and Travis had fun pretending to be the pelican.

Bird Buffet (3)

The most enjoyable challenge was using the tweezers to grip the grass clippings and sesame. He was very focused on it, and so proud each time he could move some grass or a sesame seed.

Bird Buffet (4)

The eyedropper was a delight of course, and we talked about the hummingbird’s long narrow beak being well suited to dip inside a flower.

Bird Buffet (5)

The one that gave us consternation was picking up nuts with the chopsticks. We decided we wouldn’t want to be herons!

Bird Buffet (6)

From there, Travis had fun mixing and matching his birds. He used the eyedropper in the “pelican’s” big bowl of water, and loved using the slotted spoon to move unshelled nuts from the dry bowl into the bowl of water, then fishing them out with a utensil or his hands.

BIrd Buffet (10)

He also mixed water into his sesame seeds, and found other ways to have fun with the eyedropper (as a spoon etc.), resulting in lots of enjoyment even after the stated purpose of the game was done.

Bird Buffet (8)

We hope to follow up with some bird watching outside once the weather warms up, paying close attention to the birds’ beaks!

Jeweled Turtle

Jeweled Turtle (9).JPG

We seem to be on a bit of a reptile kick lately, and this jeweled turtle helped fill a lazy morning at home. Travis loves to play with clay and aluminum foil, so what a bonus to find a craft that combined the two!

To make your turtle shells, crumple aluminum foil into a ball, and then flatten slightly until you achieve the desired shape.

Jeweled Turtle (1)

Next we rolled little bits of air-dry clay to be the head, arms, legs, and tail of the turtle. Press slightly into the underside of the foil to adhere.

Jeweled Turtle (2)

We pulled out a few sparkly odds and ends from our craft bin to decorate the shell of our turtle, including sequins and glitter glue.

Jeweled Turtle (3)

Once our first turtle was finished (admittedly with lots of adult help), Travis immediately began making a second, and this time I sat back and just watched his imagination go wild!

Jeweled Turtle (7)

The turtle had several heads, bits of clay stuck on top of the shell, eyes in several places that didn’t necessarily make “sense”, and star beads pressed into arms and feet.

Jeweled Turtle (5)

I didn’t lift a finger for this second version, and absolutely loved seeing Travis make his own creation.

Jeweled Turtle (6)

What will your child’s turtle end up looking like? Please describe or post a picture in the comments; we can’t wait to see!

Jeweled Turtle (8)

Paper Tube Snake

Paper Tube Snake (8)

We had good fun with a snake straw puppet a few days ago, and soon decided we needed another slithery friend around the house. Travis enjoyed this method of making a snake even more!

To start, paint cardboard tubes to be the snake’s body. I had one empty paper towel tube and one empty toilet paper tube, which dictated how long our final snake would be. Save lots of tubes and you can make your snake even longer!

Paper Tube Snake (1)

We painted the snake with glitter paint, giving it a very reptilian shimmer, then set it aside to dry.

Paper Tube Snake (2)

Once the paint dries, cut the tubes into pieces (about 3 pieces for a toilet paper roll, and 6 or 7 from a paper towel roll).

Paper Tube Snake (3)

Your child can decorate the snake further by making dots, squiggles, or other designs with more paint or with markers. But Travis decided he liked the glitter plain, and was super excited for the next step because it involved…

The hole punch! He loves practicing with the hole punch on paper, and was very curious to see if he could punch all the way through cardboard. The verdict is that he needed a little extra oomph from mommy’s hands, but he loved the process of punching two holes into each segment of cardboard.

Paper Tube Snake (4)

Next up was lacing. We used a long red string with an eyelet at the end, making it easier to poke through the holes without fraying, but regular yarn would work too. Travis was so proud of his ability to thread up and down through the holes as we attached our snake segments together, declaring at one point, “I love lacing!”

Paper Tube Snake (5)

Once all of your pieces are threaded on the string, tape the back and front end of the string to the cardboard. We left a little extra string at the front so Travis could tug the snake around the room.

Paper Tube Snake (6)

A little glue helped us add googly eyes and a red felt tongue as the finishing touches.

Paper Tube Snake (10)

Pardon the blurry picture, but the snake was wiggling too fast once in Travis’s hands for me to capture a clear image – a sure sign of an enjoyable snake!

Pine Cone Bird Feeder

Pinecone Feeder (6)

With daylight savings officially upon us and darker, colder days here to stay, we’re thinking about the winter to come… and in particular, helping out our feathered friends.

On our latest nature walk, we selected three large pinecones for the project. Travis was very curious to see how we would turn them into bird feeders!

First we needed to smear them with peanut butter, a gooey and fun step.

Pinecone Feeder (1)

To cover the pine cones with bird seed, we filled the bottom of a paper bag with the seeds, added our pine cones, and then shook the bag.

Pinecone Feeder (2)

The shaking was arguably the best part of the project!

Pinecone Feeder (5)

And of course, leftover seeds are fun to play with.

Pinecone Feeder (4)

Ideally, we’d have a tree or bush to hang the feeders from, but the best I could do was to hang them from the bicycle handles on our patio. We can’t wait to see if any feathered friends visit for a nibble!

Pinecone Feeder (7)


Leafy Linens

Leafy Linens (10)

This lovely fall project would make a beautiful decoration for a Thanksgiving table, or a perfect gift for school teachers around the holidays.

The first step (as with so many of our autumnal projects it seems!) was to bring home a few treasures from a walk in the park. Look for a variety of leaf shapes, ideally flat and still quite fresh and sturdy.

Leafy Linens (2)

Set out the leaves, along with a foam paint brush and fabric paint – don’t use tempera paint here, since the linens will go through the wash. I gave Travis a selection of seasonable colors, such as red, green, and gold. Use neutral-colored napkins if you plan these for a holiday table. We chose to make ours onto white handkerchiefs, which will make great table centerpieces or gifts.

Paint a leaf with a foam paintbrush, ensuring you have a nice, even layer.

Leafy Linens (4)

Place the leaf, paint side down, on the fabric, and roll over it with a brayer or old rolling pin. This new tool was Travis’s favorite part of the project, and he eagerly rolled over each leaf.

Leafy Linens (3)

Carefully lift up the leaf for the big reveal – neato!

Leafy Linens (8)

Repeat with different leaf shapes and colors until your fabric is filled.

Leafy Linens (7)

Towards the end, our prints got a bit messy as the brayer itself was coated in paint, so you may want to give yours a wash or two as your work. Travis didn’t mind though, and loved mixing our paint shades.

Leafy Linens (5)

We plan to give these to his preschool teachers as the holidays approach!

Leafy Linens (6)

Tissue Paper Eggs

Tissue Paper Eggs (7)

This morning Travis found his old baby toys in a bin, and dove into it with delight. It’s always a laugh to see the way that older kids go back and play with things they used as babies, inevitably in inventive and different ways. He was particularly enamored with an old bird shape-sorting toy, so we decided to make eggs for the birds!

The process was simple and fun – crumple sheets of tissue paper into little balls. Travis went to town with this, and I neatened them up a bit into ovals as he finished each one.

Tissue Paper Eggs (2)

To finish your eggs, wrap with colored tape. Masking tape would work well, but we had decorative washi tape that seemed even better, since it reminded me of the decorative blown eggs I learned to make in elementary school (in pre-vegan days!)

Tissue Paper Eggs (4)

Travis was very deliberate in deciding which tape pattern should wind around which egg, until we had a beautiful assortment.

Tissue Paper Eggs (6)

And then the birdies got to sit in their new nest!

Tissue Paper Eggs (5)


Folded Paper Animals

Folded Animals (7)

This rather random activity turned out to be a delight on multiple levels. Your child will learn about animals, exercise their creativity, and enhance their fine motor skills.

When I asked Travis this morning if he wanted to make safari animals, he eagerly trotted over to see what the project was all about. To make your animals, fold construction paper in half. Draw the outline of an animal in profile, then cut out with scissors and your folded creature will stand on its own two (or four) feet.

Folded Animals (2)

I’m no artist, so I relied heavily on online pictures to get my outlines correct. A giraffe in the shape of an H was the easiest, and one that even kids can try to draw.

Folded Animals (1)

Travis was practically shaking with excitement as I started cutting the giraffe out, and the animal was revealed along the folded line. He decorated the giraffe with brown spots…

Folded Animals (3)

…And then we added slits at the top to insert little yellow ears.

Folded Animals (6)

I asked him which animal we should make next, and the only limit was the scope of his imagination! Soon we had a crocodile, a pink polar bear (“Normally they’re white, but let’s make ours pink!” he suggested), a black rhino, and a green rhino. The rhinos are fun because you can add a slit at the top for a horn.

Folded Animals (5)

After that Travis was eager to try his own hand at making animals. I drew him a few outlines and he practiced cutting along a line, something we haven’t done much of.

Folded Animals (10)

He asked for a few animals that surprised me – a sheep – and a few that I wasn’t quite able to do – an elephant. I’m really not sure what this red creature below was meant to be, but Travis had fun decorating it!

Folded Animals (8)

He had so much fun playing with the animals while I turned to other tasks around the house, narrating games in the background. And then he decided that we should glue all our animals into one big pile. Not exactly what I’d had planned, but a delight to watch his enjoyment.

What animals would you and your little one like to make? Please share in the comments!

Folded Animals (11)

Snake Straw Puppet

Snake Puppet (5)

Puppet play is always fun, and this one holds particular appeal since kids can easily grasp the straws to wiggle and manoeuver their reptile friend. Honestly, the craft felt a little simple and plain after some of the complicated things we’ve been up to lately, but it’s a cinch to make, and fun to play with, so a win-win!

To make the snake, cut a long rectangle from green paper – poster board or cardstock work better than a flimsier material like construction paper, which could tear easily. Adults, trim one end of the paper into a triangle as the snake’s tail, and make the other end rounded for its head.

Snake Puppet (1)

Show your child how to make accordion pleats along the length of the paper. Travis had a bit of a hard time with this, but I gave him a separate piece of paper to practice on while I folded up our snake.

Snake Puppet (2)

On the contrary though, Travis completely took over when it came to the face, deciding where the glue should go for two googly eyes and a piece of string cut for the tongue. Not bad!

Snake Puppet (3)

Once the glue dries, attach your snake to two straws with masking tape, and slither him around.

Snake Puppet (6)

Travis decided it looked more like a crocodile, since the straws almost look like legs. Crocodile or snake, have fun puppet playing!

Snake Puppet alt