Early Explorers World Coins

LP Money (20)

Welcome to our third journey with our Little Explorers subscription! This month’s kit was all about currency and money from around the world.

LP Money (2)

In many ways, this experience was the opposite from last month’s Natural Wonders; Travis had very little interest in the learning booklet, until I eventually corned him into it over snack. But he loved all the other activities and goodies inside, whereas “natural wonders” were a bit abstract.

LP Money (15)

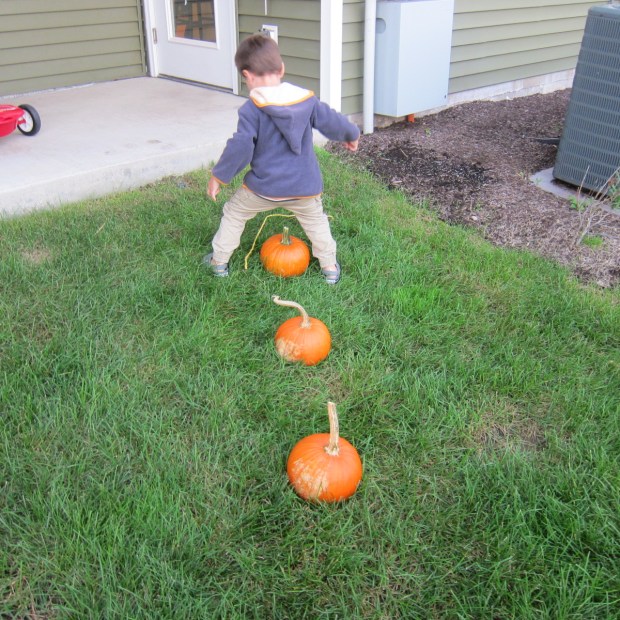
As a result, he was also much more interested when we found the spots on our map that corresponded to our stickers this month.

LP Money (3)

World Coins Craft:

We dove right in with coin rubbings the moment the kit arrived. Travis already has a budding coin collection of pre-Euro European currency, so we pulled those out and got right to it. He was fascinated watching the images appear, both trying it himself, or asking me to do some and watching the imprints emerge. Super simple, but super fun!

LP Money (7)

World Coins Science:

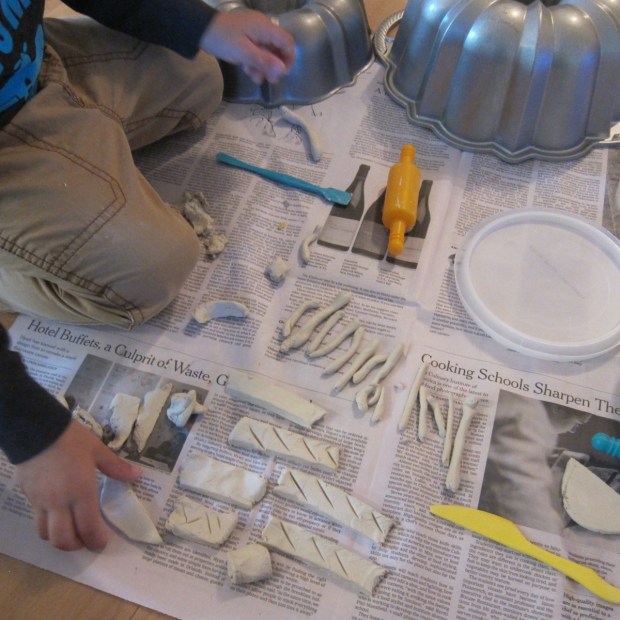
The suggestion from the booklet to make salt dough coins was a huge hit. First we watched how coins are made, and then I asked Travis if he wanted to make our own coin press. He couldn’t wait! We scooped the flour, poured the salt, added yellow tinted water (in the hope of making gold coins, although it didn’t really show up), and then stirred.

LP Money (10)

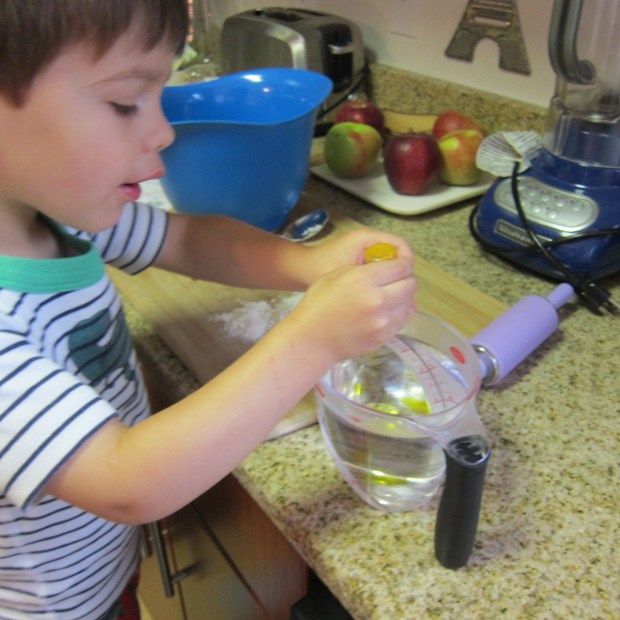
One note of caution: the booklet recipe said to add 2 cups water to 1 cup flour and 1 cup salt, but it became clear after pouring in 1 cup of water that this was not the amount needed! We had to backtrack and add lots more flour to avoid a watery mess, which made this truly a good lesson in the chemistry of baking.

LP Money (11)

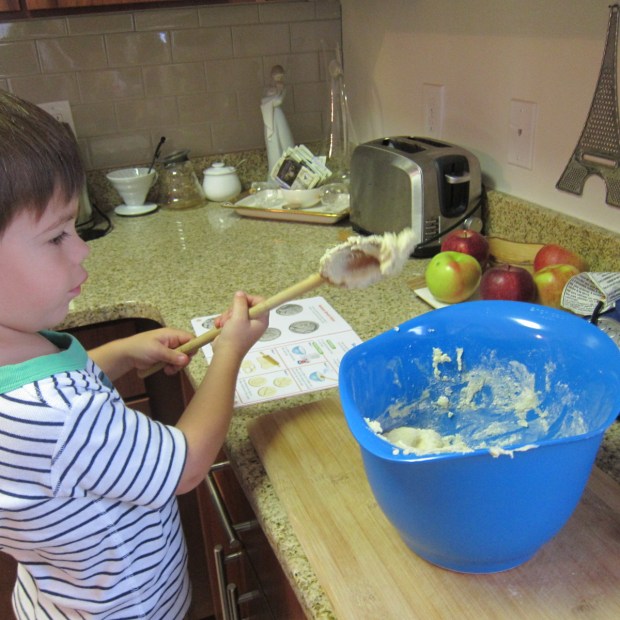
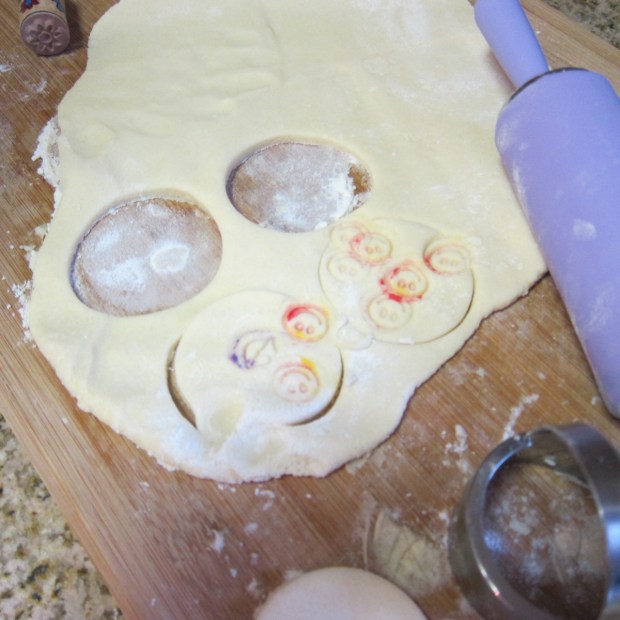
Once we had a workable dough, we rolled our coins, cut out circles, and used stamps to make designs.

LP Money (13)

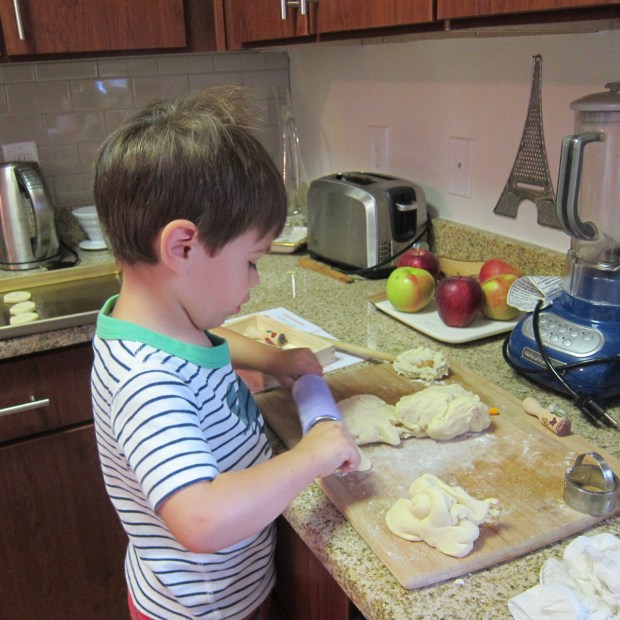
When he saw happy face stamps, Travis declared that those coins were from “Happytown!”

LP Money (12)

To preserve the coins, bake at 325 degrees F for 1 hour.

LP Money (16)

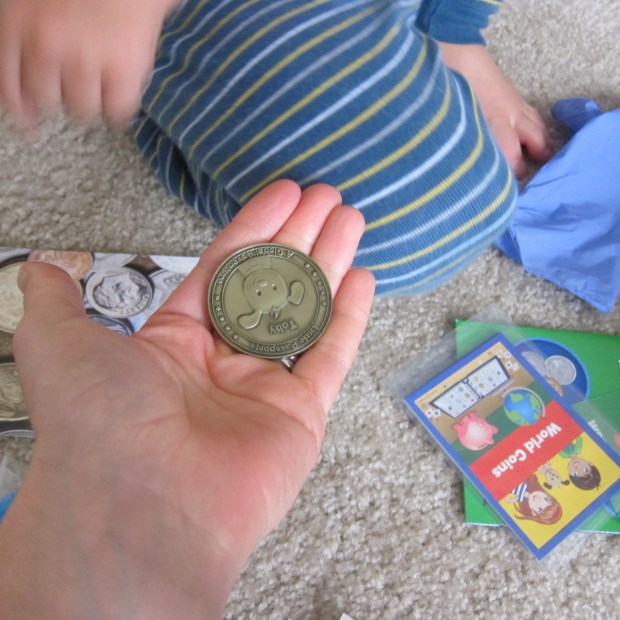
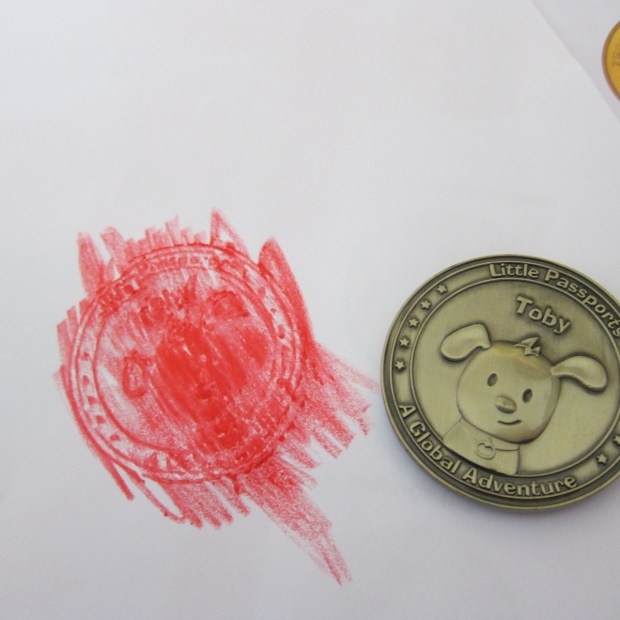
World Coins Keepsake:

Travis loved his Toby coin and coin purse mementos. The latter will be perfect for gathering other coins in our collection as it grows. And of course we did a rubbing of the Toby coin!

LP Money (5)

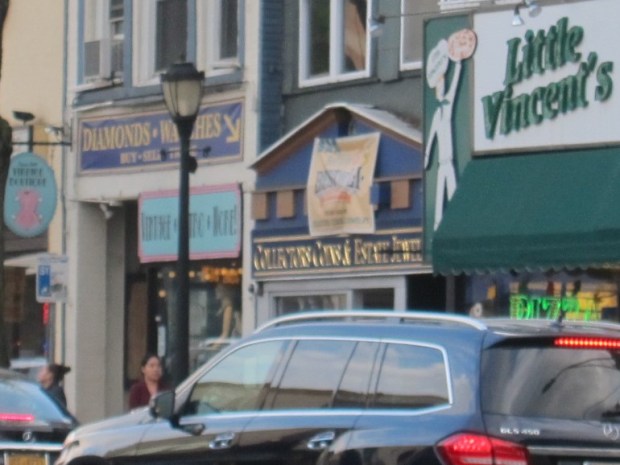
World Coins Field Trip:

Although not a direct suggestion from the booklet, we decided it would be fun to build Travis’s collection with a few new special coin, stopping into a local coin shop.

LP Money (22)

We came home to see what new treasures we had!

LP Money (24)

If you’re anywhere near the U.S. Mint in Philadelphia or Denver, then lucky you! Here is your chance to go visit. We settled for this online tour.

World Coins Further Activities:

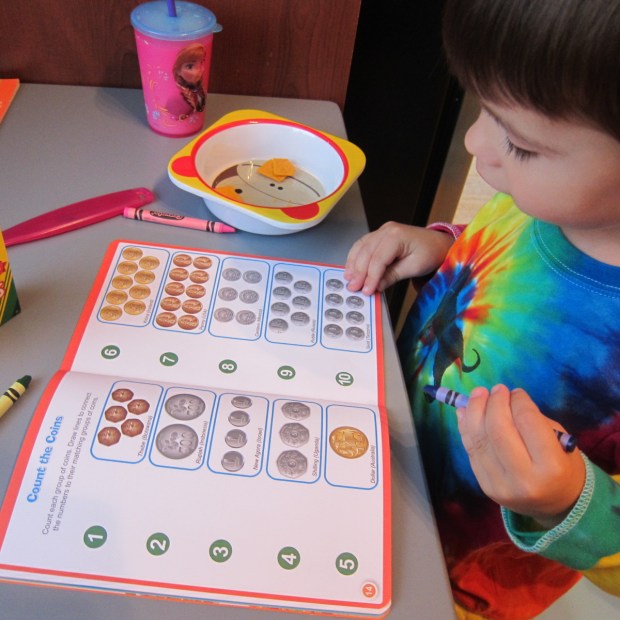
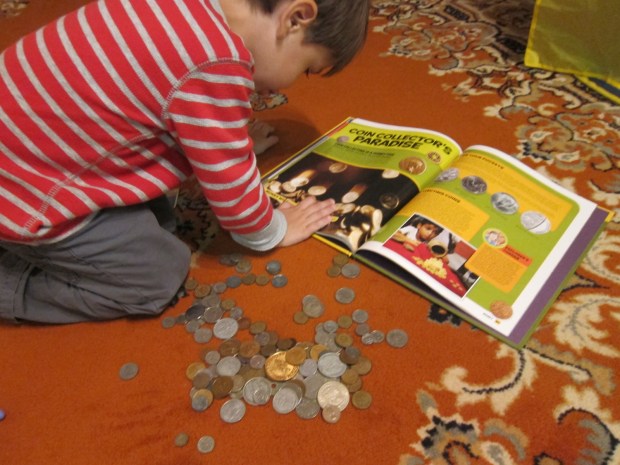
As always, the booklet was full of ideas to further your little explorer’s explorations. We sneaked in a math lesson by counting the coins in his collection thus far. Travis so proudly counted all by himself up to 27 as we slipped coins into the Toby purse!

LP Money (17)

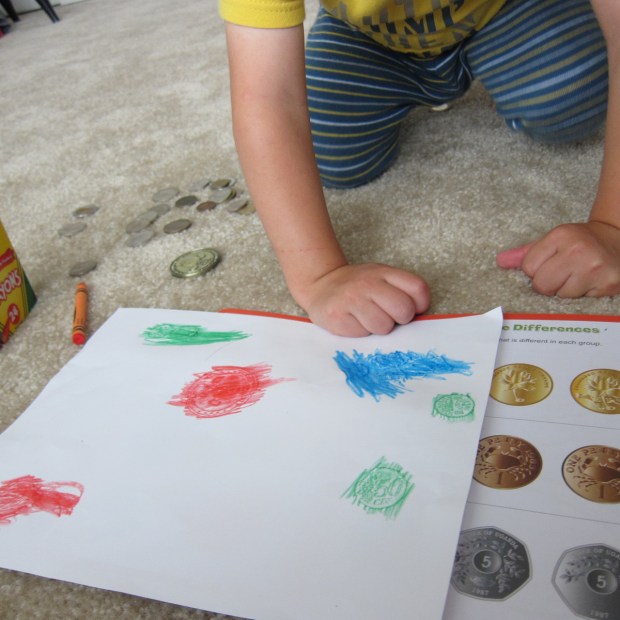
You could also try sorting in any way you want – by shape? By color? Here was our (roughly) gold and silver division.

LP Money (18)

The booklet also got us talking about which was our favorite coin and why. Travis simply adored the Roo on Australia’s gold dollar and deemed that his favorite. I was very taken with the seven sides of a thebe coin from Botswana, which I’d never heard of before.

LP Monday (10)

Finally, we headed to the library to see what more we could learn. To my surprise, there actually are quite a few quirky and fun children’s books that make this subject matter anything but dry.

LP Money (21)

In sum, you can bank on having fun with this one!

Corn-Husk Dolls

Corn Husk Dolls (5)

Corn-husk dolls are a lovely project that you can add to any fall or harvest decorations in your home. Or, as it turned out for us, just a fun chance to play with a new material!

If you have fresh corn from the farmers’ market, here’s the perfect opportunity to save the husks and turn them into something new. In a pinch, you can buy corn husks in most grocery stores.

I followed instructions from Barefoot Books’ Kids Garden kit to make the dolls. Actual assembly of a doll is a bit complicated for little hands (although kids aged kindergarten and up can get much more involved), but Travis simply adored exploring this new material while I made our “dolls.”

The husks were great for layering….

Corn Husk Dolls (4)

Or his favorite, ripping into strips.

Corn Husk Dolls (1)

Meanwhile, to make a doll, tie together three husks for each of the arms, securing with yarn or twine. Trim to desired length.

Corn Husk Dolls (2)

Tie together three husks for each leg as well, leaving them long. Line up the tops of all 4 arm and leg segments, and tie them together about 2 inches down, to form the neck and head. Trim off any excess twine. You can draw on a face with marker, if desired.

Corn Husk Dolls (3)

Travis decided that the husks he had shredded looked like a nest, so we made an “owl” as well, by gathering together husks and tying off at the neck. Or perhaps it was a Halloween ghost!

Corn Husk Dolls (7)

In an impish twist, Travis decided it was much more fun to pull apart all the husks in our doll than to set it outside with our pumpkins. So much for adding to our fall decor! But I loved seeing his delight, which made the project worth it.

Corn Husk Dolls (6)

Get creative! What other dolls or animals can you make from the husks? Please share in the comments!

Engineering a Dinosaur

Engineer Dino (2)

This adorable suggestion from Little Passports allows kids to plan and construct – the basics of engineering! For my three-year-old, the activity was equally about the fun of squishing straws into marshmallows (and eating a couple along the way), as it was about building a dinosaur… But nothing wrong with that! It was a neat exercise in getting him to think more deliberately about how to build a structure.

We started by setting up two of our dinosaur toys as models (if you don’t have dino toys at home, consider looking at a picture online), and gathered our materials – Dandies marshmallows and straws.

Engineer Dino (1)

I asked Travis if he thought T-rex’s head should be a marshmallow or straw, to which he replied the former, and we went from there. As we added each piece, Travis loved helping decide what should come next, and was also fascinated by how we could shape the dinosaur by trimming the straws into smaller pieces (a grown-up or big kid job).

Engineer Dino (3)

He especially loved figuring out how tails, arms, and legs attached.

Engineer Dino (5)

The fun didn’t end when our dinosaurs were complete – we had lots of leftover marshmallows which he wanted to play with. This one became a “snowman” with a firefighter’s hose.

Engineer Dino (7)

It also turned into a neat lesson on fractions, since as I cut the straws into halves, thirds, or quarters, he helped me count the pieces. Overall, great STEM-based fun!

Engineer Dino (4)

Fall Friends

Fall Friends (9)

Here’s a quirky, sweet project to compliment any fall nature walk – make a collection of the items you find, then bring them home and turn them into “friends”.

Travis loved this element to a stroll we took at a local Audubon society, delightedly filling up the bag I brought along. Although unseasonably warm weather means we didn’t find too many brightly colored leaves yet, there is no shortage of neat things to find. Big seed pods were especially a hit, as were little acorn caps, pieces of bark, and other small treasures.

Fall Friends (1)

To make our friends once home, I gathered odds and ends from our craft bin – pom poms and buttons were good options for eyes.

Fall Friends (2)

Ribbon and decorative tape could make smiles. Travis thought it was funny that the tape made a straight line for an “angry friend” (who actually was his favorite!) instead of a curved smile.

Fall Friends (3)

Adults, you may need hot glue depending on what materials you’re working – pipe cleaner arms and legs needed the help of the hot glue gun, as did items we glued to roly-poly seed pods.

Fall Friends (10)

In sum, have fun with this one. What will be the body of your friend – bark, a rock, a big leaf? The only limit is your child’s imagination!

Fall Friends (7)

Pillowcase Wish Flags

Pillowcase Flags (7)

This project is yet another that I’ve tabled for over a year, since I needed a hot glue gun. Armed with my latest favorite crafting tool, it was a beautiful project after school one day this week.

Wish flags (also called Prayer Flags) are rectangular strips of cloth traditionally found outside in the Himalayas, used to bless the countryside or impart another wish. I told Travis a bit about the history and context of the project as I cut an old pillowcase into 4 rectangles.

Pillowcase Flags (1)

Cut a long piece of twine, and arrange your rectangles in a row with the twine extending across all 4; make sure to leave enough twine at the end to hang your flags up later. Fold each rectangle in half over the twine, using hot glue to seal it down.

Pillowcase Flags (2)

If it’s not glitter paint these days, then Travis isn’t interested, so glitter paint it was to decorate our wish flags!

Pillowcase Flags (3)

The idea was to mimic the woodblock-printed text and images that can be found on Tibetan prayer flags. Travis mostly just had fun painting, but I asked him if any of his art work represented a wish or hope he had for anyone. Older children may really want to put some thought into this part!

Pillowcase Flags (5)

Mama added a wish flag for love and peace on earth for all humans and animals.

Pillowcase Flags (4)

Once the paint dried, we hung our project outside in the sunshine – what a beautiful addition to any landscape!

IMG_0020


Erupting Apples

Exploding Apples (3)

We pretty much never tire of making baking soda explode with vinegar around here. To add an autumnal spin to the project, this time we erupted “apples” instead of volcanoes!

To make your apple mixture, combine 1 cup baking soda, 1 tablespoon dish detergent and 1 tablespoon water. We had everything ready to go in a bin for outside, since we knew this was going to be a messy one…

Exploding Apples (1)

Time to get your hands dirty! Get in there and mush your baking soda mixture around, until you can form it into balls as the apples. We squirted in a little red food coloring, but oddly this made our apples purple, not red! Ah well, a little leaf as the finishing touch made them super cute.

Exploding Apples (2)

I gave Travis an old ketchup bottle filled with white vinegar, and he went to town squirting onto the apples, delighted by the foamy erupting result.

Exploding Apples (4)

He couldn’t stop there of course; half the fun is stirring around the foamy mixture afterwards. Look, a leftover apple!

Exploding Apples (6)

Travis also decided he wanted to cover one of our gourds with the foam – why not, since this added to the fall feel of the project.

Exploding Apples (7)

As always, this activity is the perfect way to blow off energy when your kids just want to get messy!

Exploding Apples (5)

Clay Fortune Cookies

Clay Fortune (15)

Last night was the Chinese Mid-Autumn Festival (or Mooncake Festival), celebrating the harvest. Traditionally, families celebrate with picnics and mooncakes eaten underneath the full moon. Making vegan mooncakes was too arduous an undertaking, but fortune cookies seemed like a nice cultural symbol to set the tone, and were easy to make with… clay! This was a fun way to introduce Travis to a new culture and new ideas.

Clay Fortune (1)

After a real fortune cookie snack, he loved watching the “cookie shop” we set up, as I demonstrated how to roll the clay flat into circles.

Clay Fortune (3)

Fold each circle in half, then pinch inwards into a fortune cookie shape.

Clay Fortune (2)

This was a bit tough for Travis, but he loved watching me pinch our cookies as he created other shapes.

Clay Fortune (5)

We let the clay air-dry overnight, and then painted with watercolors the following afternoon. Travis had fun selecting different shades for each cookie!

Clay Fortune (12)

To make the fortunes, simply cut paper into thin strips and decorate with pictures or words.

Clay Fortune (10)

I gave Travis a few prompts, asking what he most hoped for or would wish for somebody else, and wrote his words on some of our fortunes.

Clay Fortune (11)

Then it was time for the “festival”! This really just entailed heading out after dark as a family to see the moon (so bright my camera couldn’t handle it).

Clay Fortune (7)

We enjoyed the Chinese tradition of telling riddles as we snacked on real fortune cookies. Two fun ones for kids that earned big giggles:

What’s full of holes but still holds water? – A sponge!

What’s black and white and re(a)d all over? – The newspaper!

Clay Fortune (8)

Overall, a really fun activity whether you tie the clay cookies into a larger festival or not.

Clay Fortune (16)

Days of the Week Chart

Days of Week (4)

Travis is in nursery school three days a week now (!), a transition that has gone remarkably well, but which sometimes leaves him confused as to whether it’s a school day or a weekend – a term used loosely since his “weekend” is now four days long.

This easy chart helps him visualize the week, and is great both for pre-readers and for kids who can read the days of the week.

To make the chart, cut a piece of poster board into a strip, and divide into 7 spaces (decorative washi tape makes a nice border between days). Write the names of the days across the top.

Days of Week (2)

We filled in each space with a visual of the main activity for each day.

Days of Week (3)

You can draw simple pictures on index cards, and write the words of the activity as well. In addition, we added photos for some of the activities that repeat weekly, like school:

Days of Week (1)

You can print out photos, or use a handy instant camera for the pics.

Days of Week (8)

As the final touch, we added a large paperclip along the top, which Travis can slide along as the week progresses. He loves matching up which day it is with which activity we’re headed off to enjoy!

Days of Week (7)

Duck, Duck, Goose Dress-Up

Duck Duck Goose (13)

There’s no time like October to embrace the glee of dress-up. Whether you’re planning out your actual Halloween costumes or just having fun around the house, kids seem to just morph when they are in costume, If you want, save this one (an adorable suggestion from Highlights High Five) for Halloween; it would be perfect for a parents and a child or for a group of siblings. Or just get silly like we did during a morning of play and use for creative costume play!

Travis thought the project was a delight from start to finish, intrigued right away by all the materials as we gathered them.

Duck Duck Goose (1)

First up was making our hats – two yellow ducks for mom and dad, and a white goose for Travis. Buy solid color hats from a craft store, then trace the visors of the hats on orange felt, leaving an outer edge about 1/4-inch longer than the brim for the “beak.”

Duck Duck Goose (2)

I cut them out, trimming slightly to make sure they fit the brim, and then glued on. You can have your child help you with regular glue, or use hot glue for slightly better adherence.

Duck Duck Goose (3)

To make the eyes, draw black dots with marker on styrofoam balls. Travis had fun drawing one very wobbly eye, but then asked me to fill in the circles on the others.

Duck Duck Goose (4)

Use Velcro dots to add the eyes to each hat. Neat, they stick!

Duck Duck Goose (6)

To make our shirts, we made long lines of glue on the sleeves of plain t-shirts from the craft store – two yellow, one white – and stuck on feathers in the corresponding colors.

Duck Duck Goose (9)

Travis thought this part was endlessly fun, so we covered the bellies of the shirts as well.

Duck Duck Goose (10)

Let your costumes dry completely. While we waited, Travis gathered leftover feathers and pretended it was the duck’s nest! Leftover Styrofoam became the “eggs.”


Duck Duck Goose (12)

The next day, it was time to play! I thought Travis might find the feathery shirt uncomfortable, but he was so excited to be a goose, instantly honking up a storm.

Duck Duck Goose (14)

And insisting that Mommy Duck quack, of course, so here I am:

Duck Duck Goose (17)

Even Daddy Duck got in on the action. We played many rounds of Duck, Duck, Goose of course, and Travis wanted to wear his shirt the rest of the morning. If you do opt for these costumes on Halloween, wear white or yellow rain boots to complete the look.

Duck Duck Goose (15)


Pumpkin Leapfrog

Pumpkin Leap (2)

Wondering what to do with all those pumpkins from the pumpkin patch? Get in a little exercise before you carve them!

Pumpkin patches are such a fantastic outing this time of year; ideally head to one where your child can truly see where pumpkins come from (attached to the vne), instead of a big lot where pumpkins have been placed in a row.

Fall Bucket (4)

Travis was so proud picking out our pumpkins, especially since he could lift them all by himself. At home, I asked if he wanted to play pumpkin leapfrog, which earned an eager and curious “Yes!”

Pumpkin Leap (1)

Set your pumpkins up in a line (use as many as you’d like – we had 4, but you could go up to 8 or even higher, if you want to make the course harder), and cut a line of string to mark the start and finish of your course.

Pumpkin Leap (3)

Take turns leaping over the pumpkins, and see how long it takes! You can make this competitive for older kids by using a timer, or just be silly with it for younger ones.

Pumpkin Leap (4)

Next we ran a slalom “S” course around the pumpkins, great for practicing fancy footwork.

Pumpkin Leap (5)

From there, go on and make up your own silly versions. Travis loved straddling each pumpkin, running circles around them, and more.

Pumpkin Leap (6)

The perfect activity to tide us over until its time to carve, and yet another fantastic suggestion from our Barefoot Books Kids Garden set.