Baking Powder vs. Baking Soda

baking powder (9)

Today Travis and I made potions!

The impetus for this little experiment came from Raddish Kid’s lesson plan attached to our Hot Cocoa Cupcakes. Kids can delve further into the world of leaveners and what makes baked goods rise. I knew some of the science was too advanced for Travis, but I culled out bits of the lesson that were appropriate to a preschooler.

baking powder (1)

First, I set out a dish of baking soda and baking powder, and invited Travis to explore them. We ran through the five senses: touch, taste, smell, sight, and sound. Could we hear the powders? We giggled at that, then moved on to the others.

baking powder (2)

He noticed that the baking soda was smoother and finer than the baking powder, although they felt similar. He declined the offer to taste, but in this case, it’s perfectly safe to do so!

A quick science lesson followed: baking soda is basically ground up rock, and it’s a base, which means it needs an acid to react.

Baking powder contains a base and two acids, and it will react in a recipe two times. Travis liked this idea, and that it means fluffier pancakes or cupcakes.

To start out experiment, I put out two test tubes of water. We added baking soda to one and baking powder to the other. Aha, only the baking powder reacted, so water was not an acid!

baking powder (3)

Now we tested each in four other liquids: vinegar, liquid soap, rubbing alcohol, and juice. The baking soda only reacted in the vinegar and juice – we found our two acids!

baking powder (5)

Baking powder, on the other hand, reacted in everything. That said, none of baking powder’s reactions were quite as spectacular as the classic baking soda/vinegar pairing.

baking powder (7)

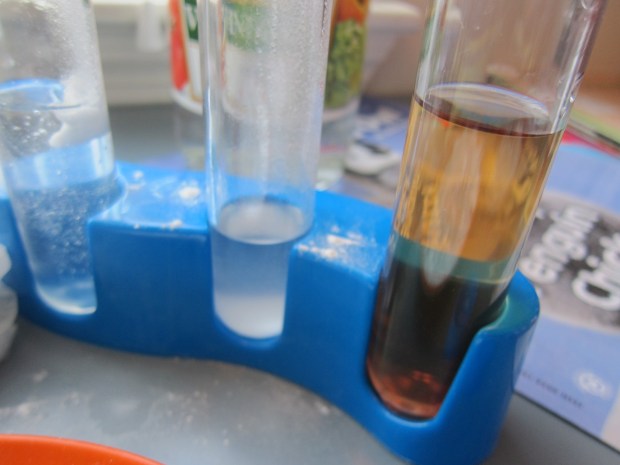
Travis’s favorite? Baking soda in the vinegar of course; we had to do that a few times. The juice was quite fun too, bubbling up wildly to the top of the test tube.

baking powder (8)

In sum,this is a neat way for your kids to understand why baked goods are rising in the oven; you can really see that bubbling and rising action at work.

baking powder (6)

Another oldie but goodie? Show your kids that you can blow up a balloon with yeast! This is something Travis and I did when exploring the letter Y, back when he was only 2 years old, but it never grows old!

Glow in the Dark Flower

glow flower (7)

Get ready: There is some serious wow factor to this project. You will need a few special supplies for it, including a black light, which you can purchase from sellers like Amazon, as well as a highlighter pen you don’t mind sacrificing (hint: you’re going to cut it open). But armed with those items, kids will adore this project!

First, I showed Travis the black light, and how it works. Keep exposure to a minimum, because as a reminder, black lights use UV rays.

glow flower (1)

Next, we filled a clear vase with water, and set aside a few white flowers from a bouquet we’d purchased.

I showed Travis how the highlighter pen would look in the black light. He couldn’t believe the way the yellow streaks glowed!

glow flower (6)

We returned to regular light, where I very carefully cut open the highlighter crosswise using a sharp knife; any box cutter should work; just go slowly and carefully.

Inside will be a strip of fibers that contain the highlighter ink. This was so neat to see!

glow flower (3)

We added the fibers to our vase of water, where the highlighter color seeped down.

glow flower (4)

Travis very seriously added our flowers. Now we had to wait, but were rewarded with glowing flowers a few hours later!

glow flower (5)

Glowing Fishbowl

Glowing Fishbowl (5).JPG

Although I don’t advocate keeping real fish as pets (it’s a sad existence to travel around and around a bowl for years on end), fake fish can make adorable companions! On a recent trip to a local fish hatchery, Travis picked up a plastic fish and turtle. We thought it would be cute to make them a little habitat to stay in. What’s better than a fishbowl home? A glowing fishbowl home!

First we squirted glue into the insides of the a clear glass bowl with a wide mouth, intending to make lines that looked like seaweed. Our glue was very runny, so didn’t work as well as we hoped, but we still then managed to dump in a whole can of glow-in-the-dark glitter and swirl the bowl until it coated the “seaweed.”

glowing fishbowl (2)

Definitely do this step over a trash can!

I then piped on a few fish with additional glow-in-the-dark paint and we set it aside to dry.

The glitter, disappointingly, didn’t show up as glowy as we hoped, but the fish were cute glowing in the dark.

glowing fishbowl (3)

Once we filled the bowl with water, it was the perfect home for our fish and turtle.

glowing fishbowl (4)

Eat the Rainbow

raddish rainbow (8)

This lesson was an extension of the Cozy Minestrone soup Travis and I made at the beginning of the month from Raddish Kids. I didn’t do the lesson directly in conjunction with the recipe, as I wanted Travis to focus on the food and fun of cooking. But it made for a couple of cute projects over the course of a week, after the fact! If you prefer, you can do this lesson first, and cook Cozy Minestrone after.

First, Travis and I sat down to name all the colors of the rainbow. For each, I produced a square of matching construction paper. Next I told him we’d brainstorm fruits and veggies for each color. We set a timer for 30 seconds for each; Travis was in charge of the timer and loved this part!

raddish rainbow (1)

At the end, we had a few items for most colors…

raddish rainbow (2)

…but tons on the green. Clearly green “won” and we talked about why this might be.

raddish rainbow (3)

Now we looked at an infographic describing what gives each fruit or veggie its color, and what that corresponded to in terms of health.

raddish rainbow (7)

Kids can also watch a fun description of phytonutrients. Finally, we had a printout from Raddish, that we can refer back to later.

Next, we went through a grocery flier and looked for fruits and veggies.

raddish rainbow (4)

We pasted these into a collage that went up on a the fridge – a great visual reminder of foods we aim to eat each week!

raddish rainbow (5)

Finally, I asked Travis to think of what colors he’d eaten that day. Orange for papayas, green for cucumbers, etc. We kept a running tally, and kept it up over the course of a week. At the end, we could see that the blues and purples were most lacking in his diet, but he scored quite well elsewhere!

raddish rainbow (6)

Overall, this lesson was a great intro to nutrients for a preschooler. The lesson plan includes tons more detail for big kids, so do be sure to check out Raddish for yourself!

Glowing Planets

Glowing Planets (6).JPG

One of the bonuses about winter’s early sunsets is that even little kids are awake to see the stars and planets. Travis and I talked recently about what it is that makes planets glow; they don’t make their own light the same way stars do, of course, but they do reflect the light of the Sun and thus give off a glow – sometimes the brightest one in the sky!

We came in to make our own glowing planets, thanks to a few simple materials.

glowing planets (1)

First, I asked which planets Travis wanted to make, and for each, we brainstormed a little diagram of what he knew about it. Earth, for example, would appear blue and green from space, and has oceans and continents.

glowing planets (2)

Saturn was made of gases, has rings, and is colder than Earth.

glowing planets (4)

We finished out diagrams for Earth, Mars, Saturn, and Neptune (the four that Travis picked) and colored four golf balls accordingly. Travis loved making Mars bright red! Use permanent marker for the best results.

glowing planets (3)

Now make a slit in the bottom of each ball with an X-acto knife (grown-up step), and place over the flame of a tea light.

glowing planets (5)

We found that small tea lights worked better than tall ones, even though we had more of the latter.

glowing planets (8)

Now your planets glow just like the ones in the sky! These were especially fun in the bedroom at night.

glowing planets (9)

Plastic Egg Fireflies

plastic firefly (5)

Travis is into making things glow lately, and beyond glow-in-the-dark paint, we brainstormed other ways to play with light. I pulled out an old tea light and a few plastic eggs leftover from Easter, and we were able to cobble together this little firefly. It made us nostalgic for summer nights!

To make our bug, first we selected patterned paper for the wings. Travis had fun flipping through a booklet of paper and picking the one he liked best. Alternatively, you could have your child scribble on white paper and cut out wing shapes.

plastic firefly (1)

Next I snipped a pipe cleaner into small sections – 6 for the legs, and two slightly longer for the antennae.

plastic firefly (2)
Grown-up step: Use a piercing tool to poke holes for the legs and antennae. The oblong part of the egg will be the back of the firefly’s body, and the more rounded part will be its head.

plastic firefly (3)

Slip in the pipe cleaners, bending slightly so they stay put. Curl the tops of the antennae over.

Next we glued on the wings and eyes. Whoops, because of where I’d pierced the antennae holes, our eyes were above them instead of below them. Oh well!

plastic firefly (4)

Once the glue dried, we could make our little creature glow. Travis was absolutely delighted, and had so much fun taking the tea light out and putting back in again.

plastic firefly (6)

Pretty soon the bug was flying all over the house. A nice reminder of summer evenings to come, here in the middle of winter!

Glow in the Dark Moon and Stars Painting

Glow Moon (6).JPG

Travis loves the craters on the moon, and is always asking how they’re made. So we’ve done a few fun projects where he gets to make craters, everything from poking holes into clay to making explosions outside. This little project was also another way to add a comforting glow to his bedroom at night. We just needed glow-in-the-dark paint, and a fun tool – q-tips! – and we were ready to start.

glow moon (1)

First, I marked off a section of dark construction paper with masking tape. The area within the tape would be the moon, and the rest of the paper was for the stars.

glow moon (2)

We filled in the moon with glow-in-the-dark paint, then used a q-tip to form lots of craters.

glow moon (3)

The only glow paint we had is actually meant to be squeezed from a tube, not brushed on, so to make stars we squeezed out dots of paint and then smooshed them with a q-tip.

glow moon (4)

Travis loved this step!

glow moon (5)

Now we just had to wait until dark. We let the painting dry under bright lights, and transferred to his room at bedtime.

Glow Moon alt.JPG

A beautiful glowing (crater-filled!) moon.

Starry Night Constellations


starry night (4)

Our star-themed fun continues, here in the dark days of winter. January is a great time of year to talk with little ones about stars, because the sky gets dark so early; in the summer, it’s still light when Travis goes to bed, and he hardly ever gets a chance to star gaze!

Tonight, we had flashlight fun with some of our now-familiar constellation forms. Ahead of time, I used permanent marker to make a dot for each star on construction paper, making the shapes of favorites like Orion, Canis Major, the Big Dipper, and the Southern Cross.

starry night (1)

Now it was up to Travis to punch out the holes, using a pen (or a sharp pencil would work).

starry night (2)

I was quite impressed with how exact he managed to be, puncturing the paper only where I’d made dots. He loved the challenge!

starry night (3)

Now stand in a dark room, and shine a flashlight through the holes onto the wall. Voila, you’ll see the starry sky suspended before you! Travis loved being the one to hold the flashlight, and line up the beam so a particular constellation appeared.

starry night (5)

Indeed, he loved it so much he had to punch holes all over a second sheet of paper. Now it looked like the Milky Way was flooding our wall with stars!

starry night (8)


No-Cook Overnight Oatmeal

no-cook oats (5)

Let’s face it – mornings are crazy, amiright? High Five magazine must know it, because Travis’s January issue featured a great recipe that kids can help make the night before. Shake up these no-cook oats, and they’re ready to go for breakfast!

Ingredients:

  • 1/4 cup rolled oats
  • 1/4 cup plain non-dairy yogurt
  • 1/4 cup non-dairy milk (we used coconut)
  • 1 teaspoon agave nectar
  • 1/4 teaspoon ground cinnamon
  • Handful of dried apricots or raisins
  1. Combine all of the ingredients in a jar with a tightly-fitting lid.no-cook oats (2)
  2. Seal the jar and shake – kids will love this step!no-cook oats (3)
  3. Refrigerate for at least 8 hours, or overnight.

no-cook oats (4)

In the morning, simply uncap the jar and voila – breakfast is served. You can serve cold like muesli, or warm it briefly in the microwave.


Fresh Water, Salt Water

fresh water (4)

This activity from Travis’s January issue of High Five magazine provided a nice dose of STEM learning, alongside the usual monthly craft. We’ve done a similar experiment before, but liked the set-up for this version!

Fill 2 large clear glasses with 1 and 1/2 cups warm water each.

fresh water (1)

Add 1/3 cup salt to one cup, and stir until dissolved.

fresh water (2)

The instructions said to tint the other cup blue with food coloring so you can tell them apart. Because the salty cup is cloudy, this step isn’t really necessary, but blue water is cool, so why not!

Now add the same object to each of the two cups, and observe any differences. We tried the magazine’s suggestions of aluminum foil balls, which floated to the top in both versions.

Next we tested plastic dinosaurs. Both sank. Hmm, no difference!

fresh water (5)

Finally, when we tried tomato slices, the tomato in the salt water seemed to pop above the surface with more buoyancy.

fresh water (6)

But why hadn’t the others been different? We added more salt to the salty cup, liberally pouring in and stirring. After two more tries, we had a crayon that floated!

fresh water (7)

The crayon in the opposite cup, down at the bottom, helped illustrate buoyancy best for Travis.

fresh water (8)

Overall, he loved the set-up and scientific nature of the project, plus adored pouring the salt. Great for budding scientists.