Alphabet Dictionary

Alphabet Dictionary (1).JPG

As with playing Letter Detective, here’s an activity you can do with your child over the course 26 days. We ended up taking a short-cut (read on for why!) but Travis really enjoyed the process.

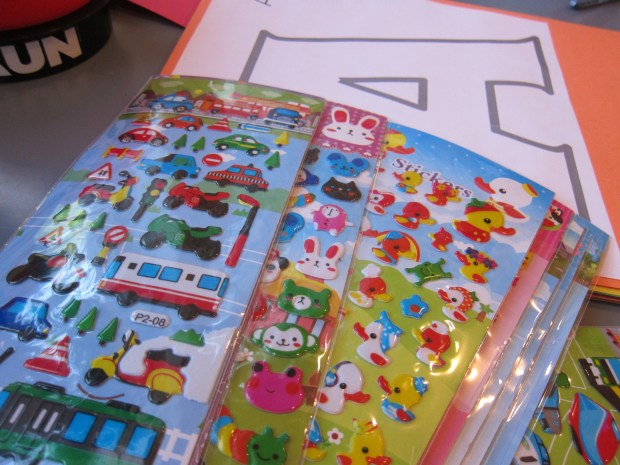
To start, I made a “book” with a printed letter of the alphabet glued onto colorful construction paper for each page. Hole punch these and tie together with yarn.

Alphabet Dictionary (8).JPG

Each day, Travis drew something beginning with the assigned letter on its page. Then we went through stacks of fun stickers and added anything that started with that letter.

“A” received an apple drawing, as well as apple and alligator stickers on the first day.

Alphabet Dictionary (2)

He was so excited to get a second chance to comb through the sticker packs on day #2, and found bananas, bunnies, and buses for “B”.

Alphabet Dictionary (3)

Plus drew a “bagel”!

Alphabet Dictionary (4).JPG

After a few days of focusing only on one letter per day, I realized Travis was frustrated finding stickers he couldn’t use yet. So instead, I laid out all the printable pages for him, and a whole pack of stickers, and made it a free-for-all.

Alphabet Dictionary (6)

Well wouldn’t you know he loved it! “Thanks for buying all these stickers!” he declared, happily stickering all over, occasionally asking me where one belonged.

Alphabet Dictionary (5)

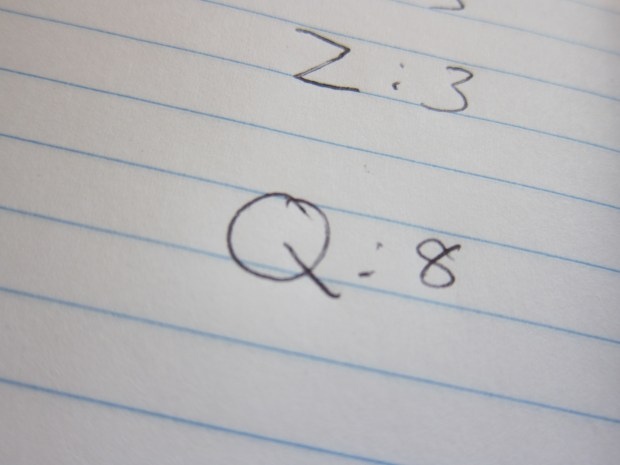
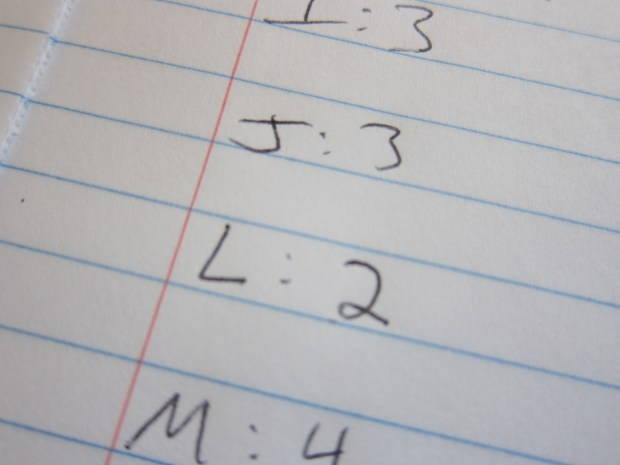
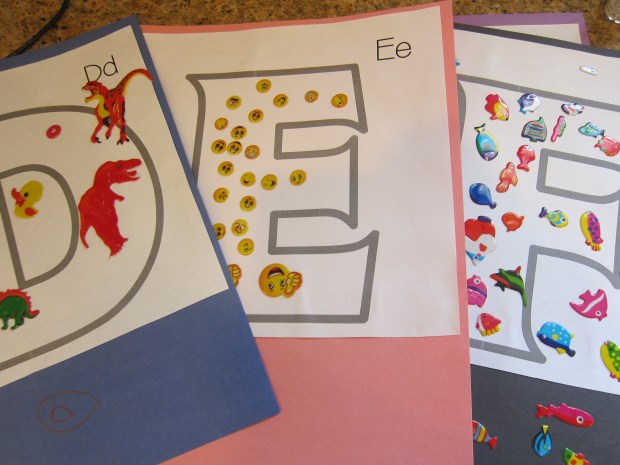
Based on the sticker themes in our set, we had some letters that received lots (S for stars, T for trains) and some with relatively few.

Alphabet Dictionary (10)

We got a little creative; our E page was covered in “emotions” from emoticon stickers.

Alphabet Dictionary (11)

Another idea is to supplement with pictures cut out of magazines. One way or another, Travis was very proud of his “dictionary.”

Alphabet Dictionary (9)

It was a great phonetic addition to the tracing and modeling we’ve done throughout the summer.

Alphabet Dictionary (7)

I would say this boy is kindergarten ready!

Letter Detective

Letter Detective (1).JPG

For 26 days, Travis has been playing detective. Letter detective that is!

For the assignment (a neat suggestion from his summer pre-k to kindergarten workbook), I purchased a small glass jar with a lid and set aside a collection of pennies.

Each day, he was tasked with finding one letter of the alphabet. Every time he notices it, a penny goes in the jar. Fair game includes magazines we read, food labels, street signs around town, and more.

When we started with A, he needed lots of prompting, but over the course of the day he spotted 8 As.

Letter Detective (2).JPG

8 pennies in the jar!

Letter Detective (3).JPG

Truth be told, it was hard for Travis to find the letter of the day as we drove; his recognition isn’t fast enough to keep up with the speed of a car. But at-home materials proved more fruitful, and the goal is to count up the pennies at the end and perhaps earn a small reward!


Coach Whistle

Coach Whistle (8).JPG

The sports coaches at Travis’s camp have whistles… which means Travis needs one too! Well, it turns out that we couldn’t exactly make a whistle sound from this Highlights craft, but it was fun to make and Travis was so proud to wear it around his neck.

First, cut a strip of paper that is 1 inch wide and 9 inches long. I love letting Travis help with a ruler for sneaky “math” practice.

Coach Whistle (1)

Cut out the strip and cover in duct tape; we used a colorful blue. Cut a u-shaped notch in one end.

Coach Whistle (2)

Grown-up step: Hot glue two juice lids to the opposite end from the U.

Coach Whistle (3)

Roll up, continuing to glue, until there’s only a 1/4-inch gap open between the lids and tape. Fold back the U so it overlaps this gap. I knew we needed to get this exactly right for a true whistling sound, but because we were working in those quick minutes before camp, I had to sort of fudge it.

Coach Whistle (4)

Snip the end of the tape so there is an opening to blow into.

Coach Whistle (5)

Attach a pony bead to the back of the whistle with hot glue, and thread through yarn to go around your “coach’s” neck.

Coach Whistle (6)

As I mentioned, Travis did more of a hoot hoot into the whistle, and didn’t get a true whistle sound, but he loved it and proudly showed it off to camp counselors.

Coach Whistle (9)

Picnic Scene Craft Challenge

Picnic Challenge (6)

Travis loves the open-ended craft challenge he finds in his Highlights magazine every month, having crafted robots and camping tents in the past, among others. Today, we wanted to make a picnic scene using nothing more than colored paper, cotton balls, and paint.

I loved the little method that Travis came up with. First he needed a paper base, and he chose green grass. We glued down a separate square of colored paper for the blanket.

Everything else in the little scene was made of cotton balls, which he dipped into paint and then glued on!

Picnic Challenge (1)

It definitely was a five-year-old’s take on a challenge for kids as big as age 12, but I loved watching his process. There was green cotton ball grass:

Picnic Challenge (3)

Orange cotton ball food:

Picnic Challenge (2)

And pink cotton ball people! He then made some black cotton ball ants.

Picnic Challenge (4)

He loved carefully pouring the paint onto each cotton ball before gluing them down, and enjoyed it so much that he wanted to make a second version. This time his pink person dined on yellow lemonade.

Picnic Challenge (5)

Paint-Popper Art

Paint Popper (2)

If the kids aren’t in camp and need to get out some crazy summer energy, then this project is for you!

To make the popper, cut an empty toilet paper tube in half. Tie a knot in two balloons, and cut off the tops. Slip one balloon over each half of the empty tube and secure with tape. Bright and colorful tape isn’t necessary, but does add an element of fun.

Paint Popper (1)

Because we knew we were going to make a mess, Travis and I headed outside for this one. I put an old sheet on the ground and covered it with thick craft paper. We filled each paint popper with a separate color and I showed Travis how to pull back on the knot of the balloon and splash the paint forward.

Paint Popper (3)

Now this was fun!

Paint Popper (4)

He loved selecting which color to use next, and sometimes just dripped the paint out of the popper for big thick blobs on his canvas.

Paint Popper (5)

The one drawback is that the poppers didn’t last long. After a few colors, the tape and balloon came lose and the cardboard roll lost its shape.

Paint Popper (6)

But it was more than enough time for him to produce fantastic splattery art.

Paint Popper (9)

And get some sunshine in the process!

Paint Popper (7)

Butter Art

Butter Sculpture (8).JPG

Travis loves butter (our favorite is the original from Earth Balance!), so much so he’s been known to ask for it by the spoonful whenever we make recipes with butter. So when he read an article in his latest Highlights about a butter artist, we had to give sculpting with butter a try.

Butter Sculpture (2)

I pulled two sticks of Earth Balance from the fridge (the colder the butter the better) and gave him a dull knife to carve.

Butter Sculpture (1)

At five years old, Travis didn’t actually make anything recognizable, but that wasn’t the point. First he told me he had sculpted Darth Vader, and then he was at work on a city.

Butter Sculpture (6)

Every once in a while he’d have a nibble of course!

Butter Sculpture (9)

I felt a bit like a kid again as I put my own skills to the test on the second stick of butter. This one was a shoe:


Butter Sculpture (4)

And this one was a bed:

Butter Sculpture (5)

We had such a laugh during this whole activity, washed our hands really well after, and otherwise learned something new about butter and art. In other words, highly recommended!

Stick Letters

Stick Letters (2)

I recently made sure to collect a variety of sticks: some long, some short, some very straight, and some slightly curved. Because I knew Travis and I had stick letters in our future!

The following day, I dumped out the bag of sticks on the floor and told him we’d be going through the alphabet.

Stick Letters (1)

Now, this was a real test for Travis as we prep for kindergarten, because I knew it would require patience to work through all 26 in one sitting, plus he had no guidelines to follow for the letters. I am thrilled to report our summer work is paying off; he was fascinated and focused the whole time.

Part of the fascination is that we turned it into a challenge: which letters would take the fewest sticks, and which the most?

He started confidently with 3 sticks for A. But then B really gives him pause; I pointed out that to make curves, we needed more sticks, but they had to be short ones. That meant a total of 6 sticks for B!

Stick Letters (3)

He began working his way through the alphabet and this was a great way for me to notice which ones gave him pause. At first he boldly clustered the lines of E together. I helped him see one went at the middle, one at the top, and one at the bottom.

Stick Letters (11)

M and N were a little tricky. We focused on a vocalizing an “up down up down” pattern to help him get there.

Stick Letters (5)

Could he turn P into an R by adding only 1 stick? He could, no help required!

Stick Letters (6)

Curvy S needed so many sticks.

Stick Letters (7)

But the winner for the most sticks was the curviest – Q, requiring a total of 8.

Stick Letters (10)

Meanwhile, he aced the ones that used only 2 sticks: L, T, and V.

Stick Letters (9)

We loved everything about this activity, from the nature walk to collect the sticks, to the feeling of accomplishment, to the fun of making each letter.

Amazing Astronauts

Amazing Astronaut (4).JPG

Travis and I will be cooking up some cosmic cuisine in the days ahead, thanks to his latest Raddish Kids crate. But even before the cooking began, we had to try out the lesson plan on astronauts, one of his favorite topics in the world.

To set the stage, ask your child what it would be like to be an astronaut, and what he or she would most want to do. Travis wants to fly a spaceship to another planet!

We watched a few informative videos from Chris Hadfield (familiar to us from one of Travis’s favorite books, The Darkest Dark). Hadfield, an astronaut from the ISS, has fantastic videos featuring everything from eating dessert in space to sleeping in space.

I read Travis some of the facts about what it takes to become an astronaut at NASA and then it was time to simulate being an astronaut with three cool projects.

For the first, we made space boots to walk on the moon! Travis drew a “terrain” on a long strip of butcher paper.

Amazing Astronaut (1)

He drew astronauts and craters, and then we spread the paper outdoors on our patio.

Amazing Astronaut (2)

Meanwhile, I made the boots: poke holes in two buckets, and thread rope or twine through. Gather the rope up above the buckets and knot into a loop.

Amazing Astronaut (3)

Very carefully, have your child step up onto the buckets and hold the ropes taut. Travis got the hang of lifting his arms to lift the rope as he took each step.

Amazing Astronaut (5)

“This is what it felt like for Neil Armstrong to walk on the moon!” he marveled. He gave a proud astronaut cheer at the end of his moon walk.

Amazing Astronaut (6)

Next up, we created a space meal! Watch Chris Hadfield again, and then set out a menu. Travis had a juice box, one of baby sister’s pouches, and a tortilla!

Amazing Astronaut (7)

For added fun, make sure to suit up first: snow pants make for a big bulky astronaut suit; Travis insisted on adding his jacket, too!

Amazing Astronaut (8)

Dining in space is fun!

Amazing Astronaut (10)

Finally, we made a Glove Box, which is how astronauts study potentially harmful materials. Trim the top pieces from a cardboard box and cut two arm holes in one side.

Amazing Astronaut (11)

Fill with fun items. Rocks from Travis’s collection made natural “moon rocks” of course, and I added a few other odds and ends.

Amazing Astronaut (12)

Travis slipped on garden gloves (cleaning gloves would work, too). Cover the top with saran wrap, and have your child insert their hands through the holes; now it was like he was manipulating the items from within an astronaut’s glove box!

Amazing Astronaut (13)

He loved peering at the rocks through the magnifying glass.

Amazing Astronaut (14)

For added authenticity, you can duct tape the wrists of the gloves to the holes, but we skipped that step. What fun to be an astronaut for the day!

Amazing Astronaut (15)

Tricky Triangles

Tricky Triangles (5).JPG

These fun foam triangles are a homemade version of a tangram puzzle! We followed a template from Highlights magazine, which made for great puzzling on a Saturday morning.

First, follow the lines provided to divide a large sheet of craft foam into 8 triangles. Big kids can help with the lines and the cutting, but this was more of a craft that I set up for Travis than one we prepared together.

Tricky Triangles (1)

Soon I had 3 sets of triangles for him, in orange, green, and yellow foam.

Tricky Triangles (2)

We looked at the shapes in the magazine and he wanted to make the fish first: green triangles! Tangrams are wonderful for helping children think spatially and translate what they see on the page to a real model.

Tricky Triangles (3)

Travis needed help with the orientation of a few triangles, but mostly could see how the fish came together.

Tricky Triangles (4)

Next up was an orange fox! I had Travis point out where the biggest triangle went first as a starting point, and we worked our way outward from there.

Tricky Triangles (6)

He was quite proud when he saw the fox take shape.

Tricky Triangles (7)

Finally, he made the yellow cat. Add big googly eyes to any or all of these, if you have them!

Tricky Triangles (8)

As your child becomes skilled at copying the provided designs, branch out and make up your own! Next time I’m going to cut up a smaller version since these would be perfect to slip in a zip-top bag and turn into a take-along toy for car rides or waiting rooms.

Bug Movie

Bug Movie (7)

Travis got to stay up extra late tonight to watch a special movie. Not one on TV… a real live bug show!

Before it got dark, we headed outside and put up two sticks (actually, a stick and one toy microphone stand!) and I tied a piece of string tight between them. Then we carefully draped a pillowcase over the string.

Bug Movie (1)

(Note: for a “big screen movie” version of this, tie a thicker rope between branches on two trees and use a whole sheet instead of a pillowcase).

Bug Movie (2)

As the sun set, we headed outside. Set a toy lantern at the foot of the pillowcase or sheet to illuminate it. And now sit back and wait!

Bug Movie (4)

Travis was so excited and couldn’t stop asking questions about when it would be dark enough, and if the bugs were sleeping, and what kind of bugs we might see.

Bug Movie (5)

The waiting and anticipation, honestly, were the most magical part about this activity. Travis felt so special staying up late with me, and watched the darkening sky as much as he watched our glowing lantern.

I wish I could tell you we saw something spectacular like a moth or a giant beetle against our sheet. The results were more ho hum: mosquitoes, gnats, fruit flies.

Bug Movie (9).JPG

But Travis wasn’t disappointed in the slightest! He was so thrilled with each insect that found our lamp and hummed around. We loved this activity so much we’ll definitely do it at least once more before summer is out.

Bug Movie (8)

What bugs came to your “movie”? Please share in the comments!