Hooray for Helpers

Hooray Helpers (4)

The Gallant challenge in Travis’s Highlights magazine this month was about thanking community helpers, the people who make a community run smoothly and safely. The magazine offered several ways to thank these helpers, but Travis had already done many of these activities! We’ve thanked librarians, brought brownies to our local fire station, and given cards to the mailman.

So for something new, he chose to honor the construction workers in town! The town happens to have a big project laying new pipe along an entire road, and we see the workers out in the hot sun every day. So I knew water would go a long way.

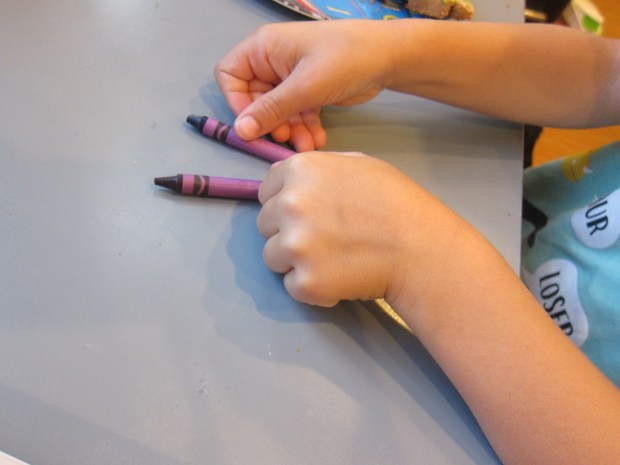
At breakfast, Travis put together a thank you card.

Hooray Helpers (1)

I was so proud of him writing the words himself, then a drawing two construction workers beneath a hot sun. On the inside, I penned a more proper “thank you for all you do,” signed Travis age 5.

Hooray Helpers (2)

Our original intent was to leave the water while the crew was at work, but it turns out the timing was always at odds with Travis’s camp hours. So we left the water where we were sure they’d see it the next morning, along with the note and cups.

Hooray Helpers (5)

This was a great way to get Travis thinking about those who do the hard work in a town and to give back.

Hooray Helpers (3)

Violet V

Violet V (4).JPG

Here are two very quick ways to form a V after your child traces the letter.

After tracing upper case V, I simply asked Travis to form one with his hands.

Violet V (1)

Easy! Plus you can give a quick lesson on how this V can mean victory or peace.

Violet V (2)

Next he traced lower case v using a violet crayon. I handed him a second crayon in a close shade of purple, and asked him to make them into a v. Voila!

Violet V (3)

“U Pick” U

U Pick (2)

After some easy tracing of letter U, I gave Travis a little spin on making our three-D versions today: “u pick” the material from our craft bin!

U Pick (3)

This led to some excitement, since he feels important whenever he’s allowed to dig through the materials in here. First he fashioned a very straightforward U from yarn.

U Pick (1)Next he decided he wanted to try dowels! I knew these would be too rigid, but wanted him to figure it out for himself. So the package of dowels was opened and fiddled with, but then discarded.

U Pick (4)

Aha! He discovered that pipe cleaners were a bit bendier. In no time at all, we had lower case u as well.

U Pick (5)

Tie a T

Twig T (3).JPG

Travis loves the letter T; because it’s the first letter of his name, it’s the one he’s most familiar with and gives him no trouble. So he was able to trace it this morning and then was interested to see what we would make it out of.

First we found a two twigs in the yard. I asked him to think which part of the T needed to be the longer twig and which shorter.

“I know,” he announced, and formed the letter in moments.

Twig T (1)

Two ties for lower case t were a bit tougher, only because they had to be folded. But with some folding help, he tackled this one, too.

Twig T (2)

Fun with Idioms

Idioms alt.JPG

Many Raddish lesson plans that accompany their recipes are quite involved, but this one was fairly straightforward. But it got lots of giggles and introduced my kindergartner to a new term and concept.

I sat Travis down and read through the silly poem “Losing Pieces” by Shel Silverstein, in which he talks about talking off his head, crying his eyes out, and singing his heart out. It concludes:

There’s really not much

left of me.

Travis giggled at the last line but I asked him what was going on here. Had the author really lost his head? Walked his feet off?

Idioms (1)

Hmm… We needed more exploration. Travis is familiar with the book Parts by Tedd Arnold, but we hadn’t known there was a More Parts sequel. I showed Travis an online read-through, again producing giggles.

Idioms (2)

Once the read-through was complete, I told Travis he’d been listening to idioms. In other words: a group of words that mean something different from what the words actually say.

Raddish also suggested a great clip with illustrations by children showing the literal meaning of an idiom (like ‘holy cow or ‘cat got your tongue’) and then a child steps in to explain what it really means.

Idioms (3)

So now it was Travis’s turn! Check out the list of idioms here if your child needs help thinking of one to illustrate. Travis laughed when we got to “chip on one’s shoulder” so we stopped there.

Idioms (4)

He drew a person and positioned a little yellow chip right on the shoulder. For fun, show your drawing to friends or family members and see if they can guess which idiom is pictured!

Idioms (5)

Proportional Pie

Proportion Pie (6)

Much like the magnetic hearts that Travis and I crafted today, this project is a fun way to teach kids about symmetry… With the added bonus that it’s edible!

Unlike linear symmetry, this project shows circular symmetry. You can point out to your child things in nature that show symmetry in a circle like this, including starfish and spider webs.

For the ready-to-eat equivalent, bake a pre-made pie shell according to package directions and let cool. (Note: A convenient vegan go-to is Wholly Wholesome).

Spoon a thick layer of non-dairy yogurt into the pie.

Proportion Pie (1)

Set out plates of berries or other fruits for your child to use as decoration and score the top of the yogurt so the pie is divided into 4 equal portions.

Proportion Pie (2)

(Note: Bigger kids might want to do this with six portions, but four seemed easier for my kindergartner to handle).

I placed a strawberry in one quarter of the pie. How many strawberries should each of the other three sections receive? Travis quickly added 1 strawberry to each.

Proportion Pie (3)

Next I placed two blueberries in one section. At first he placed his blueberries any which way, but I showed him how to place them not just in the right quadrant, but also the same place.

Proportion Pie (7)

“Is it ready to eat?” he wanted to know. Almost!


Proportion Pie (4)

We added just a few more blueberry and strawberry decorations to help him see the symmetry, and then it was time to scoop into the pie. What delicious fun!

Magnetic Hearts

Magnetic Heart (10).JPG

This quick craft not only teaches about the topic of symmetry, but is also a fantastic way to explore the properties of magnets!

To cut out symmetrical hearts, fold cardstock in half and draw half a heart; cut out.

Magnetic Heart (1)

I thought to only have Travis help cut out the accompanying two long rectangles we would need from each color of cardstock, but he insisted on cutting out the heart himself – great practice along curves!

Magnetic Heart (2)

Open up the paper to reveal a symmetrical heart, then cut it in half.

Magnetic Heart (4)

Fold the rectangular strips you’ve cut out accordion style to form 5 pleats.

Magnetic Heart (5)

Fold this strip around itself to form a square and use tape or glue to adhere shut.

Magnetic Heart (6)

Tape a magnet to one side of the square, facing towards the center of your heart.

Magnetic Heart (7)

Tape down onto the heart and repeat on the other side.

Magnetic Heart (8)

Now, your two heart halves will snap together!

Magnetic Heart (9)

The other fun way to do this is to deliberately set up the magnets to repel each other. Travis loved chasing halves of hearts around the play room this way!

Magnetic Heart (13)

As you play, have a quick talk about attraction and repulsion in magnets, and you’ll have thrown a little learning into the fun.

Magnetic Heart (12)


Clothespin Number Match

Clothespin Match (2)

For this quick counting exercise, we used number flashcards from Travis’s summer workbook. You can easily make flashcards at home though featuring a set number of things on one side and the numeral on the other.

If you make your own, I recommend following the lead of the workbook we’re using, which presented novel ways to count things: two fingers, for example; five pips on a dice; or six marks on a playing card.

Clothespin Match (3)

I gave Travis all of the cards in a big pile and a bowl of clothespins. I thought he might consider the activity somewhat tiresome, but he loved the idea of clipping the pins to each card!

Clothespin Match (1)

After counting and telling me what the number on the front was, he checked his answer against the numeral on the back.

Clothespin Match (4)

Then it was time to reach into the bowl of clothespins!

He very carefully added and counted as he went, including for the highest numbers. “Can seven even fit?” he wondered while working on that card, and was thrilled when the answer was yes. Our card with 10 was a tight squeeze.

Clothespin Match (5)

This requires so many clothespins that sometimes we had to steal from finished cards to complete new ones. When there was only 1 clothespin left in the bowl, I challenged Travis to single out the card representing #1. Bingo!

Clothespin Match (6)

Overall, this is simple but good review for counting, and it gets those fine motor skills working, too.

ABC Hop

ABC Hop (5).JPG

Yes you can fit in letter writing, alphabetical order learning, and gross motor skills in one activity… With ABC Hop! This simple game requires no more than a paved surface and a piece of chalk.

We headed outside early before the afternoon summer heat sets in. I asked Travis to write the alphabet. This was fantastic practice to write the letters from memory, not following a tracing line. He faltered on only a few, like K, but had a firm grasp of many others.

ABC Hop (1)

I quickly realized his letters were going to be too small to hop on, though, so wrote out a second set for him. Once the alphabet was complete, we began to sing the ABC Song. With each note, he hopped from letter to letter.

ABC Hop (2)

Whoops, occasionally he had to run from the end of one line to the start of the next.

ABC Hop (3)

I thought he might get tired, but he hopped to the very last Z.

ABC Hop (4)

To make this harder, you could even try mixing up the letters or putting them in zig zags occasionally!

Questing Stone

Questing Stone (4).JPG

This painted rock craft is sort of a DIY riff on a “Choose Your Own Adventure Book”! Travis and I followed Highlights magazine’s suggestion for the two sides of our first stone, and also created our own alternate versions.

Questing Stone (2)

All you need for the craft are rocks and puffy paints.

Questing Stone (1)

For the suggested version, one side was a unicorn head. The opposite side was a dragon’s tail. Mommy’s art skills are noticeably lacking, but I like to think that adds to the DIY charm.

Questing Stone (5).JPG

Give the puffy paint ample time to dry. Then, instead of a traditional story time, we made up a tale together. Because Travis seemed antsy just sitting still, we turned it into game with action figures. Here comes Iron Man to the castle…

Questing Stone (7)

Whenever we came to a crossroads in the story, Travis flipped the stone. We decided the unicorn would represent a good outcome and the dragon’s tail was bad outcome. Yay, Iron Man got into the castle!

Questing Stone (9)

Oh no, the next flip was the dragon, so he was swarmed by enemies at the next turning point of the story.

Questing Stone (10)

Travis didn’t like this turn of events, so decided the blob of paint he’d made on another rock represented  “water power.” If we flipped to the water symbol, Iron Man would win.

Questing Stone (11)

And so on! Big kids can get truly sophisticated with their storytelling, perhaps even writing down the all the possible junctures. My 5-year-old just loved the novelty of flipping the stone and acting out a tale as we saw how it all played out.

Questing Stone (12)