Coach Whistle

Coach Whistle (8).JPG

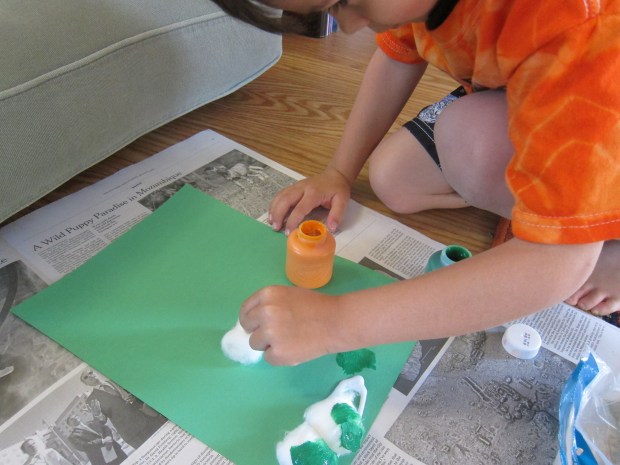
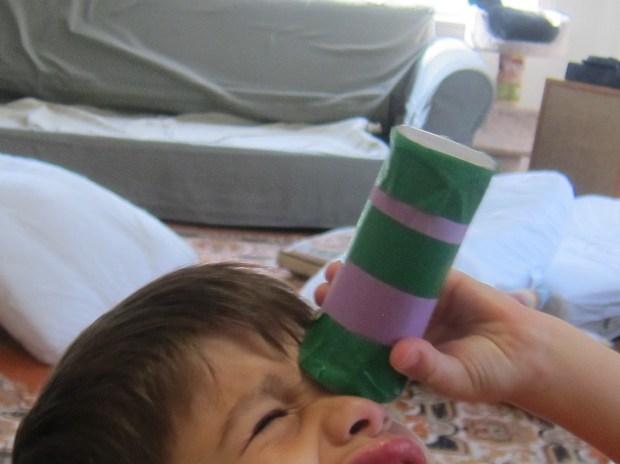
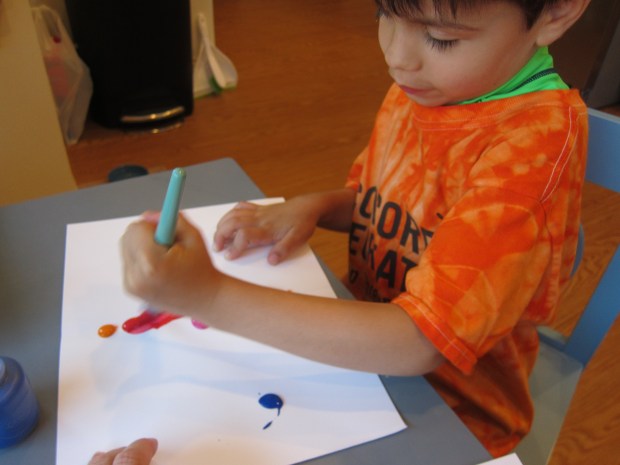
The sports coaches at Travis’s camp have whistles… which means Travis needs one too! Well, it turns out that we couldn’t exactly make a whistle sound from this Highlights craft, but it was fun to make and Travis was so proud to wear it around his neck.

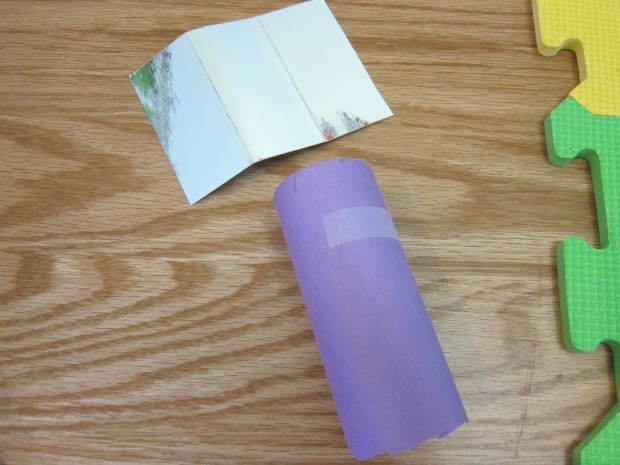
First, cut a strip of paper that is 1 inch wide and 9 inches long. I love letting Travis help with a ruler for sneaky “math” practice.

Coach Whistle (1)

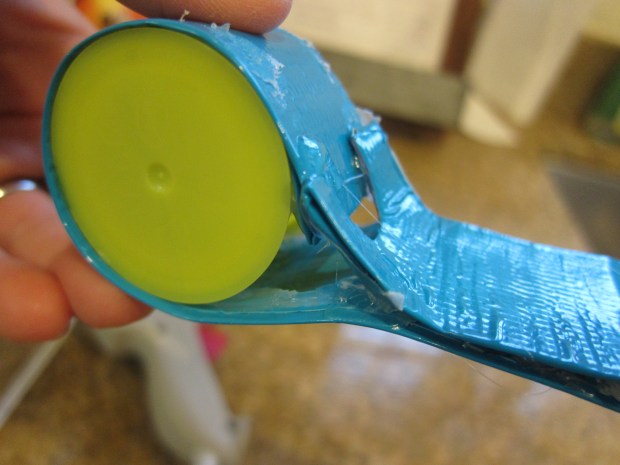
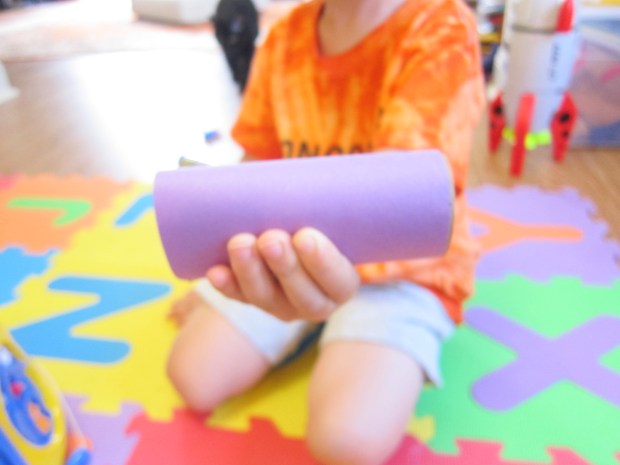
Cut out the strip and cover in duct tape; we used a colorful blue. Cut a u-shaped notch in one end.

Coach Whistle (2)

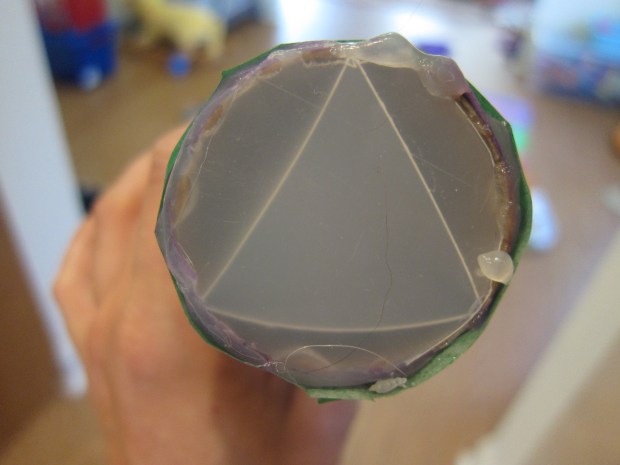
Grown-up step: Hot glue two juice lids to the opposite end from the U.

Coach Whistle (3)

Roll up, continuing to glue, until there’s only a 1/4-inch gap open between the lids and tape. Fold back the U so it overlaps this gap. I knew we needed to get this exactly right for a true whistling sound, but because we were working in those quick minutes before camp, I had to sort of fudge it.

Coach Whistle (4)

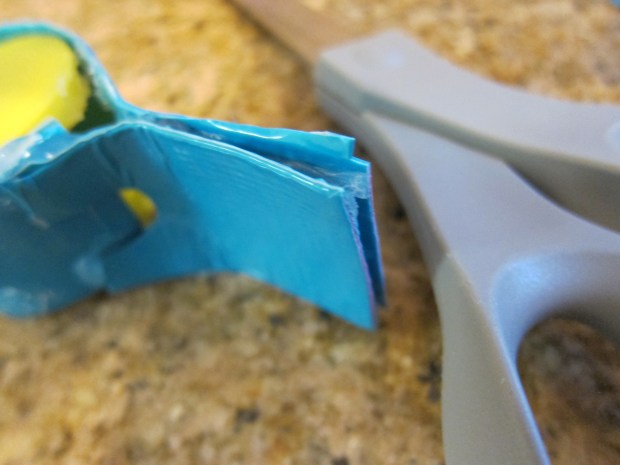
Snip the end of the tape so there is an opening to blow into.

Coach Whistle (5)

Attach a pony bead to the back of the whistle with hot glue, and thread through yarn to go around your “coach’s” neck.

Coach Whistle (6)

As I mentioned, Travis did more of a hoot hoot into the whistle, and didn’t get a true whistle sound, but he loved it and proudly showed it off to camp counselors.

Coach Whistle (9)

Picnic Scene Craft Challenge

Picnic Challenge (6)

Travis loves the open-ended craft challenge he finds in his Highlights magazine every month, having crafted robots and camping tents in the past, among others. Today, we wanted to make a picnic scene using nothing more than colored paper, cotton balls, and paint.

I loved the little method that Travis came up with. First he needed a paper base, and he chose green grass. We glued down a separate square of colored paper for the blanket.

Everything else in the little scene was made of cotton balls, which he dipped into paint and then glued on!

Picnic Challenge (1)

It definitely was a five-year-old’s take on a challenge for kids as big as age 12, but I loved watching his process. There was green cotton ball grass:

Picnic Challenge (3)

Orange cotton ball food:

Picnic Challenge (2)

And pink cotton ball people! He then made some black cotton ball ants.

Picnic Challenge (4)

He loved carefully pouring the paint onto each cotton ball before gluing them down, and enjoyed it so much that he wanted to make a second version. This time his pink person dined on yellow lemonade.

Picnic Challenge (5)

Paint-Popper Art

Paint Popper (2)

If the kids aren’t in camp and need to get out some crazy summer energy, then this project is for you!

To make the popper, cut an empty toilet paper tube in half. Tie a knot in two balloons, and cut off the tops. Slip one balloon over each half of the empty tube and secure with tape. Bright and colorful tape isn’t necessary, but does add an element of fun.

Paint Popper (1)

Because we knew we were going to make a mess, Travis and I headed outside for this one. I put an old sheet on the ground and covered it with thick craft paper. We filled each paint popper with a separate color and I showed Travis how to pull back on the knot of the balloon and splash the paint forward.

Paint Popper (3)

Now this was fun!

Paint Popper (4)

He loved selecting which color to use next, and sometimes just dripped the paint out of the popper for big thick blobs on his canvas.

Paint Popper (5)

The one drawback is that the poppers didn’t last long. After a few colors, the tape and balloon came lose and the cardboard roll lost its shape.

Paint Popper (6)

But it was more than enough time for him to produce fantastic splattery art.

Paint Popper (9)

And get some sunshine in the process!

Paint Popper (7)

Kaleidoscope


Kaleidoscope (7).JPG

Having made several varieties of kaleidoscope in a Kiwi Crate recently, today Travis helped me tackle a DIY version. Ours didn’t come out exactly as intended, but the materials were fun and it quickly became a prop in Travis’s make-believe games!

First, wrap an empty toilet paper tube in colorful construction paper; Travis chose purple. Tape on.

Kaleidoscope (1)

Trace the bottom of the tube three times on a plastic lid. We used the lid of an oatmeal can, which was not entirely clear, and perhaps why our results weren’t 100%. But oh well! Cut out the three circles and hot glue one circle to one end of the tube.

Meanwhile, cut a piece of reflective paper so it is 1 inch shorter than the tube.

Kaleidoscope (2)

Fold into thirds and then open back up again. Fold it up to form a prism (making sure the reflective side is on the inside) and tape to secure.

Kaleidoscope (3)

Slide the prism into the tube, all the way back against the hot-glued circle.

Kaleidoscope (6)

Slip the second circle over the prism. Fill the remaining space with multi-colored pony beads. Hot glue the final circle to the other end of the tube.

Kaleidoscope (4)

Kids can decorate the outside of the tube with colored tape or markers, if desired.

Kaleidoscope (5)

We found that this worked best when we held it directly up toward a light source. But even with slightly cloudy viewing, it worked great as a “viewfinder” or “telescope” or “homing device” in Travis’s games!

Kaleidoscope (8)

Symmetrical Art


Symmetrical Art (10)

Travis has done so many crafts at camp that it felt like a while since we’d sat down just to paint together. We amended that this morning with a craft intended to follow up on recent fun with symmetry.

First he folded a piece of paper in half, very importantly made a nice crease, and opened it back up again.

Symmetrical Art (6)

I squirted out big blobs of paint near the center crease, according to his preference. “Red, and orange, and blue!” he instructed.

Symmetrical Art (1)

He smeared them all together, noting the way the blobs ran together, made new colors (purple!), and got super smeary.

Symmetrical Art (2)

Now we folded the paper over again, smooshing the paint inside. We opened it back up for a neat symmetrical reveal. “I made a footprint!” he said.

Symmetrical Art (3)

He loved it so much that he immediately requested to use the second piece of paper I’d folded. This time he chose a different set of colors, including light blue, yellow, and black.

Symmetrical Art (4)

Blob blob blob and smoosh smoosh smoosh and we opened it up again.

Symmetrical Art (5)

He thought this one looked like Darth Vader’s mask – even cooler!

Symmetrical Art (7)

Bottle Sailboat

Bottle Sailboat (6)
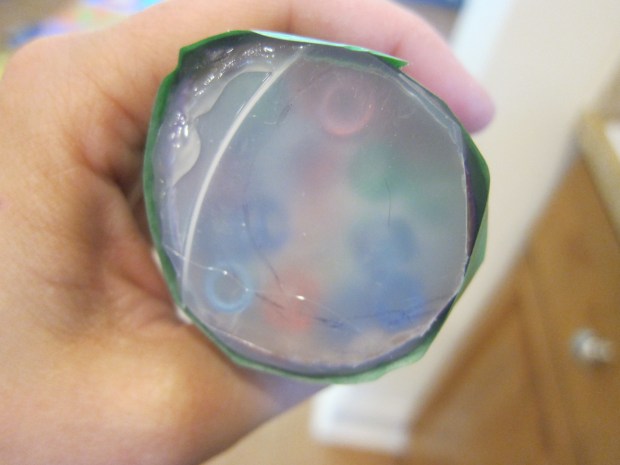
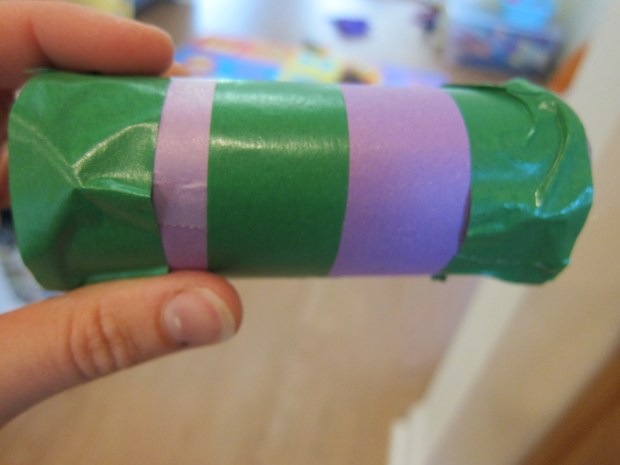
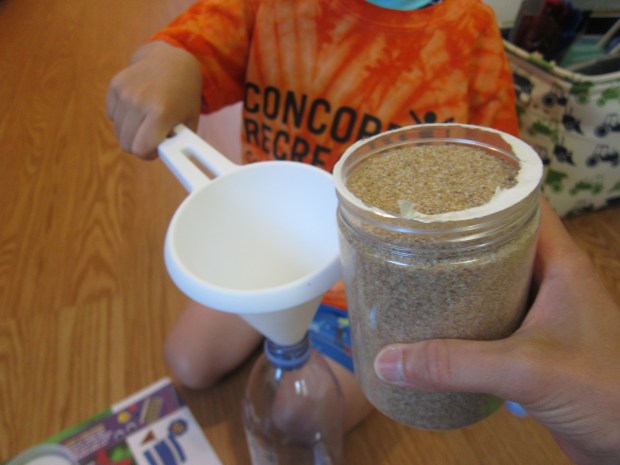
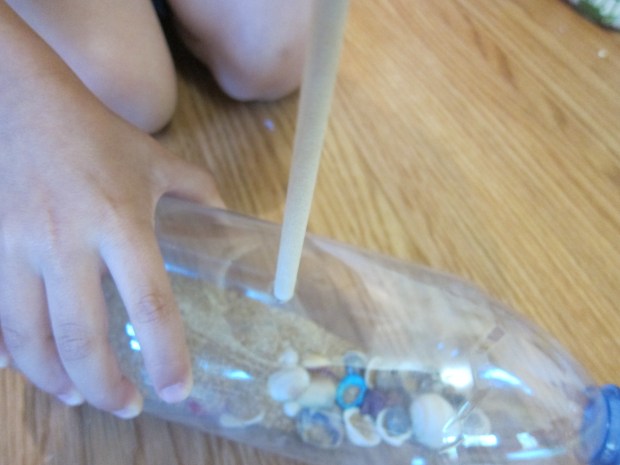
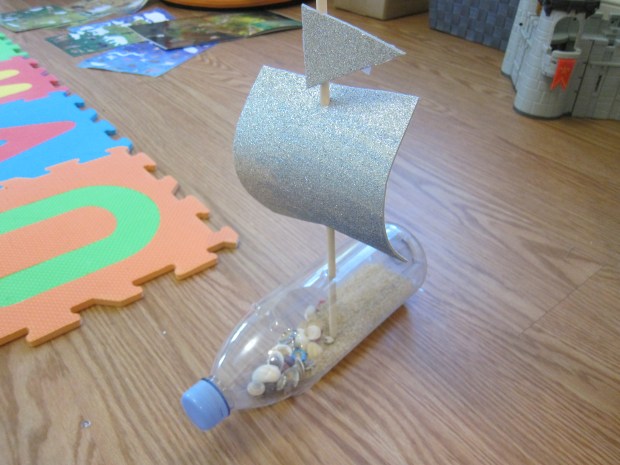
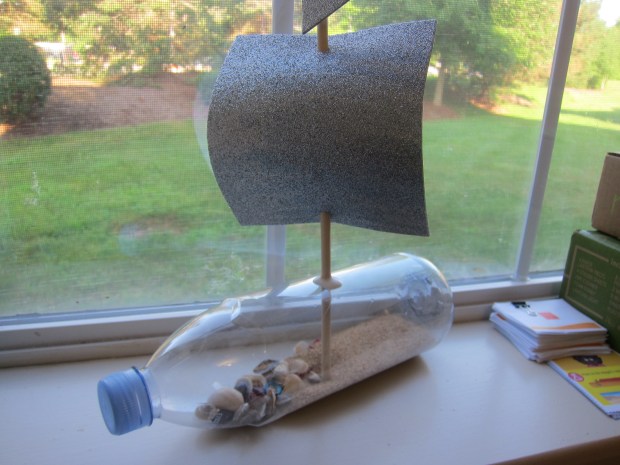
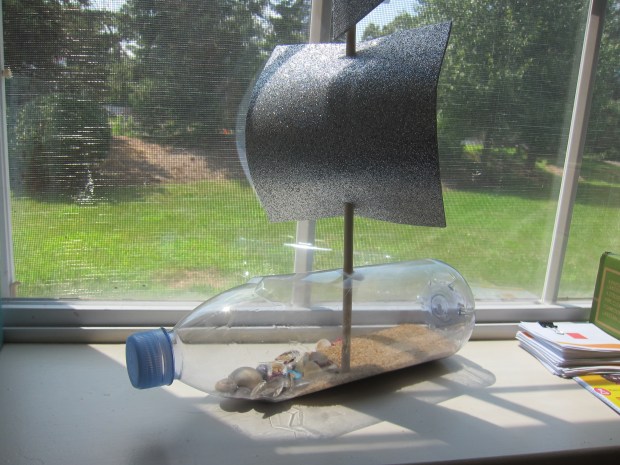
Although not nearly as expert or astonishing as a model ship in a bottle, this craft is a cute riff on the idea, and a version that kids can make all by themselves!

Remove any labels from a plastic water bottle and insert a funnel into the opening. Pour in about 1/2 cup sand; you can use some you’ve saved from the beach, or buy it at the craft store. Travis loved being the very important funnel holder while I poured.

Bottle Sailboat (1)

Sprinkle in a few small sea shells; again, these can either be ones you’ve collected, or store-bought in a pinch. Replace the cap on the bottle.

Bottle Sailboat (2)

To make a sail, pinch the bottle slightly to cut a slit in the center. Insert a wooden dowel and secure with glue.

Bottle Sailboat (3)

Cut out a square from craft foam for a sail, and a triangle from the foam for a flag. Because we used sparkly craft foam, Travis didn’t add much decoration. Your kids may want to decorate their flags with markers or stickers.

Bottle Sailboat (4)

Punch two holes in the “sail” and insert onto the dowel mast. Tape on the flag.

And now set sail! Although the bottle will really float in the tub or a pool, we thought it was prettier just to look at.

Bottle Sailboat (5)

Questing Stone

Questing Stone (4).JPG

This painted rock craft is sort of a DIY riff on a “Choose Your Own Adventure Book”! Travis and I followed Highlights magazine’s suggestion for the two sides of our first stone, and also created our own alternate versions.

Questing Stone (2)

All you need for the craft are rocks and puffy paints.

Questing Stone (1)

For the suggested version, one side was a unicorn head. The opposite side was a dragon’s tail. Mommy’s art skills are noticeably lacking, but I like to think that adds to the DIY charm.

Questing Stone (5).JPG

Give the puffy paint ample time to dry. Then, instead of a traditional story time, we made up a tale together. Because Travis seemed antsy just sitting still, we turned it into game with action figures. Here comes Iron Man to the castle…

Questing Stone (7)

Whenever we came to a crossroads in the story, Travis flipped the stone. We decided the unicorn would represent a good outcome and the dragon’s tail was bad outcome. Yay, Iron Man got into the castle!

Questing Stone (9)

Oh no, the next flip was the dragon, so he was swarmed by enemies at the next turning point of the story.

Questing Stone (10)

Travis didn’t like this turn of events, so decided the blob of paint he’d made on another rock represented  “water power.” If we flipped to the water symbol, Iron Man would win.

Questing Stone (11)

And so on! Big kids can get truly sophisticated with their storytelling, perhaps even writing down the all the possible junctures. My 5-year-old just loved the novelty of flipping the stone and acting out a tale as we saw how it all played out.

Questing Stone (12)

Picnic-Perfect Basket

Picnic Perfect (7).JPG

This fun basket is a great way to involve kids in the planning for a summer picnic. It’s perfect for holding utensils and napkins: a mini basket to put in the big basket!

To assemble, Travis helped cover an empty snack box with brown cardstock. We trimmed it to fit and glued on, then let dry.

Picnic Perfect (1)

Meanwhile, I showed him how to weave a few additional strips of brown cardstock together.The weaving was a little beyond his ability but he helped use a glue stick at each intersection I showed him to complete the weave.

Picnic Perfect (4)

Leave one strip extra long to be your handle and glue that down on the other side of the “picnic basket.” Meanwhile, glue an empty toilet paper tube into the box. Once dry, add plastic utensils!

Picnic Perfect (3)

We colored in a watermelon slice on pink cardstock for a touch of whimsy. I colored in a green rind and Travis added black seeds with crayon. Glue to the side of the basket.

Picnic Perfect (5)

Finally, we colored in a piece of white cardstock as the “blanket.” Travis’s choice of gray and black seemed a littler, er, dark, so I added a few pink stripes! To make it sturdy, glue this cardstock onto corrugated cardboard, and then glue the basket onto the “blanket.”

Picnic Perfect (8)

For the final touch, we tucked in some paper napkins. This craft makes a great caddy for kids to use all summer long, easily able to reach utensils and napkins when the family dines al fresco. Or bring it along to the next true picnic! You could even tuck in salt and pepper or a few other light items.

Picnic Perfect (6)

Starburst Symmetry

Starburst SYmmetry (10)

This quick project was a fantastic way to show Travis circular symmetry, slightly different from symmetry with two halves as we’ve explored late in symmetrical socks and paper doll projects. There was a lot of need for precision with this activity, so I was proud of Travis’s concentration level.

To start, fold a coffee filter in half. Then in half again, then in half again! Travis took the task of folding and making a good crease each time quite seriously. At the end, your filter will be the shape of an ice cream cone.

Starburst Symmetry (1)

Next he spritzed the filters with water until damp on each side, but not soaking.

Starburst Symmetry (2)

Use marker to make dots all over the filter, counting to three for each dot. This was a great little lesson in patience and also not scribbling (as he’d done recently for a different type of coffee filter project).

Starburst Symmetry (3)

Flip the filter over – wow! His pattern was waiting there on the other side.

Starburst Symmetry (4)

I showed him how to go over his dots again – slowly and carefully – to make the final result a little more clear.

Starburst Symmetry (5)

Now he opened it up for a big reveal. “Wow!”

Starburst Symmetry (6)

He wanted to know how the pattern had gotten there, but understood once I explained that the marker went through all 6 layers of the filter, resulting in perfect symmetry in all 6 segments.

Starburst Symmetry (8)

I loved how his pattern made a purple diamond, unintentinoally.

Starburst Symmetry (11)

These are beautiful hung on the wall or fridge once they dry!

Starburst Symmetry (9)

Make a Natural Wind Chime

Natural Chime (6).JPG

I’ve wanted to make this art project for Veronika for quite a while but wanted to wait until we were in our new home before doing so. With the unpacking done, it was time to get crafty!

Some of this wind chime was trial and error, but an eight-month-old baby doesn’t mind a few quirks in the end result.

To make the chime, first make a hole in small shells, whether those collected at the beach or ones from the craft store.

Natural Chime (1)

Instructions suggested that I could do this by twisting a pair of sharp nail scissors against each shell, but they were far too tough. Next I tried tapping them with a screwdriver, using gentle pressure with a hammer. But I wasn’t gentle enough, and any open-faced shells like clams shattered.

Natural Chime (2)

Turns out the screwdriver method worked great with any curled snail shells, though!

Natural Chime (3)

Once I had enough shells with holes, I threaded them onto gold string. Tie these to the arms of a decorative starfish. If you don’t have a starfish, a piece of bamboo or driftwood would be pretty, too.

Natural Chime (4)

I suspended the star fish from a low branch of a tree outside, and clicked the shells together for Veronika to hear the beautiful sound.

Natural Chime (7)

She was immediately entranced and wanted her own chance to clack the strings and shells together.

Natural Chime (8)

Next we lay down on a towel underneath the tree to enjoy way the shells looked from up above. We could watch the strings move and the leaves dance in the tree, and I talked about everything she could hear and see. All in all, this was a beautiful project!

Natural Chime (10)