Puffy Paint Shamrocks

Puffy Shamrock (9)

Painting green shamrocks is all well and good, but why use regular paint when you can use puffy paint?

To make the fun mixture, simply mix together shaving cream, glue, and green food coloring.

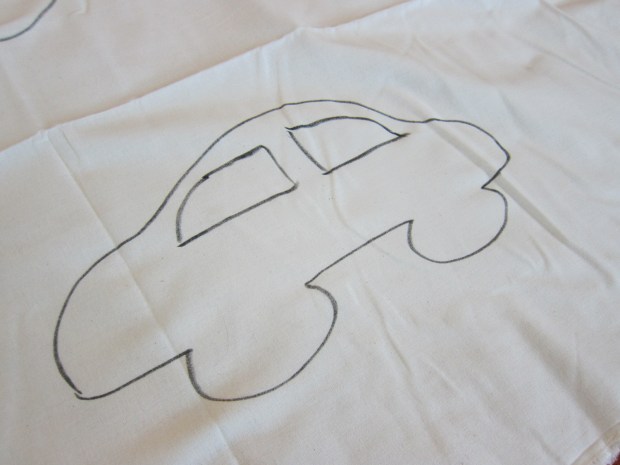
Before you make the paint, either trace or draw shamrock shapes onto paper. Use a thick cardstock, so the paper doesn’t tear.

Puffy Shamrock (1)

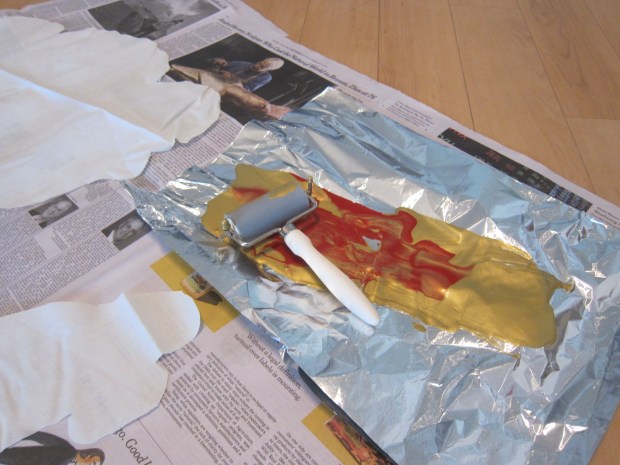
I wish I could tell you we measured out the ingredients for our puffy paint, but instead we had a lot of goopy, inexact fun. First we squirted shaving cream into plastic cups.

We added a healthy pour of glue into each – perhaps 2 tablespoons per cup? Stir the mixture together well.

Puffy Shamrock (2)

At first, we tried adding green food coloring to one cup. Oddly, this tinged the puffy paint very yellow, key lime at best. Travis’s favorite part of the whole craft was adding more and more food color and trying to get a greener shade.

Puffy Shamrock (3)

My little mixologist!

Puffy Shamrock (5)

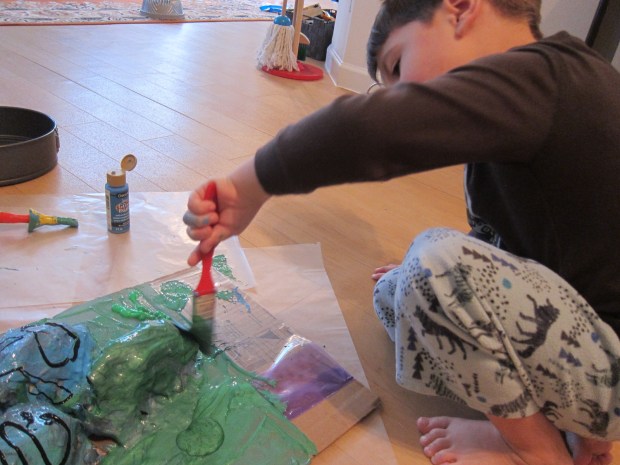
Meanwhile, I used green paint in a second cup. This gave us a very pale pastel green – nice for springtime, though not true Kelly Green!

Puffy Shamrock (6)

Once you have the color you like, paint over your shamrocks.

Puffy Shamrock (7)

No points for neatness, of course.

Puffy Shamrock (8)

It only took a couple of hours for the paint to dry, and Travis loved how puffy and soft it was to the touch.


Dot Paint Shamrocks

Dot Shamrock (5).JPG

We’re pretty crazy about St. Patrick’s Day around here (despite not being Irish!), so be on the lookout for several shamrock-themed crafts and recipes this week. In this first version, kids will love the reveal of the shamrock shape after they finish dotting their paint!

First, cut out a shamrock, either free-hand or using a template.

Dot Shamrock (1)

You can tape the shamrocks down to construction paper or poster board, but we actually did ours on foam board – this allowed us to later use it as a sign at our town’s St. Patrick’s parade.

Now you have two ways to dot paint around the shamrocks. First, there are good old dot paints.

Dot Shamrock (3)

For a novelty version, set out a tray of green paint and use pencil erasers to make small dots.

Dot Shamrock (2)

We liked doing both, to compare the big and little dots side by side.

Dot Shamrock (4)

Once you’ve finished dotting, peel up the shamrock shapes – voila! The silhouette is left behind. Now off to the parade!

Dot Shamrock (6)


Markers + Paper = A Long Story

Long Story (5).JPG

Snow day here! The school snow day caught me unawares (I was sure they wouldn’t cancel!) which means we had to come up with lots to do indoors and quick! Enter this easy two ingredient game, and you have endless varieties of play.

Travis was intrigued watching me set up. I laid down piece after piece after piece of white paper in a row, and taped them together, until we had a long scroll.

Long Story (1)

I told him it was for a story, and if he told me what was happening in each frame, I would draw it in. He ended up dictating a fantastic tale involving a crocodile on a boat, who likes to vacuum.

Long Story (3)

Later there were some bells with feet who come to the crocodile’s rescue.

Long Story (4)

I happily followed along with my limited art skills.

Long Story (2)

Once our scroll was filled, he immediately wanted another story. This time, I posed the challenge that he be the author and illustrator.

His story turned out to be all about bells (bells are big here, these days), who got progressively bigger, and had hair and large eyes to see bugs.

Long Story (7)

Even though the story was a bit nonsensical, I loved watching his artistic process, and seeing the way he used markers to capture what he was trying to say.

Long Story (8)

Using your same pictures, you can weave new tales with different words, or grab more paper and keep making up new stories. The only limit here is when you run out of paper or tape, whichever happens first.

Long Story (6)Happy snow day!

Pressed Tiles

Pressed Tiles (13)

It’s rare that I can grab Travis’s interest for more than 30 minutes of crafting these days, so when this activity occupied us for nearly an hour, I knew we had a winner!

I came home with a new package of oven-bake clay, quite different from the white air-dry clay we normally use.

Pressed Tiles (1)

Travis was thrilled with all the colors, and in no time he had an assortment in front of him for chiseling, shaping, and rolling.

Pressed Tiles (7)

To make a lasting project, we used our collection of stamps – animal and pirate-themed sets worked perfectly – and pressed images into the clay. Once baked, I knew these tiles could be used for numerous games!

Pressed Tiles (2)

For the cleanest method, press the clay into a square, cover with plastic wrap, and press the stamp on top.

Pressed Tiles (6)

Travis didn’t always use the plastic wrap, which was just fine.

Pressed Tiles (5)

He mostly did his own thing with the stamps and clay while I made an actual set of tiles we could use in the future. I confess my fingers hurt by the end from warming up so many different colors and flattening to 1/4-inch thick! Travis meanwhile pretended he was baking some of his in an “oven.”

Pressed Tiles (10)

When it’s time to really bake the clay, arrange your tiles on a parchment paper-lined baking sheet and bake according to package instructions – ours went in at 275 degrees F for 30 minutes.

Pressed Tiles (8)

Now what to do with them! We decided we could use these as a more permanent version of our printable story cards.

Pressed Tiles (12)

You can also play games with the animals, assigning them by habitat or finding other ways to sort them.

Pressed Tiles (11)

If you want any of your tiles to be jewelry, make sure to poke a hole with a toothpick before baking. However you use them, these tiles are great for arts and crafts, fine motor skills, imagination, and more.

Papier-Mache Mountains

LP Habitats (13)

Papier-mâché projects are always such good goopy fun. It’s been ages since we last whipped up a batch of this simple flour-and-water paste, and this project was great for a cold afternoon.

First, find a cardboard base and grab a roll of aluminum foil, and enlist your kids into shaping the foil into mounds.

LP Habitats (7)

They don’t need to look like perfect mountains; any tall or humped shape will do! Glue down to the cardboard base and let dry.

A layer of masking tape will help the papier-mâché newspaper strips adhere better, and also further helps anchor the mountain range to the cardboard. After a quick glance, Travis decided this step was way too time-consuming, so mommy took over.

LP Habitats (8)

Next up: papier-mâché! We mixed 1 part water to 1 part flour for our goop, and ripped strips of newspaper.

LP Habitats (9)

Layer the newspapers all over your mountains and let dry.

Finally, the mountains received a coat of paint – Travis’s favorite part by far.

LP Habitats (10)

We ended up with very artistic mountains, including shades of blue and silver and black.

LP Habitats (12)

And of course puffy paint had to make an entrance, because no paint project is complete without puffy paint in our house these days.

LP Habitats (11)

Once the paint dried, we pulled out some animal toys from around the house.

LP Habitats (17)

Now our animals could traipse about the Himalayas (or Rockies, or Alps)!

LP Habitats (18)

Classroom or Naptime Keepsake

Keepsake (12)

A stuffed friend can make all the difference if your child feels anxious about school, or needs an extra snuggle at naptime. And when your child has a hand in making that stuffed friend, things are even better!

I am no sewer, so this craft was entirely new territory for me, requiring a sheet of cotton canvas from the craft store. First I asked Travis what shape he’d like his comforting keepsakes to be. The first was a small car, which we made small enough to fit in his school backpack. Then we traced a larger free-form shape for naptime, sort of like a cloud, but mostly abstract.

Keepsake (1)

Cut out your designs (you’ll need two of each, to be the front and back of the stuffie), and paint with fabric paint. This was a fun chance to use our paint roller! Let dry completely.

Keepsake (3)

You can decorate the keepsakes further before sewing and stuffing. Try gluing on pieces of felt, or coloring with fabric markers. Travis opted for the latter.

Keepsake (7)

Next it was time to stuff and sew! This meant a special trip to visit grandma and her sewing machine – Travis was ecstatic seeing the machine in action.

Keepsake (10)

At home, we finished the keepsakes with stuffing; Travis loved helping poke it into the furthest corners.

Keepsake (5)

He was so proud to set his naptime keepsake on his bed.

Keepsake (8)

Lastly we tucked the small car stuffie in his backpack, just in case he needs to give it a special squeeze at school.

Keepsake (11)

Giant Medals

Giant Medal (10).JPG

The Olympics are well underway, and we’ve already had fun making our own bobsleds and dining on medal cookies. These medals aren’t for eating, but they make for fantastic pretend play if your little athletes want to climb up onto the podium!

First, find a circular object to trace for the outline of your medals – go for big here, the idea is a giant medal!

Giant Medal (1)

Next, we piped designs onto our medals with puffy paint. Older kids can get very detailed with this – writing out 1st, 2nd, or 3rd, or the year, or making laurel leaf designs. Travis just adores squirting puffy paint, so I knew his would take forever to dry, and put together a few medals with a lighter hand on the puffy paint.

Giant Medal (2)

Set aside to dry.

Giant Medal (4)

Next our medals needed a metallic coat of paint. We only had silver and gold, but you can add a bronze or coppery-colored one if you have it!

Giant Medal (5)

Again, Travis was heavy-handed on the paint, but I loved watching his enjoyment of the project, and set aside a few more useable medals. We left them to dry overnight.

GIant Medal (6)

In the morning, we punched a hole into the top of each medal and threaded red ribbon through.

Giant Medal (8)

And the medal goes to…!

Giant Medal (9)

Felt Play Mat

Felt Mat (7)

Felt play mats are a great way to occupy the kids while you’re getting work done around the house or cooking dinner. Set out a large sheet of felt for each child, along with customizable mix-and-match pieces, and let the entertainment begin!

My original plan for this game was to set Travis up with a Medieval castle scene, but he wasn’t that interested. Instead, we recreated objects from his current favorite show, Fireman Sam.

Felt Mat (1)

I let Travis decide which pieces he wanted, and cut them from corresponding felt colors – red firetrucks, yellow houses, green trees (“and we need brown trunks!” Travis made sure to add), blue water etc.

Felt Mat (2)

Kids who are 5 and up should be able to cut out their own felt pieces, but Travis was excited just watching me to so!

Forgive my lack of artistic skills, but here was our mountain rescue center with a radio and “flares.”

Felt Mat (4)

Once we had enough pieces, the play began! We had a little orange “fire” that could be moved around the scene, and his firetruck rushed in to the rescue.

Felt Mat (3)

We decided we did need a few people, so added Playmobil figures.

Felt Mat (10)

As he played, I added further shapes like a castle, a pond with fish, and a few more nature elements.

Felt Mat (9)

Now he could mix and match games and create imaginative tales to his heart’s content!

Felt Mat (8)


Friendship Heart Necklace

Friendship Heart (13)

Here’s the final craft we’re putting together this Valentine’s Day, this time thinking of a few special friends. Even if it’s not Valentine’s, this is a great craft to ask your kids who their best friends are, and to talk about budding concepts of friendship and the emotions that go with it. Also, the idea of keeping half of something for yourself and giving the other half away was a bit novel for my preschooler, so I’m glad we did the activity!

First, we needed simply to have fun with clay! Travis has become quite adept at rolling clay between his hands to form a ball.

Friendship Heart (1).JPG

From here, I showed him how to flatten the balls into discs, and I asked him how we might cut out a heart shape. You can just use cookie cutters, but Travis is very into his chisel tool, so we chiseled. It helped if I made the outline of a heart for him to follow, first.

Friendship Heart (3)

Next, chisel each heart in a zig-zag down the middle, so you have two halves for each one.

Friendship Heart (7)

Punch a hole into each heart piece near the top with a chisel or straw, then let the clay air-dry overnight.

Friendship Heart (8)

The next day, we decorated. First, Travis applied a coat of watercolor. He decided the jagged halves looked a bit like teeth, ha!

Friendship Heart (10)

Then we painted on a layer of tacky glue so he could adhere beads and confetti pieces. Glitter would be pretty, too.

Friendship Heart (11)

We had the perfect beads with letters on them that could be used for friends’ initials, a great find in the craft bin!

Friendship Heart (12)

I cut strands of colored twine for necklace strings, and then our friendship hearts were ready to be shared with good buddies.

Friendship Heart (14)


Creative Crowns

Creative Crown (8)

In our ongoing quest for the best kingly crown, Travis and I found this method – simple as can be, and no glue required!

First, cut a piece of contact paper long enough to wrap around your child’s head, and twice as wide as you want the final product to be; tape down to a work surface and peel the paper backing off only half of the sticky paper.

Creative Crown (1)

I set Travis up with a variety of materials that he could adhere to the contact paper, using what we had in our craft bin: pipe cleaner pieces, yarn pieces, bits of construction paper and felt, and strips of decorative washi tape. Patterned fabric pieces and stickers would also be great for this craft!

Creative Crown (2)

He set about arranging the items on the sticky paper. Ideally, the pieces will point upwards like the points of a crown, but Travis preferred some of his sideways instead.

Creative Crown (4)

This was a great chance to talk about the difference between horizontal and vertical as he worked!

Creative Crown (5)

Once Travis declared his crown finished, I removed the remaining paper backing and folded the sticky paper over on itself; he loved helping seal in the decorations.

Creative Crown (6)

Simply use clear packing tape to fasten the crown into a circle, then let your child be king or queen for the day!

Creative Crown (9)