Borax Snowflakes

Borax Snowflake (1)

I’ve avoided Borax as a crafting tool until now because it can be a potential skin irritant, and of course hazardous is if ingested… but snowy days inspire snowy projects, and for this one we really needed the Borax. Luckily Travis was very responsible using it as an ingredient in our craft.

Borax Snowflake (2)

The goal was to make sparkly crystal snowflakes, but first we needed to do some mixing. Under careful supervision, have your child pour 1/3 cup Borax into a mason jar.

Borax Snowflake (4)

I added 3/4 cup boiling water, and then monitored carefully as Travis stirred to dissolve the Borax; make sure your child doesn’t touch the glass jar, as it will be hot at this point. Travis loved the slightly taboo nature of all this!

Borax Snowflake (5)

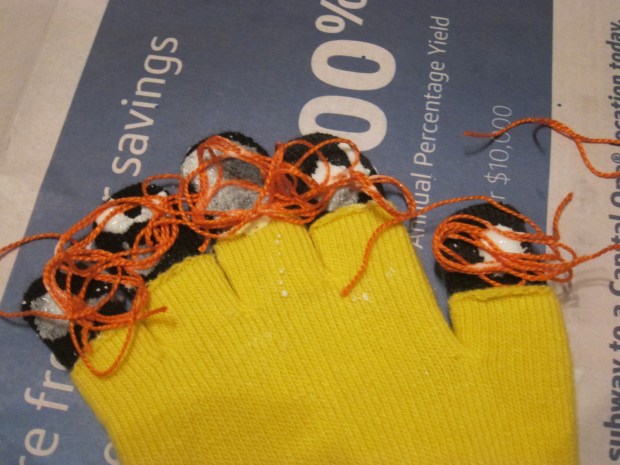
To make your “snowflakes”, bend pipe cleaners into a roughly snowflake-like design. Ours were really more like stars, with five points instead of six. Of course you could also make other shapes, including circles, squares, triangles, or just freeform.

Borax Snowflake (3)

Tie the pipe cleaner shapes onto jumbo craft sticks, and then dangle into the Borax solution. Now we needed to wait overnight!

Borax Snowflake (6)

In the morning, on yet another day of polar weather, we were rewarded with sparkling icy snowflakes.

Borax Snowflake (8)

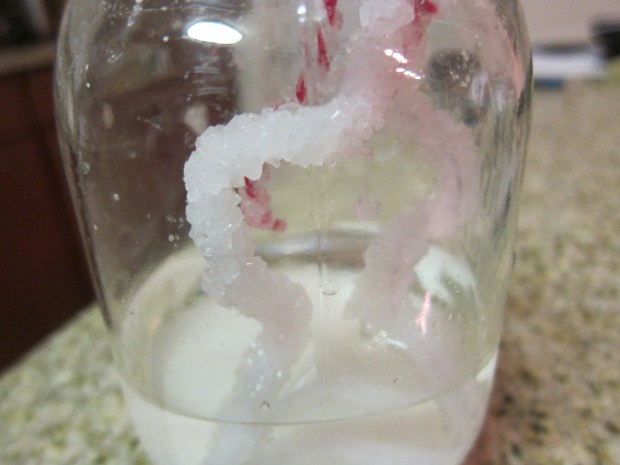
We’re going to set these aside to make them ornaments next Christmas!

Borax Snowflake (7)


Science… Meets Art

Science Meets Art (3)

This project (from our latest High Five issue) exemplifies the STEAM acronym: a little bit of scientific discovery paired with a nifty art creation at the end. You can do both components of the project, or just the science part, or just the art part… but I recommend the whole thing because we enjoyed it from start to finish!

First up, use some science (the S part of STEAM) to make at-home paints. Fill 6 large muffin cups with 1/4 cup baking soda each.

Science Meets Art (1)

Next, add about 15 drops of food coloring to each muffin cup. We only had powdered food coloring at home (from Color Kitchen), so sprinkled about a 1/2 packet of powder per compartment.

Science Meets Art (2)

Now you’re going to quickly pour vinegar into each muffin cup, and watch the colorful explosion!

Science Meets Art (4)

Of course this is similar to many baking soda and vinegar projects we’ve done in the past, talking about how the gas created when the two substances touch makes all that foam and bubbles. But this time, we were left with a new product… paint!

Science Meets Art (5)

Now it was time to use the paint for the A part of STEAM. We painted white coffee filters, and Travis had a blast, mixing colors and stirring each paint very carefully – a petit artiste!

Science Meets Art (7)

Set the filters aside to dry; these are going to be your flower blossoms.

Science Meets Art (8)

As a small gripe, you’re going to have undissolved baking soda left in each paint mixture, which leaves the coffee filters a bit grainy after they dry. I found it helpful to rub off the excess baking soda over the trash can before Travis and I moved on to the final steps of the project.

Meanwhile, make the flower stems by painting jumbo craft sticks green. The only green paint we had in the house was a dot marker, but this worked in a pinch. Let dry.

Science Meets Art (9)

To finish the flowers, wrap each painted filter around a medium-sized Styrofoam ball. Poke one of the green “stems” up through the filter and into the Styrofoam.

Science Meets Art (12)

Glue the tips of the filter together so the ball inside is no longer visible and voila – flowers!

Science Meets Art (11)

We set them in a vase, where we got to enjoy the fruits of our labor: beautiful flowers in the middle of a snowy winter.

Science Meets Art (13)

Thanks High Five!

Science Meets Art (6)

Pinecone Snow Owl

Pinecone Owl (8).JPG

These cute owls were the perfect craft to put together on a day with two-foot-high snow drifts outside our window!

Our inspiration came from the picture of this adorable little guy.

Pinecone Owl (1)

All we needed were pinecones and cotton balls to recreate him indoors, and luckily I had both on hand.

Tearing apart cotton balls always feels so fluffy and fun!

Pinecone Owl (3)

Travis helped push the cotton into the pinecone, until we had mostly filled it in with white.

Pinecone Owl (4)

As an alternative, we tried using a white feather boa for an even fluffier look, winding it in between pinecone sections.

Pinecone Owl (2)

These owls turned out so fluffy though that they looked more like snow gerbils!

Pinecone Owl (5)

To finish our owls, we added googly eyes and little beaks cut from brown felt.

Pinecone Owl (6)

They’re nice and warm inside and away from the snow!


Build a Scrapbook

Scrapbook (5)

If kids love books, then kids adore books about themselves. This cute scrapbook idea came from Ranger Rick Jr., and was the perfect indoor activity for a cold winter afternoon!

First we needed to take pictures, which was by far the most exciting part of the whole project for Travis. An instant camera is so great to have on hand for moments like this; we love the Instax instant mini camera.

Scrapbook (2)

Travis proudly helped load up the film, decide which items around the house needed to be captured on film, and of course pointing and shooting.

Scrapbook (1)

Once we had about 20 photos, we sorted them into categories, such as family members, daily activities, and favorite things.

Scrapbook (3)

How you arrange your scrapbook from here is up to you! We affixed pictures onto colorful construction paper (cut in half, an easier size for little hands to turn the pages). You could also decorate plain white paper with wrapping paper scraps, or marker and crayon designs.

Scrapbook (4)

I helped with the layout and writing on each page, and Travis added stickers.

Scrapbook (7)

To bind your scrapbook, punch out holes with a hole puncher and tie together with colored ribbon.

Scrapbook (8)

The best part was curling up for a nighttime read of the book. Travis was so proud pointing to the pictures he’d taken! Definitely a treasure that we’ll leaf through again and again.

Scrapbook (9)

What pages would you include in your child’s scrapbook? Please share in the comments!

Scrapbook (10)


Sponge-Print Wrapping Paper

Sponge Wrapping Paper (8).JPG

Enlist the kids help with gift wrapping this year… not just to wrap up the presents, but to make the wrapping paper first. Not only will they enjoy making this easy DIY gift wrap, but they’ll be so proud when they see gifts presented to loved ones in the paper that they made.

To start, cut sponges into shapes and glue onto old jar lids – the sponge should be cut until about the same size as or smaller than the lid. Simple shapes like triangles and squares are easiest, but get fancy if you’re handy with a paring knife!

Sponge Wrapping Paper (1)

I spread out a leftover roll of craft paper, and Travis immediately set to dipping his sponge stamps into paint…

Sponge Wrapping Paper (5)

…and dotting all over the paper. He liked making “patterns” as he worked.

Sponge Wrapping Paper (4)

Sometimes he spaced the stamps far apart, and sometimes he liked clustering them, so we ended up with a final product that was decidedly his creation.

Sponge Wrapping Paper (7)

We also had fun swirling together blue and white paint to make a light blue.

Sponge Wrapping Paper (9)

Once the paint is completely dry, it’s gift wrapping time!

Sponge Wrapping Paper (10)

What fun wrapping ideas have you used this holiday season? Please share in the comments!

Hand-Shaped Dish

Hand Bowl (7)

I’m a sucker for any craft that incorporates the size of a child’s hand. Last year, we made  a wreath featuring Travis’s handprints. This year we switched our art medium to clay. This little dish is perfect for holding holiday candies, and would also make a great gift for grandparents on your Christmas list!

To start, we gathered our materials: air-dry clay and balloons. Balloons and clay first thing in the morning? Travis was in heaven!

Hand Bowl (1)

Blow up one balloon to a size your child can comfortably hold in his or her hand; set aside.

Hand Bowl (2)

Trace your child’s hand onto a piece of paper and cut out; set aside.

Hand Bowl (3)

Now flatten your clay using a rolling pin until it is large enough to hold the handprint.

Use a clay slicing tool or plastic knife to cut around the handprint.

Hand Bowl (4)

Now here’s the slightly funny part: drape the hand over the balloon, and let sit somewhere kids can’t touch it or mess with it until dry.

Hand Bowl (5)

Once dry, remove the balloon and set your hand on the counter as a decorative dish.

Hand Bowl (6)

Don’t forget to inscribe with kids’ names and the year, so you’ll always remember!

Hand Bowl (8)

Symmetry Butterflies

Symmetry Butterfly (9).JPG

In a day with wind chills in the teens, we needed a little reminder that spring always comes after winter! Butterflies always seem to fit the bill, so I set up this butterfly craft in the morning for Travis.

It’s yet another great way to emphasize symmetry found in nature for little kids, a tiny science lesson thrown in with the art.

First, I traced a butterfly wing on paper that was folded in half, and cut out. Open up and you’ll have symmetrical wings.

Symmetry Butterfly (1)

I tried to persuade Travis to paint only on one side of the wings, which he did at first…

Symmetry Butterfly (3)

…but once he knew that was my request, he became impish and painted on both sides. (Don’t worry, the final design will still work; the result just won’t seem as “magical”).

Symmetry Butterfly (5)

Once your child has finished painting, fold the wings in half and rub firmly to make sure the paint transfers over.

Symmetry Butterfly (6)

Open up for a symmetrical surprise!

Symmetry Butterfly (7)

I painted one a bit more cleanly for him,  so he could learn from the example.

Symmetry Butterfly (4)

After the paint dried, we added butterfly bodies (cut from additional construction paper) and drew on faces. Travis has just begun drawing noses and mouths, so I loved watching him do this part.

Symmetry Butterfly (8)

Even if the butterflies look a little grumpy!

Symmetry Butterfly (10)

We were out of googly eyes, but sparkly stick-ons worked for eyes in a pinch. Hang your butterflies in the window, and enjoy watching them soar!

Starry Holiday Table Runner

Starry Table (7)

This project is a great way to get kids involved in holiday décor! The result is charmingly homespun and sure to delight relatives or other visitors at your holiday table.

To start, I prepped a star stencil. Ideally, you’ll want to use a real star stencil from a craft store. I printed a star template on paper and cut out the star shapes, which worked in a pinch; if you use this method, however, be sure to have several templates on hand, as each one can only take a coat or two of paint before tearing.

Starry Table (5)

Next we prepped our workspace, unrolling a large length of craft paper, and pouring white paint into a foil pie plate.

Starry Table (1)

Travis loved helping thin the paint with just a touch of water, for a creamy consistency.

Starry Table (2)

Next I showed him how to hold the stencil in one place on the paper, and paint over the exposed open star shapes. He loved the challenge, and although his paintbrush sometimes slopped over the edges, this only added to the charm of our final runner.

Starry Table (3)

Keep moving your stencil until you’ve covered the entire length needed with star shapes. He even pretended he was a professional painter as he worked!

Starry Table (4)

We left the paint to dry, and then I cut the craft paper to form a thinner rectangular runner, with a triangle snipped from each end for a banner-like effect.

Starry Table (6)

The runner is perfect under our advent calendar display while we wait for the day to actually celebrate with relatives, and then we’ll move it to the buffet table!

Starry Table (8)

Missing-Mitten Puppets

Mitten Puppets (7)

We loved this suggestion from our December issue of High Five magazine! What parent of small children doesn’t have an odd mitten or two lying around? Kids always seem to be losing just one of a pair. To prolong the fun, I also purchased a cheap three pack of gloves, so our imaginations could run wild with puppet making. Although mittens would have been ideal, gloves worked just as well for our new puppet friends.

First, we followed the two suggestions from High Five. An old yellow glove received orange thread as a mane, which Travis loved gluing to the fingertips.

Mitten Puppets (1)

We added googly eyes and felt pieces for the nose and mouth. Black thread was perfect for little whiskers.

Mitten Puppets (2)

Felt ears (in pink and blue), a blue felt nose, more googly eyes, and more black thread as whiskers turned an odd blue glove into a mouse. Squeak!

From there, I left Travis’s imagination take over. We had a very abstract elephant covered in orange thread and yellow felt, shown here in the foreground:

Mitten Puppets (9)

He next asked to make a porcupine, so I got out “quills” from brown felt and Travis added a pom pom nose.

Mitten Puppets (5)

Then he decided we needed a black cat, with pink felt ears and facial features. Travis insisted that the cat needed a sparkly pom pom, too.

Mitten Puppets (6)

Then of course it’s time for a puppet show!

Mitten Puppets (11)

What color mittens do you have on hand to turn into animals? Please share ideas in the comments!

Mitten Puppets (8)

Making a Rocket

Rocket (9).JPG

An extra mailing tube from the post office spurred this idea, and turned out to be a huge hit.

Rocket (1)

To turn a simple mailing tube into a rocket, the first thing you’ll need to do is paint it silver using a metallic acrylic paint. Travis has his own agenda more and more these days, a busy three-and-a-half year old. He normally isn’t so into painting, but when I told him we were using “big boy paint” (i.e. non-washable) like real astronauts, he leaped to the task!

Rocket (2)

Cut two fins for the rocket from cardboard and paint those as well. Let dry completely.

Rocket (4)

For the flames of the rocket, you can trim lengths of orange and red fabric into strips, hot glue the edge of the fabric onto plastic piping, and insert into the bottom of your rocket. Or you take a vast short-cut, cut strips of orange and red construction paper, and glue them in. Yup, we went the simple way!

As the final step, I hot glued the two cardboard fins to the body of the rocket, and then made the cap. Cut a piece of shiny craft paper into a circle, and cut out 1/4 of the circle. Fold into a cone, and hot glue onto the top of the rocket.

Rocket (5)

As soon as the glue was cool, it was Travis’s toy to zoom, and oh boy was he exited!

Rocket (7)

It was his suggestion that we launch the rocket off a launch pad, so we repurposed an old cardboard box as our launch site.

Rocket (8)

Definitely a big hit with this three-nager.