Indoor Skip-Count Hopscotch

Indoor Hopscotch (5)

This last-minute game for a slightly cloudy morning turned out to be a huge hit, though we somewhat adapted regular hopscotch rules. All you need to take the game inside is a roll of painters tape.

To start, I laid out the shape of a hopscotch board on our floor. Be sure to alternate single and double squares.

Indoor Hopscotch (1)

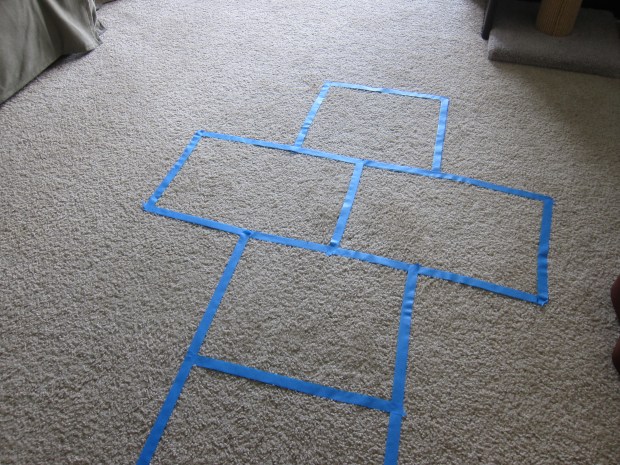
For the numbers, I overlapped several pieces of tape so marker didn’t get on the floor. Use permanent marker for the numbers so it doesn’t rub off on feet!

Indoor Hopscotch (3)

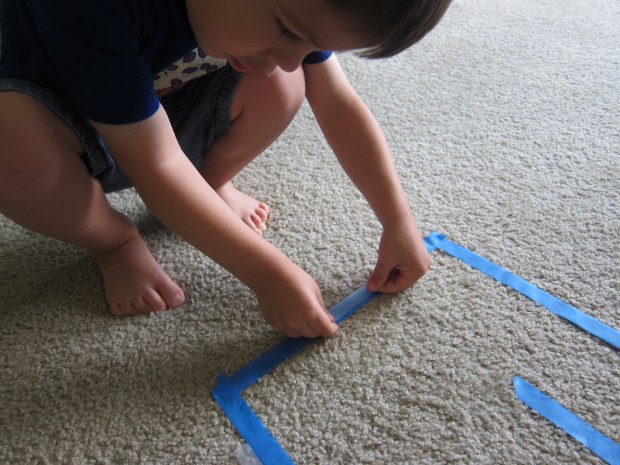
Travis wanted to help make the board, so some clear tape let him play along!

Indoor Hopscotch (2)

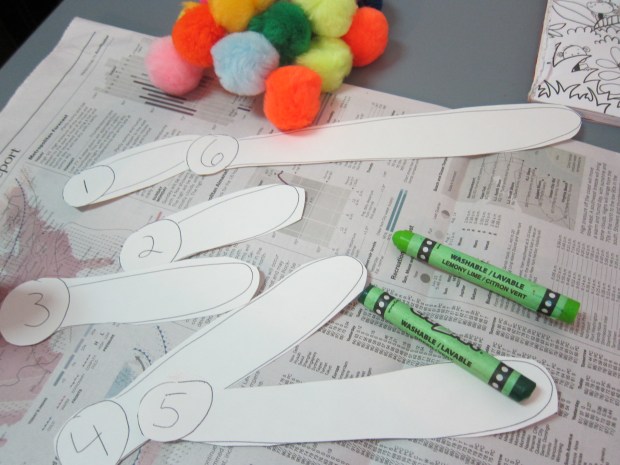
I numbered the board in even numbers only, for fun with counting by twos (skip-counting), but you can number yours traditionally if you prefer.

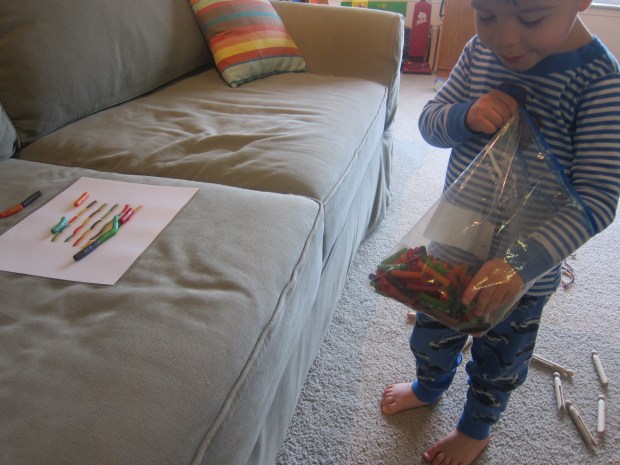
Once the board was set up, we pulled out the bean bags. I gently introduced the idea of hopscotch – tossing the bean bag and hopping to your number – but didn’t harp on the rules since Travis is a bit young for the game.

Indoor Hopscotch (4)

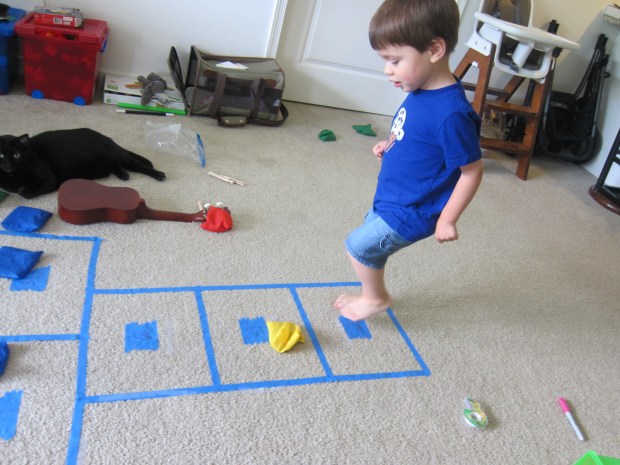
He loved counting his hops as he retrieved each bag. He often would toss several bean bags at once, and pick them up as he went along.

Hopscotch has the bonus of working his gross motor skills, since getting all the way off the ground in a hop is still a challenge. Bigger kids can practice alternating hopping on one foot with landing on both in the double squares, a nice challenge.

The board then became a vehicle for his imagination! He self-narrated for quite some time with bean bags and hopping while I was busy making lunch.

Counting Caterpillars

COunting Caterpillar (7)

Ever since our Number Crate arrived from Koala Crate, Travis can’t get enough of counting anything and everything – magnets on the fridge, berries in his bowl, chairs in a waiting room. These adorable fuzzy caterpillars let us have crafty fun with his interest!

While he napped, I cut out “caterpillars” from poster board, increasingly long in length. The caterpillars can then be numbered 1 through 10 (or even higher, although we only went up to 6, because we ran out of pom poms!).

Counting Caterpillar (1)

If you cut the caterpillars from green construction paper, even better! Luckily Travis didn’t mind coloring them in with the help of a fat green crayon.

COunting Caterpillar (2)

Then it was time to make our caterpillars fuzzy. I asked him to tell me the number on each one, and once he supplied the answer, he could proudly apply that many blobs of glue. This part of course was super fun.

COunting Caterpillar (5)

Each blob of glue got a pom pom, until we had correctly filled in all our caterpillars.

Counting Caterpillar (4)

Let them dry and then have fun playing with your furry little friends!

COunting Caterpillar (6)


Paper Plate Fraction Puzzles

Plate Fractions (6)

These homemade puzzles were easy as can be, and were a huge hit! Although preschoolers might not entirely latch onto the notion of fractions, it’s an easy way to introduce the concept while having fun. Bigger kids can cut their puzzles into increasingly intricate fractions, such as sevenths or eighths.

To start, all you need to do is decorate paper plates with markers. Travis was very intent adding brown dots and brown circles around the rims of the plates.

Plate Fractions (1)

I added a few decorative elements to each plate so that there would be a recognizable image to form into a puzzle for each.

Plate Fractions (2)

For a 3 year old, I cut plates into halves, thirds, or fourths.

Plate Fractions (4)

Travis puzzled over making the four pieces of this one into a full circle for quite some time!

Plate Fractions (8)

He loved our puzzle that was in thirds, and was so delighted every time he made each paper plate whole again.

Plate Fractions (5)

A great little morning diversion.

Plate Fractions (7)

Number Bead Stringing

Number Bead Stringing (5)

This project is great on so many levels! It keeps little hands busy if you’re doing chores around the house, works their number skills, and helps hone their fine motor skills.

The original post I saw for the game said to thread beads onto pipe cleaners, but I didn’t have any at home. Instead, we have several laces from a bead lacing kit, so I attached a piece of masking tape to the end of each and numbered them 1 through 10.

Number Bead Stringing (1)

The task was then to thread the correct number of beads onto each string.

Number Bead Stringing (2)

Travis loved counting along as he threaded, and said his creations were necklaces for mommy and daddy – how sweet!

Number Bead Stringing (6)

Don’t fret if your child doesn’t complete threads 1 through 10 in one sitting, this is the kind of game you can leave lying around for a little while.

Number Bead Stringing (4)


Numbered Photo Puzzles

Number Puzzle (5)

This craft turned out to be the perfect diversion when rain hampered our outdoor plans for a summer day – it takes several hours from start to finish, which suddenly made the afternoon indoors far less daunting!

First, we needed to select photos to become our puzzle pieces, making this a great activity to talk about relatives you haven’t seen in a while, or about your child’s favorite memories.

Make sure it’s a photo you don’t mind cutting up though! Adults: Cut the photo into pieces the width of the craft sticks you will be using. We made 8 piece puzzles, but you can go bigger or smaller.

Number Puzzle (2)

Next we applied a layer of Mod Podge to the craft sticks and adhered our photo pieces. Travis didn’t like how messy his fingers got pressing the slim pieces of photo on so precisely, so soon he was involved with his own (slightly) cleaner Mod Podge game while I finished up the photo gluing.

Number Puzzle (1)

And p.s. YES, Mod Podge is vegan! How have we never used this stuff before?

We had to let the project dry, and then we applied a second layer of Mod Podge on top of the photos to set them completely, which meant another round of waiting for it to dry.

But finally it was puzzle time! Adults: Number the sticks of each puzzle with a sharpie in order 1 through 8. (Or, you know, reverse your 1 and 2 by accident, like I did in the photo below).

NUmber Puzzle (4)

Your child will easily be able to form the image by following along in number order.

Number Puzzle (6)

Travis loved the way each puzzle came together, and was so proud lining up the numbers. A fantastic way to make counting into a game.

Number Puzzles alt.JPG

DIY Sponge Blocks

DIY sponge (1)

When it comes to homemade building blocks, these are as easy as they come! Just buy large sponges in bulk (aim to have about 8 to 12 total), and you’re ready for play.

I hadn’t even finished cutting the sponges into shapes (rectangles, squares, and triangles) before Travis noticed them piling up on the counter and demanded we start playing with them.

DIY sponge (2)

The building commenced right away.

DIY sponge (3)

Once the initial novelty of the shapes and texture wore off, it was time to be more imaginative. The sponges soon turned into food.

DIY sponge (4)

Which needed to be grilled of course.

DIY sponge (6)

To take a break from the imaginative play, encourage your toddler or preschooler to make letters with the sponges, or simple patterns by color or shape.

DIY sponge (5)

As the grand finale, we took the sponges outside. They were exceedingly fun to dip into a bucket of water and throw onto the ground.

DIY sponge (9)

We also tested out how much water the sponges could hold, by squeezing them over a cup.

DIY sponge (8)

And you thought sponges were dull as dish water!

Frozen Ice and Sand Comets

Frozen Comet (7)

If your child loves outer space, this game is sure to be a smashing success.

Travis and I talked about how comets are made of ice and dust, and decided to make our own. I froze ice cubes and then crushed the ice in the blender for a more easily workable texture – the crushed ice was a big hit!

Frozen Comet (1)

Then we sprinkled on sand, making a sandy dusty comet-y mix. Travis loved watching the two combine.

Frozen Comet (3)

Once we had a good mix, I packed some into a plastic cup, and we added a little bit of extra water.

Frozen Comet (5)

Place your comets in the freezer until solid.

Now comes the real fun part – take the comet outside and toss it on the ground so you can demonstrate what happens when one collides with a planet!

Frozen Comet (10)


Carnations + Food Color

OW science

Here’s a fantastic nature and science lesson… the science of which was new even to me as an adult!

Have you ever heard the term “transpiration”? It’s the process through which moisture is carried in a plant from the stem to the leaves and petals. Well, if you add color to that moisture, what happens to the petals?

All you need to find out are white carnations (or a similar white flower; we used what I think were daisies to start) and food coloring. It helps to have kid-safe (i.e. plastic) test tubes with a holder, so you can set up the project without unsafe glass vases. Travis helped place one white flower in each of four test tubes.

OW science (2)

We added food coloring to three of the tubes – be generous with the amount you use, about 10 to 12 drops! – and left the fourth one empty as a “control.”

OW science (3)

Imagine our surprise when a mere hour later, the color was starting to creep into our petals. Blue was the most immediate, for whatever reason, with a truly stunning effect.


OW science (6).JPG

Green and red were a bit slower, but by morning, we had gorgeously tinged flowers. I will have to keep this in mind for holidays like St. Patrick’s Day!

If you have enough food coloring, consider setting up a full rainbow from red through purple… Alas, we were missing a few colors, and I was also too nervous to leave the rainbow assortment on a window sill where cat or toddler could knock them over. But we did like the results so much that we purchased a second batch of white flowers (Are these ones carnations, anyone?) and added orange into the mix.

OW science (8)

We also had a more vibrant green the second time around. All in all, great fun!

OW science (9)

Pasta Bead Sequencing

Pasta Bead (4)

Here’s another fantastic activity for the Kool-Aid dyed pasta we made a few weeks back. We’ve already strung together bracelets with our pasta beads, but this time I used the pasta for a slightly more educational purpose.

Using the template available from Kiwi Crate, I printed out pictures of the pasta beads arranged by color, and then had them laminated. You can skip the lamination, but doing so means you can do this activity again and again!

Pasta Bead (5)

Encourage your child to line up the beads in the order that’s shown on the card. As an alternative, give him or her a pipe cleaner, to thread the pasta in order.

Pasta Bead (6)

Travis is a little young to accomplish a task like this from start to finish still, but he loved selecting a pasta piece from his bag and placing it on the correct color. We’ll work up to completing the whole sequence on pipe cleaners as he gets older!

Pasta Bead (3)

This activity would be perfect for on-the-go moments when you need to keep your kiddo occupied, like a restaurant or waiting room.

Pasta Bead (1)

Update: At closer to 3, Travis now loves doing this activity directly onto a pipe cleaner!

kool aid update.JPG

Marshmallow Sculptures

Marshmallow Sculpt (3)

Travis and I had some gooey fun attempting to make sculptures from marshmallows last November, but I confess our attempts were foiled by using large marshmallows and unsteady straws as construction materials.

This time we used toothpicks and the small marshmallows from Dandies, and were able to create much sturdier constructions! Note: I recommend playing this game soon after your child has had a meal or a snack – that way the marshmallows will be viewed more as building material, and less as a treat to eat… Although we did sneak a few bites along the way!

Already compared to November, Travis was much better at construction. He loved adding a marshmallow to either end of a toothpick, and loved that they looked like Q-tips!

Marshmallow Sculpt (2)

I then helped arrange these into more complex structures, whether two-dimensional shapes…

Marshmallow Sculpt (1)

Or three-dimensional creations.

Marshmallow Sculpt (6)

The project was a great way to discuss shapes and dimensions! We even tried a double-decker hexagon.

Marshmallow Sculpt (7)

In sum, sticky fun for everyone.

Marshmallow Sculpt (4)