Sprinkled Candy Bar Wrappers

Confetti Sprinkles Fathers Day (6)

The fun shredded paper “confetti” on these DIY candy bar wrappers makes them perfect to give as a gift! To wit, we made this craft today to gift on Father’s Day.

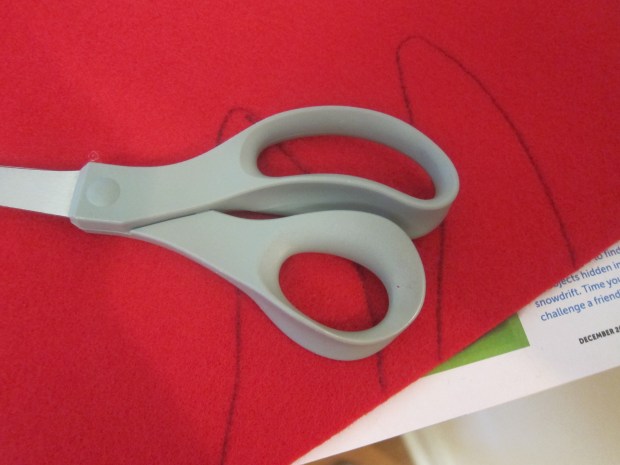
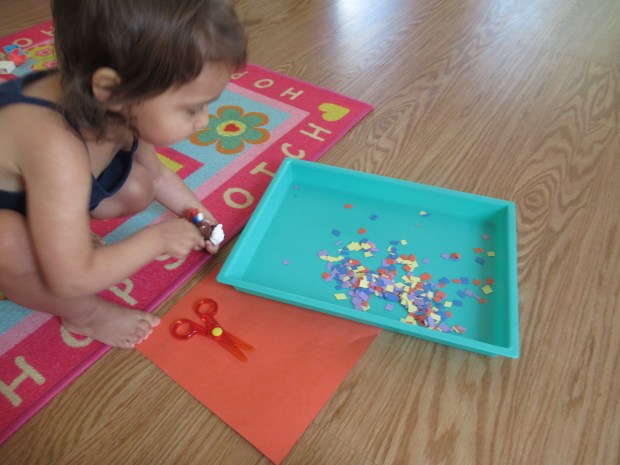
To start, you’ll need lots of tiny pieces of paper. This would be a great chance for preschoolers to work on their cutting skills, but for Veronika, it was about playing with the pieces after I cut them!

Confetti Sprinkles Fathers Day (2)

I then wrapped two chocolate bars in additional sheets of construction paper. We chose orange and blue, for the colors of daddy’s favorite sports team of course.

Confetti Sprinkles Fathers Day (3)

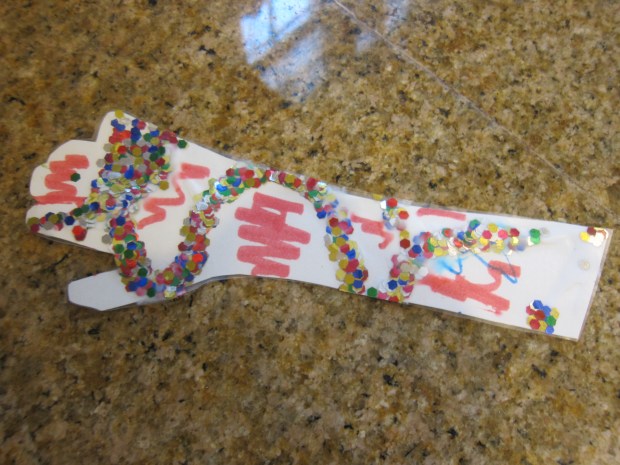
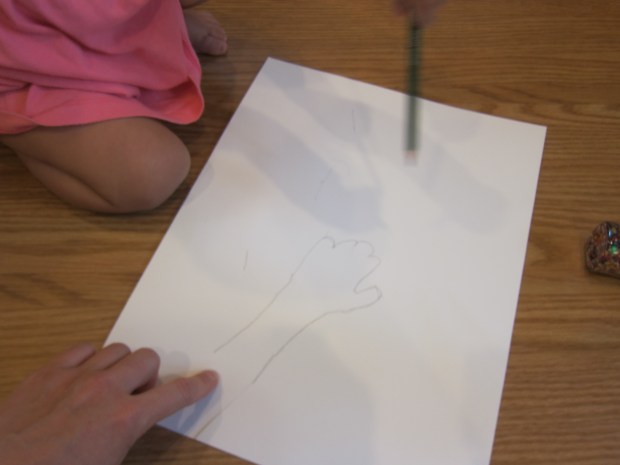
Next, a grown-up will need to make a design or word on the top of each wrapper. Ours featured a heart on one and the letters D-A-D on the other.

Confetti Sprinkles Fathers Day (5)

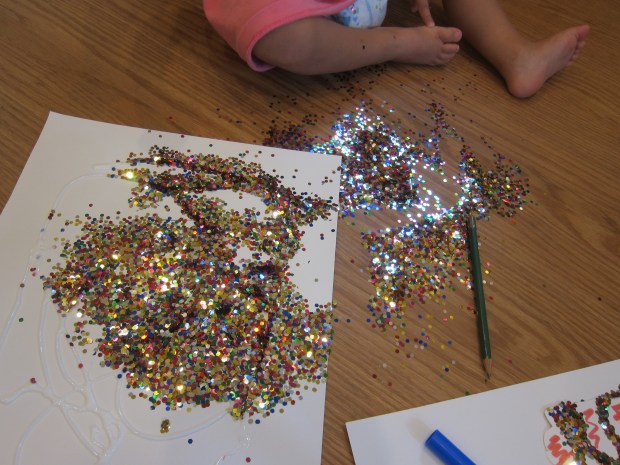
Then Veronika sprinkled our paper “confetti” down on the glue. Tap lightly over a trash can to remove any excess paper pieces and let dry complete.

Confetti Sprinkles Fathers Day (4)

The DAD version was a little harder to read than we’d hoped, but the heart was clear as could be, and needless to say daddy loved them!

Food-Coloring Painted Cards

FOod Color Painting (8)

This novel painting method makes a lovely piece of art. You can either mount the artwork on the wall for display, or use them like we did for Mother’s Day cards!

To start, I filled a few plastic cups with a little water, then added about 5 drops of food coloring to each, resulting in rich, bold colors.

Food Color Painting (1)

Set these “paints” out for your toddler, along with two novel “canvases” for painting: paper towels and coffee filters.

Food Color Painting (2)

The colors bleed through the tissue of these papers in such beautiful ways. Veronika loved mixing the colors, too, which meant our bright primary colors soon turned to new shades.

Food Color Painting (4)

We decided we liked the result on the paper towels better than on the coffee filters, so once the color had dried, I glued these onto construction paper backgrounds.

Food Color Painting(6)

Add a note for your recipient, and it’s ready to send. We’re wishing a happy Mother’s Day to all the moms out there!

Yarn-Wrapped Vase

This quick toddler-friendly craft makes a beautiful vase to keep around the house, or would also be a nice gift for Mother’s Day.

To start, you’ll need an empty plastic bottle. (Preschoolers or older kids could alternatively use a glass bottle). Because the bottle was already a bit sticky from where I had peeled off the label, our first strand of yarn adhered nicely. I added a piece of tape just for extra security, then showed Veronika how to begin twisting the yarn around the bottle.

We have a great skein of yarn that changes colors every few inches, so she was able to make a multi-colored vase with no effort at all! If you have single colors of yarn, simply snip off strands and knot them together every time you switch colors.

Veronika’s little toddler hands grew tired when the bottle was about this full…

…so I filled in the gaps with additional yarn. When the bottle is covered, simply tuck the final thread under another strand to hold it tight. I then made a second version on a small glass jar, which meant we could have a neat multi-height arrangement of flowers on our Mother’s Day table. All the vases need now is to be filled with special flowers to make any gift recipient smile.

Valentine’s Day Vase

Valentines Vase (5)

This cute Valentine’s Day gift idea from Hands on As We Grow is a great way to recycle leftover plastic bottles! We used non-dairy smoothie bottles, which were the perfect size and shape.

Clean and dry the bottles thoroughly, then set out a tray filled with Epsom salt. We added red food coloring (naturally!) for Valentine’s Day.

Valentines Vase (1)

Next, I showed Veronika how to smear white glue all over the bottle with a paint brush.

Valentines Vase (2)

Once the bottle is completely covered, simply roll in the salt. It will cling on, and it sparkles so beautifully! Veronika thought it was so pretty that we added blue food coloring and made a second bluish-purple version. Let dry completely.

Valentines Vase (3)

Meanwhile, Veronika was still busy playing with the Epsom salt mixture, stirring it around with a paint brush or dipping her brush into the cup of glue and back again. Just be sure to supervise play closely, as Epsom salt is not edible.

Valentines Vase (6)

When the vases are dry, fill with roses and set out for someone special!

Bookmark

Bookmark (4)

I love crafts that capture the size of my children’s hands or feet at regular intervals, a beautiful way to freeze time, given how fast they grow! I was due for a new craft like this with Veronika, and today I decided to make it a bookmark version!

It was admittedly hard to get Veronika to hold still while I traced her hand and forearm on a sheet of poster board. She giggled when the pencil tickled her, or just seemed surprised at the feeling, but I managed to get a fair approximation.

Bookmark (1)

Cut out the shape you’ve traced and let your toddler decorate. I thought Veronika might want to use markers, but she was far more into the glitter bottle I pulled out. Knowing she was likely to dump the whole bottle, I put down wiggly lines of glue on her hand shape and then placed it over a second sheet of poster board to catch the mess. Phew, this mostly contained the glitter dump!

Bookmark (3)

Once decorated, cover your child’s artwork with contact paper, and trim the contact paper to the same shape as the bookmark.

Bookmark (5)

Don’t forget to write the name and date on the back! This is going to make a beautiful memento when I read. I think we’ll even make one or two more to give to grandparents as gifts!

“We Love You Because…” Scavenger Hunt

We Love You Hunt (5)

This love-filled hunt was the perfect way to bring a smile to dad’s face this Father’s Day! You could also use this cute twist on a scavenger hunt for anyone’s birthday, or at Valentine’s Day.

I first traced hearts on construction paper using cookie cutters, making one large heart and 10 small ones. We used pink paper (for love of course) as well as orange because that’s daddy’s favorite color!

We Love You Hunt (1)

Travis helped me brainstorm a list of all the things we love about daddy. I loved leaving this up to him, ranging from the big (he’s daddy so we love him!) to the small (like references to games they play).

We Love You Hunt (2)

We then had fun secreting the pieces of paper all around the house in places that dad was sure to find them throughout his day, like on the coffee pot or near his desk.

We Love You Hunt (3)

Then it was time to surprise daddy with the large heart, which read, “We love you because…” And off he went to find the 10 reasons. The kids looked so proud leading the way on the hunt, and of course their dad loved it.

We Love You Hunt (6)

Who will you make a scavenger hunt for? Please share in the comments!

Cupid’s Coasters

Salt Coasters (5)

These salt dough coasters are a fun project and they make a pretty gift. In other words, a fantastic way for kids to say ‘I love you’ to any relatives or friends.

To start, Travis needed to make sure our dough ended up pink, which meant he counted out 8 drops of red food coloring into 3/4 cup water.

Salt Coasters (1)

In a bowl, combine 2 cups flour, 1 cup salt, and the red water; stir to form a dough, and then knead until smooth.

Salt Coasters (2)

I would use a touch less flour next time, as the dough was quite dry and a little crumbly.  Roll it out until a 1/4-inch thick and use a 4-inch circle cookie cutter to cut out shapes.

Salt Coasters (3)

I showed Travis how to drag a toothpick through the dough to make designs. It was a bit tough for him, but after some frustration, we had circles marker with hearts and arrows (to represent Cupid’s arrow).

Salt Coasters (4)

Bake at 250 degrees F for 2 hours. Let cool completely, then use at home or wrap up for a gift!

Peppermint Candy Box

Peppermint Candy Box (5).JPG

It was all about holiday gifts in our home over the weekend. When we spotted these decorated cookie tins in Travis’s Highlights magazine, we knew we’d found the perfect gift for his kindergarten teachers!

Wrap a store-bought cookie tin in white felt.

Peppermint Candy Box (1)

Use hot glue or tacky glue to adhere securely. We wrapped only the lids, since the bottom of our tins were already printed in holiday pictures, but you can wrap the whole box if desired. Cut out red pieces of felt to mimic the red swirls of a peppermint candy and glue these to the lid.

Peppermint Candy Box (2)

Fill the tin with your favorite holiday cookies or other treats, of course!

Peppermint Candy Box (3)

To finish the presentation, wrap in plastic wrap (or clear cellophane) and secure with green ribbon on each side so it looks like a peppermint candy waiting to be twisted open.

Peppermint Candy Box (4)

Fortune Cookie Gifts

Fortune Cookie (6).JPG

Travis and I hope to prepare several homemade Christmas gifts this year. This easy twist on fortune cookies is sure to bring a smile to the recipient’s face! It’s what Travis will be gifting to his bus driver this year as well as to a few special neighbors.

You can order fortune cookies online through Amazon, although many packages come in huge bulk quantities. I found one retailer with a more moderate quantity of 50, which was the perfect amount.

To decorate the cookies, heat 6 ounces unsweetened baking chocolate in the microwave at 30 second intervals, until melted.

Fortune Cookie (1)

Working with one cookie at a time, dip half of it in the melted chocolate, then roll in sprinkles for decoration. White ones made a beautiful contrast to the dark chocolate!

Fortune Cookie (4)

Transfer to a baking sheet lined with parchment paper and let stand until the chocolate is completely set.

Fortune Cookie (5)

Travis loved cracking open a few extra cookies to read fortunes as we worked!

To package these, I purchased Christmas-themed takeout containers at the craft store.

Fortune Cookie (7)

As an alternative, look for clear takeout containers and decorate with holiday stickers. Line each container with wax paper and nestle in about 7 to 8 fortune cookies.

Fortune Cookie (8)

Add gift tags as a finishing touch!

Hands of Love

Hands of Love (6)

With only a few days left before her first birthday, it was time for another set of hand prints with Veronika. I haven’t done this since she was nine months old and those little hands have grown.

Anyone who follow this blog knows that handprints with Veronika are a risky endeavor. I had plates of paint ready, along with a thick soft paintbrush, and wet wipes right next to me.

Hands of Love (1)

Gently brush paint over your baby’s palm. She seemed to like the soft sensation!

Hands of Love (2)

I pressed her hand firmly down on a small canvas tote bag. The idea was to make gifts for upcoming holidays! Other fabric like t-shirts or hand towels would be fun, too, if you use acrylic paint.

Hands of Love (3)

You can also just press the prints onto thick paper for pretty commemorative artwork. Add a border with marker, and don’t forget to add the date!

Hands of Love (7)

Now compare these prints to your older sets and marvel at how much your baby has grown.

Hands of Love alt.JPG