Edible Sno Cone Creation Station

Sno Cone Creation Station (10)

Here’s an activity that will a) cool the kids off; b) provide sensory play; c) fire up the imagination; and d) give them a yummy snack! I told the kids they were going to open up their own sno cone stand, and the excitement began.

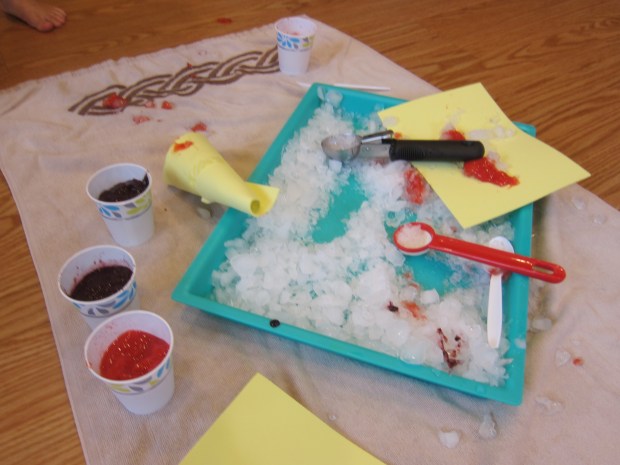
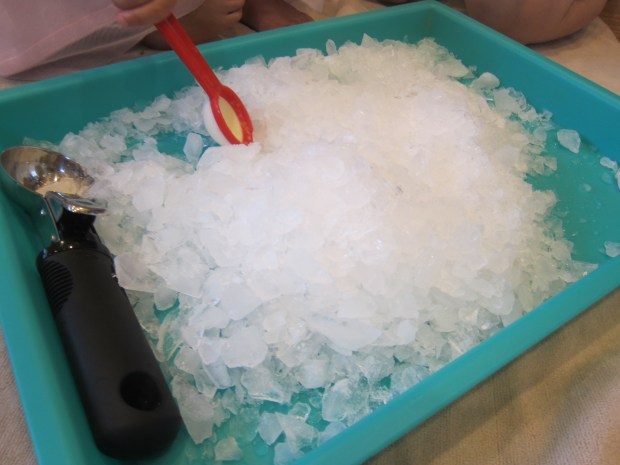
I set out a tray of crushed ice (an easy task thanks to our fridge filtration system, but a blender can do this for you, too), then added ice cream scoops.

Sno Cone Creation Station (1)

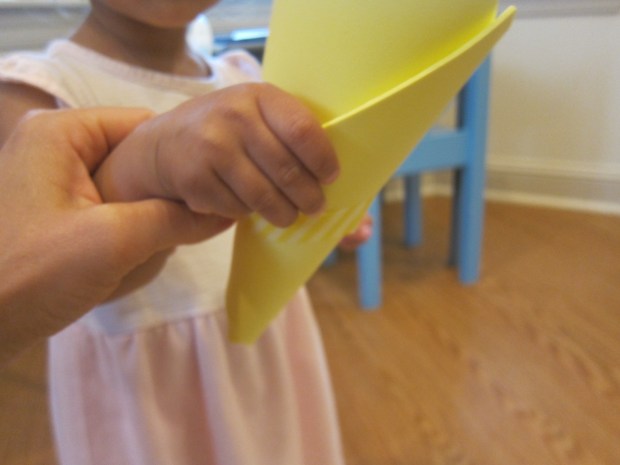
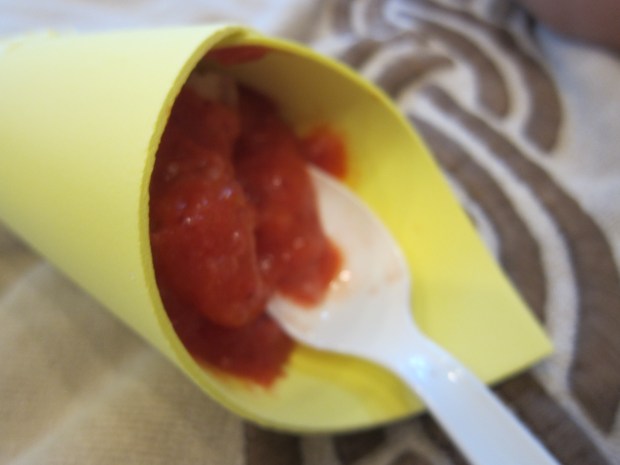
For “cones”, we folded conic shapes from craft foam. These turned out to be very easy to break, so next time I would probably stick to little plastic bowls.

Sno Cone Creation Station (3)

All they needed now were fruit syrups to flavor the ice! For these, I simply pureed fruits in the blender. We had pink from strawberries and deep purple from a mix of blueberries and blackberries.

Sno Cone Creation Station (9)

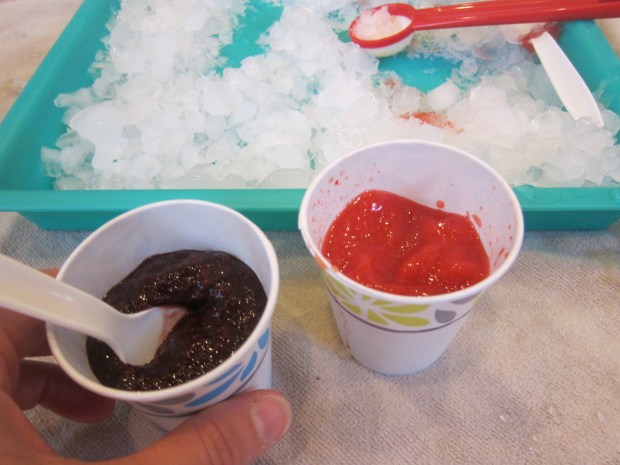
If you have condiment squirt bottles, those would be perfect to use here! I gave the kids paper cups filled with each syrup instead, along with plastic spoons.

Sno Cone Creation Station (5)

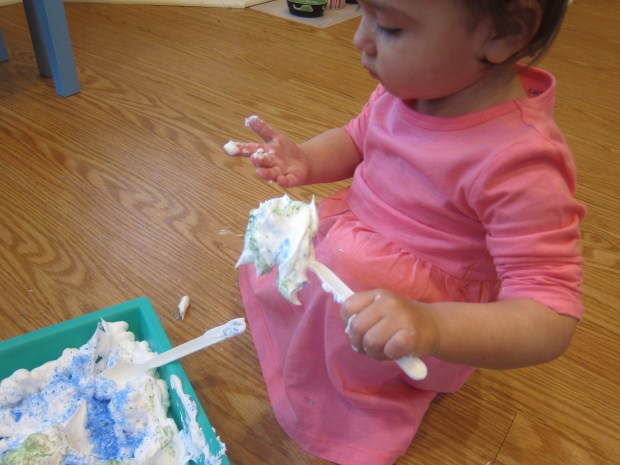
As with a recent nature soup activity, I loved that this game could engage both my toddler and 1st grader in different ways. For Veronika, it was all about the sensory aspects. First she just loved spooning through the ice.

Sno Cone Creation Station (2)

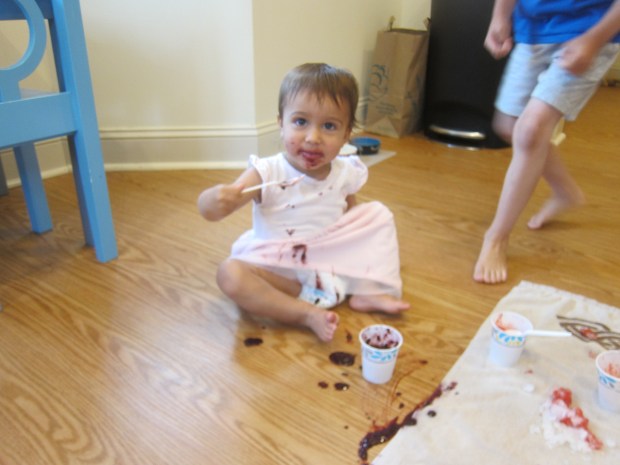
When she tasted plain ice, she copied big brother and said, “It’s yummy!” but I don’t think she really thought so.

Sno Cone Creation Station (7)

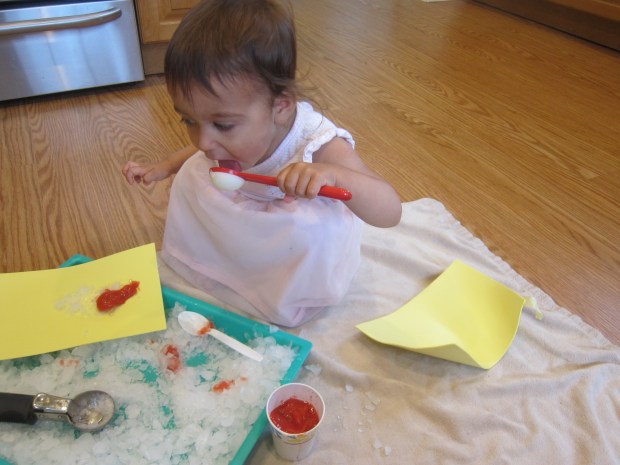
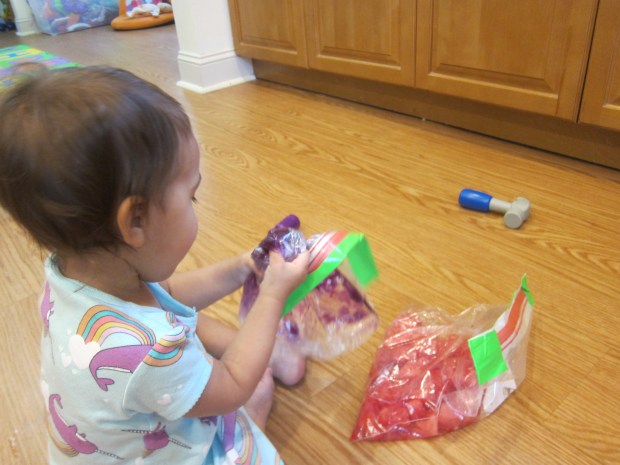
“It’s cold!” she added instead, looking confused. So we showed her how to spoon the berry syrup on top of her ice. Well now she couldn’t be stopped!

Sno Cone Creation Station (11)

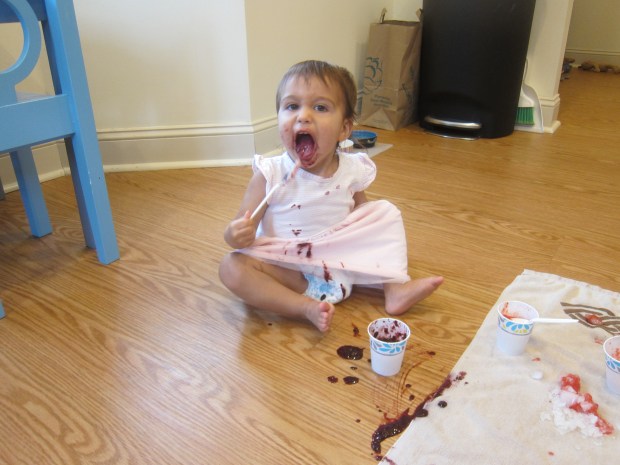
In retrospect I would have done this activity in just a diaper to avoid berry stains, but it was worth a few purple splotches. She was having such delicious fun I let it be.

Sno Cone Creation Station (12)

Travis, meanwhile, enjoyed the role-play aspect of the game. He loved using the ice cream scoop to properly fill a “cone,” and then asking me for my order, adding strawberry or purple berries on top accordingly.

Sno Cone Creation Station (8)

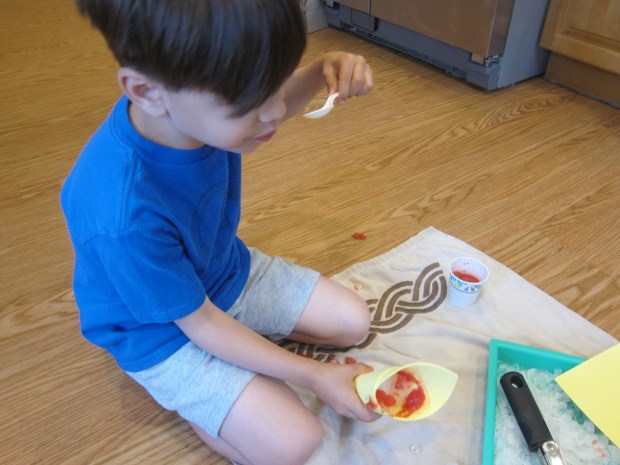
And of course he did lots of tasting, too!

Nature Sensory Bags and Suncatchers

Nature Sensory Bag (5)

I hadn’t made Veronika a sensory bag in a while, and she seemed due for some squishy fun.

Normally for a nature-themed activity like this, the first step would be a nature walk! But we needed to stay close to home this morning so ended up just walking around the neighborhood. The kids still found plenty of treasures!

Nature Sensory Bag (1)

“I found a baby pinecone,” Veronika told me proudly, as she added leaves and pinecones and other finds to the bag. I also made sure to add a few pretty flowers, knowing I’d want them for the suncatcher.

Nature Sensory Bag (3)

When we got home, I filled both a gallon-sized zip-top bag and a snack-sized zip-top bag with clear gel. (Either hair gel or aloe vera gel work well; use whichever you can find that is largest and cheapest!).

For the small bag, I added only the flower petals, spaced nicely apart. I then taped this to the window. An instant suncatcher!

Nature Sensory Bag (6)

Veronika poked at it curiously, but I think the sun hurt her eyes because she didn’t linger as she has with previous sunlit projects.

Nature Sensory Bag (4)

Then I added everything else into the goo of the larger zip-top bag. This version, a more classic sensory bag, received way more of Veronika’s attention. Through the gel, she could feel all the various textures.

Nature Sensory Bag (7)

Prickly pine needles, hard pinecones, soft flowers. She needed to show it to her doll, of course!

Nature Sensory Bag (9)

She loved picking it up and squishing it, especially around the firm pinecones.

Nature Sensory Bag (11)

I love to leave bags like this out where a toddler can return to them over the course of a day or two, interacting with it slightly differently each time.

Nature Sensory Bag (8)

For security, use hot glue along the zipper when you seal the bag shut, and you won’t have to worry about any unexpected messes disturbing the fun!

Nature Sensory Bag (10)

Nature Soup Sensory Activity

Nature Soup (10)

Here’s a beautiful activity that will engage the senses and fire up the imagination, making it accessible for multiple ages. I told the kids they were going to open a nature restaurant on the back patio and serve up nature soup. Let the excitement begin!

First we needed to gather “ingredients” from all around the yard. I armed the kids with zip-top bags to put in any treasures they found. Veronika loved little flowers and bits of grass, while big brother Travis preferred large finds like pine cones and bark.

Nature Soup (1)

We’re ready!

Nature Soup (2)

Back on the patio, I had filled a storage bin with a shallow layer of water and added plastic plates, bowls, and spoons. We dumped in all the nature treasures and it was time to cook!

Nature Soup (4)

For Veronika, this was mostly a beautiful sensory experience.

Nature Soup (3)

She loved feeling the cold water and the texture of all the nature items, as well as smelling the sweet pine scents of the pine cones and needles.

Nature Soup (9)

It was great practice for her pouring and scooping skills. She even was scooping up bits of bark with a spoon and transferring to a cup so steadily.

Nature Soup (11)

For Travis, it was much more about imaginative play. He loved making me new “drinks” to try and even provided me with a stick “straw” in each cup.

Nature Soup (5)

He was so proud of his culinary creations!

Nature Soup (7)

Meanwhile Veronika was busily splashing in the water, simultaneously keeping cool and learning.

Nature Soup (8)

I would highly recommend this activity on any warm day.

Nature Soup (12)

Watermelon Squish Bag, Two Ways

Watermelon Squish (7)

Summertime just begs for watermelon in all its forms, and today we decided to use watermelon as a theme not just to eat but to play!

I made two watermelon sensory bags for Veronika and although these didn’t turn out exactly as I hoped, she still had lots of fun.

The first was a true watermelon bag. Using leftover chunks from a big watermelon we sliced into for snack, I placed cubes of fruit in a zip-top bag. Seal with green duct tape to prevent your toddler from opening (and to look like a watermelon rind!). Then squish!

Watermelon Squish (1)

Veronika loved using this bag with her hands, crushing the soft cubes between her fingers. She also smashed at it with a toy hammer.

Watermelon Squish (2)

Then we made a pretend watermelon in a second zip-top bag. Fill the bag with clear hair gel and add a touch of red food coloring for a pink tint. Unfortunately my red turned out to look more purple, so next time I would color it with pink tempera paint.

Watermelon Squish (8)

As a result, the fact that we were trying to replicate a watermelon was lost on Veronika. Still, I added a few black seeds from the real watermelon, and she loved moving these around with her fingertips. Initially she thought they were bugs, but then she started saying “seeds!” as she squished at them.

Watermelon Squish (5)

Arguably, she liked this “failed” squishy bag better, holding it, squeezing it, and occasionally even draping it on her head.

Watermelon Squish (6)

So if the goal of a sensory bag is to keep a toddler busy, then this one was a winner.

Watermelon Squish (3)


Tea Scented Ice Sensory Play

Scented Ice Play (7)

We’ve been busy with ice lately during a heat wave, and today we added an olfactory element to the fun: ice cubes scented with tea! You’ll want strongly scented teas for the best results with this activity. Think flavors like cinnamon, maple, ginger, mint, or other bold scents.

Scented Ice Play (1)

The night before, I brewed strong cups of 3 tea varieties, using 3 or 4 tea bags for each mug of hot water. Let cool and then pour into the compartments of an ice cube tray.

Scented Ice Play (2)

Partly to add a visual sensory element to the game and partly just so I would remember which cube was which, I also color-coded the three different teas with food coloring. Yellow was for peppermint, red for cinnamon apple, and blue for maple ginger.

In the morning, it was HOT out on our patio and the ice was frozen solid, the perfect combination.

Scented Ice Play (3)

The ice cubes came out of the tray within moments. I held each different scent up to Veronika’s nose in turn. Look how happy the maple ginger made her!

Scented Ice Play (4)

She loved leaning in for a big whiff of each, asking for “more more” insistently since at first the cubes were too cold for her to touch and lift.

Scented Ice Play (5)

Then she wanted to take a lick! She loved the peppermint best.

Scented Ice Play (6)

As the ice melted, the yellow, blue, and red coloring began to trickle off. I couldn’t decide if I was glad I’d used color or not. The kids were more into the smells and tastes anyway, not the sensory look of the colors, and it just meant messier fingers. But oh well!

Scented Ice Play (8)

And then they discovered that the ice on the hot patio melted in a matter of seconds.

Scented Ice Play (9)

I guess this disproves the theory that watching ice melt is dull!

Scented Ice Play (11)

Both kids loved smelling the tea and swirling the cubes and tasting until the last drop of ice had melted.

Scented Ice Play (10)

A perfect sensory experience for a hot morning.

Sensory Bean Astronaut Box

Sensory Bean Astronaut (2)

In honor of SpaceX’s would-be historic launch today, I set up this easy astronaut-themed sensory bin for Veronika!

All I used were two different colors of dried beans, which I poured into a shallow tray. I originally had the box half filled with dark red beans and half with white, but they very quickly were mixed together.

Sensory Bean Astronaut (4)

Then I simply added a few astronaut toys, including aliens and a little space rover for Veronika to play around with. It was an instant hit!

Sensory Bean Astronaut (1)

She loved the sound that the rover made as it drove over these bumpy “moon rocks”.

Sensory Bean Astronaut (6)

Of course we could also collect samples of rock to take back to Earth.

Sensory Bean Astronaut (11)

She moved the little figures around in the beans, enjoying the way this made the beans scatter. I also showed her how to bury the alien underneath them, and she could then go digging.

Sensory Bean Astronaut (5)

A sensory box like this would work with just about any toy of course, whatever your toddler currently likes best! Or just add scoops instead of toys, for practice pouring. But the astronaut theme felt perfect in conjunction with today’s historic event, even when we later learned the launch was a no-go for bad weather.

Sensory Bean Astronaut (8)

Towards the end of her play, she discovered that if she raked her astronauts quickly through the beans, they scattered over the edge.

Sensory Bean Astronaut (9)

So then this happened.

Sensory Bean Astronaut (10)

Which is just fine because dried beans are one of the easiest sensory items to clean up ever! You can do this activity over a towel for even faster clean-up, but I find it just as easy to sweep all the beans into a dustpan. They sweep up with zero mess, unlike other materials I could name.

Sensory Bean Astronaut (7)

We are wishing the astronauts good luck on their voyage!

Ooey Gooey Noodle Worms

Ooey Gooey Noodle Worms (3)

I love activities that introduce new textures to a toddler, even if they might seem a little gross to us grown-ups. Veronika has no qualms about getting her hands dirty, so on today’s menu was mud worms!

I cooked up a batch of linguine for the “worms”, and then placed them on a shallow tray that we could take out to the patio. Now we just needed to bury them in “dirt” a.k.a. chocolate pudding.

Ooey Gooey Noodle Worms (9)

She gleefully began scooping through, using both fingers and a sand shovel

Ooey Gooey Noodle Worms (2)

In retrospect, I would have used a lot more pudding and a lot fewer “worms”, as this wasn’t really hunting or digging. We just had lots of worms crawling all over the tray! But of course the pretend play was a bit advanced for her anyway, and she loved scooping.

Ooey Gooey Noodle Worms (1)

We got our fingers in the mixture together and used words like “slimy” and “goopy” as we played.

Ooey Gooey Noodle Worms (4)

When the noodles landed on the patio, they did sort of look like little worms after a rainstorm.

Ooey Gooey Noodle Worms (5)

Then Veronika decided it was even more fun to scoop them up from the tray and toss them on top of other items on the patio.

Ooey Gooey Noodle Worms (7)

Admittedly that made clean-up a little tougher, but she was having so much fun I didn’t stop her! All in all this was good gooey fun.

Ooey Gooey Noodle Worms (8)

Rainbow Salt Tray

Rainbow Salt Tray (9)

Here’s a project I remember doing with Travis when he was a toddler, and the seeming “magic” of it never grows old. I told Veronika that today she was going to paint a rainbow!

To set up, line the bottom of a shallow tray with construction paper, arranging the pieces in rainbow order.

Rainbow Salt Tray (2)

Oddly, our pack of paper doesn’t include purple, so I quickly colored a white piece with purple marker to fix that! Tape down the pieces of paper so they overlap. It’s helpful to use clear tape along all the seams, so salt doesn’t slip in between the sheets in the next step.

Now just cover the paper with a layer of table salt!

Rainbow Salt Tray (3)

I showed Veronika the tray and handed her a paintbrush. “Paint?” she asked. She began swirling the paintbrush through and immediately saw blue.

Rainbow Salt Tray (4)

A huge smile appeared on her face. As she worked, she uncovered all the colors of the rainbow.

Rainbow Salt Tray (5)

Of course she got a little impish and enjoyed sweeping salt out of the box for a time, too.

Rainbow Salt Tray (8)

You can make this educational by drawing big letters or shapes in the salt. (Hint: it might make for good sightword practice if you’re homeschooling a kindergartner, too!).

Rainbow Salt Tray (7)

But mostly Veronika just had fun, seeing what color would magically rise to the surface next as she brushed through each portion of the tray.

Rainbow Salt Tray (6)

You’ll notice that the tray was great fun to sit in, even after we’d dumped the salt!

Rainbow Salt Tray (11)

Texture Touch

Texture Touch (13)

I have a neat set of fabric swatches for Veronika, featuring a pair of each item ranging from the nubby to the scratchy to the smooth. Today we played with the swatches in multiple ways, for games that involved both sensory play and learning.

Texture Touch (2)

First, I hot-glued one of each pair onto a baby food jar lid. Hot-glue a magnet onto the other side. Now, the swatches had become magnetic toys that Veronika can slide around on a baking sheet!

Texture Touch (6)

I set them out for her to explore at her own leisure, but then we took the time to go through the pile together, talking about each one. Rough and scratchy were definitely interesting.

Texture Touch (1)

Veronika also loved any that were soft and smooth. When she felt the fluffy ones, she said our cat’s name and started rubbing it all over herself!

Texture Touch (11)

There are then lots of ways to extend the play. I gave her the other half of the swatches (not glued to magnetic lids), and helped her find the match for each one.

Texture Touch (9)

Although the ability to find a match will probably be beyond your 18-month-old’s ability, there has to be a first time for introducing any concept! I made things easier by giving her a choice of only 2 or 3 swatches. “Which one is the pair?” I asked her.

Texture Touch (7)

Then we lined them up in order, going from softest to roughest.

Texture Touch (12)

She also loved transferring the magnets over from the baking tray to our fridge. After that, I left the little swatches in a bin which meant she could return to them throughout the day. I have a feeling we’ll get a lot more play out of these!

Texture Touch (8)

Shaving Cream and Colored Sand

Shaving Cream Colored Sand (6)

Is there much educational value to this sensory tray? No. But is it fantastic messy fun? Yes! And sometimes that’s all you need with a toddler.

I originally intended to use sand for the craft, but didn’t have any. In a pinch, I made colored salt! I first put coarse salt into small zip-top plastic bags and added a few drops of food coloring to each. Seal and knead to disperse the color. (Meanwhile, you can also use colored sand from a sand art kit or add your own food coloring to sand at home).

Shaving Cream Colored Sand (2)

Now squirt a generous layer of foamy shaving cream onto a shallow tray – the more the better! If you prefer, you could do this activity right on a craft table, but I liked containing it (somewhat!) on the tray.

Shaving Cream Colored Sand (3)

Sprinkle with the colored sand or salt. I added a few plastic spoons to facilitate things, but Veronika immediately had her hands in the mixture without any encouragement. She liked scooping it onto the floor in big dollops…

Shaving Cream Colored Sand (4)

…and also enjoyed testing how it felt with her fingers. The contrast of smooth creamy shaving cream and very coarse salt is of course the point here, and she seemed fascinated by this mix of textures.

Shaving Cream Colored Sand (5)

I thought she might just spoon through it, but soon her little toy figures were in the shaving cream. Once they were messy, she couldn’t quite decide if this was funny or if she was worried about them! I rinsed the toys off before she got upset.

Shaving Cream Colored Sand (8)

In retrospect, I would have done this project at bedtime, rather than early in the day. That way I could have stripped Veronika down to a diaper and plopped her into a bathtub right after. As it was, I felt bad cutting things short before the mess got out of control, once I realized she was walking around with shaving cream all over her hands, feet, and legs.

Shaving Cream Colored Sand (7)

But she still got in a good twenty minutes or so of fun.