Clothespin Puppets

Clothespin Puppets (2)

It’s that time of the month when we’re emptying out the craft bin before stocking up for the month ahead, and I love projects like this that use up all the bits and bobs! Since Travis learned about puppets this month, we made one last simple type: clothespin puppets!

We wanted to decorate the body of the clothespin, but didn’t want to wait for paint to dry. The perfect solution? Strips of decorative washi tape.

Clothespin Puppets (1)

Once the tape was in place, we could decorate them in any way. Most of them received wiggle eyes, and we also glued down feathers, beads, pom poms, and more.

Clothespin Puppets (3)

All the kids had to do was pinch the clothespins to make the “mouth” of each little creature talk.

Clothespin Puppets (5)

These cute puppets are sure to make their way into all sorts of imaginative games.

Clothespin Puppets (4)

Tabletop Christmas Tree

Tabletop Christmas Tree (9)

This easy toddler project makes the perfect centerpiece for a holiday table! The little tree is just the right size if you find your family gathering is smaller this year due to COVID-19.

To start, I printed out a Christmas tree template from Hands on As We Grow. Trace the tree shape onto two pieces of cardboard, then cut out from the cardboard. I wasn’t in the mood to wrestle with thick cardboard so used an old cereal box instead. In retrospect, it might have been worth using the thicker kind, since thin cardboard wasn’t entirely sturdy standing up. It also meant we had to paint over the printing on the cereal box.

Tabletop Christmas Tree (2)

Luckily, green paint hid most of the cereal box writing! Veronika helped apply two thick coats of sparkly green paint to both sides of the tree shapes and we set them aside to dry.

Tabletop Christmas Tree (4)

Next, cut slits in the two trees so they can slot together. That means you’ll need to make a slit in the center top of one tree and in the center bottom of the other. Slot together until they sit flush against a tabletop.

Tabletop Christmas Tree (3)

Time to decorate! Veronika helped add lots of white glue, and then we stuck on red and green pom poms and beads.

Tabletop Christmas Tree (7)

Any other holiday items from your craft bin would work great here, too, like holiday stickers or ribbon.

Tabletop Christmas Tree (8)

We think this makes the perfect little Christmas tree.

Tabletop Christmas Tree (10)

Threading Pipe Cleaners for Christmas

Threading Christmas Pipe Cleaners (3)

I had intended this project as a fine motor activity with a holiday twist for Veronika, but big brother Travis immediately wanted in on the action, too, so it makes a great project for the whole family on a winter afternoon.

First up, I filled a tray with the following: sparkly red, silver, and green chenille stems; red and green beads; and an assortment of colored jingle bells.

Threading Christmas Pipe Cleaners (6)

I showed Veronika how to thread a bead onto one of the pipe cleaners.

Threading Christmas Pipe Cleaners (8)

She took a few tries, but then was much more interested in the jingle bells. She actually was quite skilled at inserting a pipe cleaner into the narrow loop on each bell!

Threading Christmas Pipe Cleaners (9)

I helped a little and she produced this little bracelet.

Threading Christmas Pipe Cleaners (12)

Travis jumped in on the action and wanted to make holiday gifts for friends, a unexpected bonus of the activity.

Threading Christmas Pipe Cleaners (2)

I was so proud that he even made patterns, counting out the same number and color of beads on each side of his jingle bells.

Threading Christmas Pipe Cleaners (4)

Meanwhile, Veronika was honing those fine motor skills or just busy digging through the materials as if this were a sensory tray. Between the sparkly chenille stems and the jingling bells, there was lots to love!

Threading Christmas Pipe Cleaners (11)

Straws and Yarn

Straws and Yarn (8).JPG

This project is fantastic for keeping motor skills sharp in the summer break between preschool and kindergarten… and the final product easily becomes a gift for someone special, whether a graduation or a birthday!

Tie a piece of yarn to a drinking straw with a tight knot; set aside. Help your child snip straws into pieces of varying size. We used wide pastel-colored milkshake straws, and discovered that the smaller we snipped them, the more they were ilke “beads” for our necklace.

Straws and Yarn (1)

The straws could be a bit tough to snip, and Travis loved when pieces went flying!

Straws and Yarn (2)

Have your child begin threading them on to the yarn.

Straws and Yarn (5)

Travis tried a few tactics, including pushing a straw “bead” onto the yarn, or pulling the yarn up through.

Straws and Yarn (3)

I loved his patience and concentration as he worked!

Straws and Yarn (4)

Once long enough for a necklace, tie the two ends of the yarn into a secure knot.

Straws and Yarn (6)

Travis enjoyed the project so much that he insisted we make two; he didn’t want either grandmother to feel left out, so we’ll be gifting two of these!

Straws and Yarn (7)

Coral Reef Diorama

Coral Reef (12).JPG

Today, Travis and I did an activity in conjunction with our Taste of Thai recipes to help him learn about the coral reefs of Thailand.

There was a lot in this lesson that was new for Travis, including guided imagery, but first I had to set the stage! I asked him if he knew what a scuba diver was and he correctly answered someone who dives underwater (thanks Fireman Sam!).

Coral Reef (1)

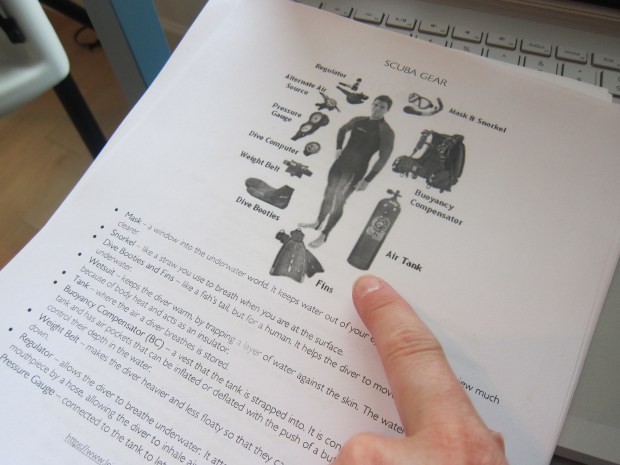
I showed him an included picture with scuba gear and then we mimed climbing in to all this equipment. Shimmy shimmy into your wet suit! This part was silly and fun.

Coral Reef (2)

Next up was our imaginary trip: a guided imagery about scuba diving in a coral reef. I knew this would be a bit of a challenge for my four-year-old, so instead of asking him to sit quietly with eyes closed, I had him paint a box blue for our upcoming diorama while I read the scenario. This allowed his hands to keep busy as he listened, and he liked the process!

Coral Reef (3)

For a simple, little-kid diorama, we made a version using play dough blobs as the base onto which we could add shells, fish stickers, and fake coral.

Coral Reef (5)

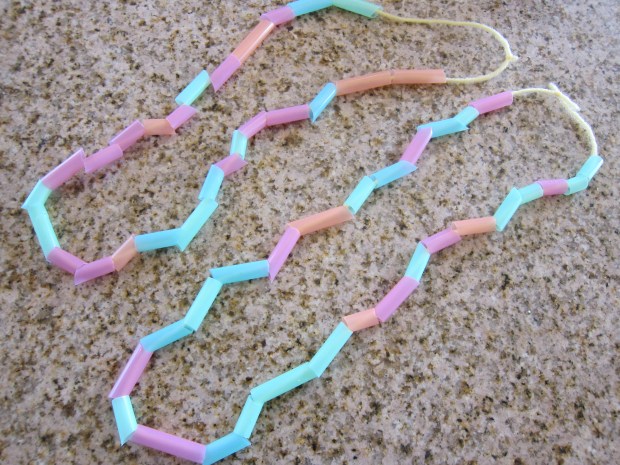
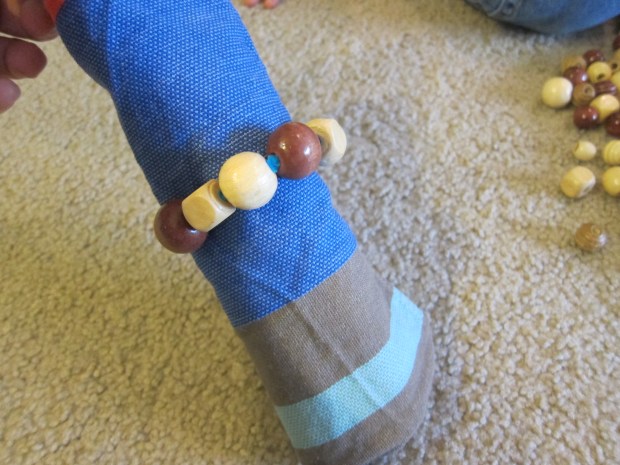
To make the coral, thread beads onto pipe cleaners – great for fine motor skills!

Coral Reef (6)

While we worked, I played Raddish’s suggested video in the background so he could see real examples.

Travis’s favorite part was using play dough to make the body for snails and hermit crabs who could live in our shells from the craft store!

Coral Reef (8)

He was so proud when he thought one of his shell creations looked like a narwhal.

Coral Reef (10)

Meanwhile, I made a few more tropical examples for him to see.

Coral Reef (7)

Bigger kids can delve a lot further into this homeschool lesson. Raddish also provided a list of discussion questions about the coral reef and links to further reading about what they are and how to protect them.

Coral Reef (9)

But for my preschooler, this simplified lesson was good fun!

Coral Reef (11)

Spin Drum

Spin Drum (8).JPG

This great little craft will have little musicians marching and drumming all over your house. Perfect for a rainy day!

For the body of the drum, we used small papier-mache boxes that I purchased off Amazon, about 4 inches across. Remove the lid, and punch three holes in the box, at 3 o’clock, 6 o’clock, and 9 o’clock.

Spin Drum (1)

This step might be tough for little fingers, so add your own muscle power to the hole puncher. We even enlisted daddy’s help after my hand got tired!

Place a dowel in the bottom hole, then string twine through the side holes, looping it around the dowel in the center as you go.

Spin Drum (2)

Glue the dowel in place – I definitely recommend hot glue for this step.

While the glue briefly dried, Travis was in charge of decorating the lid with markers. He said his design was a mandolin! (Kids can decorate the side of the box, too).

Spin Drum (3)

We hot glued on the decorated lid, and then tied wooden beads to the dangling ends of string, securing them with a double knot.

Spin Drum (5)

Make sure your beads and strings are the right length to hit near the center of the box lid, before you tie off the knot. Our first try was too short, but a second drum was just right.

Spin Drum (4)

Now spin and play!

Spin Drum (6)

My impish boy soon decided his drum worked not only as an instrument but as a “spear”, too, which made for lots of imaginative play. Either way, I loved seeing him have fun!

Wooden Napkin Rings

Wooden Napkin (3)

We recently switched Travis from his highchair to a big boy table. It seemed like the perfect occasion to make him his own napkin ring as well!

For this simple craft, all you need are wooden beads and pipe cleaners. Threading the beads on is great practice for little fingers.

Wooden Napkin (2)

As we worked, Travis and I discussed the different beads – some dark wood, some lighter, and in different shapes like squares and circles.

He lost interest after a while and the beads themselves became fodder for a game. Meanwhile, I finished the napkin rings by looping any remaining pipe cleaner back over itself to seal.

Wooden Napkin (4)

Slip in a napkin and you’re done! These would be a lovely project for kids around the holidays, too.

Wooden Napkin (6)