Glue Dots and Buttons

Glue Dots and Buttons (6)

Veronika seems to enjoy art projects best when I squeeze out the dots of glue ahead of time and then she gets to press down materials on each little white blob. So today, with no other agenda or other final product in mind, that’s exactly what she got to do!

To set up, I used a piece of black construction paper as the background so that the white dots would show up clearly, and simply dotted all over it with glue. I set out a plate of buttons, pom poms, and dried beans for her. Anything else easy to glue down would be great in the mix, too.

Glue Dots and Buttons (1)

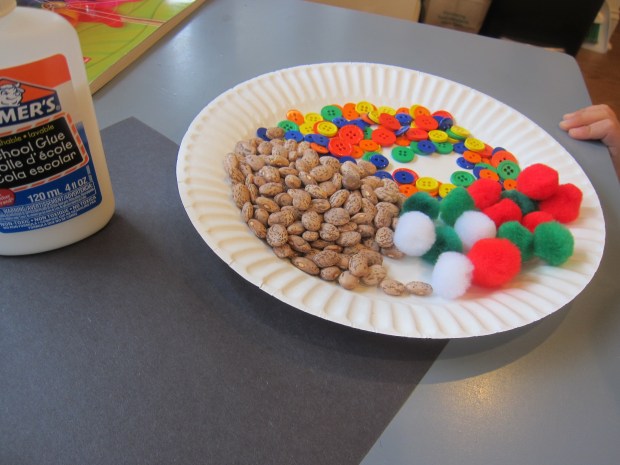
Veronika immediately began adding buttons, and wanted to name the color of each as she pressed down.

Glue Dots and Buttons (3)

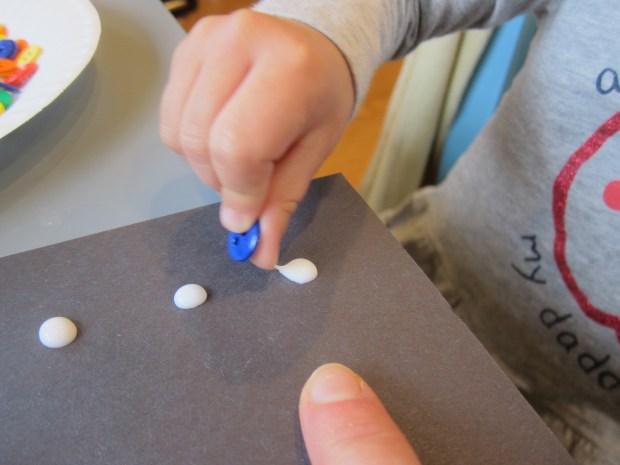
For fun, I made some of the glue dots in a representation of other things, like a smiley face. She was delighted as soon as she saw what we’d made.

Glue Dots and Buttons (4)

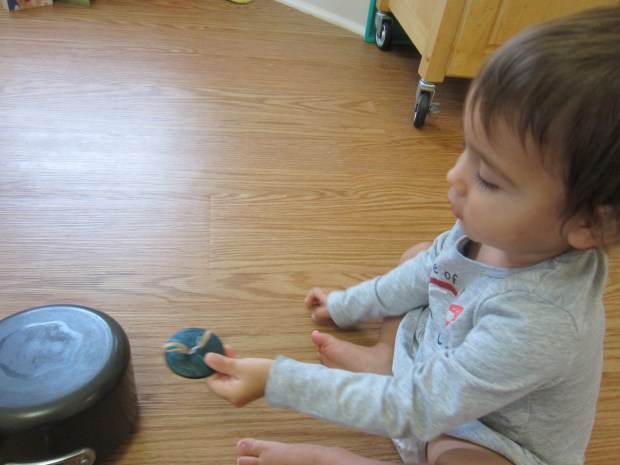
She didn’t want to add any of the pom poms, but enjoyed pressing down the dried beans, too.

Glue Dots and Buttons (5)

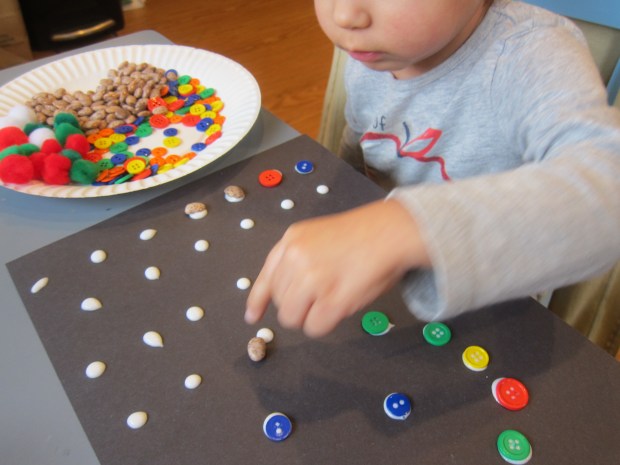
This was a simple activity for fine motor skills, and would work well as a busy activity for preschoolers who can even make the glue dots by themselves.

Glue Dots and Buttons (2)

Button Tap

Button Tap (5)

Mix up your toddler’s musical play with this silly D.I.Y. instrument. The buttons can be drumsticks, cymbals, or anything else your toddler imagines as you jam to favorite tunes.

To assemble, I used large two-hole buttons from the craft store and simply threaded one end of an elastic through each hole.

Button Tap (1)

Now, the two loops of the elastic stick out from the back. Slip these loops over fingers, then turn pots and pans upside-down for some classic drumming.

Button Tap (2)

Veronika didn’t actually like wearing the loops on her fingers, but she sure loved clanging the buttons against the pans.

Button Tap (3)

She also liked putting the buttons in the pan, covering with the lid, and then shaking it to make noise.

Button Tap (6)

For a slightly different version of buttons-on-pans, I hot-glued smaller buttons to the fingertips of an old garden glove.

Button Tap (7)

Now she could slip this on and tap tap tap her fingers against the metal.

Button Tap (9)

Consider this homemade instrument the next time you have a toddler sing-along over Zoom!

Button B

Button b (6)

Today’s summer letter of the day was B! After tracing, I helped Travis draw two very careful Bs using white crayon on black paper (a fun chance to use white, sadly always the most underutilized crayon in the box).

Button b (2)

Travis made dots of glue on each B, and filled the upper case with buttons

Button b (3)

…and the lower case with breakfast cereal.

Button b (5)

He was so careful applying each piece along the lines; I sat back and marveled at how his fine motor skills (and patience!) have changed over the course of pre-k.

Button b (4)

Even better, he enjoyed the button art so much that he asked for a second piece of paper and a glue stick to continue the fun once our Bs were complete – what could be better than that? If you don’t have buttons, beads would also work great for this project.

Button b (7)

Button Toss

Button Toss (6).JPG

This fun game (another winner from Highlights magazine) involves crafting on the front end and then becomes a sport with some math involved by the end!

To put it together, you’ll need 3 boxes, ideally of different sizes and heights. Paint each box a different color, for the best contrast.

Button Toss (1)

We also squirted on some puffy paint because, puffy paint.

Button Toss (2)

Note: If you don’t have paint, you can wrap them with wrapping paper instead. Glue the boxes together in any configuration and let dry.

Button Toss (3)

To play, I cut out paper circles and marked each with a different score for each box. The easiest was worth a 1, the second was a 2, and the hard one was a 5. (Note: Big kids can skip count by 5s, labeling the boxes 5, 10, and 15).

Button Toss (5)

In an empty egg carton, add paper circles numbered 1 through 12 (or 5 through 60, if skip-counting).

Button Toss (4)

Each player now needs 2 buttons – one to toss and one as a score piece.

Travis took his first toss – a lucky 5!

Button Toss (8)

I helped him count his button five spaces forward through our scoreboard.

Button Toss (7)

He loved the challenge of the game, and the challenge of counting his score each time.

Button Toss (12)

The first person to 12 (or 60) wins!

Button Toss (11)


Clay Charms

Clay Charms (10).JPG

With a big batch of clay in the house, we decided to shape some into charm necklaces – they’ll make the perfect gift for the upcoming September birthdays of several relatives!

You can shape your charms in one of two ways. First we tried a butter knife to cut out simple squares or rectangles. This was definitely Travis’s preferred method.

Clay Charms (2)

Alternatively, you can use cookie cutters to fashion your charms into circles.

Clay Charms (3)

We found a bunch of old buttons in our craft box, which made perfect imprints into the clay, like flowers or hearts.

Clay Charms (5)

Once you’re happy with your designs, let the clay set. If you have oven-dry clay, bake according to package instructions. Ours was air-dry clay, so we left it out overnight. While the clay is still soft, poke a hole through each with a toothpick or wooden skewer so you can string it onto a thread later on.

The next day it was time to paint! Watercolor works very well on clay, but you could also use acrylic paint.

Clay Charms (6)

After a swipe or two with a paintbrush, Travis decided it would be much more fun to do watercolors by hand. I laughed and decided why not! The results were surprisingly beautiful.

Clay Charms (7)

Let the charms dry again, then thread twine through the hole in each charm. Voila! A charm necklace.

Clay Charms (9)

Button Tree

Button Tree (9)

We haven’t let the icy weather deter us from outdoors adventures, including collecting treasures like sticks and winter leaves. But that doesn’t mean we’re not excited to see blossoms on the trees! This adorable button tree is a nice harbinger of spring.

The first step of course is to collect your sticks – head some place beautiful in the summer sunshine for this part!

100 happy (72)

Once home, Travis loved sorting through our collection. I quickly realized that he would be way more in to playing with the sticks than shaping them into a tree on poster board…

Button Tree (1)

…so after he had fun for a while, I took care of gluing our sticks in place.

Button Tree (3)

Once the glue dried, it was time to add the buttons! Travis was very proud to add big drops of glue and press a button “leaf” into place over each one.

Button Tree (6)

We had fun choosing which color buttons to place where.

Button Tree (5)

The final creation was so whimsical!