Puffin Costume

Puffin (10)

Our October issue of Ranger Rick Jr. featured a cover story on puffins, with information inside about these bright-beaked birds. If your child is still looking for a Halloween costume, consider putting together this DIY puffin outfit. It’s perfect for trick-or-treating… or just everyday dress up!

Because we were making the costume simply for play at home, I skirted a few corners. But you can be more exact if this will actually be the Halloween garb of choice for your child.

First, make the puffin’s head. Fold a 20 inch x 12 inch piece of white felt in half. Draw the head shape (available from the online template) onto one side of the fold and cut out.

Puffin (1)

Add two “head top” shapes cut from black felt with fabric glue or a hot glue gun. Next cut the beak shape from orange construction paper and glue on as well. Let dry.

Puffin (2)

We added details like eyes and feathers with a marker. Here is my very serious puffin testing out the headpiece.

Puffin (7)

The piece of black felt I had at home was big, but not quite large enough for the suggested wings – a full 34 inch x 18 inch rectangle! So working with what I had, I traced on the wing shape from the template in chalk, and cut out. I added a ribbon to tie around Travis’s shoulders; if you are using truly large enough felt, part of the felt itself will become the tie.

Puffin (5)

Finally, we needed puffin feet. Trace the foot shape onto orange craft foam and cut out; add details with marker.

Puffin (6)

Poke a pipe cleaner (ideally orange) through the middle of each foot shape, and wrap around the thong of a flip flop. If you’re going all out for Halloween, make sure your pipe cleaners and flip flops are orange too! Yellow pipe cleaners and some old summer flip flops worked for us in a pinch.

Puffin (9)

Finish a true puffin costume with a white shirt and white pants.

My little bird was happy just to fly around the apartment.

Puffin (8)

What a cute idea this was!

Fall Bucket List Part II

Fall Bucket (57)

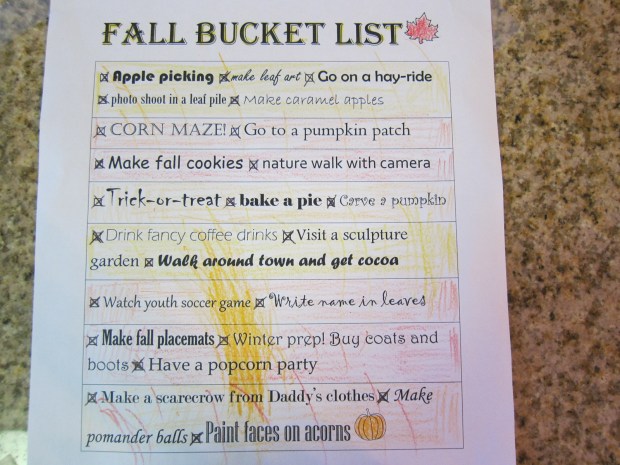
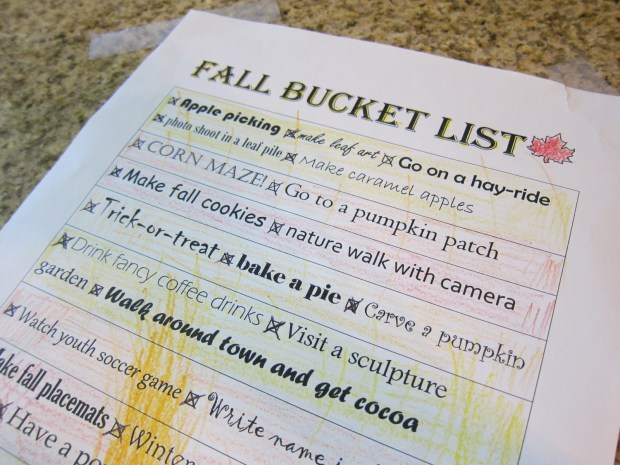
Back in September, Travis and I set the goal of a Fall Bucket List of items to enjoy in the 90 days between the first of autumn and the first of winter. Below is our journey through all 23 items. If you followed along with your own bucket list, I’d love to hear about it in the comments!

9/29 – Visit a Sculpture Garden

Fall Bucket (1)

We made this our first stop, exploring the grounds of a local museum that houses a wonderful sculpture scavenger hunt for children. Travis was delighted he could finish rhymes like that/hat and known/stone to find each sculpture along the way. We explored materials, emotions, shapes and more in the works of art that we found. It was a beautiful 70 degree day with no real change to the leaves yet, so definitely still early autumn.

10/1 – Make a Scarecrow from Daddy’s Clothes

Fall Bucket (10)

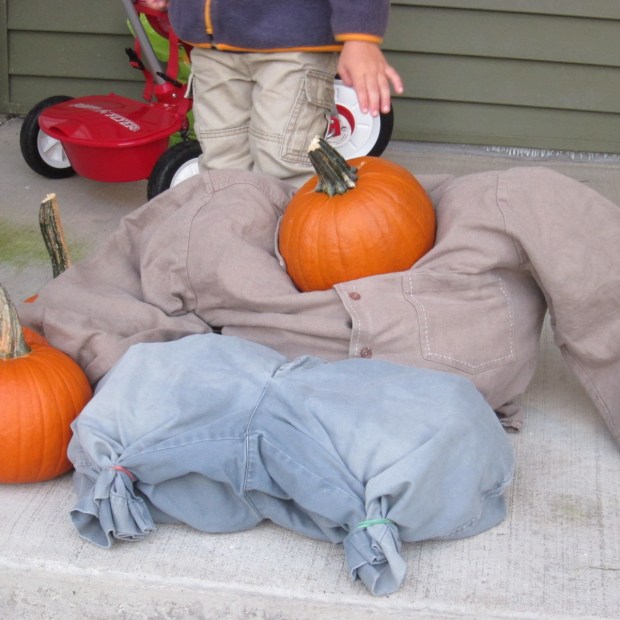
It was a crisp fall morning that turned into a beautiful sunny afternoon, so we checked our way through a whole bunch on our Bucket List this day. To start, we stuffed daddy’s shirt and shorts with newspaper for a scarecrow in anticipation of…

10/1 – Go to a Pumpkin Patch

Fall Bucket (6)

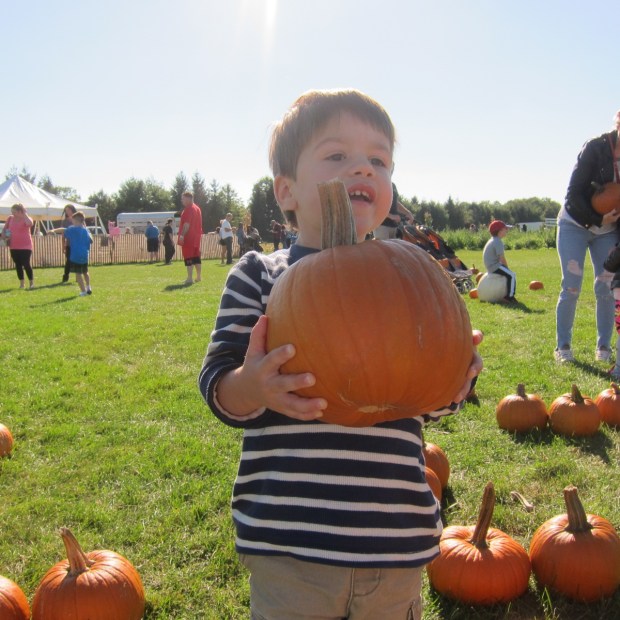
….heading to a local farm to pick pumpkins! Travis was so proud helping to select four pumpkins, one of which was perfect for finishing off that scarecrow as the head. We set the other three aside for decorating later on…

10/1 – Go on a Hay Ride

Fall Bucket (3)

The pumpkin farm also included a hay ride, one of the first we encountered over the season whose name I would dispute slightly. This one was a flatbed pulled by a tractor, with a line of hay down the middle. We later rode on one billed as a “hay ride” that was merely a covered wagon pulled by a tractor, not a hay bale in sight! Ah well, the hay ride counted as an experience, and we checked it off on our list.

10/1 – Corn Maze

Fall Bucket (7)

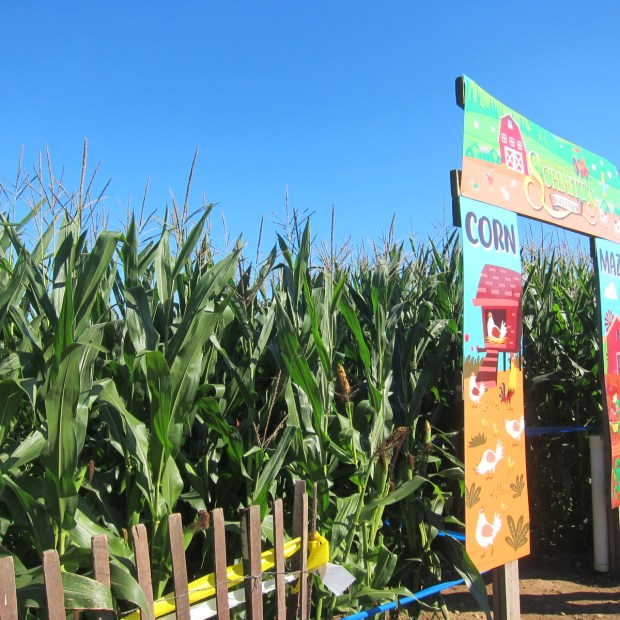
We finished off our pumpkin patch day with a walk through the corn maze, Travis proudly pointing the way at each intersection. Talk about tricky; I followed along on the map, and when I thought we were in the middle of the maze, it turns out we were right back where we had started!

10/4 – Drink Fancy Coffee Drinks

Fall Bucket (14)

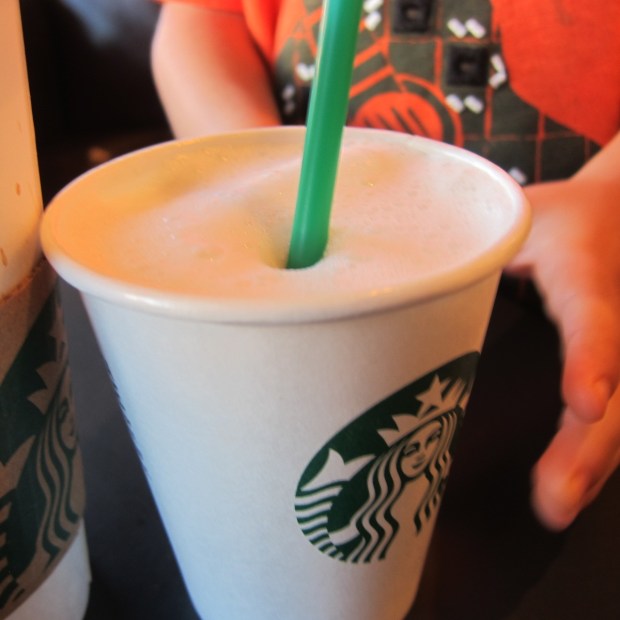
The weather was staying unseasonably warm, but that didn’t stop us (er, Mom and Dad) from craving cozy coffee drinks. I use the term coffee loosely here, since you’ll want a seasonal drink for your child with no caffeine. I had hoped to treat Travis to a pumpkin-flavored steamed milk, but upon learning that the pumpkin mix is not vegan, we settled for an almond milk vanilla steamer. His first ever Starbucks drink!

10/7 – Apple Picking

Fall Bucket (16)

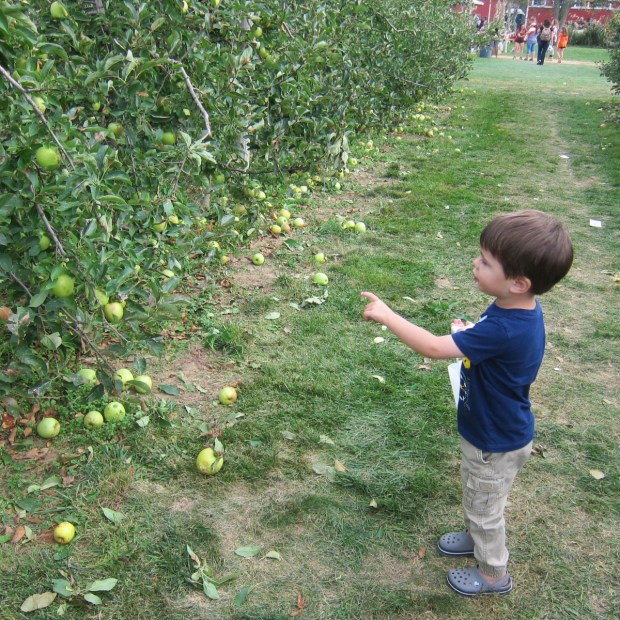
Apple picking day! Travis loved filling up a bag with plump Jonagolds at a farm that included another hay ride (“hay ride”) and a big red barn selling roasted corn and other fall treats. What did we do with all those apples? We ate apple crisp (simply use olive oil in place of butter to make the recipe vegan), applesauce, and enjoyed lots of apples out of hand just for snacking.

10/12 – Paint Faces on Acorns

Fall Bucket (18)

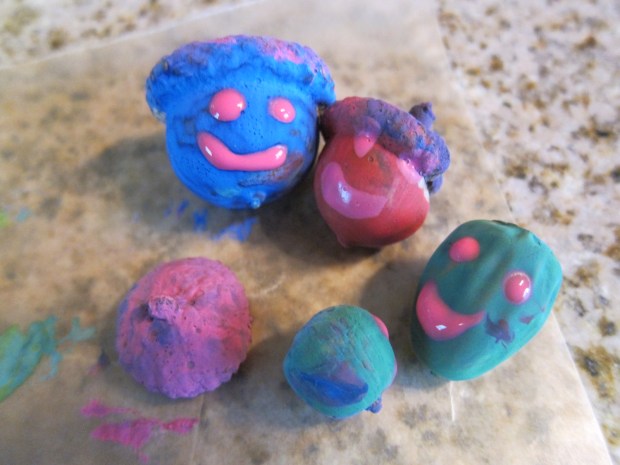
This suggestion was cute and quirky, and as luck would have it, a walk in the woods resulted in acorns of varying sizes so we could make a “family.” Travis loved figuring out which acorn was the daddy, mommy, brother, and baby, and then decided we needed to dress them with paint. He had so much fun picking out the colors – a blue shirt and pink “hat” for the daddy and so on. Painting tiny faces was a challenge for his fine motor skills, but to my surprise he insisted on being part of it.

10/13 – Watch Youth Soccer Game

Fall Bucket (20)

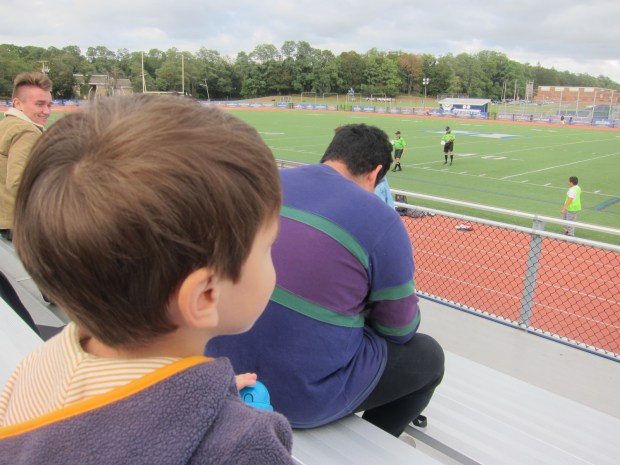
This was unexpectedly my very favorite item on the list, as it wasn’t something I would have thought to do. On a random afternoon, Travis and I headed to the local high school to cheer on the team despite knowing none of the players. Travis proudly sipped apple cider and loved watching the referees blow their whistles. Plus it felt good to have some hometown pride!

10/14 – Have a Popcorn Party

Fall Bucket (25)

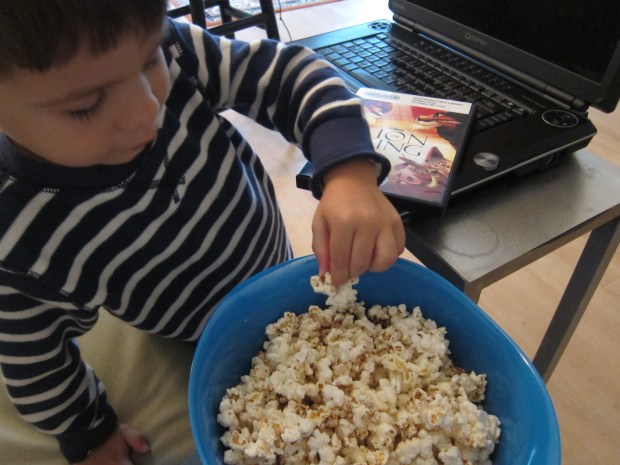
I originally had grand plans when I put this on our Bucket List, envisioning an event where we might invite over family and friends, ask guests to bring a favorite popcorn recipe, string up popcorn garlands, and make popcorn balls. Our weekends filled up fast though, so we checked this one off our list in much simpler, quieter fashion; on a dreary Saturday afternoon, we made it movie-and-popcorn-party-day just for the family. This meant Travis got to select a film to rent, and I whipped up the easiest fall-spiced popcorn ever: Sprinkle a bag of popped plain popcorn with salt and pumpkin pie spice, then toss to coat.

10/17 – Winter Prep! Buy Coats and Boots

Fall Bucket (36)

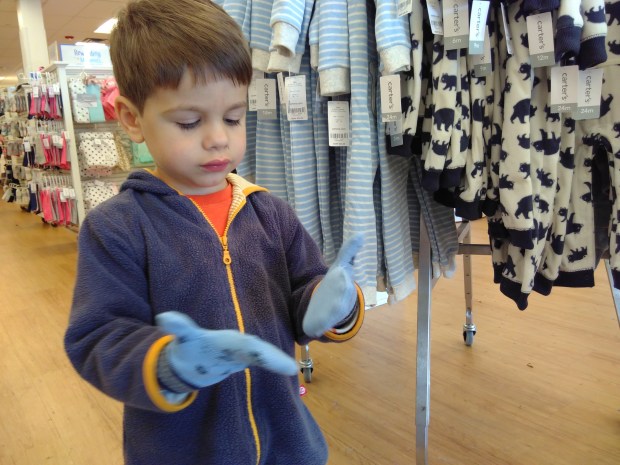
This first truly chilly day, midway through the season, reminded us to get to the winter prep item on our list! Travis was so proud helping to pick out his new coat and mittens. The mittens were such a hit that he insisted on wearing them right away, even though it wasn’t quite that cold. It felt nice to be prepared and ahead of the game… But I was also happy to hang up the heavy new coat and get back to enjoying the fall!

10/18 – Make Fall Placemats

Fall Bucket (28)

The leaves were slow to change this year, giving us more muted yellows than vibrant oranges and shocking reds. But we still collected leaves on our walks, which allowed us to make these placemats. Simply arrange leaves between two sheets of wax paper, then iron to seal.

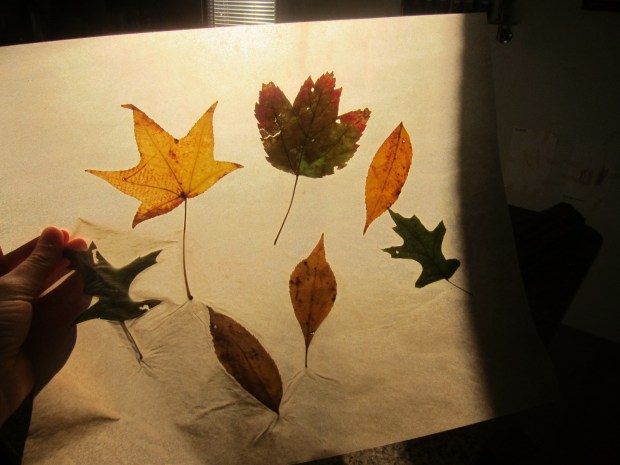
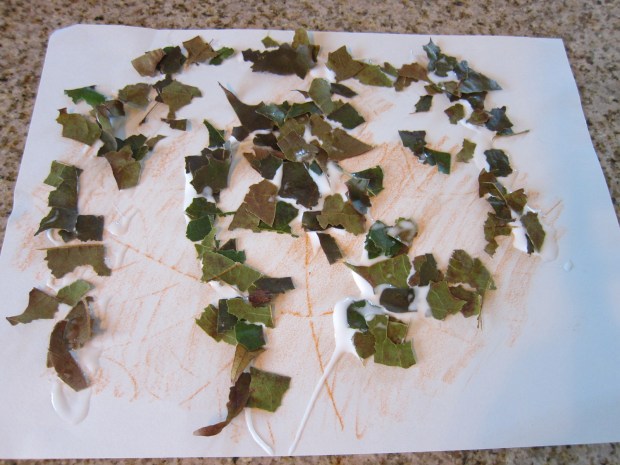
10/19 – Make Leaf Art

Fall Bucket (26)

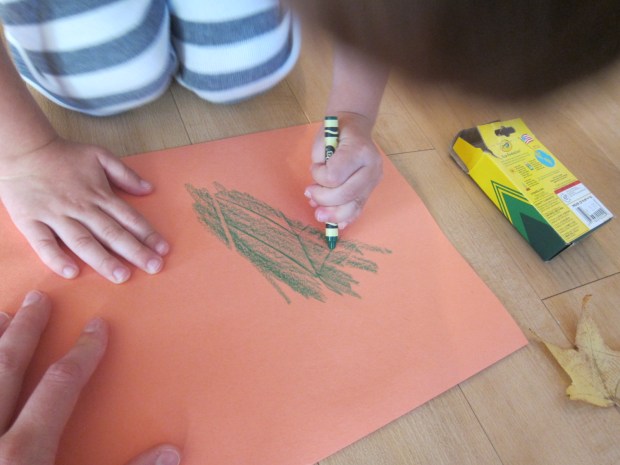
Leaf rubbing never grows old, the magic of watching bumpy veins appear through paper with a crayon. For more complicated leaf art, we turned some of the leaves into “leaf glitter,” made big pools of glue, and sprinkled on this “confetti.”

Fall Bucket (33)

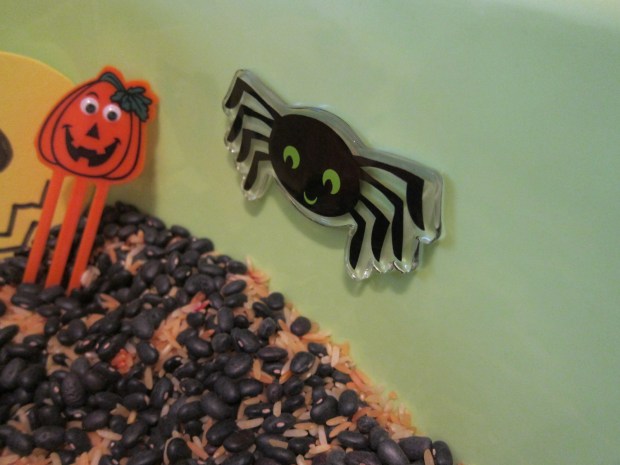
10/19 – Nature Walk with Camera

Fall Bucket (35)

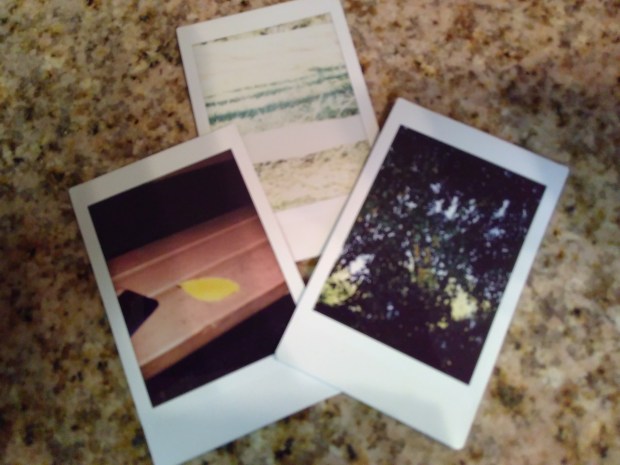
After that busy morning of leaf art, we headed off on another nature walk, this one an assignment from Travis’s nursery school teacher! (Yup, I’m the dorky mom who loves homework). This time we brought along the instant camera. Travis loved taking snaps of our favorite finds, including bugs, leaves, spider webs, and more.

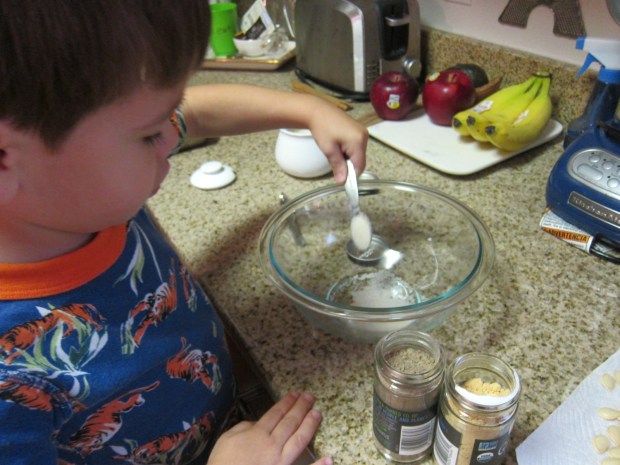
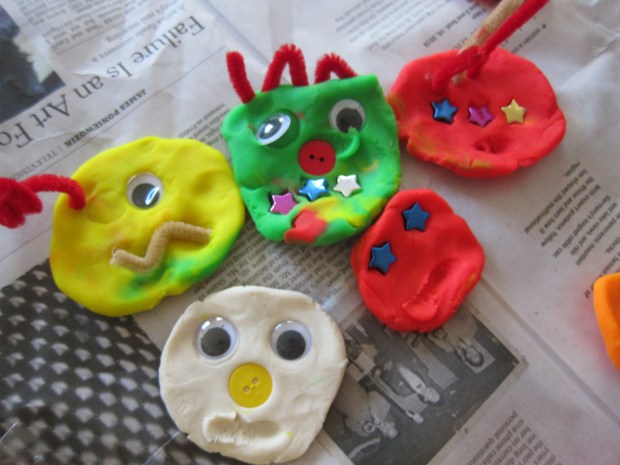
10/26 – Make Fall Cookies

Pumpkin Cookies (5)

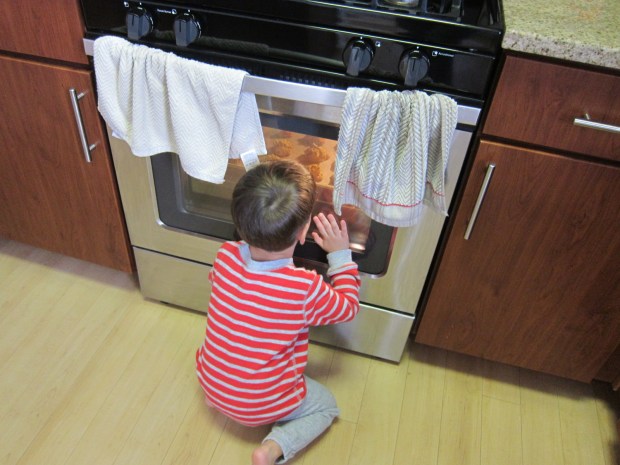
We went a long stretch without bucket listing, thanks to a weekend away and a busy school week. But after school we decided it was time to get back in the swing of things with fall cookies. We decided our fall cookies had to have pumpkin in them, but if other fall flavors are your thing, consider sugar cookies cut with a leaf-shaped cutter, or maple cookies, or whatever else says fall to you!

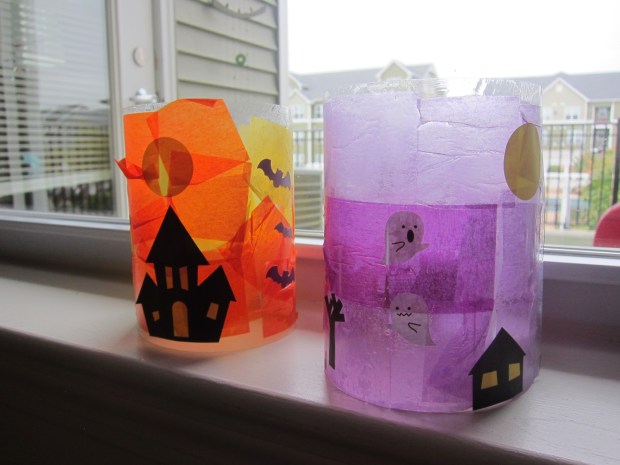
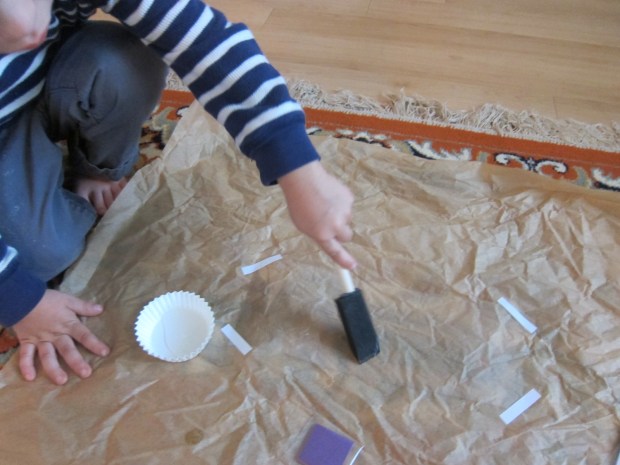
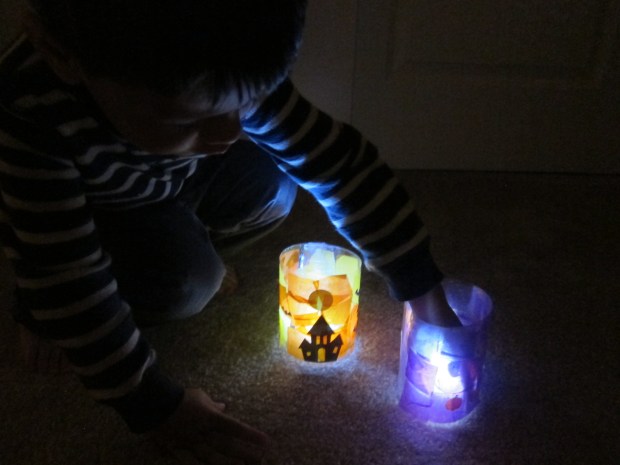
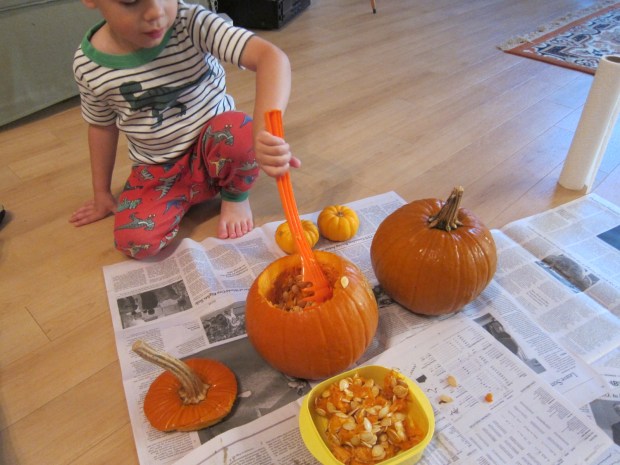
10/27 – Carve a Pumpkin

Fall Bucket (38)

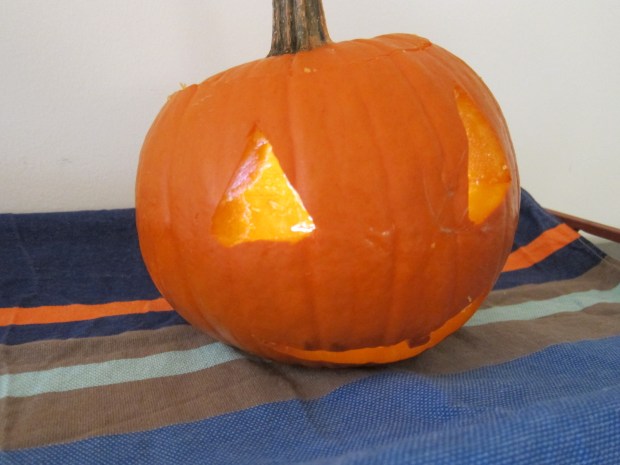
The big moment finally arrived: Pumpkin carving day! Travis and I have decorated pumpkins before, but this was the first year we got in there with a carving knife, and man oh man did he love it. I remember that fascination when pumpkin’s stem lines up with the jagged top of a jack-o-lantern like a puzzle piece. And the joy of scooping pumpkin guts. And the glee of seeing the lit up face once a candle (aka battery-powered tea light) is inside. In sum, all the spooky magic of Halloween.

Fall Bucket (37)

10/29 – Make Caramel Apples

Fall Bucket (39)

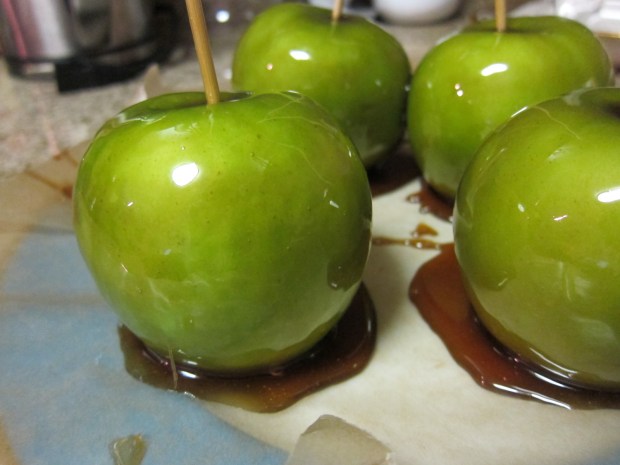
Well, here’s the one thing on the list we didn’t truly accomplish; after two failed attempts at making caramel, I had to accept that this one wasn’t in the cards, due to a faulty old thermometer which wasn’t reading the temperature of my caramel correctly. So we coated our apples in a sticky glaze, but the result wasn’t what we hoped for. Next year!

10/31 – Trick-or-Treat

Fall Bucket

No explanation needed! Travis was a NAVY Leap Frog parachuter, and loved every minute. His favorite candy this year? Twizzlers!

11/4 – Photo Shoot in a Leaf Pile

Fall Bucket (41)

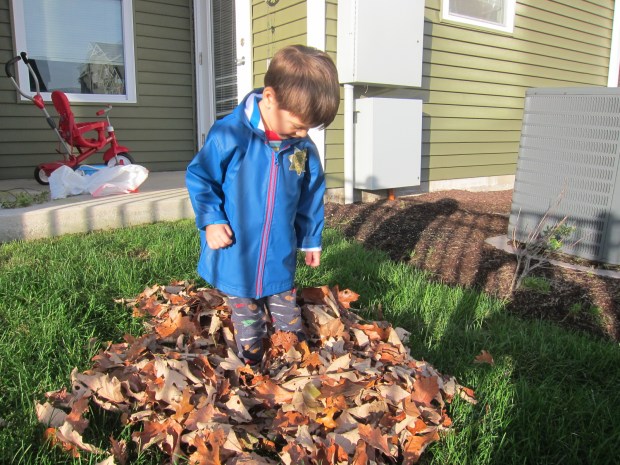
We were into November, and winding down our Bucket List. By now the leaves were really on the ground, so it was leaf pile time! We don’t have trees around our apartment property, but that didn’t stop us from filling a large trash bag in the local park, bringing it home, and creating a leaf pile off our patio!

11/11 – Make Pomander Balls

Fall Bucket (50)

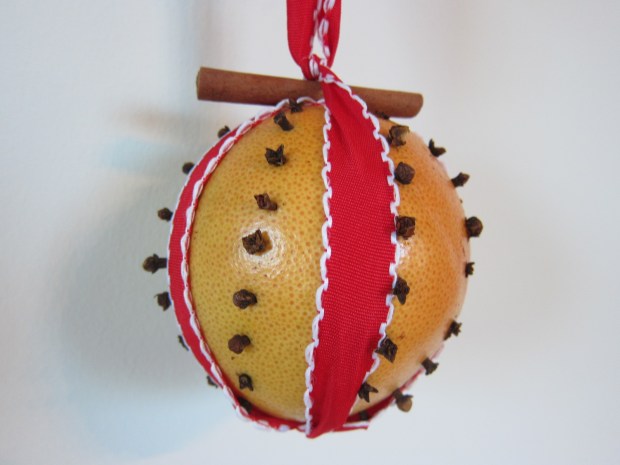
I intended to save this drop in our Bucket for a Thanksgiving decoration, but Travis asked for it one morning while we were tucked in from an early arctic blast. This simple pomander uses large citrus (we used grapefruit), cloves, and ribbon. Travis loved the materials involved, happily turning the clove spice can into a musical shaker while I prepped the grapefruit: Draw lines in any pattern that you want using a washable marker. Use a toothpick to make holes evenly spaced along the lines, then wash your citrus to remove the marker. Insert a clove into each toothpick hole you’ve made. Cut a length of ribbon and wrap up the citrus as you would a present. For a lovely touch, knot a cinnamon stick at the top.

11/12 – Write Name in Leaves

Fall Bucket (51)

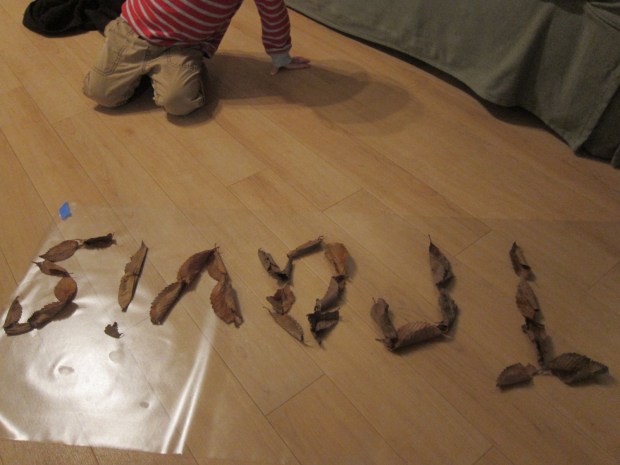
It never hurts to throw a little learning into the fall fun. Name recognition is a key skill for preschoolers, so with leaves from (yet another!) fall walk in the woods, I spelled out T-r-a-v-i-s on a large piece of contact paper. Fold the paper over to seal the leaves between the sticky sheets, and your child has a beautiful poster with their name!

11/20 – Walk Around Town and Get Cocoa

Fall Bucket (56)

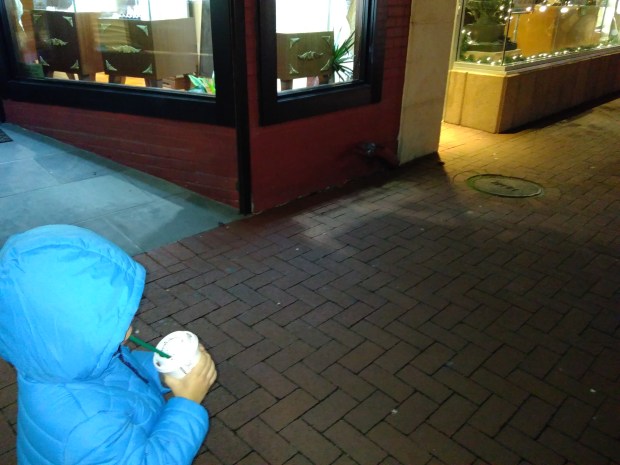
By now we were in late fall (that winter coat has come out of the closet!) and checking off the final items on our list. Town was already brimming with Christmas decorations which made it the perfect time to check out the décor. Travis was gleeful to spot reindeer in one shop window, and loved cupping his hands around his warm cocoa.
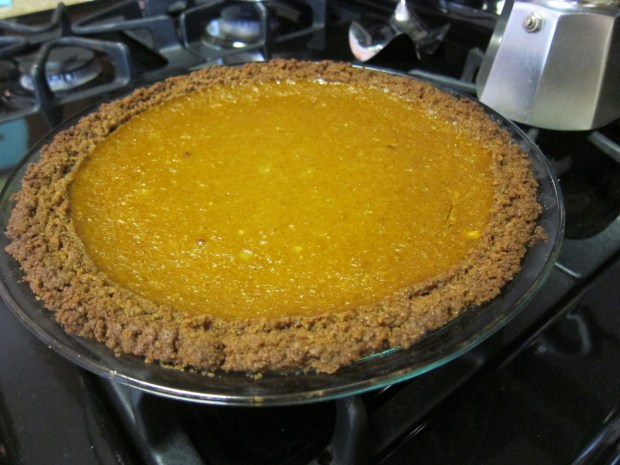
11/22 – Bake a Pie

Fall Bucket (59)

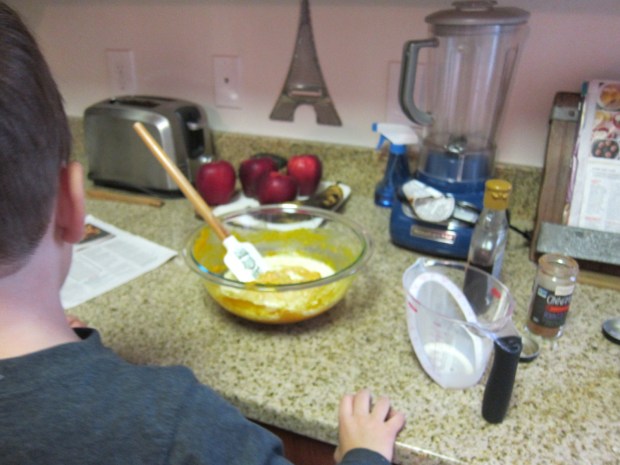
Just in time for Thanksgiving, we put the final check mark on our Bucket List, baking a fresh pumpkin pie for Thanksgiving. My little helper had way more fun nibbling on extra ginger cookies for the crust than he did in stirring together the ingredients, though!

Pumpkin Pie (3).JPG

Even though there’s technically a full month of autumn left on the calendar, it felt appropriate to end our Fall Bucket List here. As soon as Thanksgiving ends, we’ll no doubt turn out attention to winter-y Christmas fun. Which reminds me, perhaps we’ll need an advent Bucket List to take us through December…

Thanks for coming on the journey with us!

Fall Bucket (58)

Halloween Candy Experiments

Halloween Candy (4)

Well, the initial blood sugar rush of Halloween has subsided and sugar comas have set in, and we have lots of leftover candy. In our vegan household, I divide the candy into three piles: vegan candies to eat and enjoy; non-vegan candies to donate to our military overseas through Operation Gratitude; and non-vegan candies with which to do a little experimenting.

For the first experiment, make a “magical pumpkin” by stripping the color off any hard-shelled candy. Reeses Pieces are ideal, since you’ll have orange and brown galore, but we only had Skittles to work with. First, arrange the candies in the outline of a pumpkin on a plate. We nearly didn’t have enough orange for the outline, but by adding in a little brown and a green stem, we made it work.

Halloween Candy (2)

It was Travis’s idea to add red as the pumpkin’s “guts”!

Halloween Candy (3)

Once you’re outlined your pumpkin, fill the plate with a little hot water; the colors will bleed and fill in your pumpkin almost like watercolors. Sweet and neat!

Halloween Candy (5)
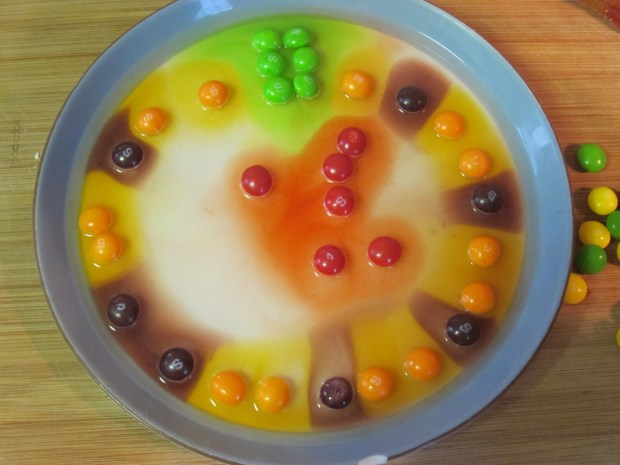
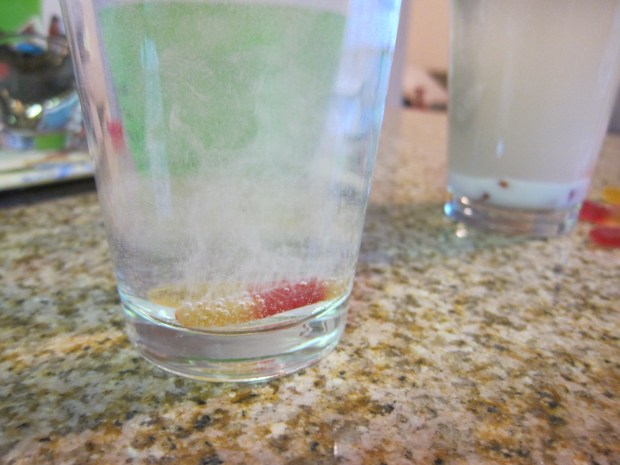
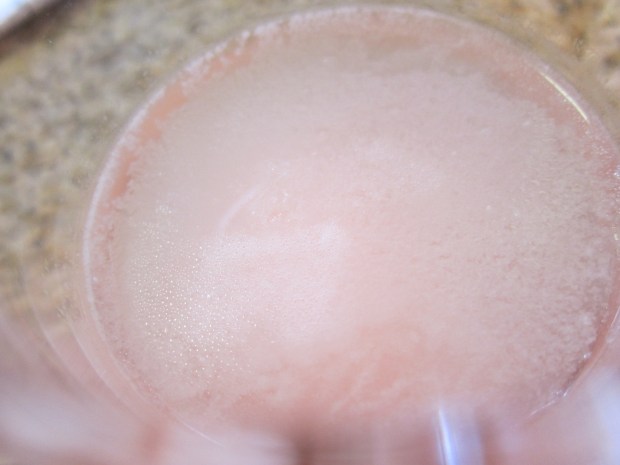
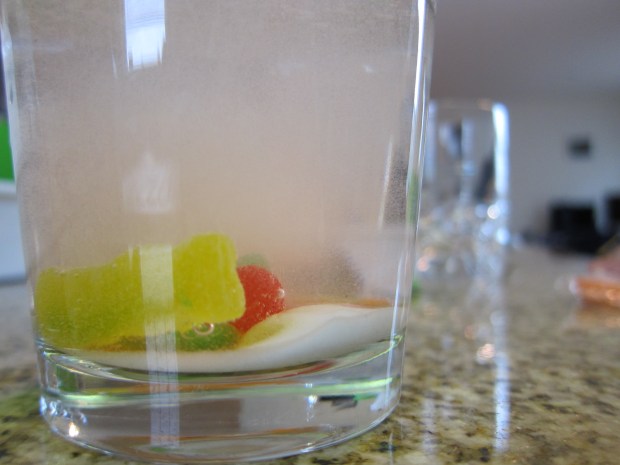
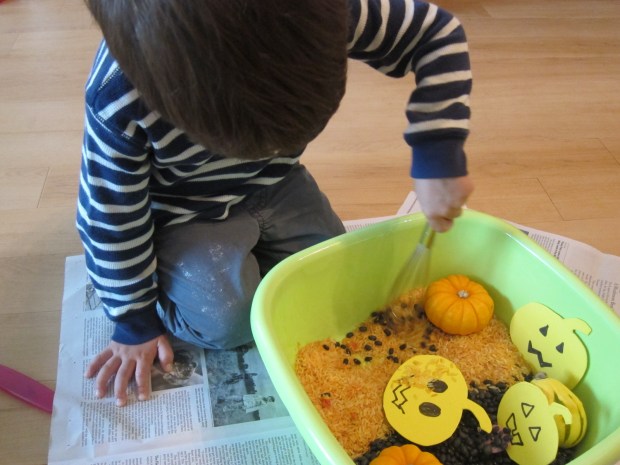
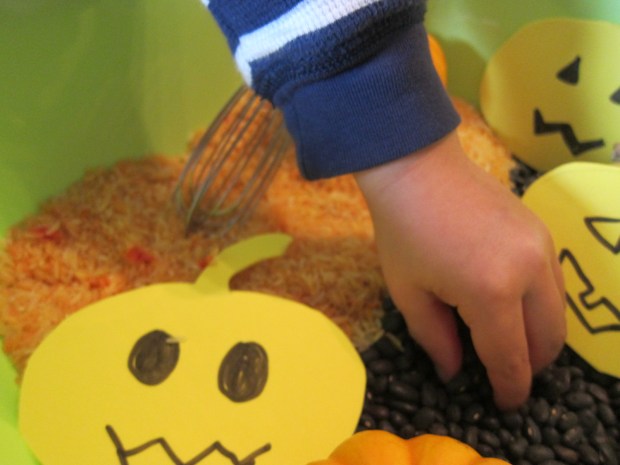
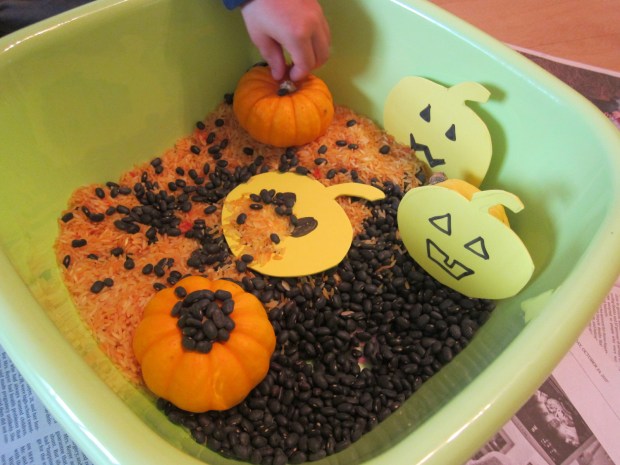
Travis wanted to stir the candies, which messed up the pumpkin shape, but allowed us to see the white candy left behind.
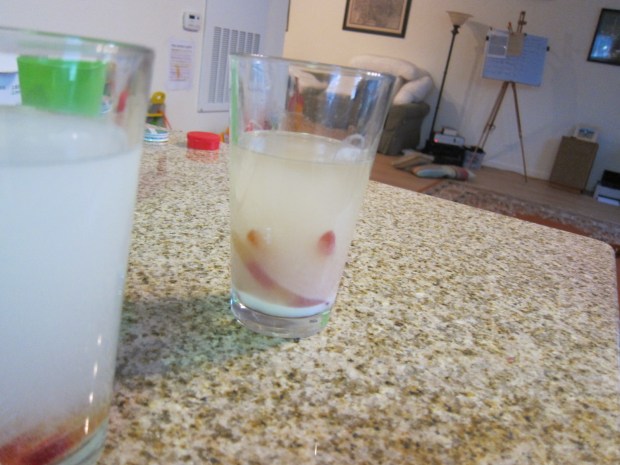
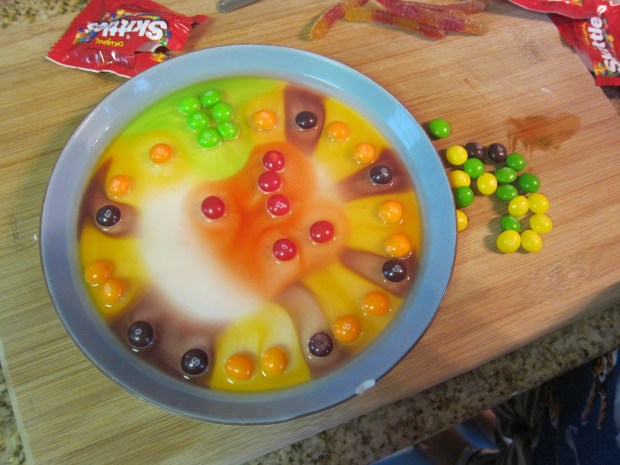
Halloween Candy (7)

Next we tried to make gummy worms dance, following instructions we’d found online. Cut your gummy worms into small pieces, then fill a cup with 3 tablespoons baking soda and 1/2 cup water. Add the worms and let stand for 15 minutes.

Transfer the worms to a second cup filled with vinegar. You’ll see bubbles appear, and then hopefully the worms will float up and wriggle.

Halloween Candy (8)

Unfortunately, ours did not rise up (perhaps because we used Surf Sweets brand?) – but that didn’t seem to matter. Travis loved the fizzing, and declared this his favorite of all our experiments.

Halloween Candy (10)

You can also test for any candy for acid with a similar method. Add candy to a cup of water and sprinkle with baking soda; if you notice bubbles, the candy has acid. Mike & Ike’s left our water still, but sour patch kids did the trick!

Halloween Candy (11)

Finally, you can test your candies to see if they contain oil. Dissolve any candy (we used Starbursts) in hot water, and let stand for a few minutes.

Halloween Candy (13)

If there’s oil, you’ll soon see a shiny or waxy layer on top. Yup, Starbursts definitely had oil!

Halloween Candy (15)

Try this with Laffy Taffy, too, or any other chewy candy.

That was the end of our experimentation, and we finished with some more noshing, of course. Travis’s favorite vegan candies to eat by the way? The following make the top of his list:

Twizzlers

Swedish Fish

Surf Sweets gummy worms

Dum Dums

Unreal dark chocolate peanut gems

Glee gum blow pops

Hope your Halloween was equally sweet and full of treats!

Halloween Candy (12)

Indian-Spiced Pumpkin Seeds

Roasted Pumpkin Seeds (5)

As promised from our pumpkin carving post, we didn’t toss the seeds this year, but saved them instead for roasting! There are so many ways to spice your pumpkin seeds, but this year we gave them an Indian flair (thanks to a recipe from Little Passports) to honor both the American holiday and Travis’s Indian heritage.

Ingredients:

  • Seeds from 1 pumpkin
  • 1 teaspoon sugar
  • 1/4 teaspoon cardamom
  • 1/4 teaspoon ground ginger
  1. Rinse your pumpkin seeds very well, then transfer to paper towels and pat dry.
  2. In a bowl, combine the remaining ingredients. Add the pumpkin seeds and stir to coat.
  3. Arrange the pumpkin seeds on a baking sheet lined with foil and bake at 375 degrees F for 15 minutes, until golden brown.

Roasted Pumpkin Seeds (4)

Note: Travis really enjoyed spooning out the sugar, so we ended up with closer to 2 teaspoons sugar in our recipe.

Roasted Pumpkin Seeds (2)

Good thing everyone around here has a sweet tooth!


Dancing Bats and Ghosts

Dancing Ghost (7)

What is it with playground slides and static electricity? Travis was fascinated the other day when he kept picking up a shock each time he went down the slide and then touched the railing on the stairs back up. So we turned it into a teachable moment – minus the shock! – with this little lesson on static electricity at home. You can cut any shape you want into tissue paper, but since it’s Halloween, we had to go with bats and ghosts of course.

Dancing Ghost (1)

I didn’t trust myself to cut tissue paper free-hand, so downloaded templates of a bat and ghost, and traced onto the paper before cutting out.

Dancing Ghost (2)

Tape the shapes to a tabletop or similar surface; set aside.

Dancing Ghost (3)

To create the static, blow up a balloon (a spooky black was the perfect shade for today), and rub in your hair (or on a sweater). Hold the balloon over the tissue paper, and the static will make the ghosts and bats lift up and dance!

Dancing Ghost (6)

Travis loved every element of this experiment, including making static from his own hair…

Dancing Ghost (5)

…And seeing if he could make the tissue paper rise up.

Dancing Ghost (4)

Of course you also could just create static and the tissue paper will stick directly to the balloon, but taping our tissue paper spookies to the table turned it into a hokey Halloween jig.

Dancing Ghost (8)

Halloween Luminaries

Halloween Luminary (10)

Last year we indulged in an extra crate from Kiwi Co to make a trick-or-treat tote bag (which we’ll be using again this year!). This Halloween, Travis has graduated up in crafting skills and could help put together Kiwi Co’s neat luminary project, a reminder that it’s not just pumpkins that glow on All Hallow’s Eve.

To replicate the project at home, you can purchase similar materials to everything described below at a craft store.

To start, we taped down the two provided clear sheets of flexible plastic onto a work surface (a brown paper bag or scrap paper work fine), and painted them with a layer of glaze (which looked quite similar to Mod Podge).

Halloween Luminary (1)

We divided the provided tissue paper squares into oranges and purples, and pressed onto the sticky glaze.

Halloween Luminary (2)

Travis had fun with the orange one, but then decided he didn’t like the way the glaze felt on his fingers. So I finished up the purple one, and then we painted over the tissue with an additional layer of glaze before setting them aside to dry.

Halloween Luminary (3)

To make our luminaries spooky, we had fun adding the provided stickers – Travis particularly liked making a “pumpkin patch” on one.

Halloween Luminary (4)

The plastic is then folded into a cylinder, and secured with clear round stickers.

Halloween Luminary (6)

Place your luminaries on any surface, then add a tea light inside.

Halloween Luminary (7)

Boo-tiful!

Halloween Luminary (8)

No-Bake Spider Cookies

Spider Cookie (1)

We’re one week from Halloween, and the bushes all around town are draped in fake cobwebs or plastered with giant black spiders. We added to the arachnid fun with this easy dessert idea from Highlights magazine. For vegan chocolate cookies, try the wheat-free Newman O’s oreo cookies; scrape out the crème filling and replace with the cream cheese or peanut butter. If you can’t find Newman O’s, any vegan chocolate cookie will do!

Ingredients:

  • 8 round chocolate cookies
  • 1 tablespoon non-dairy cream cheese or peanut butter
  • 16 pretzel sticks
  • 8 raisins
  1. Divide the cream cheese or peanut butter evenly among 4 of the cookies. Set aside.
  2. Snap the pretzel sticks in half so you have 32 pieces. Arrange 8 pieces on each of 4 cookies, to be the spider legs, using the cream cheese as “glue” to hold them in place. Top with the remaining 4 cookies.
  3. Add an extra dot of cream cheese on the top cookies, and press on the raisins as eyes.

If only all spiders were this adorable!

Spider Cookie (2)

Halloween Sensory Bin

Halloween Sensory (3)

Seasonal sensory bins are always good fun, equally delightful for little tots as they are for preschoolers. This one gets an October twist with an orange and black background, and Halloween goodies tucked inside.

To prepare the rice, place white rice in a zip-top bag and shake with orange food coloring – I achieved a nice orange by mixing the yellow and red from Color Kitchen. Spread on a foil-lined baking sheet and let dry.

Halloween Sensory (1)

Fill a tub with the orange rice on one half and dried black beans on the other – it’s getting spooky in here!

Halloween Sensory (2)

Next I placed a few odds and ends in the bin, like mini pumpkins and gourds, and foam in the shape of jack-o-lanterns. I added a whisk and spatula, then presented the bin to Travis after a morning at school.

Halloween Sensory (4)

He loved sprinkling the black beans onto the rice for a startling contrast. Pretty soon this was an imaginative game of making pumpkin soup.

Halloween Sensory (7)

The texture of the dried beans was a big hit…

Halloween Sensory (5)

…as was the sound they made when sprinkled on top of the pumpkins, making this bin a delight for auditory senses as well.

Halloween Sensory (10)

You can keep bins like this around for a couple of days for children to return to. Later, we added some wobbly Halloween stickers and a few more pumpkins to our “patch.”

Halloween Sensory (12)

What else would you add to your Halloween sensory bin? Please share in the comments!

Halloween Sensory (13)

Flying Ghost Teabag

Flying Ghost (3)

Here’s a Halloween experiment that’s exciting for kids and grown-ups both. A note of caution, since the game involves fire; I recommend making this an activity for two adults and any children; one grown-up can light the match while the othe keeps kids a safe distance away.

Snip open a tea bag and empty the tea – as a nice bonus, the experiment smells lovely already!

Flying Ghost (1)

Once you open up the tea bag you’ll be left with a long cylinder. To give it a spooky flair, draw a ghost face on the bag.

Flying Ghost (2)

Now set alight the top edge of the cylinder with a match.

Flying Ghost (4)

The flame will travel down the “ghost”, and when enough heat is trapped in the cylinder, he rises up and flies!

Flying Ghost (5)

Everyone in the room gasped and giggled at this one, from kids to grandparents.

Interestingly, we tried it with a different brand of tea bag on the final go, and it burned faster but didn’t fly as well – so if yours doesn’t work spectacularly at first, consider testing a few tea brands. This final try is the one I caught on video, though, so enjoy!

Play Dough Monsters

Play Monster (6)

Here’s the perfect way to shake up your play dough routine in the spooky month of October! This little craft is great for kids who might be experiencing their first fears about monsters; your silly and cute creations will have them giggling and realizing monsters don’t need to be scary.

Travis didn’t quite understand the concept at first, so I set about making a few goofy monsters as he watched. Beads made for silly fangs and smiles, and googly eyes are always fun.

Play Monster (1)

Trim lengths of pipe cleaner to be smiles, curly hair pieces, or even whiskers!

Play Monster (5)

Once he got the idea, Travis was so into the craft. He loved adding shiny beads as eyes.

Play Monster (3)

And decided that each monster needed a smile, which he drew on with his finger.

Play Monster (4)

We wound up with quite the little monster mash family.

Play Monster (2)