Fishy F

Fishy F alt

Today Travis and I focused on the letter F, tracing it first and then making it 3-D in two ways.

For the first, we raided daddy’s non-vegan pantry of snack foods, and used fish (goldfish crackers, that is). I drew lower case f on construction paper, and Travis loved making a big line of glue and sticking on the fishy friends.

Fishy F (1)

We used blue paper and I encouraged him to color in an ocean scene behind the fish, but he decided he didn’t want to.

Fishy F (2)

For upper case F, we used a few forest finds from a walk. Once we were home, I laid out two short sticks and one long.

Fishy F (3)

“I can do this!” he declared with confidence, and in no time had formed an F.

Fishy F (4)See you soon for G!

Easy E

Easy E (5)

For lack of a better title, today Travis and I made Es with two easy materials (straws and string)… But it turns out they were quite tricky to master!

First we traced big E and little e, and then I presented him with 4 straws; 3 were short, and 1 was long.

Easy E (1)

At first, he added the short straws to the long one in a rather slapdash way.

Easy E (2)

He traces E this way sometimes, too, so I challenged him to look closer at the E in his tracing book. Aha! One short line comes from the top, one from the bottom, and one from the middle.

Easy E (3)

Making little e with another easy material (string) was even harder. He got frustrated figuring out how to twist it in just the right way, until I provided direction.

Easy E (4)

What material would you make an E? Please share in the comments!

Q-Tip Painting

Q Tip Paint (6).JPG

Sometimes it seemed like every other project Travis brought home from pre-k involved dot markers; teachers sure do love this art medium! This craft is almost like a homemade version, but will help with precision and letter tracing.

I wrote Travis’s name all in capital letters on construction paper and set out bowls of paint and q-tips.

Q Tip Paint (1)

He thought the idea of “homemade” dot markers was so neat! At first he intended to smear along the lines of the letters, but when I showed him how to dot the q-tip, he quickly took to it. I had imagined he’d dot at intervals, but he wanted his dots right up against each other so no line showed through.

Q Tip Paint (2)

This activity is nice reinforcement if your child already knows how to spell his or her name. Because he had to move slowly through each letter, Travis noticed that an upper case R starts out looking like a P, until you add the last diagonal line. What a way to notice the building blocks!

Q Tip Paint (3)

He wasn’t satisfied until he’d added the last dot.

Q Tip Paint (4)

And loved mixing up the colors, too.

Q Tip Paint (5)

Design a D

Design D (6)

Our summer letter of the day for tracing and writing was D. Travis doesn’t struggle with the upper case, but still sometimes confuses his little d with little b. Working slowly through a worksheet helped him focus on which direction the line and circle needed to go.

To think about it spatially, we then designed D in two ways. First I gave him a pencil and string; could he make an upper case D?

Design D (1)

At first he was confused, but kept a good attitude about it!

Design D (2)

I helped him make the loop of the D with the string. Now could he see where the pencil needed to go?

Design D (3)

Tada!

Design D (4)

Next we made a lower case d with our hands. He remembered cupping his hand into a c from yesterday, which worked the same for the loop, here. His other hand went straight against it, for a delightful d!

Design D (5)

Cotton Ball C

Chalk c (4)

Today Travis practiced tracing C – an easy one! – but after the tracing, I challenged his dexterity to form a C in three ways.

First, have your child cup their hand (make sure to use the left) to form the letter. Travis had to think hard about this, but was so proud when he got it right!

Chalk c (1)

Next we headed outside to draw c’s with chalk. This was a great chance to make sure his form was correct, since there was no line for him to trace outdoors!

Chalk c (2)

I noticed that his C’s were a little short, and encouraged him to extend the line for a curvier final result.

Chalk c (3)

Finally, back inside, I drew a C for him on construction paper and we filled it with cotton balls.

Chalk c (5)

Travis wanted to do his own glue, following perfectly along the line I’d drawn.

Chalk c (6)

And he was completely in charge of placing each cotton ball, too! Again, what a difference in dexterity and patience.

Chalk c (7)

Button B

Button b (6)

Today’s summer letter of the day was B! After tracing, I helped Travis draw two very careful Bs using white crayon on black paper (a fun chance to use white, sadly always the most underutilized crayon in the box).

Button b (2)

Travis made dots of glue on each B, and filled the upper case with buttons

Button b (3)

…and the lower case with breakfast cereal.

Button b (5)

He was so careful applying each piece along the lines; I sat back and marveled at how his fine motor skills (and patience!) have changed over the course of pre-k.

Button b (4)

Even better, he enjoyed the button art so much that he asked for a second piece of paper and a glue stick to continue the fun once our Bs were complete – what could be better than that? If you don’t have buttons, beads would also work great for this project.

Button b (7)

Aluminum A

Aluminum a (4)

Travis is a pre-k grad, and although we intend to have lots of fun this summer, I also want him to avoid the “summer slide.” To keep him fresh, we’ll be working on the alphabet. This took me back to our journey through the alphabet when he was a toddler! But now the emphasis is different; he knows his letters and phonemes, but needs to work on the fine motor skills of tracing and writing.

After tracing the letter A, both upper and lower case, we designed one from a material that started with a – aluminum foil.

I showed Travis how to roll a sheet of foil into a coiled rope – fun!

Aluminum a (2)

We looked at the “a” in his workbook, and he thought hard about how to shape his foil. For the majority of it, we twisted one coil until it made a circle.

Aluminum a (1)

The second, shorter coil would be the line on the end. Travis has a habit of putting this line closer to the middle of the a’s bottom, but this “close reading” helped him pinpoint that it should go on the side.

Aluminum a (3)

Next we made an Artistic upper case A, using a favorite art medium: crayons.

I presented him with three crayons – two long and one short – and challenged him to decide which should go where.

Aluminum a (6)

After initially making what looked more like an H, he was quite proud when he tilted the two long crayons to make an A.

Aluminum a (7)

One down, 25 to go!

Aluminum a (8)

Easy Spool Speller

Spool Speller (3)

Here’s a fantastic tool for kids who are learning to read and spell, made out of just a few upcycled items in your home!

Because Travis is a novice speller, I made a speller that featured three letter words, but bigger kids can accept the challenge of four spools!

On the empty spools, I wrote letters in permanent marker. Do try to think strategically for this: I had common beginning consonants on the first spool, vowels on the second, and common ending letters on the third.

Spool Speller (1)

Note: If you’re having trouble with this, download the template from Family Fun magazine’s Dec/Jan 2016 back issue.

Next I threaded the spools onto two pencils. Ideally, your empty spools will have small holes and fit around one pencil; however, I taped two pencils together, since my spools had wider holes. Secure the ends with eraser toppers.

Spool Speller (2)

Now twist and turn to make some words!

Spool Speller (8)

The speller worked in two fantastic ways for Travis. First, I could make a word and have him sound it out. This is great if you switch rapidly from one word to another. So if I have c-o-t it says cot…

Spool Speller (5)

…but if I twist just one spool, we have h-o-t hot.

Spool Speller (6)

More challenging was for Travis to try and make his own word, which he still needed some help with.

Spool Speller (7)

In sum, a great toy, and we’re thinking this will be perfect for car rides!

Haircut Doll

Haircut Doll (6).JPG

This craft is fantastic on so many levels, whether you want to give your kids some practice with scissors, help alleviate fear of the barber shop or hairdressers… Or your kids just want to have fun and pretend it’s a day at the salon!

I made the craft for Travis, but your child might be interested in helping step by step. First, I used a hole punch to punch about 12 holes around the rim of each of two empty toilet paper rolls.

haircut doll (1)

You can use any color yarn you like for the hair. We stuck with realistic yellow and brown, but why not green or rainbow!

haircut doll (2)

For each lock of hair, thread a strand of yarn through a hole and knot to secure.

haircut doll (3)

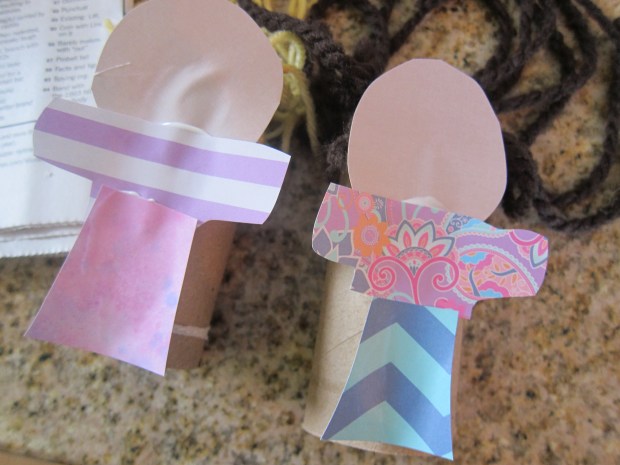
Once the hair was on, Travis helped pick out clothing patterns for each doll.

haircut doll (4)

I cut patterned paper into shapes for tops and bottoms. Finally, I added a round face for each with googly eyes glued on.

haircut doll (5)

Once the glue dried, it was time to head to the barber shop!

haircut doll (8)

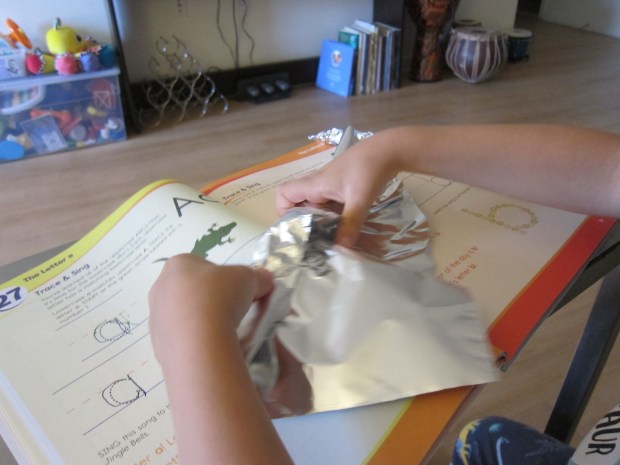
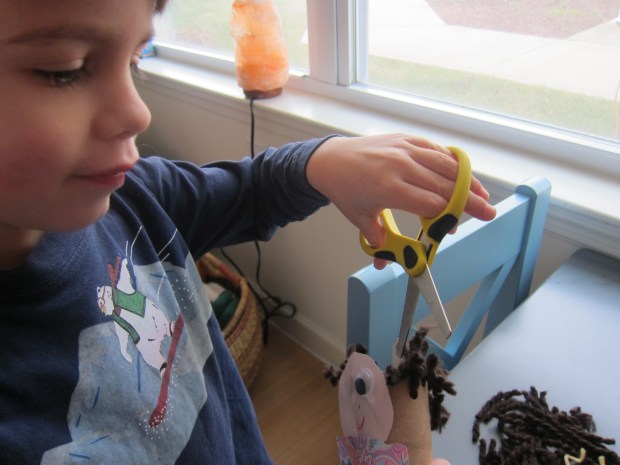
This craft marked a milestone for Travis, moving up from his plastic safety scissors to preschool scissors (these still have a blunt tip, but the blades are real metal). He was so proud!

haircut doll (9)

He didn’t miss a beat before the snipping began. He loved pretending he was his own barber, making a mess of hair on the floor.

haircut doll (10)

I watched in delight as the haircuts grew ever shorter.

haircut doll (11)

Until we had a buzz cut!

haircut doll (12)

Then Travis decided he wouldn’t be satisfied until each figure was bald!

haircut doll (13)

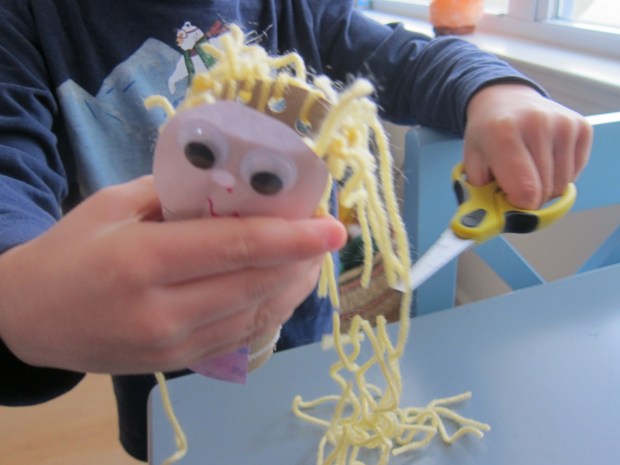
(Alas, you’ll notice they lost their eyes in the process, too).

haircut doll (15)

Overall, this was a fantastic activity: a craft; a fine motor skill builder; an imaginative game, and a way to alleviate fears all in one.
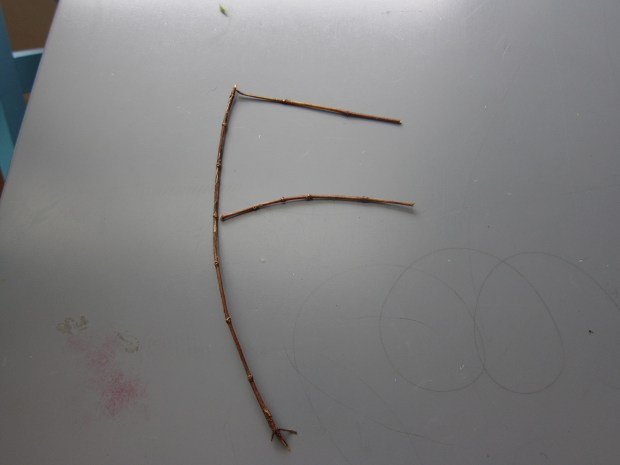
haircut doll (7)

Nature’s Alphabet

Nature alph v

How do you keep the alphabet fresh and fun for a preschooler who knows all his or her letters? Search for the letters outside, of course! This nature activity will challenge your child’s brain to see letters in whole new ways, all while getting some fresh air.

Take about a crisp fall day – we needed to pull out our winter coats, but the sunshine was gorgeous.

Nature alph (3)

First we made a list of the alphabet so we could keep track as we hunted. This is a good chance to review all the letters, or sing the ABC song if your child is learning alphabetical order.

Nature alph (1)

If your child has a camera or nature notebook, this hunt is also a great opportunity to use both! Travis is so proud whenever he takes pictures, although I had my camera, too, to catch closeups of the letters we spotted.

Nature alph (2)

Don’t try and find the letters in order – you’ll drive yourselves crazy. Instead, we stretched our eyes and imaginations, and saw what came to us.

Nature alph x

A few are easy, like x’s and A’s.

Nature alph a

Don’t forget to look up! There was a D in the curve of the branches when we looked up at this tree.

Nature alph d

Travis thought the three holes in this leaf looked like an M


Nature alph m

If we squinted, this funny shape in a tree’s trunk became a Q.

Nature alph q

Y’s are relatively easy to spot (think of Y-shaped sticks), but we liked finding them in shadows, too.

Nature alph y

We loved this spiderweb sparkling in the sunshine. No letter was immediately evident, but perhaps you can make out E’s or F’s marching along the side.

Nature alph f

In sum, this hunt was a great way to spend the afternoon outside together, and sneak in some learning! We didn’t find every letter, but we had fun trying.

Nature alph o