Science of Trees Kiwi Crate

Kiwi Trees (1)

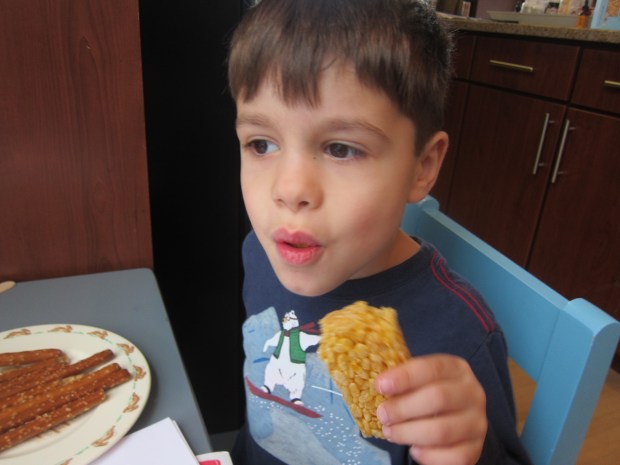
Travis’s crate from Kiwi Co. this month was about the way trees and plants take nutrients from the roots upwards, in seeming defiance of gravity. Travis loved every element of this “capillary action” crate… and for good reason!

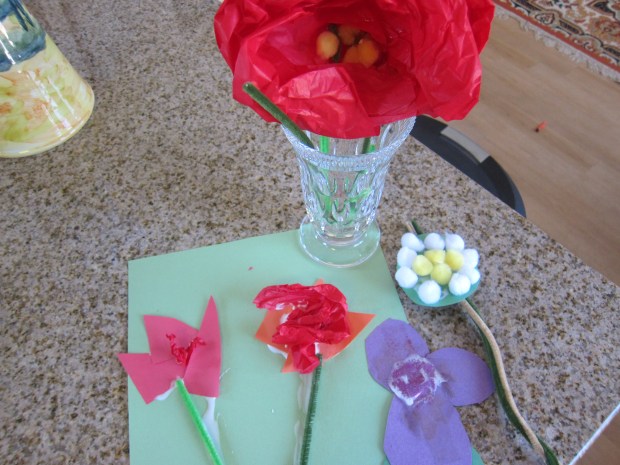
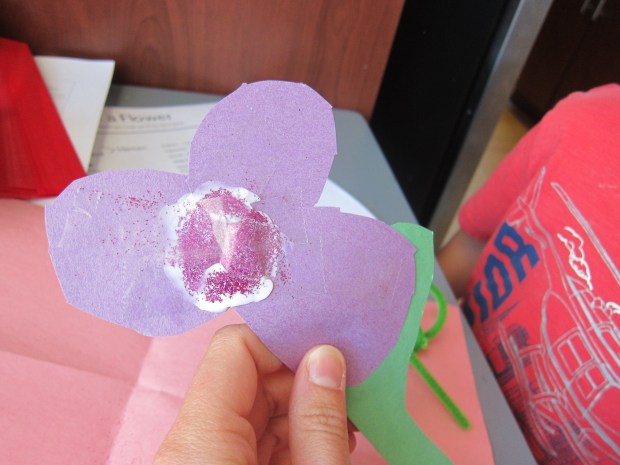
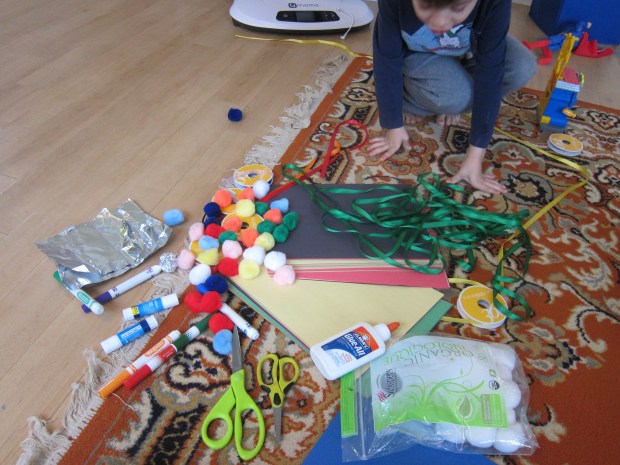
First, we needed to see capillary action in, well, action, with Capillary Action Art. Using the provided double-sided tape dots and clear slides, Travis attached on three string stems and 3 coffee filter paper flowers.

Kiwi Trees (8)

He added the provided binder clips on either side of the slide’s bottom, and two additional clips to hold everything in place. Clever: now the blender clips meant the slide could stand upright over the provided paint tin.

Kiwi Trees (9)

He dripped liquid watercolors into three of the compartments. There was red and yellow watercolor, and his booklet suggested combining them in the third compartment to make orange.

Kiwi Trees (10)

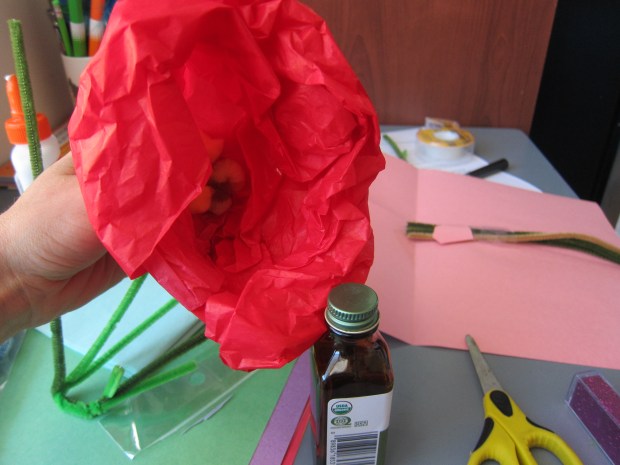
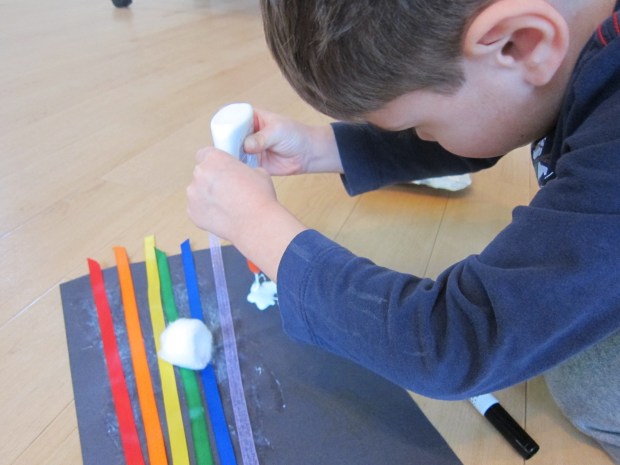
Almost instantly, the color was bleeding up the stems.

Kiwi Trees (11)

Travis was practically shaking with amazement as he watched this, especially because of how fast it happened.

Kiwi Trees (4)

When it reached the tissue “flowers,” he was ecstatic.

Kiwi Trees (3)

Kiwi must have known this would be a big hit; there are enough materials to do the project twice. Needless to say, we repeated it instantly.

As a nice finishing touch, you can use additional double-sided tape dots to place the slides into a cardboard frame, and save your artwork. Talk about STEAM!

Kiwi Trees (15)

The second activity was to Build a Balancing Tree. This required slotting together two wooden pieces as the trunk, and inserting that into a wooden base.

Kiwi Trees (23)

Wood leaves and roots allow your little engineer to tip the tree one way or another.

Kiwi Trees (18)

At first, Travis seemed disappointed. But then we put the tree to the test in a Tilting Tree Game. Roll the dice to add leaves or roots to one of the four quadrants… but if you roll the (!) symbol, there’s a natural disaster! This can be a tornado (blowing on the tree), earthquake (shaking the box it sits on), or forest fire (removing the leaves from certain colored sections).

Kiwi Trees (19)

Travis cackled every time we thought our tree was nearly complete but then disaster struck.

Kiwi Trees (20)

Okay, so this isn’t perhaps the nicest way to teach kids about natural disasters, but it sure had him thinking about the stability that a tree’s roots provide, and was a ton of fun.

Kiwi Trees (22)

We concluded with two additional activities from the booklet. First, you can demonstrate the most mundane capillary action of all with a paper towel. Pretend to spill a little water or juice on the table (Travis thought it was quite funny that mom made a mess on purpose) and then quickly place a paper towel over it. The fibers act just like the root system of a plant!

Kiwi Trees (6)

Next, we repeated a classic flower-dyeing experiment, but with a slight twist. Use any white flowers for the game, such as carnations or roses. Trim the stems at an angle, then carefully slit the stems down the middle.

Kiwi Trees (12)

Fill two cups with lukewarm water and add 20 drops food coloring (in different colors) to each cup.

Kiwi Trees (13)

Arrange two flowers so that the halved stems dangle one into each cup. I found it useful to use a paper clip to hold them in place, so the flowers didn’t tip.

Within just an hour or two, we could already see a pretty tint… on each half of the flower!

Kiwi Trees (16)

By morning, the colors were vibrant and split evenly down the middle, a fantastic visual of capillary action.

Kiwi Trees (17)

We finished with two fun suggested reads: The Tree Lady by H. Joseph Hopkins and Tell Me Tree by Gail Gibbons. In sum, we loved this crate!

Amazing Astronauts

Amazing Astronaut (4).JPG

Travis and I will be cooking up some cosmic cuisine in the days ahead, thanks to his latest Raddish Kids crate. But even before the cooking began, we had to try out the lesson plan on astronauts, one of his favorite topics in the world.

To set the stage, ask your child what it would be like to be an astronaut, and what he or she would most want to do. Travis wants to fly a spaceship to another planet!

We watched a few informative videos from Chris Hadfield (familiar to us from one of Travis’s favorite books, The Darkest Dark). Hadfield, an astronaut from the ISS, has fantastic videos featuring everything from eating dessert in space to sleeping in space.

I read Travis some of the facts about what it takes to become an astronaut at NASA and then it was time to simulate being an astronaut with three cool projects.

For the first, we made space boots to walk on the moon! Travis drew a “terrain” on a long strip of butcher paper.

Amazing Astronaut (1)

He drew astronauts and craters, and then we spread the paper outdoors on our patio.

Amazing Astronaut (2)

Meanwhile, I made the boots: poke holes in two buckets, and thread rope or twine through. Gather the rope up above the buckets and knot into a loop.

Amazing Astronaut (3)

Very carefully, have your child step up onto the buckets and hold the ropes taut. Travis got the hang of lifting his arms to lift the rope as he took each step.

Amazing Astronaut (5)

“This is what it felt like for Neil Armstrong to walk on the moon!” he marveled. He gave a proud astronaut cheer at the end of his moon walk.

Amazing Astronaut (6)

Next up, we created a space meal! Watch Chris Hadfield again, and then set out a menu. Travis had a juice box, one of baby sister’s pouches, and a tortilla!

Amazing Astronaut (7)

For added fun, make sure to suit up first: snow pants make for a big bulky astronaut suit; Travis insisted on adding his jacket, too!

Amazing Astronaut (8)

Dining in space is fun!

Amazing Astronaut (10)

Finally, we made a Glove Box, which is how astronauts study potentially harmful materials. Trim the top pieces from a cardboard box and cut two arm holes in one side.

Amazing Astronaut (11)

Fill with fun items. Rocks from Travis’s collection made natural “moon rocks” of course, and I added a few other odds and ends.

Amazing Astronaut (12)

Travis slipped on garden gloves (cleaning gloves would work, too). Cover the top with saran wrap, and have your child insert their hands through the holes; now it was like he was manipulating the items from within an astronaut’s glove box!

Amazing Astronaut (13)

He loved peering at the rocks through the magnifying glass.

Amazing Astronaut (14)

For added authenticity, you can duct tape the wrists of the gloves to the holes, but we skipped that step. What fun to be an astronaut for the day!

Amazing Astronaut (15)

Tessellations

Tesselations (9).JPG

Tessellations are geometric patterns that perfectly fill an area with no overlaps. I remember making them using a computer program back in middle school, and marveling at the way the patterns could rotate or connect. Here is a highly simplified version that even a kindergartner can grasp, which can gently introduce your child to the concept.

Tesselations (6)

To make your tessellation, draw a line along one edge of a post-it with marker, in any shape, as long as the line extends from corner to corner.

Tesselations (1)

I had to help Travis a bit with this slightly odd instruction.

Tesselations (2)

Cut out along the marker line, then tape that piece onto the front of the post-it. Your tessellation is ready to go!

Tesselations (3)

Now trace this in a line across a piece of paper.

Tesselations (4)

Once you’ve filled in the paper, color each portion, ideally in a pattern.

Tesselations (7)

Travis did great careful work to color within the lines, and thought the final result looked a bit like the scoots on a turtle shell!

Tesselations (8)


Magnetic Hearts

Magnetic Heart (10).JPG

This quick craft not only teaches about the topic of symmetry, but is also a fantastic way to explore the properties of magnets!

To cut out symmetrical hearts, fold cardstock in half and draw half a heart; cut out.

Magnetic Heart (1)

I thought to only have Travis help cut out the accompanying two long rectangles we would need from each color of cardstock, but he insisted on cutting out the heart himself – great practice along curves!

Magnetic Heart (2)

Open up the paper to reveal a symmetrical heart, then cut it in half.

Magnetic Heart (4)

Fold the rectangular strips you’ve cut out accordion style to form 5 pleats.

Magnetic Heart (5)

Fold this strip around itself to form a square and use tape or glue to adhere shut.

Magnetic Heart (6)

Tape a magnet to one side of the square, facing towards the center of your heart.

Magnetic Heart (7)

Tape down onto the heart and repeat on the other side.

Magnetic Heart (8)

Now, your two heart halves will snap together!

Magnetic Heart (9)

The other fun way to do this is to deliberately set up the magnets to repel each other. Travis loved chasing halves of hearts around the play room this way!

Magnetic Heart (13)

As you play, have a quick talk about attraction and repulsion in magnets, and you’ll have thrown a little learning into the fun.

Magnetic Heart (12)


Animal Craft Challenge

Animal Challenge (6)

Travis loved this month’s craft challenge from Highlights magazine: to make an animal using nothing more than an empty egg carton, pipe cleaners, pom poms, and googly eyes.

I was thinking something cute and fluffy, but Travis immediately knew he wanted a snake! Pipe cleaners were the obvious choice for the body.

Animal Challenge (1)

We twisted several lengths together to make long snakes. He wanted to attach eyes next, but I asked him if he thought the eyes would affix well to the pipe cleaners. He decided no, and realized an egg carton piece could be the head!

We poked holes through the egg carton segments to attach heads to bodies, and glued on the eyes.

Animal Challenge (2)

With leftover egg carton portions all around him now, he toyed around with gluing pom poms and eyes to single segments, but this didn’t work very well. Could we use the bigger, lid portion of the carton we wondered, for a body?

Animal Challenge (3)

Now Travis knew what he wanted: a spider! We threaded four pipe cleaners through from one side to the other, to make 8 legs. He wanted to glue on 8 eyes, but we only had room for 5 eyes to march across.

Then Travis decided it needed to be furry with pom poms – a tarantula! He was so thrilled with this spider that he couldn’t wait for the glue to dry.

Animal Challenge (4)

What a wonderful craft challenge, thanks Highlights!

Animal Challenge (5)

Water Work

Water Work (6)

This easy experiment will teach your preschooler or kindergartner about evaporation in an easy to see, hands-on way. Plus get you out into the sunshine each morning!

Travis filled two equal containers with 1 cup water each. We made sure to measure carefully before pouring, so our results would be accurate.

Water Work (1)

We screwed the lid tightly on one container but left the other container open. Place them somewhere that gets direct sunlight.

Water Work (2)

Each morning for a week, we headed out and measured the water. On the first day, the difference wasn’t that great, 1.5 inches of water in the lidded container, versus 1 inch in the open one.

Water Work (3)

By the next day, the results were 1.25 inches in the closed container (some had condensed on the lid!) versus only .75 inches in the open.

Water Work (5)

I asked Travis where the water was going and he correctly understood that some was evaporating into the air each day.

We continued to check on subsequent days, until a final reading of .25 inches in our open container. As a final component, Travis drew what had happened, showing a very full closed container and only a small layer of water in the open one. Those are three hot orange suns boiling off the water at the top!

Water Work (7)

A fantastic STEM/STEAM project for your summer!


Pollinators for Every Flower

Pollinators (11).JPG

The final lesson plan for the Garden Party kit from Raddish Kids was a huge hit, since Travis loves bugs and everything about them. He was a whiz already at much of this topic, but enjoyed the hands-on and artistic aspects of it!

When he came to the table for our lesson, he was surprised to find a flower waiting.

Pollinators (1)

We explored the flower in detail, including: rolling the leaves between his fingers to see how that changed the texture; smelling it; feeling the fluffy petals; and looking closely with his eyes.

Pollinators (3)

As he explored the flower, I read to him from a provided chart about plant anatomy. Much of it was a bit over a preschooler’s head, so focus on the bits your child will grasp. He liked the rather astounding fact that while people and animals are either a man (male) or woman (female), a plant is both!

Pollinators (10)

Some pollen ended up on the table… the perfect segue-way!

Pollinators (2)

I asked him to name pollinators he knew and he quickly rattled off butterflies and bees. After some prompting, he also guessed birds. I told him he was correct, especially hummingbirds, and then named a few surprises: bats, beetles, and the wind!

The next challenge was to pick a pollinator and make a flower with art supplies that was specific to that pollinator. First up was a bee! Thanks to the provided pollinator profile cards from Raddish, we learned that bees like flowers that smell sweet and in bright colors like yellow and purple.

Travis chose construction paper for this flower, and added glittery “pollen” in the center. To make it smell sweet, we dabbed a vanilla extract-scented pom pom around the petals. Travis loved this!

Pollinators (6)

Next he wanted to make one for a hummingbird. Our card said the birds don’t land on the petals but instead dip in their beaks, so I helped him fashion a tube-shaped flower from tissue paper (we used red, since the birds like the bright colors). It was fun to add vanilla to the “pollen” pom poms in this one, too, even though the profile card said the birds had good vision but a poor sense of smell.

Pollinators (5)

Travis next wanted beetles, delighting in the notes on the card that they like “unpleasant” smelling flowers or ones with no scent. We used white pom poms, since beetles prefer pale or dull colors, and added lots of yellow pollen in the center, which the beetle eats.

Pollinators (7)

He was so proud! I loved watching him think carefully about each pollinator, as well as use different materials each time.

Finally, he wanted a flower for butterflies! This one needed petals for the butterfly to rest on, bright reds and oranges, and no vanilla extract since the butterfly has good eyesight but a poor sense of smell.

Pollinators (9)

Overall, a fantastic lesson, with a little bit of art, a little bit of science, and important information about the role pollinators play in food crops thrown in there.

Edible Parts of the Plant

Parts of Plant (13)

To complement a recent Strawberry Shortcake recipe from Raddish Kids, Travis and I had fun with this homeschooling lesson on the various edible parts of a plant.

Ahead of time, I gathered two examples of each of these six plant categories:

  • Roots: carrot and potato
  • Stems: asparagus and celery
  • Flowers: broccoli and flowers
  • Seeds: peas and pinto beans
  • Leaves: spinach and lettuce
  • Fruit: tomato and apple

I hid all of these under a blanket, and called Travis over.

Parts of Plant (2)

He was immediately intrigued, of course, checking out the blanket with his hands and using his nose, too, when I invited him to use all his senses. Could he guess what was underneath? Tada! The big reveal.

Parts of Plant (3)

I challenged him to put the items into pairs, using whatever criteria made sense to him. This confused him a bit, but he began to match them up. Some he got correct without understanding why; it was easy to see that the spinach and lettuce leaves were similar, for example, or that the tomato and apple were both big and round.

Parts of Plant (4)

When he was finished, I shifted his answers around slightly. Aha, the asparagus and celery went together… because they were both the stems of plants. Same for the potato and carrot – both roots!

Parts of Plant (6)

I ran through a quick definition of each of the six parts. As a bonus, I asked him why the mushroom was leftover. Aha – a fungus!

Parts of Plant (7)

Big kids may want to pause here and make a chart and then brainstorm other foods that fit each of the six categories. But Travis and I hopped right along to the next activity: artwork! We used all of the items to make a picture. I gave him complete free reign, which meant that at first he wasn’t depicting anything, just enjoying the materials. He discovered, for example, that you can pull strings from the celery that glued down nicely.

Parts of Plant (8)

Then he got a bit more purposeful. There was a flower rimmed in pinto beans with a celery stem and mushroom center. And orange carrot curls for a sun.

Parts of Plant (11)

This, he proudly informed me, was a whale.

Parts of Plant (14)

Big kids may want to make a plant with their plants, or perhaps a funny plant person!

Parts of Plant (12)

We next checked out a few of Raddish’s suggested links, including a read-aloud of the very funny Tops and Bottoms. As he watched an informative clip about plants, Travis kept running over with tidbits. “Did you know rice is a seed??” I love seeing him so excited about learning!

We next made an art collage of the six plant parts using a grocery store flyer.

Parts of Plant (15)

After he cut out all the pictures of fruits and veggies, we talked through where on our collage each item belonged.

Parts of Plant (16)

This was also great for sightreading words!

Parts of Plant (17)

As a bonus activity, we tested out Raddish’s suggested Kitchen Garden Experiment to regrow food scraps. We read about how plants can stockpile nutrients to keep growing for a short time, provided with water and sunlight, even if they no longer have soil.

I set out three different vegetable scraps for Travis: green onion bulbs, the bottom of a head of celery, and the bottom of a head of romaine lettuce.

Regrow Food (1)

We placed each in a container filled with water and set them on the windowsill. Travis’s hypothesis was that celery would grow fastest.

Regrow Food (3)

Each day we changed the water and observed. It was immediately apparent that green onion grew far faster than the other two.

Regrow Food (4)

After a couple of days, we measured the progress.

Regrow Food (8)

We also drew a picture of what he had observed. Then Travis wanted to eat the green onion, so that was the end of our scientific method!

Regrow Food (10)

There is so much more that older kids can do to learn about plants. Consider cooking a recipe that uses all 6 parts of a plant, or perhaps sprouting seeds.

Sidewalk Constellations and Mini-Books

Sidewalk Constellation(5).JPG

It was a beautiful morning for sidewalk chalk art, and to add purpose to Travis’s art, I decided to throw in a little STEM learning, too!

We headed outside with our book of constellations, and I challenged him to lay out shells (rocks would work well, too) to represent each star in the pictures. We started with the Big Dipper.

Sidewalk Constellation (6)

Could he now connect the lines, following along with the picture in our book? This was a bit of a challenge for Travis, who had to consult the picture between each line, but he ended up with a great dipper.

Sidewalk Constellation (7)

The Southern Cross was next. He loved using big shells for two of the stars, and had an a-ha moment when he figured out which way he should draw his chalk lines.

Sidewalk Constellation (8)

Then we got silly and made up new constellations. I let his imagination run wild, and soon we had a snake constellation:

Sidewalk Constellation (1)

And a ninja constellation:

Sidewalk Constellation (9)

Make sure you take pictures of all your artwork before you head inside! I then had these printed so we could put them into a booklet.

Sidewalk Constellation(3)

Add one picture per page, along with a fact or two about that constellation.

Sidewalk Constellation (b)

We left a page blank, for future imaginative additions!

Sidewalk Constellation (c)

These mini-books will serve both as a memory capsule of your day and for storytime down the road.

Sidewalk Constellation (d)

Rainbow Science

Make a Rainbow (8).JPG

With all the talk about rainbows this month, whether cooking or crafting, it was time to get scientific. What exactly makes a rainbow appear? Today Travis and I answered the question in two ways, one more scientific, and one more artsy!

First, following the lesson plan provided by Raddish Kids, we did a visualization exercise. This was a first for Travis, but with a few prompts he got the idea. I told him to close his eyes and imagine and rainbow. He said he could see his rainbow through the trees in the morning, and it was star-shaped! Guide your child through this: what does the air feel like? Where is the rainbow? What time of day is it?

Next we did the quick run-down on the science. Raddish Kids provided two great video links to add some visual fun to hte science.

Make a Rainbow (1).JPG

We watched a few suggested video clips, to understand the science behind refraction. Raddish provides a very detailed write-up that older children can study, too.

Make a Rainbow (2)

Next up was a challenge: Could Travis make a visual of a rainbow that not only showed all the colors, but also showed how the rainbow is formed? It turns out this is called process art, and I laid down lots of material for Travis to choose from but provided little direction beyond that.

Make a Rainbow (3)

He decided he wanted a ribbon rainbow, so used lots of glue to adhere the lengths.

Make a Rainbow (4)

I was so proud when he realized he was gluing in the wrong order, and fixed things with his red placed first!

Make a Rainbow (5)

Next he needed to add the science part. He chose to use marker for sun and rain drops, and cotton balls for clouds. Now he had all the ingredients necessary for a rainbow to form!

Make a Rainbow (7)

I made a second version alongside him to show him how open-ended this project is: cotton ball clouds, tin foil raindrops, and pom poms for my sun and rainbow.

Make a Rainbow (6)

Finally, we formed a rainbow with science! Place a prism in a glass of water. Shine a flashlight or other light source on it.

Make a Rainbow (9)

Hold up a piece of white paper behind the glass, and you should see a rainbow reflected on the paper. It’s a bit tough to see in the photograph, but it was there!

Make a Rainbow (10)