Easy Vegan French Toast

Vegan French Toast

It was a lazy summer Friday, and what better way to start than French toast in bed? (!) The secret ingredient in this version? Bananas! If you want the batter a little thicker, just go bananas – use 3 instead of 2! For the milk, any non-dairy milk will do. We like vanilla almond milk.

Ingredients:

  • 2 ripe bananas
  • 3/4 cup non-dairy milk
  • 1 teaspoon ground cinnamon
  • 1 teaspoon vanilla extract
  • Bread slices (any kind)
  • Earth Balance butter
  • Maple syrup
  1. In a blender, combine the bananas, milk, cinnamon, and vanilla. Process until smooth.
  2. Transfer the banana mixture to shallow plate. Meanwhile, melt the butter in a skillet over medium-high heat – I use about 1 tablespoon for every 2 slices of French toast. Repeat as needed until you’ve prepped all your slices.
  3. Dip the bread slices into the batter and transfer to the skillet. Cook for about 2 minutes on each side, until golden brown.
  4. Drizzle with maple syrup before serving.

Vegan French Toast alt

Mason Jar Terrarium

Mason Jar Terrarium (6)

Here’s a beautiful project if you want to save any treasured finds from your summer walks!

Knowing that I wanted to put a terrarium together, we first purchased dry moss at a craft store, because I didn’t want to rip any real moss from nature. This element turned out to be the biggest hit of the craft.

Mason Jar Terrarium (1)

Travis fell in love with the way it felt – how fluffy it was, the way he could pull strands of it apart, etc. So before we began the terrarium, we played with it for a while in a large bin. Then it was time to add the moss to a clear glass jar.

Mason Jar Terrarium (3)

Next we were off to find other treasures! We returned to add rocks and a few leaves to our terrarium.

Mason Jar Terrarium (5)

A little sleeping squirrel added a whimsical touch.

Mason Jar Terrarium (7)

You could keep your terrarium on display for quite some time. However, ours lasted barely a day before Travis wanted to play with the elements inside again. Back to the bin we go!

Mason Jar Terrarium (8)

Black Bean Quinoa Bowl

Black Bean Quinoa.JPG

If your kiddos don’t like quinoa, any grain would work in this good-for-you dinner bowl – simply try rice, millet, pearled barley etc. instead. With very little heat involved, it makes a perfect summer entree!

Ingredients:

  • 1/3 cup diced red onion
  • 2 tablespoons fresh-squeezed lime juice
  • 1 (15-ounce) drained and rinsed can black beans
  • 1 cup corn kernels
  • 3 diced tomatoes
  • 5 ounces shredded Daiya cheddar
  • 1/4 cup chopped fresh cilantro
  • 3 tablespoons olive oil
  • 3 cups cooked quinoa
  • 1/4 teaspoon salt
  1. Combine the red onion and lime juice in a small bowl; set aside while you prepare the rest of the ingredients.
  2. In a large bowl, combine the black beans, corn, tomatoes, cheddar, cilantro, and olive oil. Toss in the quinoa, along with the red onion mixture and the salt.

Paper Plate Fraction Puzzles

Plate Fractions (6)

These homemade puzzles were easy as can be, and were a huge hit! Although preschoolers might not entirely latch onto the notion of fractions, it’s an easy way to introduce the concept while having fun. Bigger kids can cut their puzzles into increasingly intricate fractions, such as sevenths or eighths.

To start, all you need to do is decorate paper plates with markers. Travis was very intent adding brown dots and brown circles around the rims of the plates.

Plate Fractions (1)

I added a few decorative elements to each plate so that there would be a recognizable image to form into a puzzle for each.

Plate Fractions (2)

For a 3 year old, I cut plates into halves, thirds, or fourths.

Plate Fractions (4)

Travis puzzled over making the four pieces of this one into a full circle for quite some time!

Plate Fractions (8)

He loved our puzzle that was in thirds, and was so delighted every time he made each paper plate whole again.

Plate Fractions (5)

A great little morning diversion.

Plate Fractions (7)

Number Crate

koala number (10)

The Number Crate is by far my favorite crate we’ve received from Koala Crate to date, certainly the most M of the STEM acronym (rather obviously, since the topic was numbers). It wasn’t necessarily Travis’s favorite, but we still had lots of fun!

Things started off with scientific mixing and pouring to make Playdough, which he loved. Hmm, what could be in this squishy pouch?

koala number (2)

In a bowl we mixed together our dough conditioner, dough stabilizer, dough concentrate, and dough liquid.

koala number (4)

Travis noticed that it smelled like Fruity Bunnies! He immediately fell to kneading and playing with the dough once it was the right consistency. The provided wooden sticks were great for making “abstract art,” as well as cute porcupines and “birthday cakes”.

koala number (6)

I appreciated that the sticks had no pointy end, unlike the toothpicks we normally have around the house.

koala number (5)

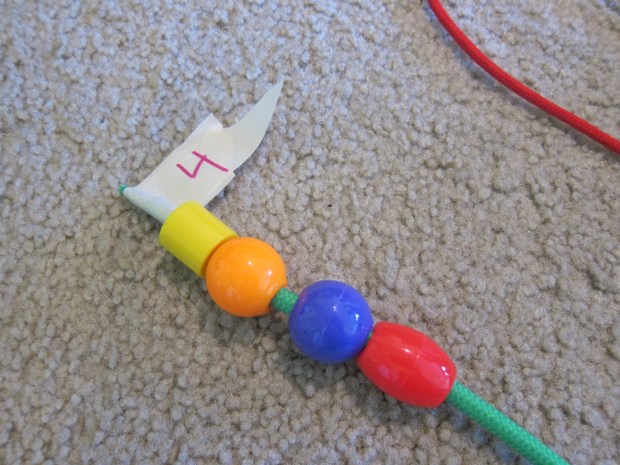
Next it was time to put our playdough to work with the provided Number Activity Mats. Two of these were obviously about numbers – counting balls up to 10 and an intro to measuring. Having a visual cue of each ball he placed while counting really helped Travis count carefully, instead of skipping a number as he’s prone to do!

koala number (14)

The measuring was cute, and great for teaching him to roll long shapes.

koala number (17)

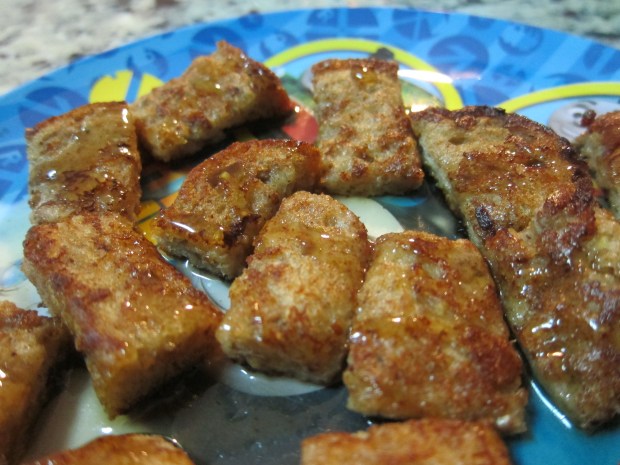
Then we had imaginative fun with play food:

Koala number (8)

And play faces:

FR week (15).JPG

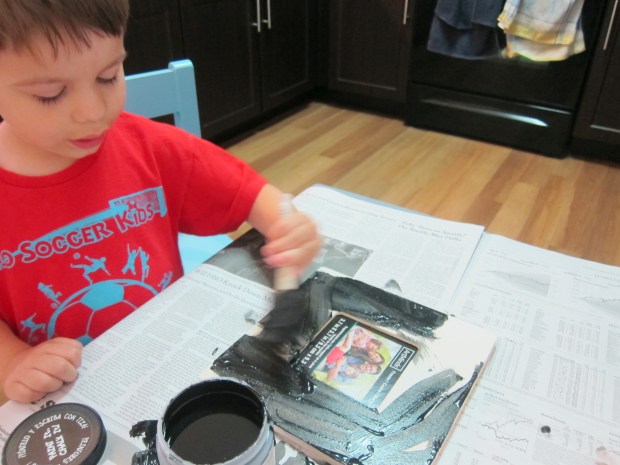
The final element of our crate was Domino Cards and the instructions for two Number Games. You could create these cards easily at home with cardboard and permanent markers! The rules of the game are a bit advanced for those on the young end of Koala’s age spectrum (3 to 5 years). For example, matching up pips on the dice was hard for Travis, as suggested in one game.

koala number (11)

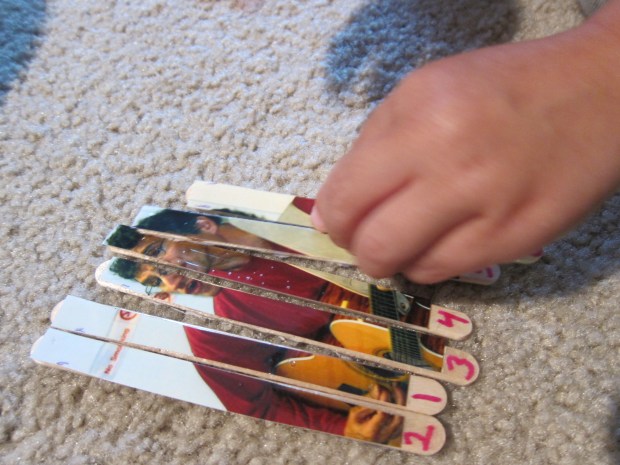
We could, however, make domino mazes by matching numbers or pictures. Overall, the activities in this crate will last us a long time for number learning fun, as Travis grows into some of the suggested games.

koala number (13)

For those who don’t have Koala’s pre-mixed playdough pouches, here is an easy at home (and no-cook!) recipe:

2 cups flour

1 cup salt

1 teaspoon oil

1 cup water

2 drops food coloring

Combine the flour and salt in a large bowl. Add the water, oil, and food coloring, stirring to combine. Knead the dough on a mat or baking sheet until everything is combined. Add a bit more flour if the dough is still a little wet (I ended up adding a generous extra 1/4 cup). Final step? Play!

Koala numbers alt

Travis loved helping stir up this batch, and was arguably way more into the making of both playdoughs than he was the number games that followed.

As a final gross motor activity, we counted with movement along to a suggestion in the booklet. Bend 1 time, jump 2 times, shake 3 times… and more!

Koala numbers var.JPG

Loaded Baked Potato

Loaded Baked Potato

I lived in London the summer I was 12, and there was a restaurant near our flat that specialized in nothing but baked potatoes. You could pretty much stuff your potato with any other food under the sun. To this day, I still think of that restaurant when I load up a baked potato as the entree. Here’s hoping my kids develop as fond a memory for loaded baked potatoes as I have!

Ingredients:

  • 4 baking potatoes
  • 1 tablespoon olive oil
  • 1 medium onion, chopped
  • 1 (15-ounce) drained and rinsed can chickpeas
  • 1/4 teaspoon smoked paprika
  • 1/4 teaspoon salt
  • Chopped chard leaves (to taste)
  • Non-dairy sour cream
  1. Bake the potatoes at 450 degrees F for about 1 hour, or until soft all the way through. Let cool slightly.
  2. Meanwhile, heat the olive oil in a large skillet over medium-high heat. Add the onion and chickpeas; cook for 5 minutes.
  3. Stir in the paprika, salt, and chard leaves – cook for about 1 minute, until the chard wilts. Use as little or as much chard as your like: leaves from a whole bunch if your family enjoys their greens, just a few leaves if you are slowly introducing the taste!
  4. Dollop with the non-dairy sour cream before serving.


Number Bead Stringing

Number Bead Stringing (5)

This project is great on so many levels! It keeps little hands busy if you’re doing chores around the house, works their number skills, and helps hone their fine motor skills.

The original post I saw for the game said to thread beads onto pipe cleaners, but I didn’t have any at home. Instead, we have several laces from a bead lacing kit, so I attached a piece of masking tape to the end of each and numbered them 1 through 10.

Number Bead Stringing (1)

The task was then to thread the correct number of beads onto each string.

Number Bead Stringing (2)

Travis loved counting along as he threaded, and said his creations were necklaces for mommy and daddy – how sweet!

Number Bead Stringing (6)

Don’t fret if your child doesn’t complete threads 1 through 10 in one sitting, this is the kind of game you can leave lying around for a little while.

Number Bead Stringing (4)


Chalkboard Frame

Chalkboard Frame (6)

I keep hearing about how fun chalkboard paint is, so it was finally time to give it a try! With a simple coat of paint, you can transform a room, wall, or object.

We opted to start out small; a wooden picture frame (picked up cheap at a craft store) made the perfect canvas. Parents, be forewarned: If you’re used to using washable paint with your toddler or preschooler, you’re entering the big leagues here. Chalkboard paint is acrylic, and won’t wash out nearly as easily.

Chalkboard Frame (2)

After we carefully covered our work surface, Travis was so excited at the novelty of the paint. He made sure his black paint got all the way to the edges.

Chalkboard Frame (3)

Ok, and he was so excited he painted over the glass in the middle where a photo would go!

Chalkboard Frame (5)

Aim for 2 layers of paint; Travis was so enthusiastic we probably ended up with closer to 3 or 4.

We had to wait awhile for the chalkboard paint to dry, so this was a good project for the morning. Our busy day distracted him until I could present him with the dry frame.

Now it was time to break out the chalk!

Chalkboard Frame (7)

He loved that he could color over it however he liked, and was thrilled when I said this time there was no need for chalk to dry. A very cute project that would make a nice gift, too.

Chalkboard Frame (8)

Numbered Photo Puzzles

Number Puzzle (5)

This craft turned out to be the perfect diversion when rain hampered our outdoor plans for a summer day – it takes several hours from start to finish, which suddenly made the afternoon indoors far less daunting!

First, we needed to select photos to become our puzzle pieces, making this a great activity to talk about relatives you haven’t seen in a while, or about your child’s favorite memories.

Make sure it’s a photo you don’t mind cutting up though! Adults: Cut the photo into pieces the width of the craft sticks you will be using. We made 8 piece puzzles, but you can go bigger or smaller.

Number Puzzle (2)

Next we applied a layer of Mod Podge to the craft sticks and adhered our photo pieces. Travis didn’t like how messy his fingers got pressing the slim pieces of photo on so precisely, so soon he was involved with his own (slightly) cleaner Mod Podge game while I finished up the photo gluing.

Number Puzzle (1)

And p.s. YES, Mod Podge is vegan! How have we never used this stuff before?

We had to let the project dry, and then we applied a second layer of Mod Podge on top of the photos to set them completely, which meant another round of waiting for it to dry.

But finally it was puzzle time! Adults: Number the sticks of each puzzle with a sharpie in order 1 through 8. (Or, you know, reverse your 1 and 2 by accident, like I did in the photo below).

NUmber Puzzle (4)

Your child will easily be able to form the image by following along in number order.

Number Puzzle (6)

Travis loved the way each puzzle came together, and was so proud lining up the numbers. A fantastic way to make counting into a game.

Number Puzzles alt.JPG

Penne with Cheesy Chard

Penne Cheesy Chard (2)

The cheesy flavor in this quick main dish meal comes from a mix of nutritional yeast and vegan Parmesan sprinkles.

Ingredients:

  • 1 (12-ounce) box whole wheat penne pasta
  • 3 Tofurky Italian sausages
  • 1 bunch chard
  • 1/2 cup vegan Parmesan sprinkles
  • 1/2 cup nutritional yeast
  • 1/2 cup panko breadcrumbs
  1. Cook the pasta according to package directions.
  2. Meanwhile, chop the sausage and cook in a large skillet coated with cooking spray over medium heat for about 5 minutes, until browned. Add the finely chopped stems from the chard; cook for 4 minutes. If you use rainbow chard, this step will look beautiful!Penne Cheesy Chard (1)
  3. Drain the pasta, reserving 1/2 cup pasta water. Add the reserved water to the sausage mixture, along with the pasta and the finely chopped leaves of the chard. Cook about 1 minute, until the leaves wilt.
  4. Stir in the Parmesan, nutritional yeast, and breadcrumbs, tossing to combine.