Carrot Loaf Cake

This brunch cake, slightly adapted from an eat-your-veggies recipe in Parents magazine, is beautiful for an Easter gathering or any other springtime event.

Ingredients:

  • 1 and 1/2 cups all-purpose flour
  • 1 teaspoon cinnamon
  • 1 teaspoon baking powder
  • 3/4 teaspoon baking soda
  • 1/2 teaspoon salt
  • 1/4 teaspoon ginger
  • 1/4 teaspoon nutmeg
  • 2 Ener-G eggs
  • 3/4 cup brown sugar
  • 1/3 cup canola oil
  • 1/3 cup applesauce
  • 1 and 1/2 cups shredded carrots

For the glaze:

  • 3 ounces non-dairy cream cheese
  • 3 tablespoons powdered sugar
  • 1/2 teaspoon vanilla extract
  • 1/2 cup plain non-dairy creamer
  • Chopped pistachios
  1. To prepare the cake, combine the flour, cinnamon, baking powder, baking soda, salt, ginger, and nutmeg in a bowl. Set aside.
  2. Make the Ener-G eggs in the bottom of a large bowl. Whisk in the brown sugar, oil, and applesauce. Add the flour mixture to the applesauce mixture, then fold in the shredded carrots.
  3. Spoon the mixture into an 8×4-inch loaf pan coated with cooking spray. Bake at 350 degrees F for 50 minutes. Cool completely.
  4. To prepare the topping, stir together the cream cheese, powdered sugar, and vanilla. Begin adding the creamer a little at a time until you reach desired consistency. For a frosting, add only a few tablespoons. If you want more of a drizzled glaze, add the full 1/2 cup.
  5. Sprinkle the top of the cake with chopped pistachios as the finishing touch.

Spring Vegetable Pie with Dill Biscuits

I spotted this recipe in Parents magazine and immediately knew it would make the perfect centerpiece of a vegan Easter brunch, with a few tweaks. The family declared it worthy of a restaurant.

Ingredients:

For the vegetables:

  • 2 tablespoons olive oil
  • 2 thinly sliced leeks
  • 2 cups shredded carrots
  • 1 chopped celery stalk
  • 1 chopped fennel bulb
  • 1/2 teaspoon salt
  • 1 (14-ounce) drained can quartered artichoke hearts
  • 1 cup chopped asparagus
  • 1 (16-ounce) package frozen peas
  • 1/2 cup chopped flat-leaf parsley
  • 1 tablespoon chopped fresh tarragon
  • 3 tablespoons Earth Balance butter
  • 3 tablespoons flour
  • 3 cups vegetable broth

For the biscuits:

  • 1 and 1/2 cups flour
  • 2 teaspoons baking powder
  • 1/4 teaspoon salt
  • 6 tablespoons Earth Balance butter
  • 1 tablespoon dried dill
  • 1 tablespoon lemon juice
  • Scant 3/4 cup plain soy milk
  • 1 Ener-G egg
  1. To prepare the filling, heat the olive oil in a large ovenproof skillet over medium heat. Add the leeks, carrots, and celery; saute for 10 minutes.
  2. Add the fennel and 1/2 teaspoon salt; cook for 3 minutes. Add the artichoke hearts, asparagus, peas, parsley, and tarragon; cook for a final 2 minutes. Remove from heat and set aside.
  3. Meanwhile, melt 3 tablespoons butter in a small saucepan over medium heat. Add the flour and cook for 3 minutes, whisking constantly. Gradually add the broth, then continue to cook for about 5 minutes, whisking frequently, until the mixture thickens. Pour over the vegetables in the skillet.
  4. To prepare the biscuits, combine the flour, baking powder, and 1/4 teaspoon salt in a bowl. Cut 6 tablespoons butter into small pieces and cut into the flour mixture with a pastry blender until it resembles coarse crumbs. Gently stir in the dill.
  5. Pour the lemon juice into a liquid measuring cup and add the soy milk to measure 3/4 cup. Let stand for 5 minutes, then whisk together with the Ener-G egg. Add the soy milk mixture to the flour mixture, stirring to form a soft, sticky dough. Drop by spoonfuls over the vegetable mixture to form 6 biscuits.
  6. Transfer the skillet to the oven and bake at 450 degrees F for 20 minutes, until the biscuits are lightly browned on top.

Easter Magic

Here are a few ideas to make Easter magic happen and the holiday feel special, even though this year isn’t quite back to normal or extended family gatherings, yet.

Go to a Drive-By Easter Bunny

Sitting on the bunny’s lap is out, but check if your town has a local Easter bunny photo opportunity from a safe distance, even if that just means waving to him out the window. Included goody bags were a definite bonus!

Turn Jelly Beans into Lollipops

On Easter Eve, we “planted” jelly beans in a cup of dirt (a.k.a. a mix of chocolate cookie crumbs and chocolate cake mix).

Add a little water and tell the kids that the Easter Bunny’s magic will make them grow into lollipops overnight.

Imagine Travis and Veronika’s delight when they came down and saw that the lollipops had “sprouted”!

Easter Egg Hunt

I had a few extra tricks this year to make sure the kids’ egg hunt was their best one yet. First, I color-coded the eggs for the first time, to cut down on squabbling. Travis got green and yellow, and Veronika’s were blue and white.

As double insurance against any egg fights, Veronika’s were all hidden down low…

…and Travis’s were up high, corresponding to their relative heights. Toddler and big kid both could hunt at their own pace, with no grabbing for the same eggs.

What were your favorite Easter extras this year? Please share in the comments!

Pond Ecology Kiwi Crate

Here’s our unboxing review of Travis’s latest from Kiwi Co, all about the ecosystem of pond life. This was a neat divergence from past crates, in that it focused on a place rather than one scientific principal. There was lots to learn about frogs, fish, and more!

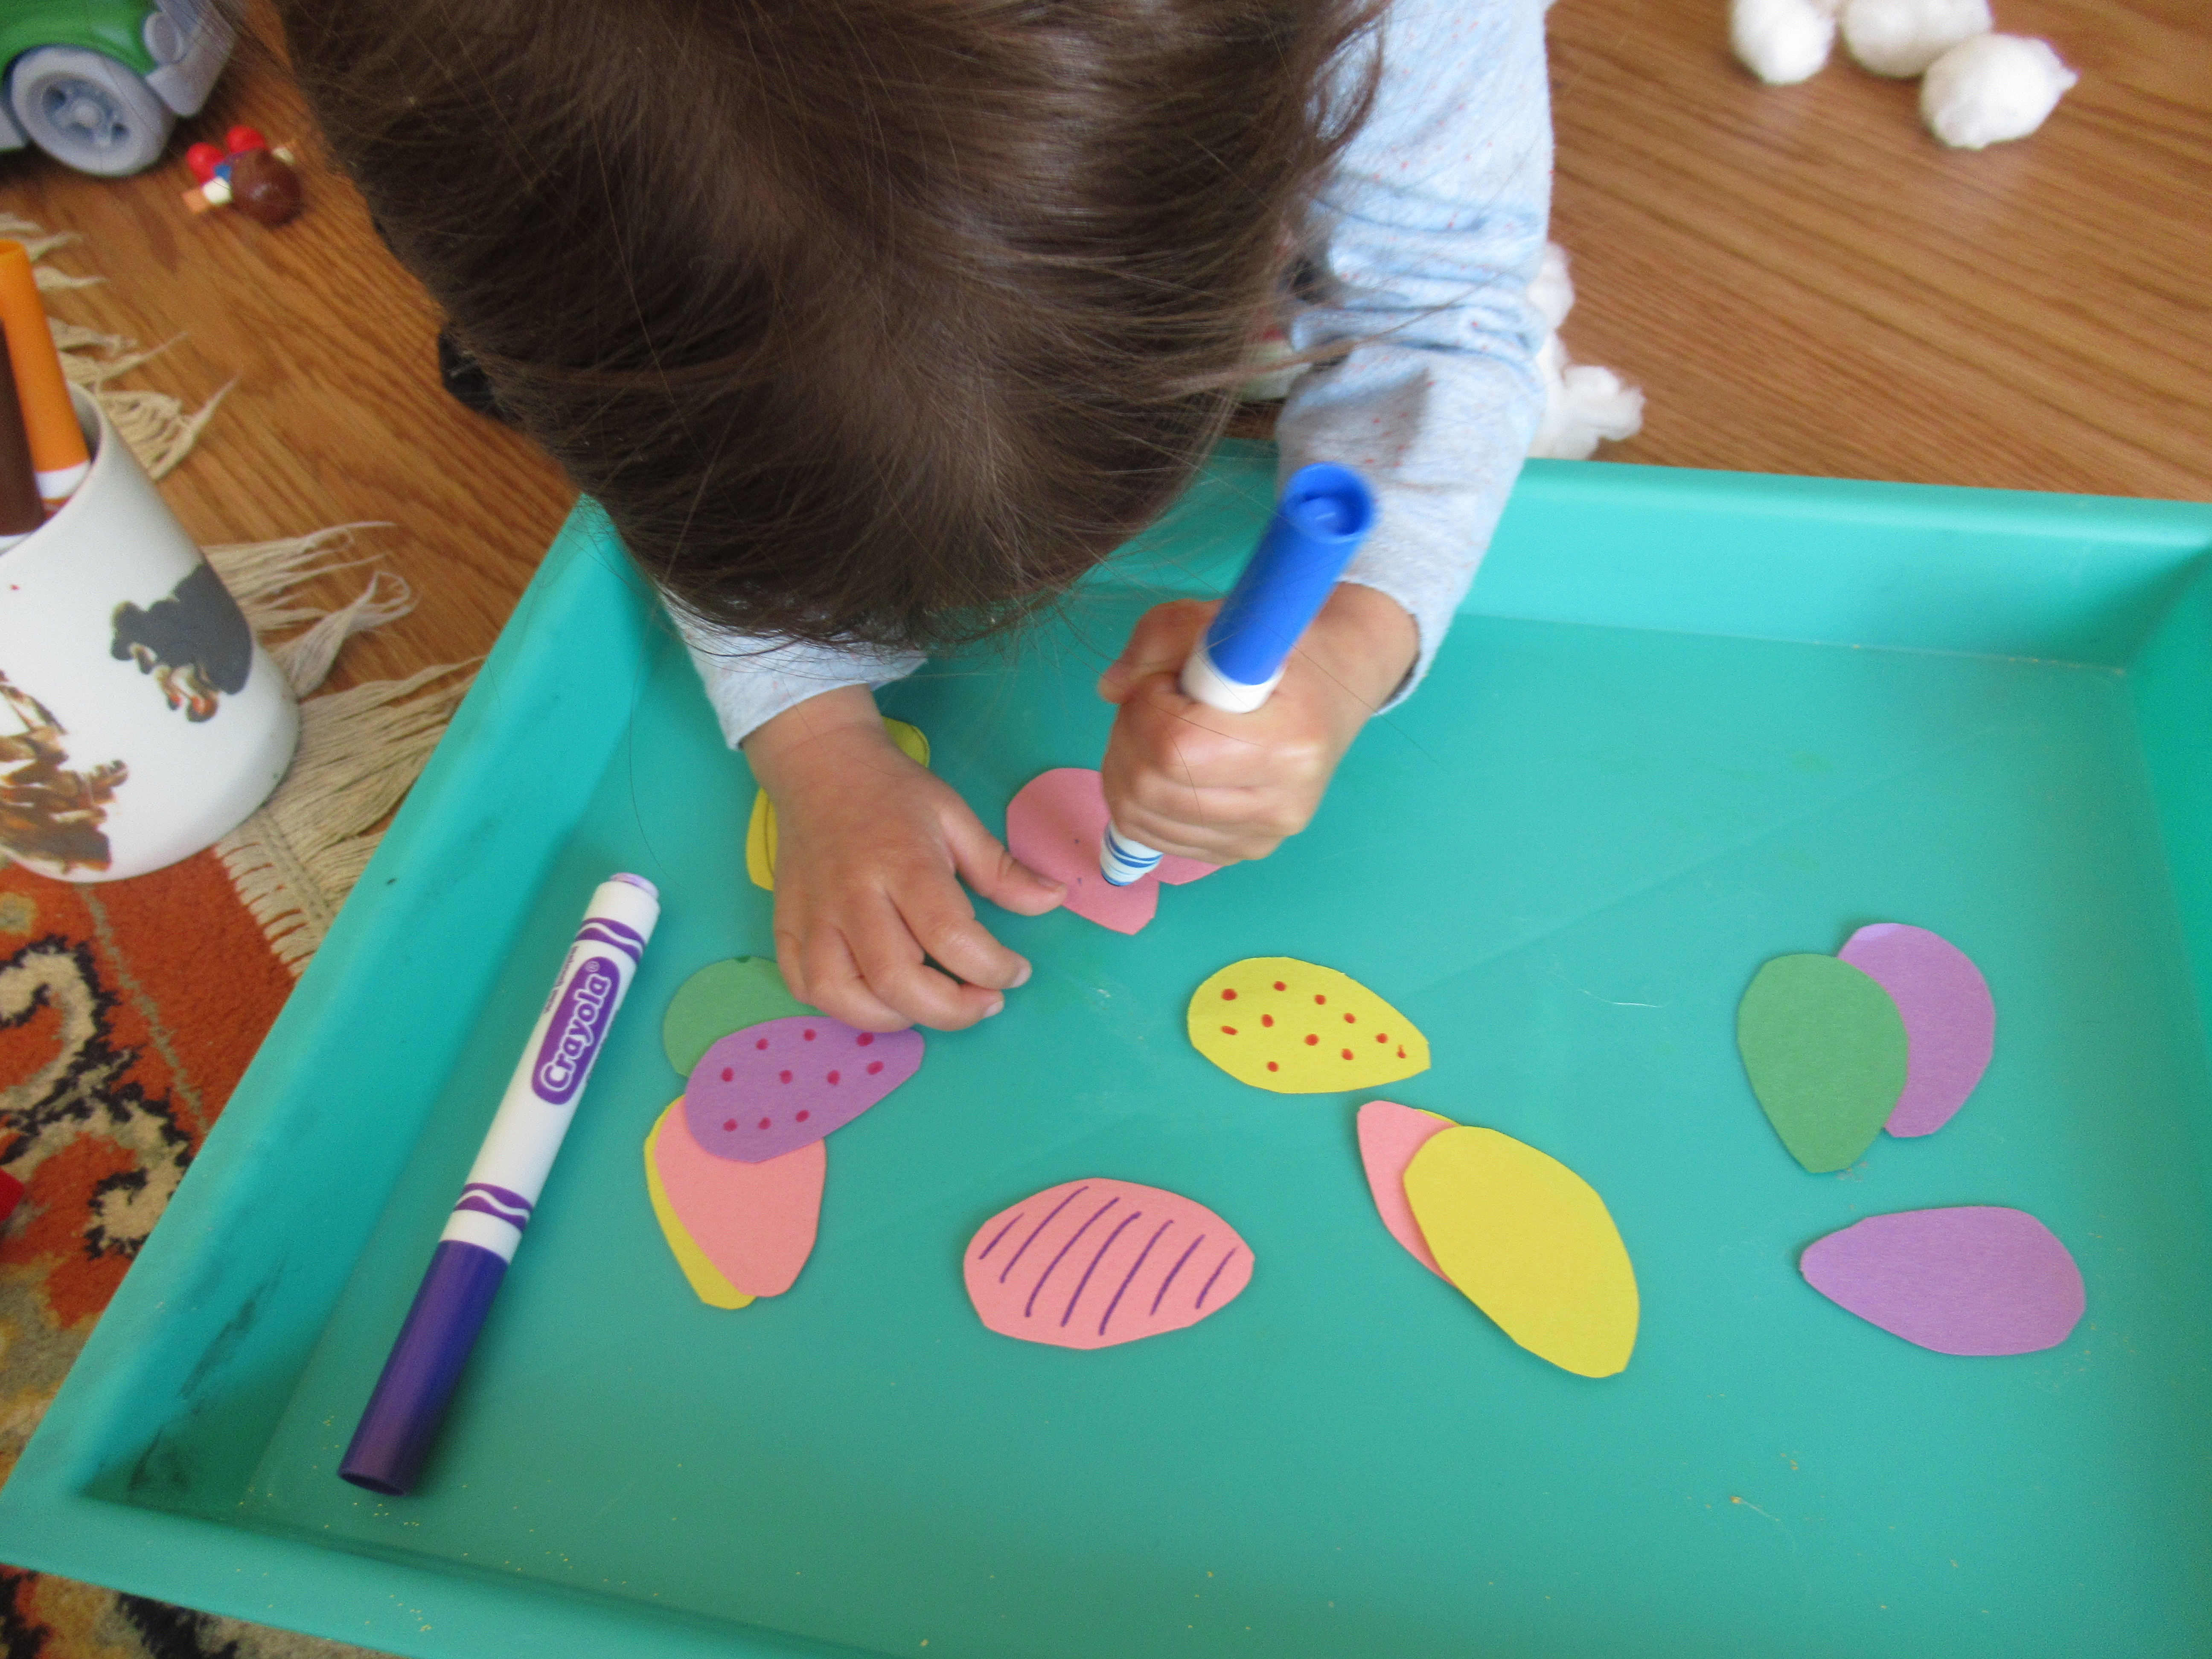
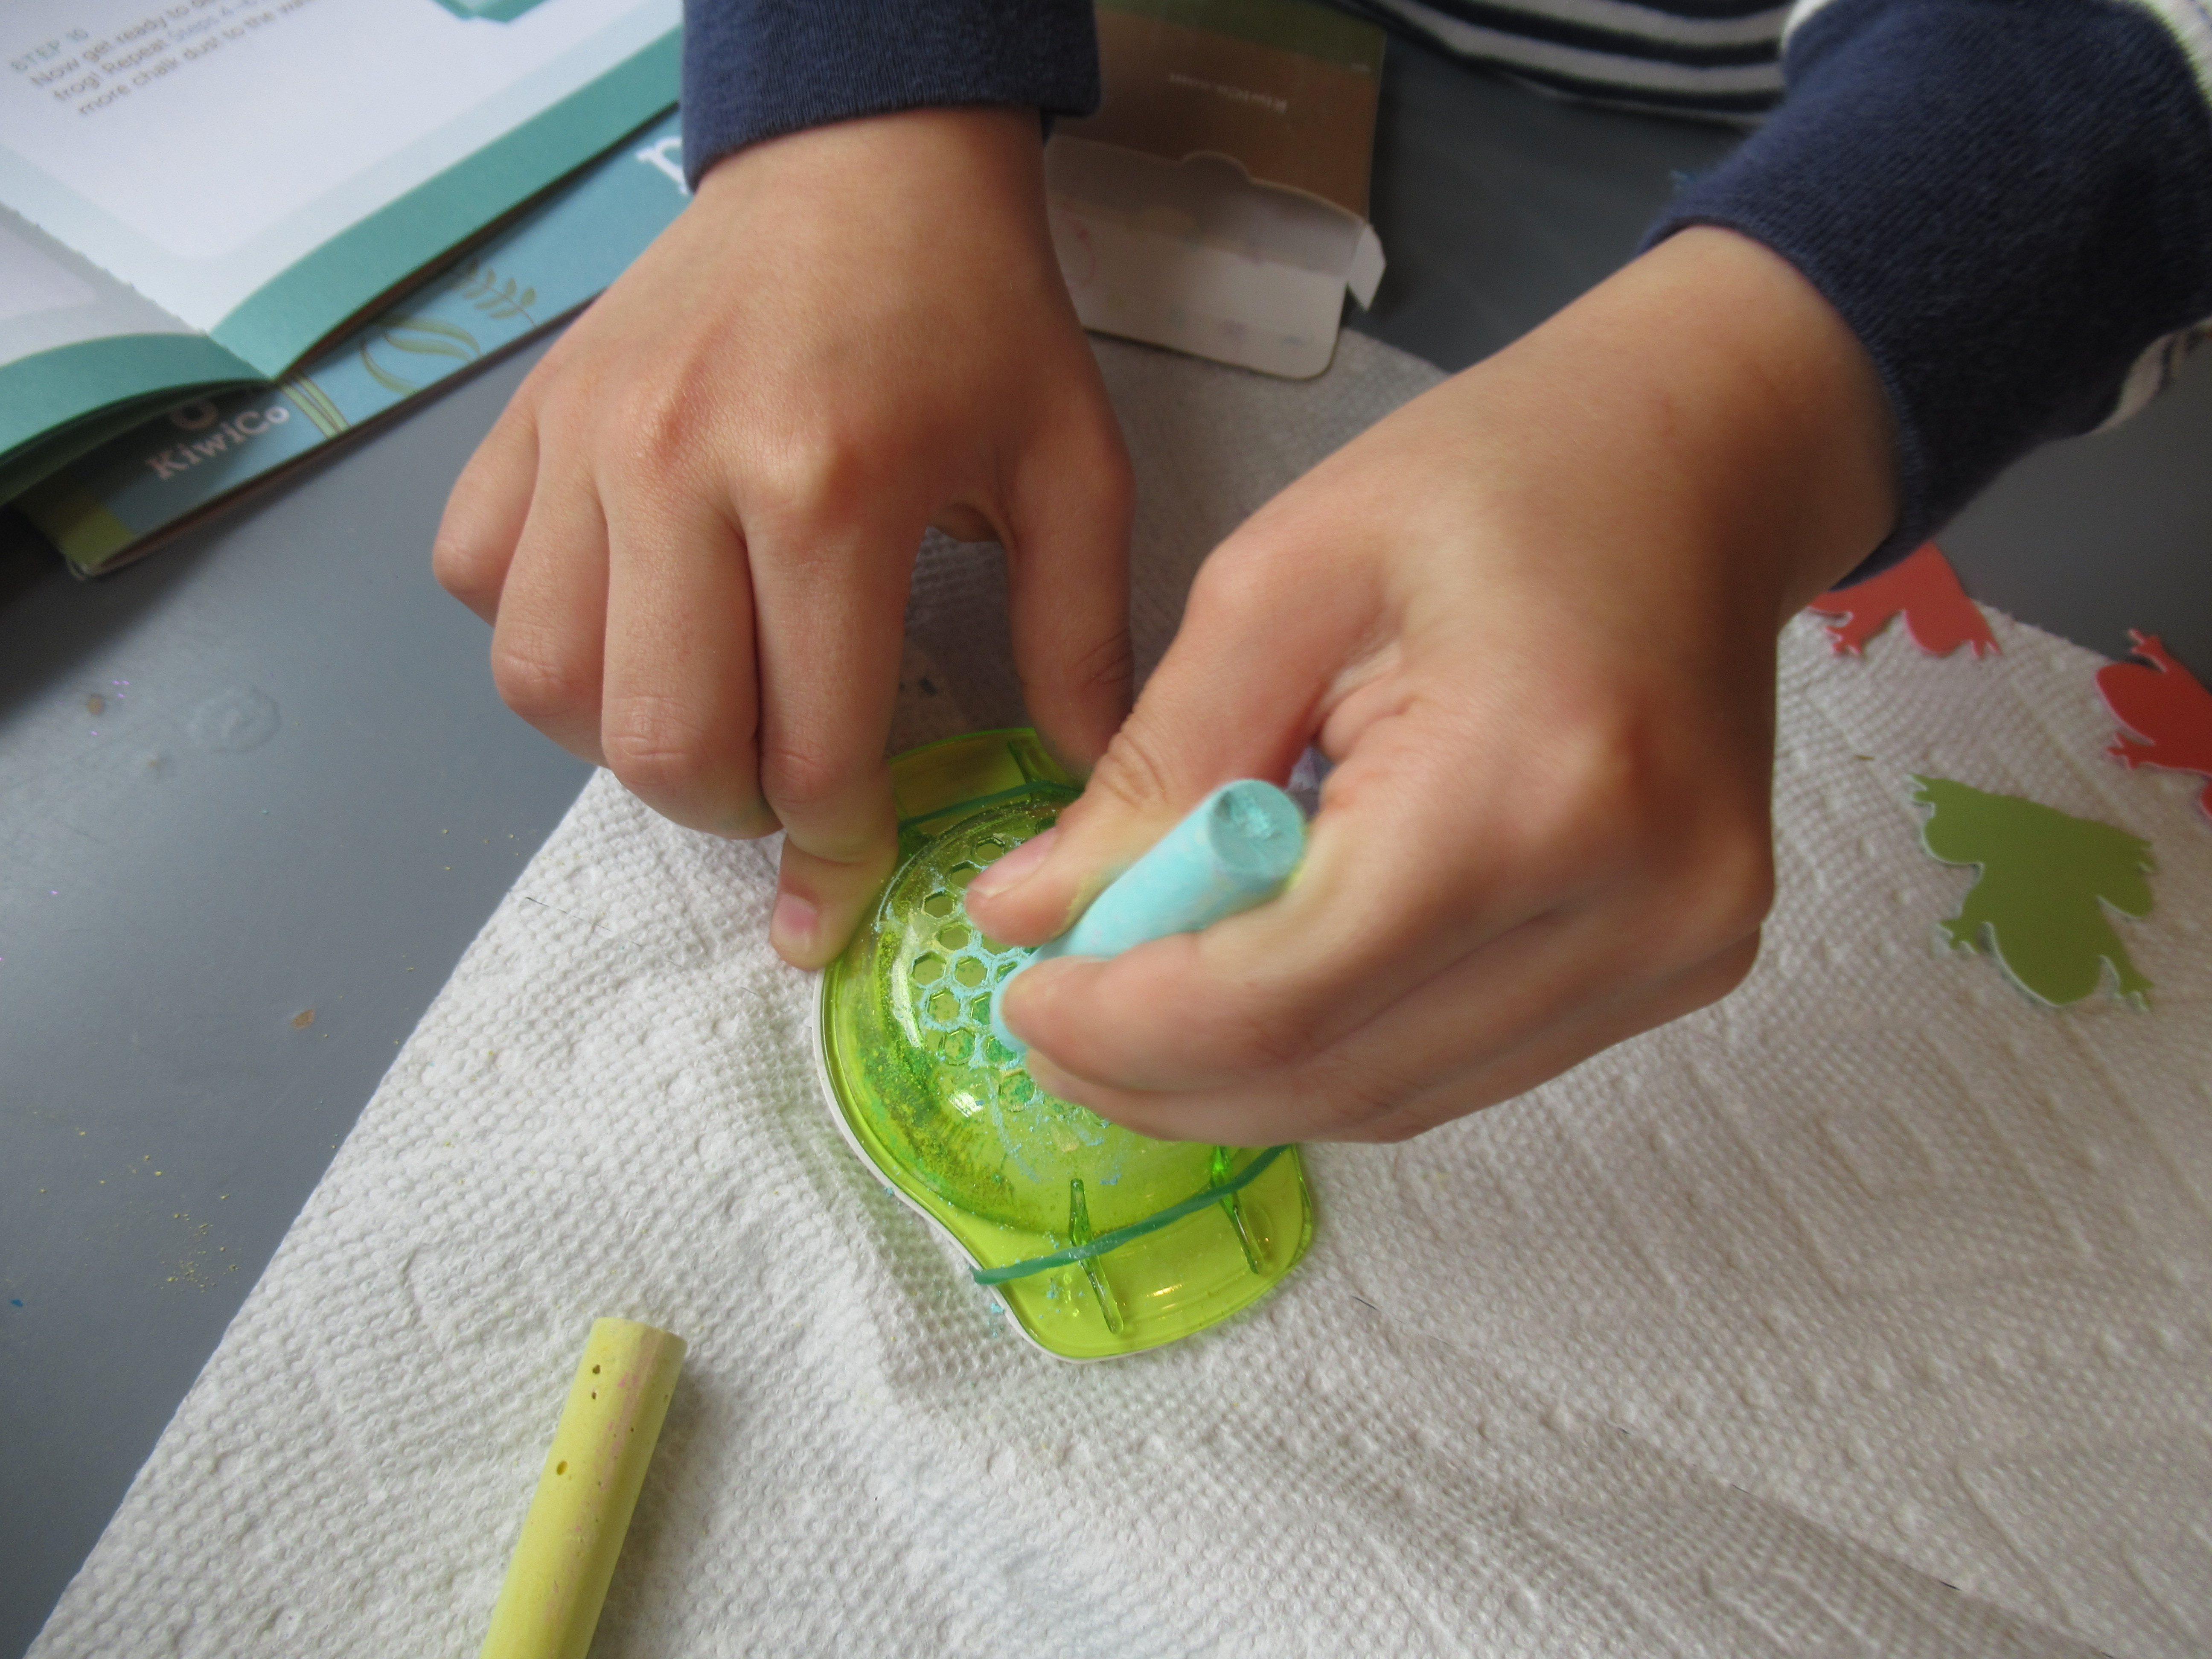
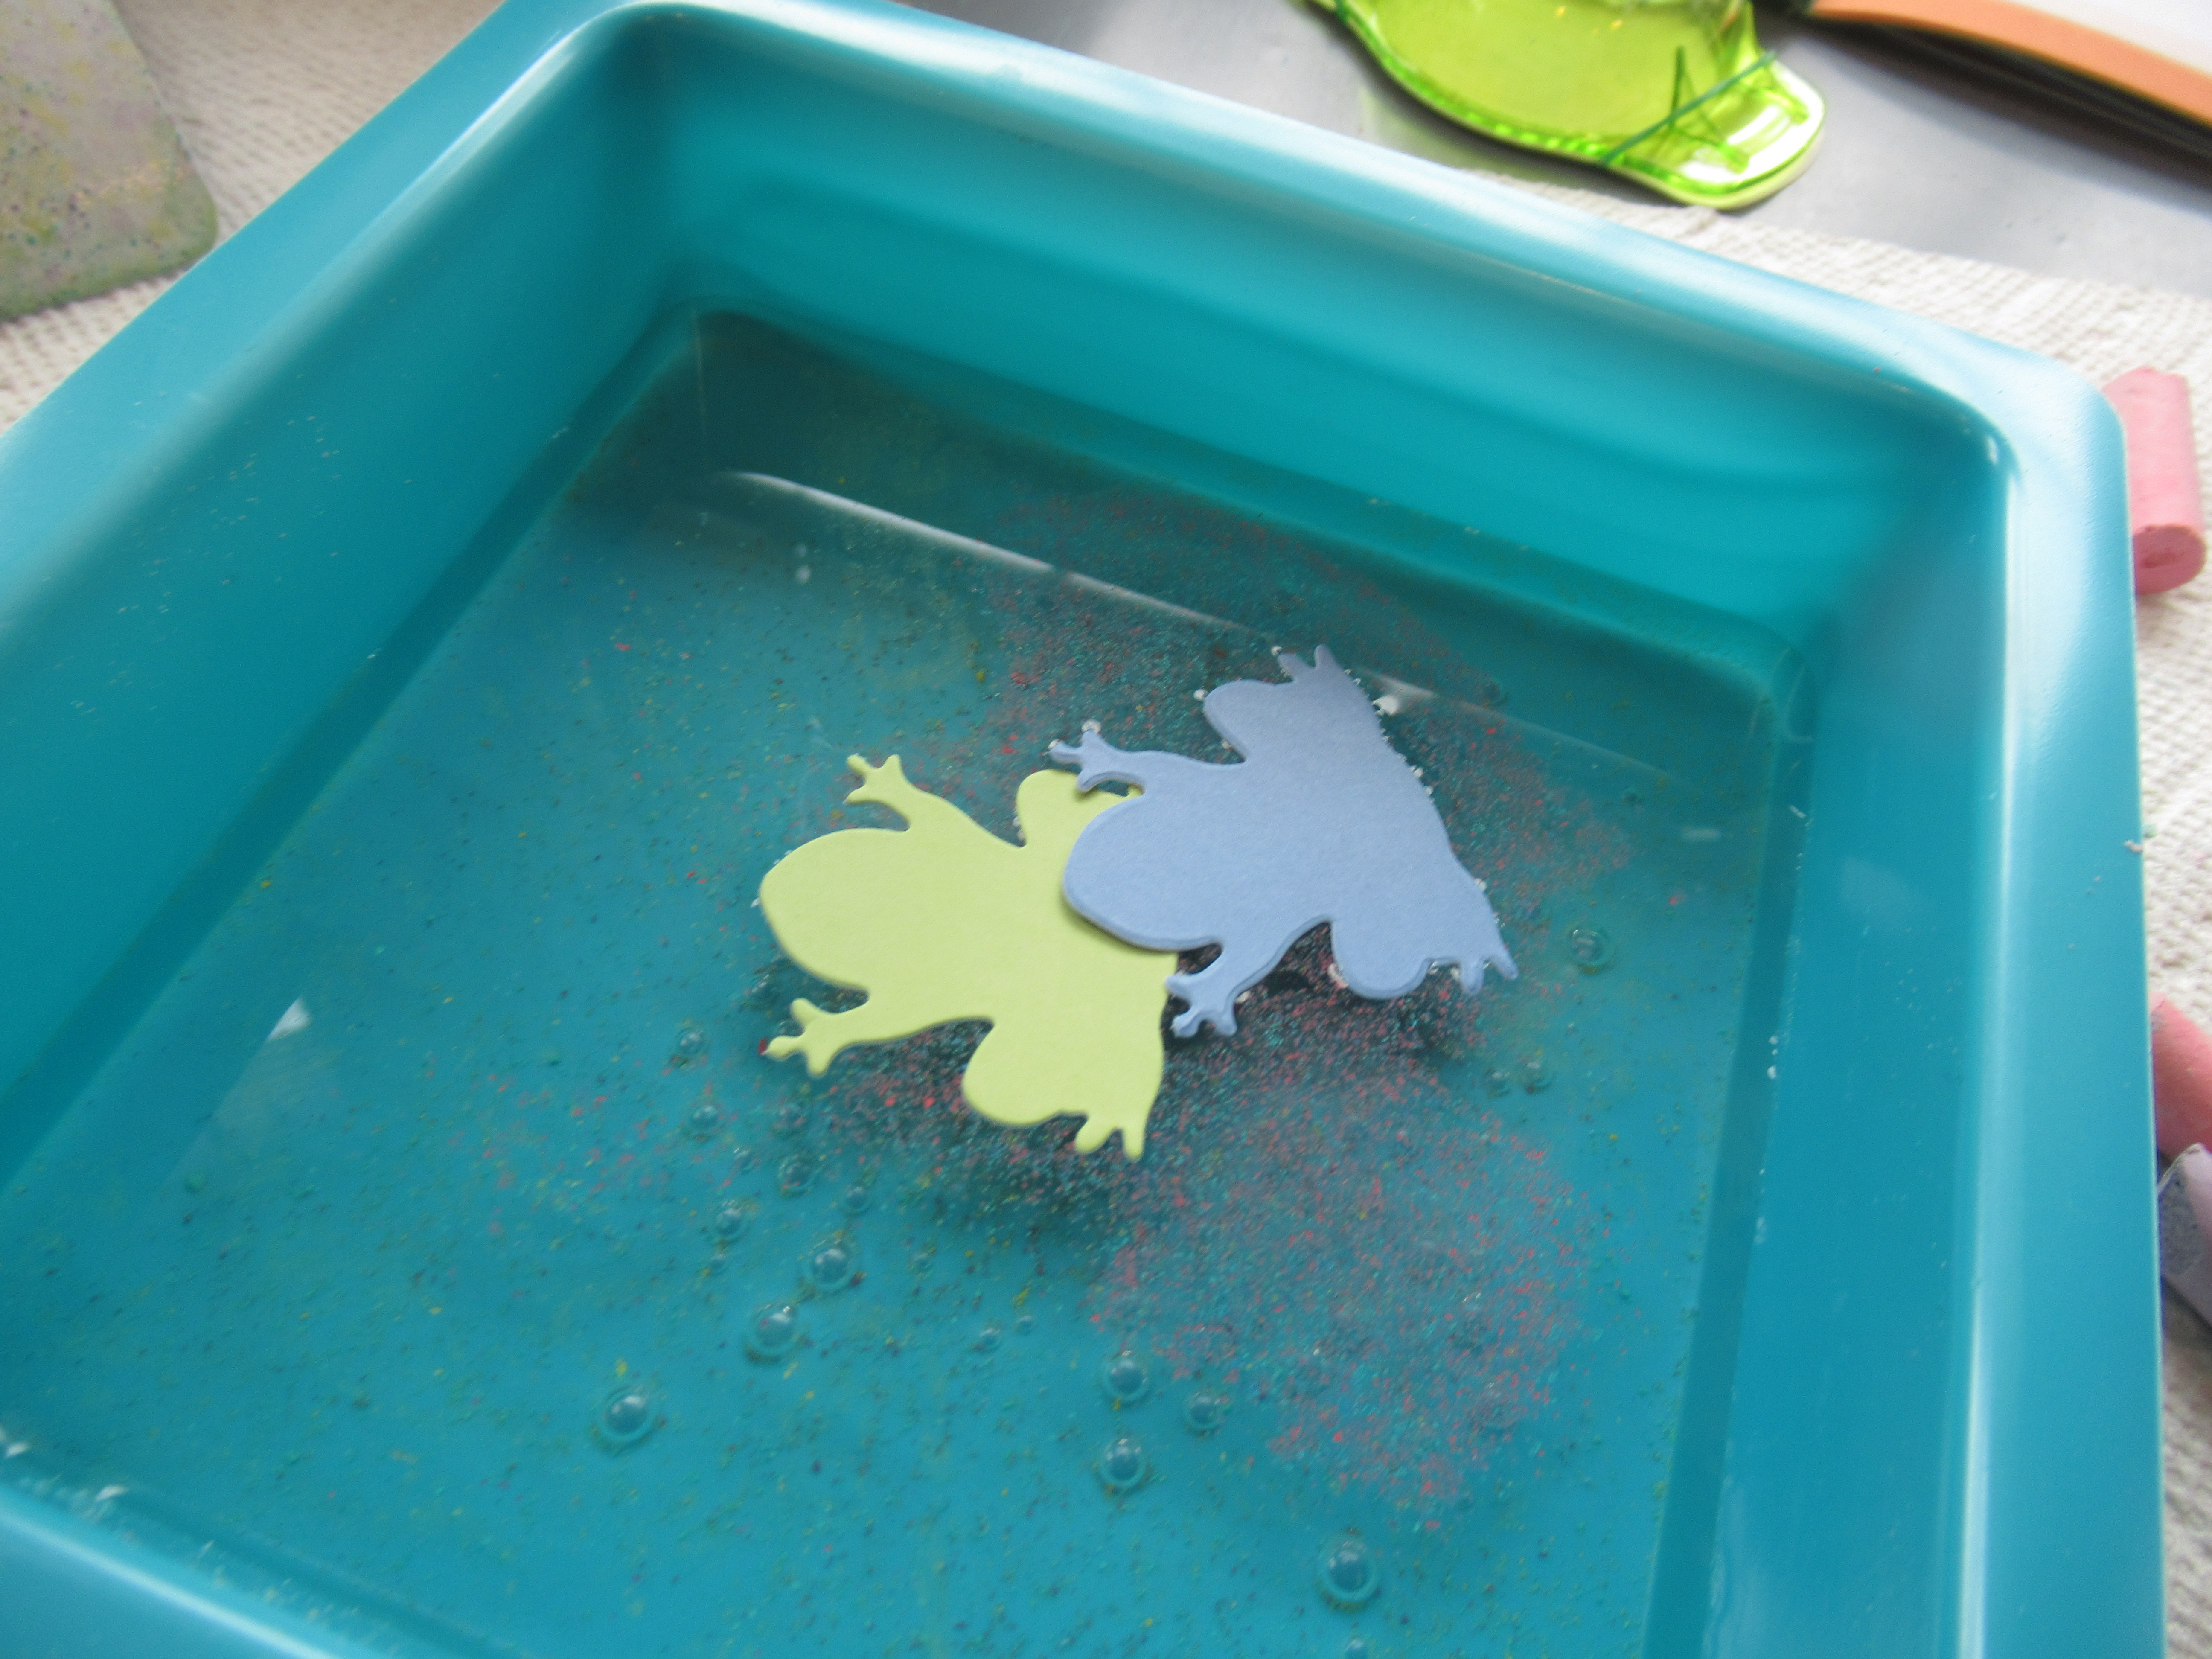
The first project was the most creative of the lot: making Chalk-Art Frogs. The process relied on surface tension (floating chalk) to color in the provided paper frog shapes. Travis helped put together the provided chalk grater and loved carefully grating a mix of chalk colors into it.

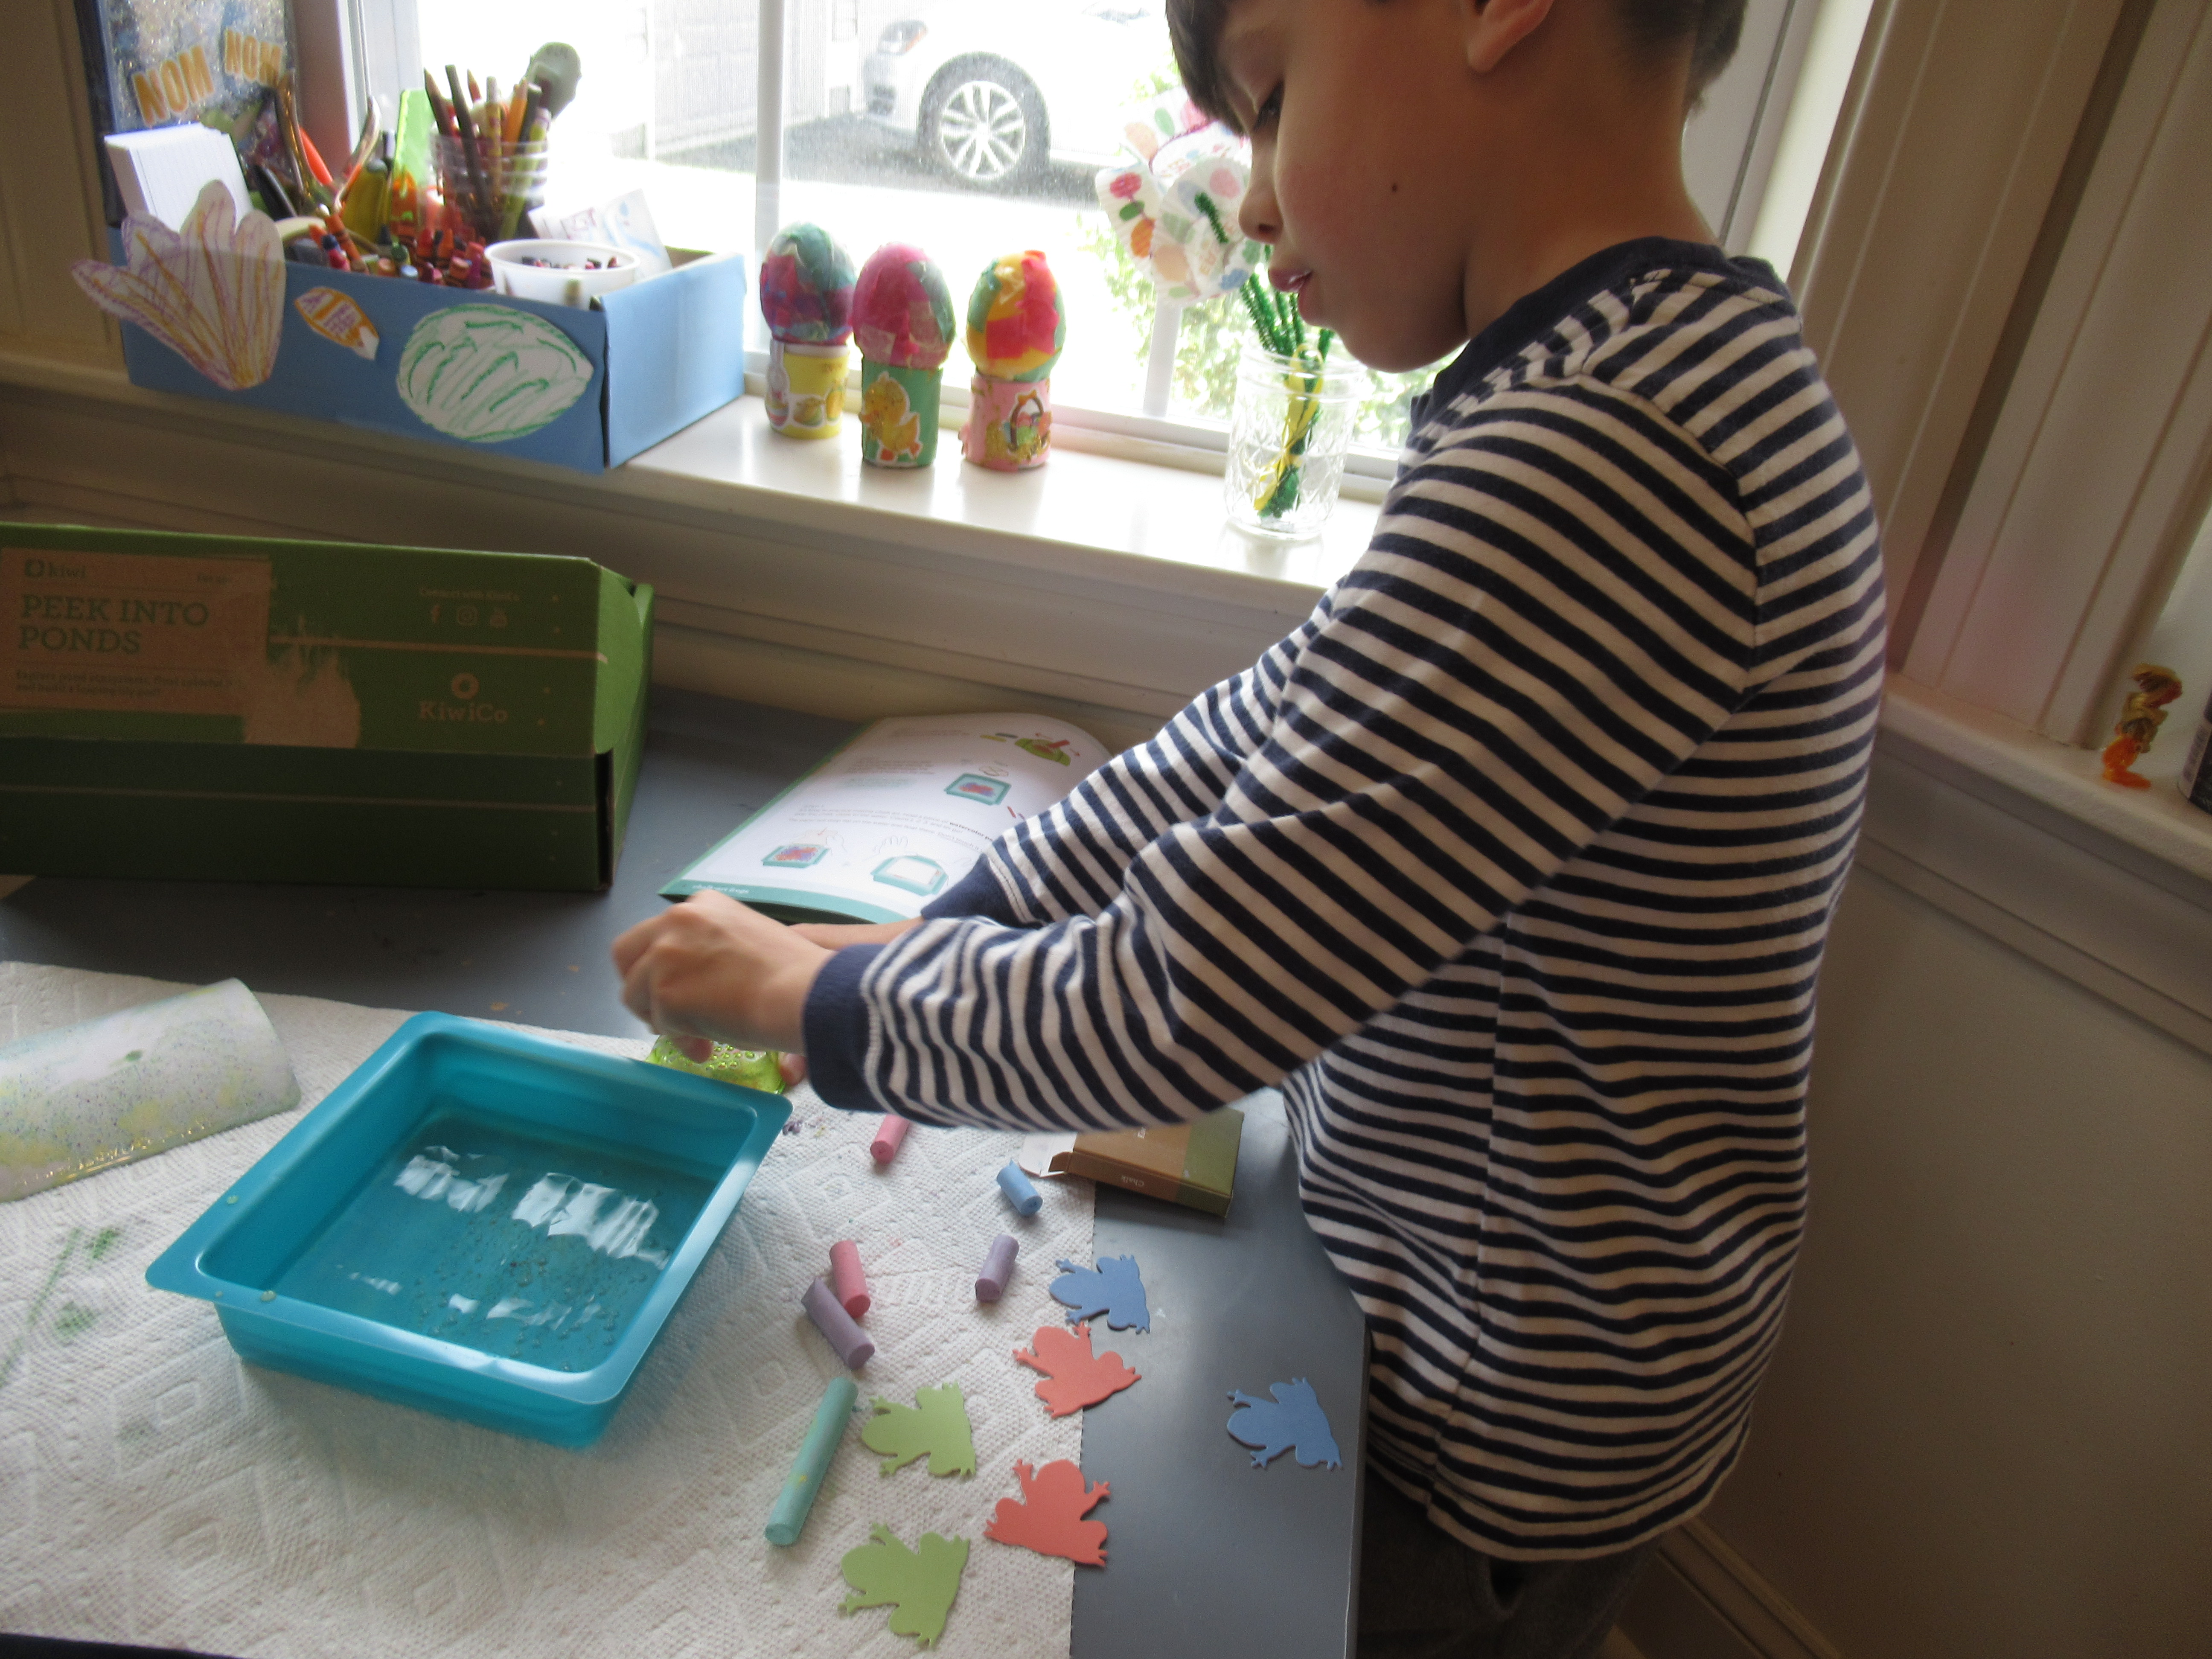
Tip over the provided tray of water and gently tap out the chalk. We did a test run on a provided square of paper first.

Lift up gently for the big reveal!

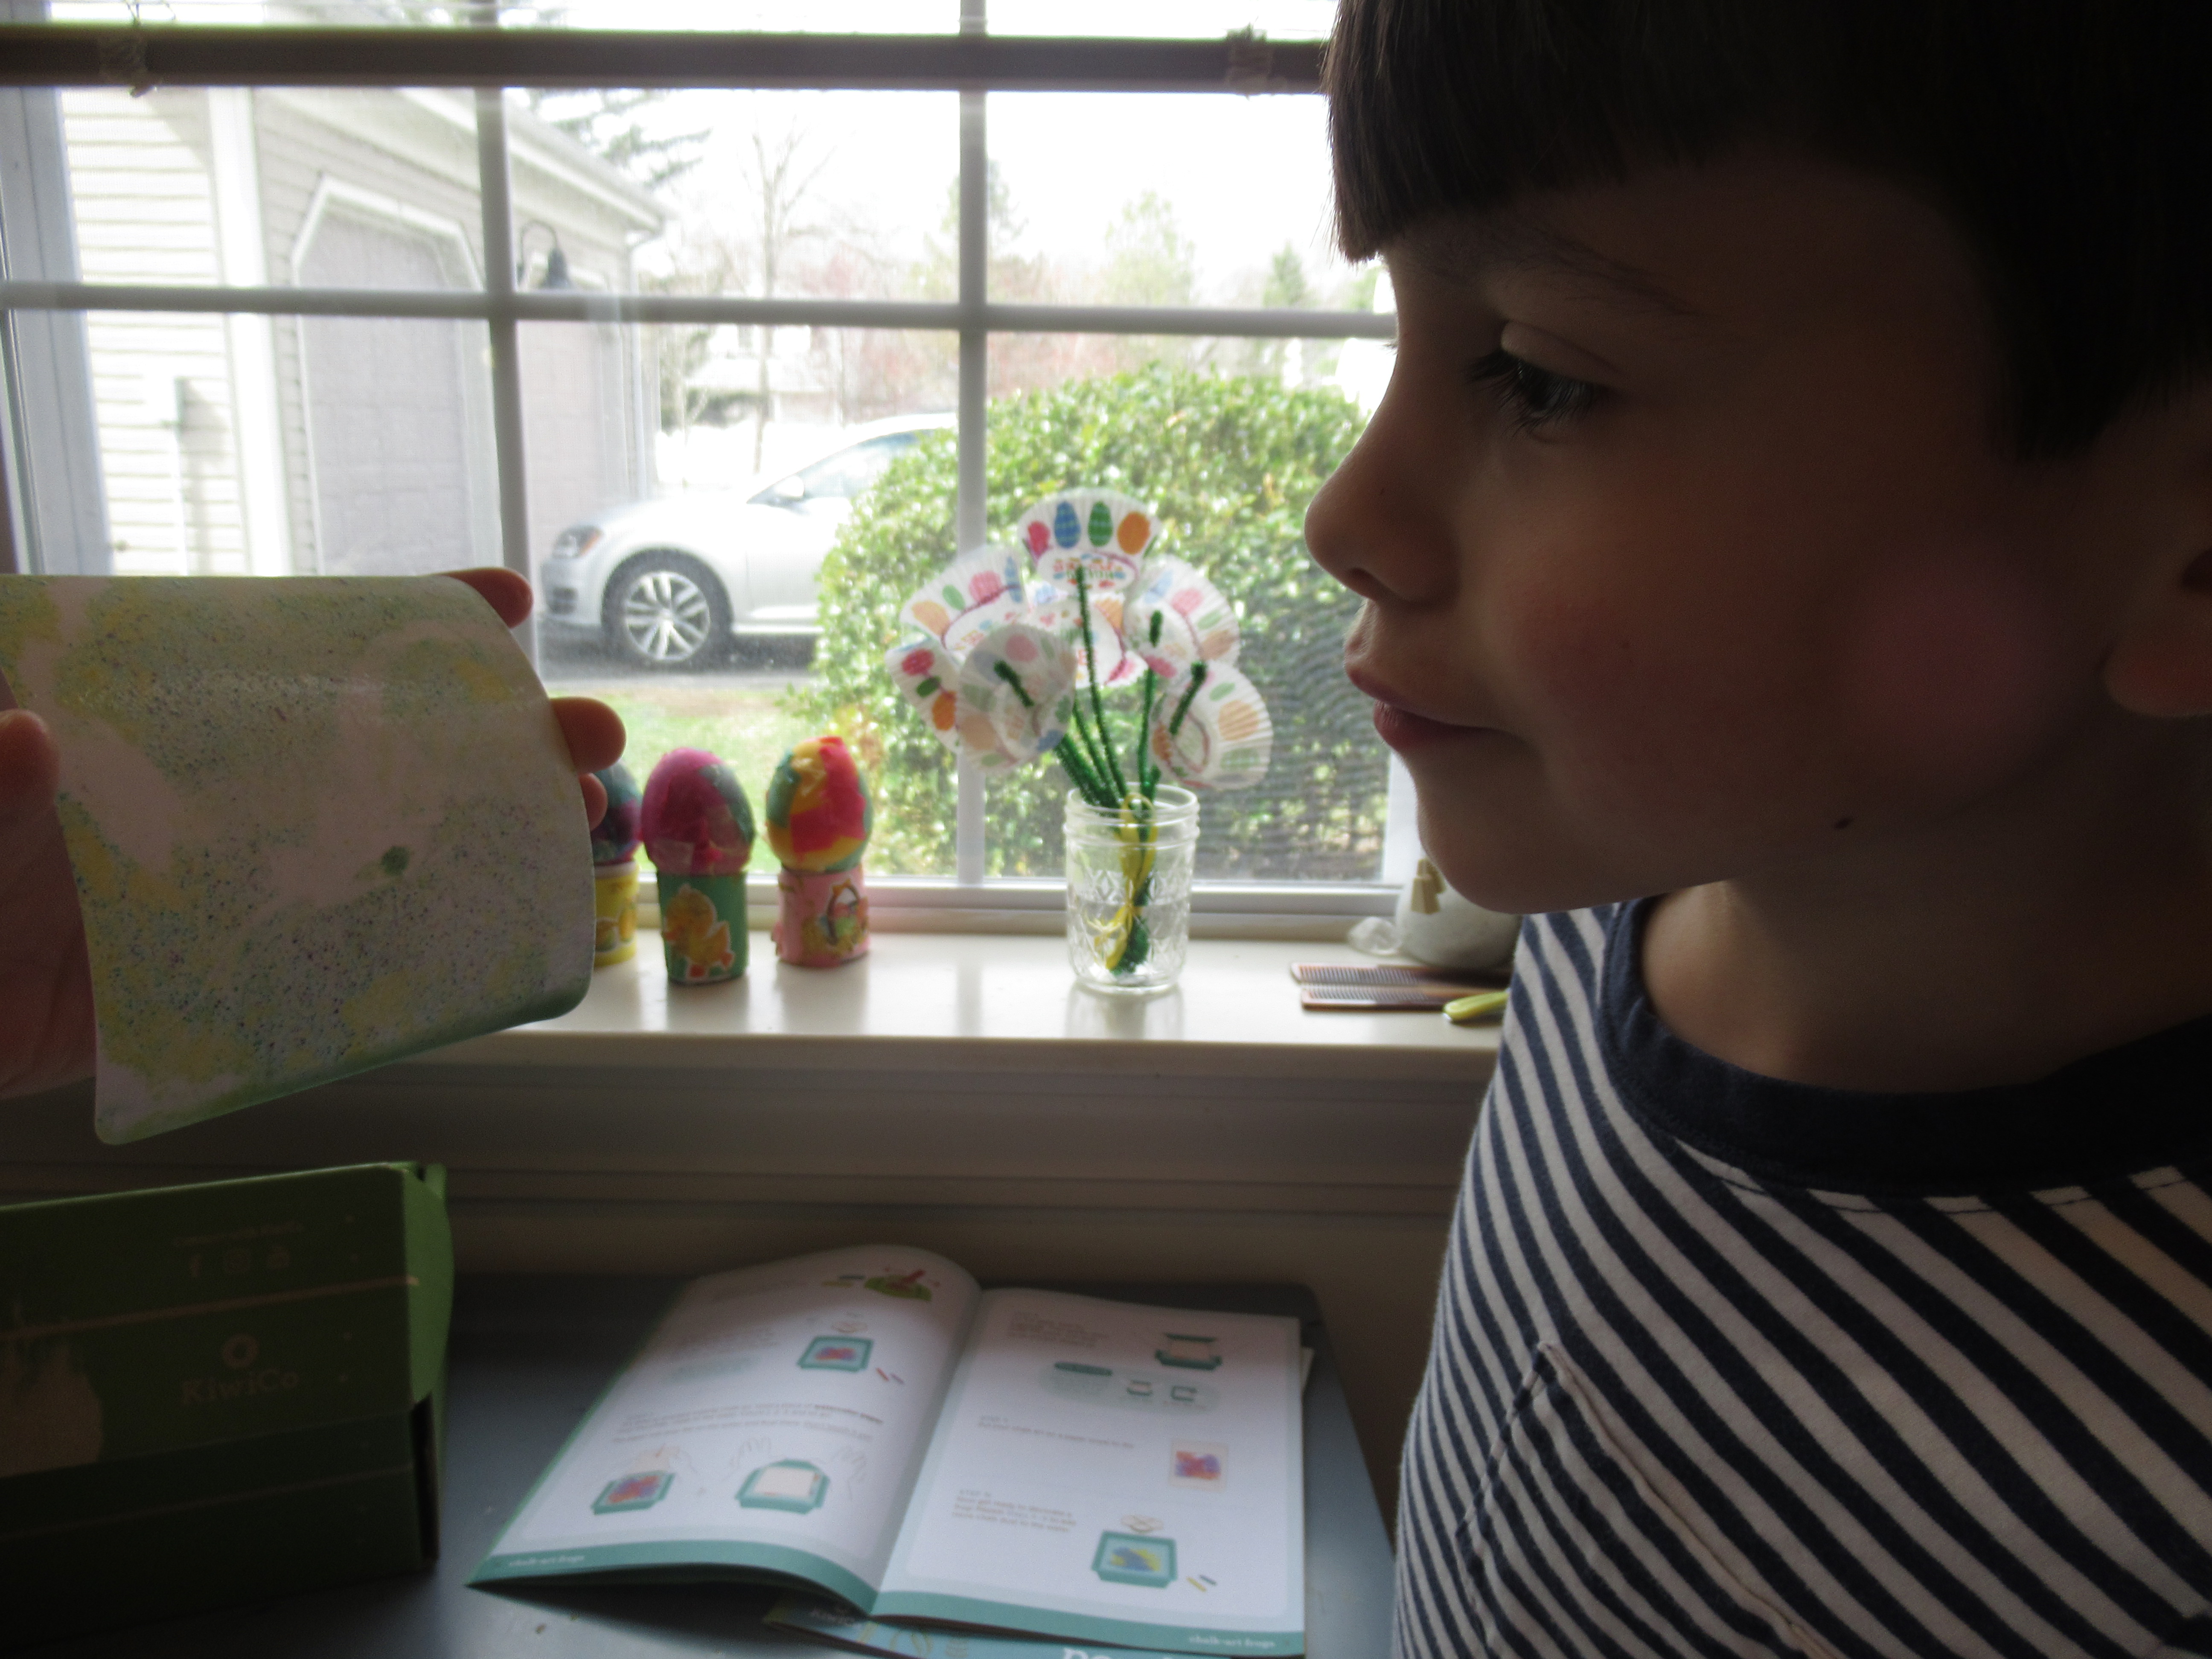
Next Travis carefully added the frogs, which didn’t pick up the chalk as clearly as the white paper, but were still neat. Let dry completely, then move on to…

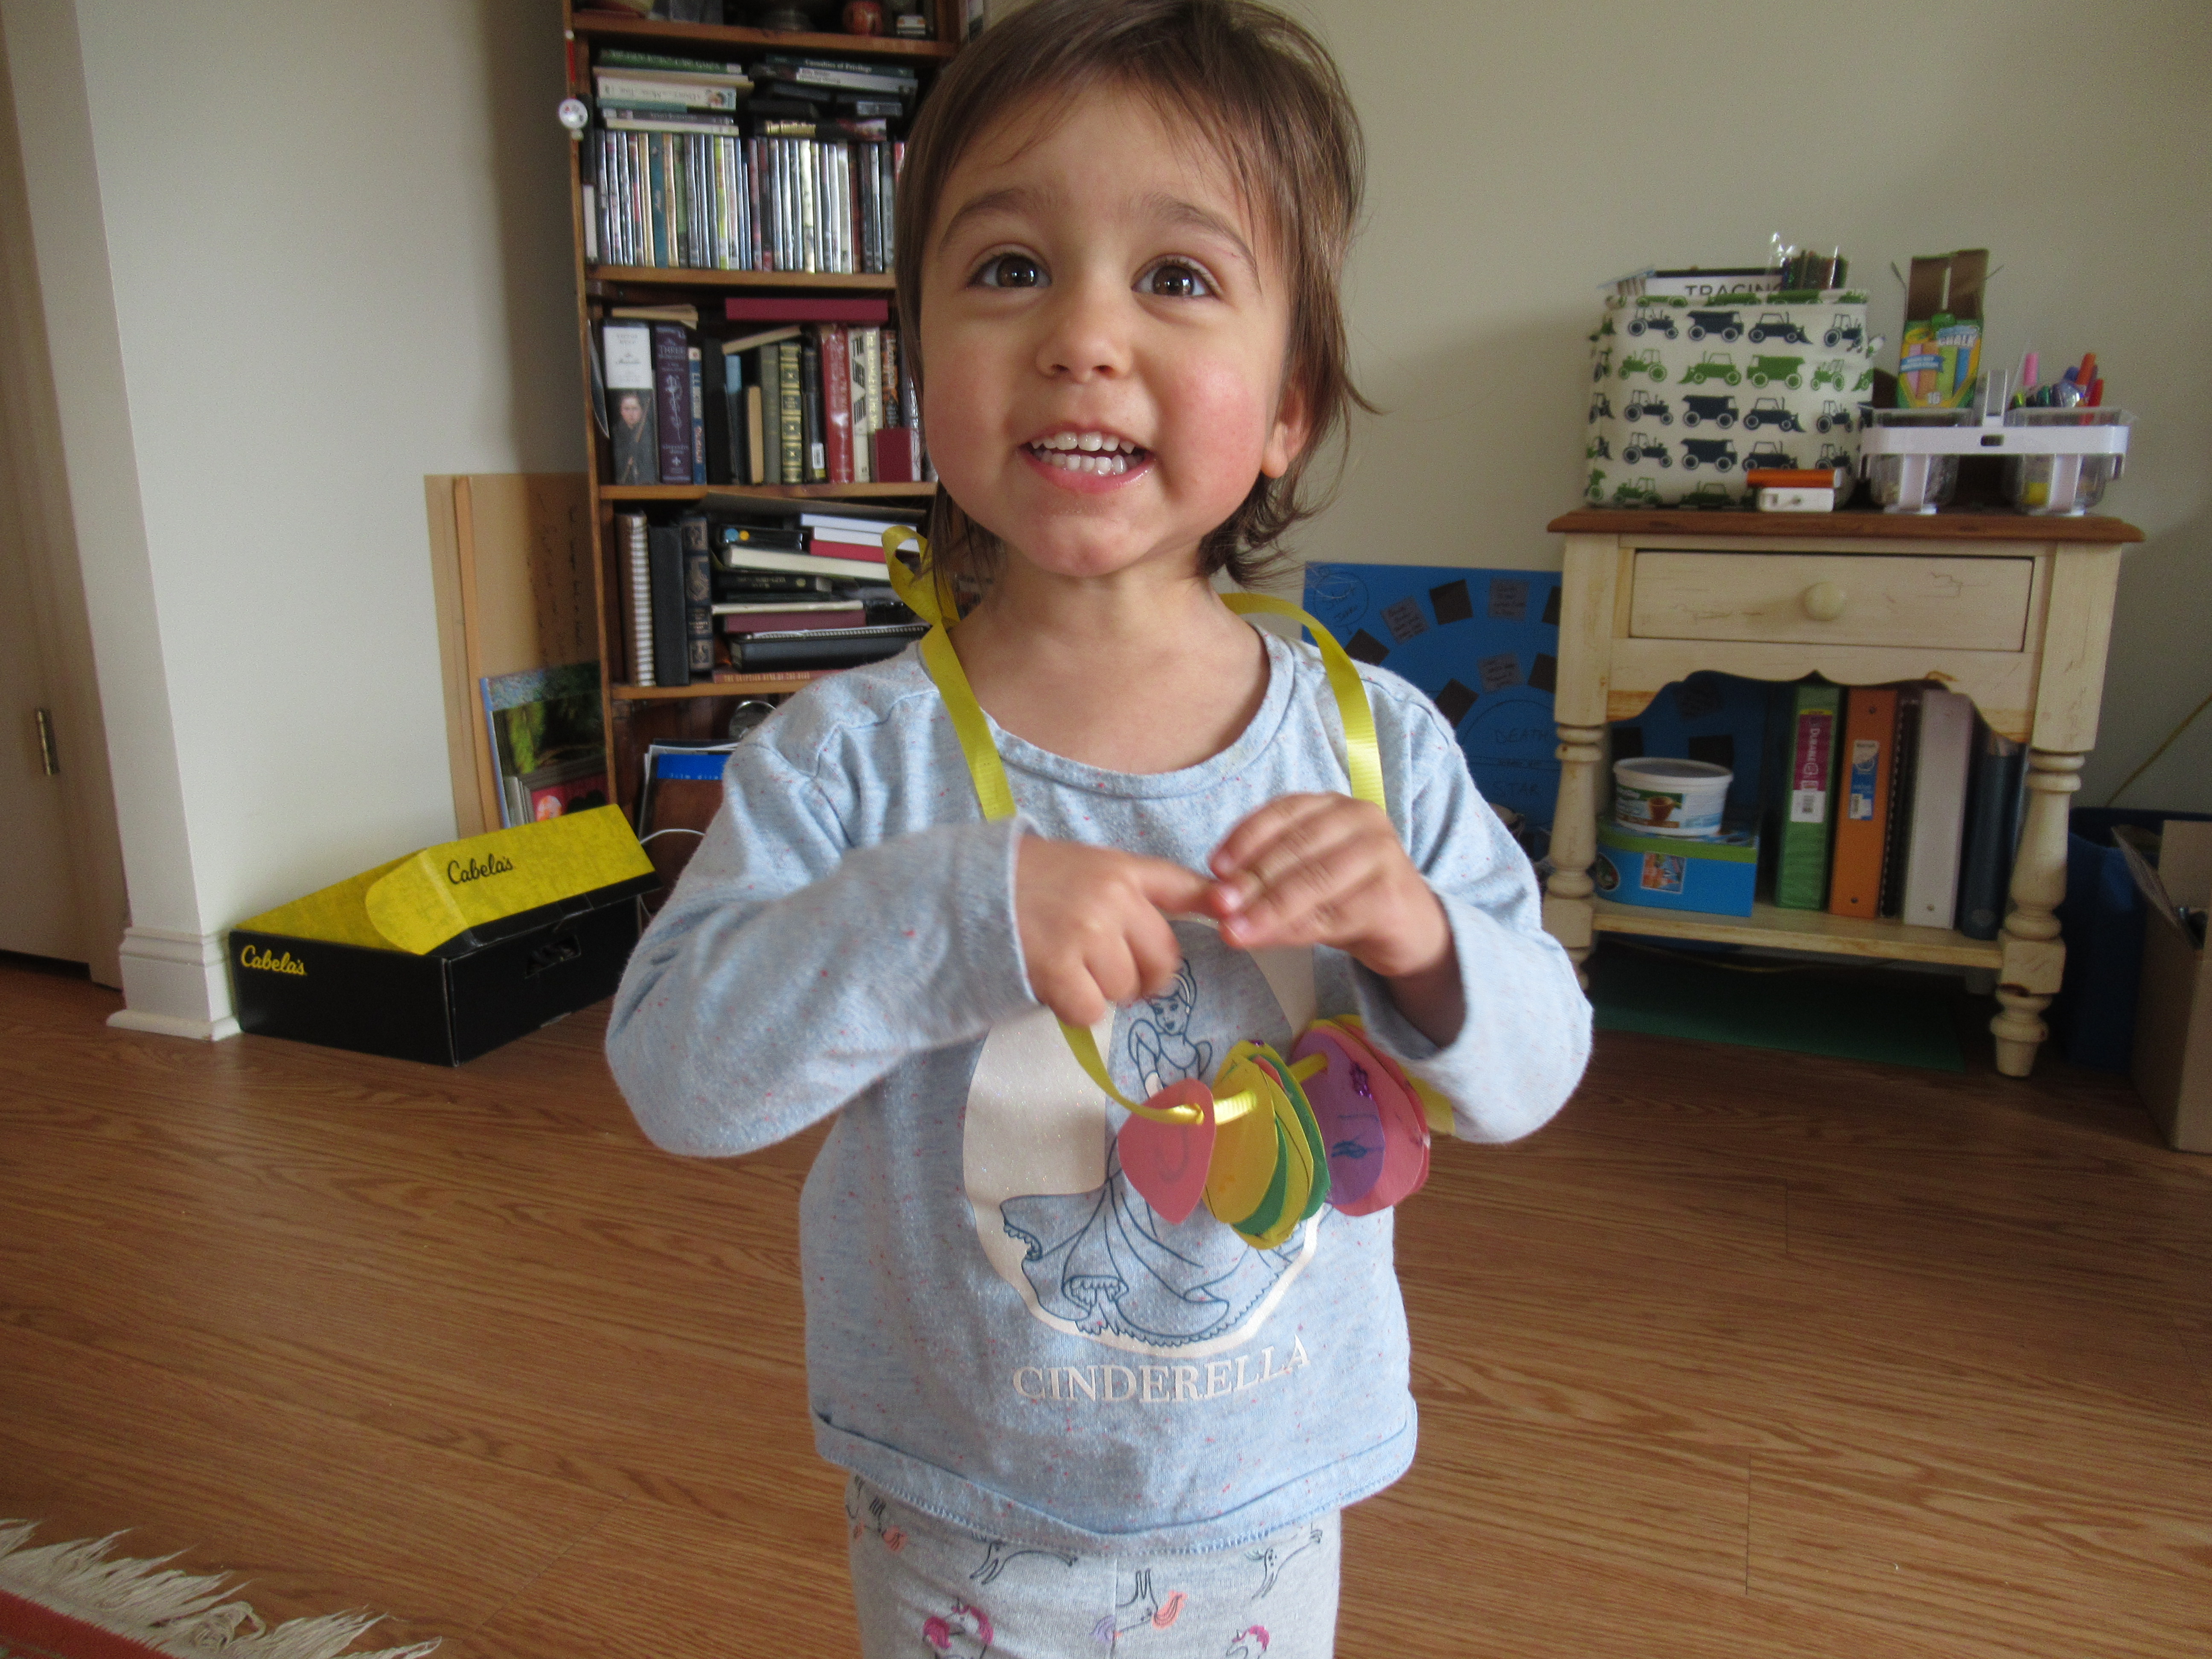
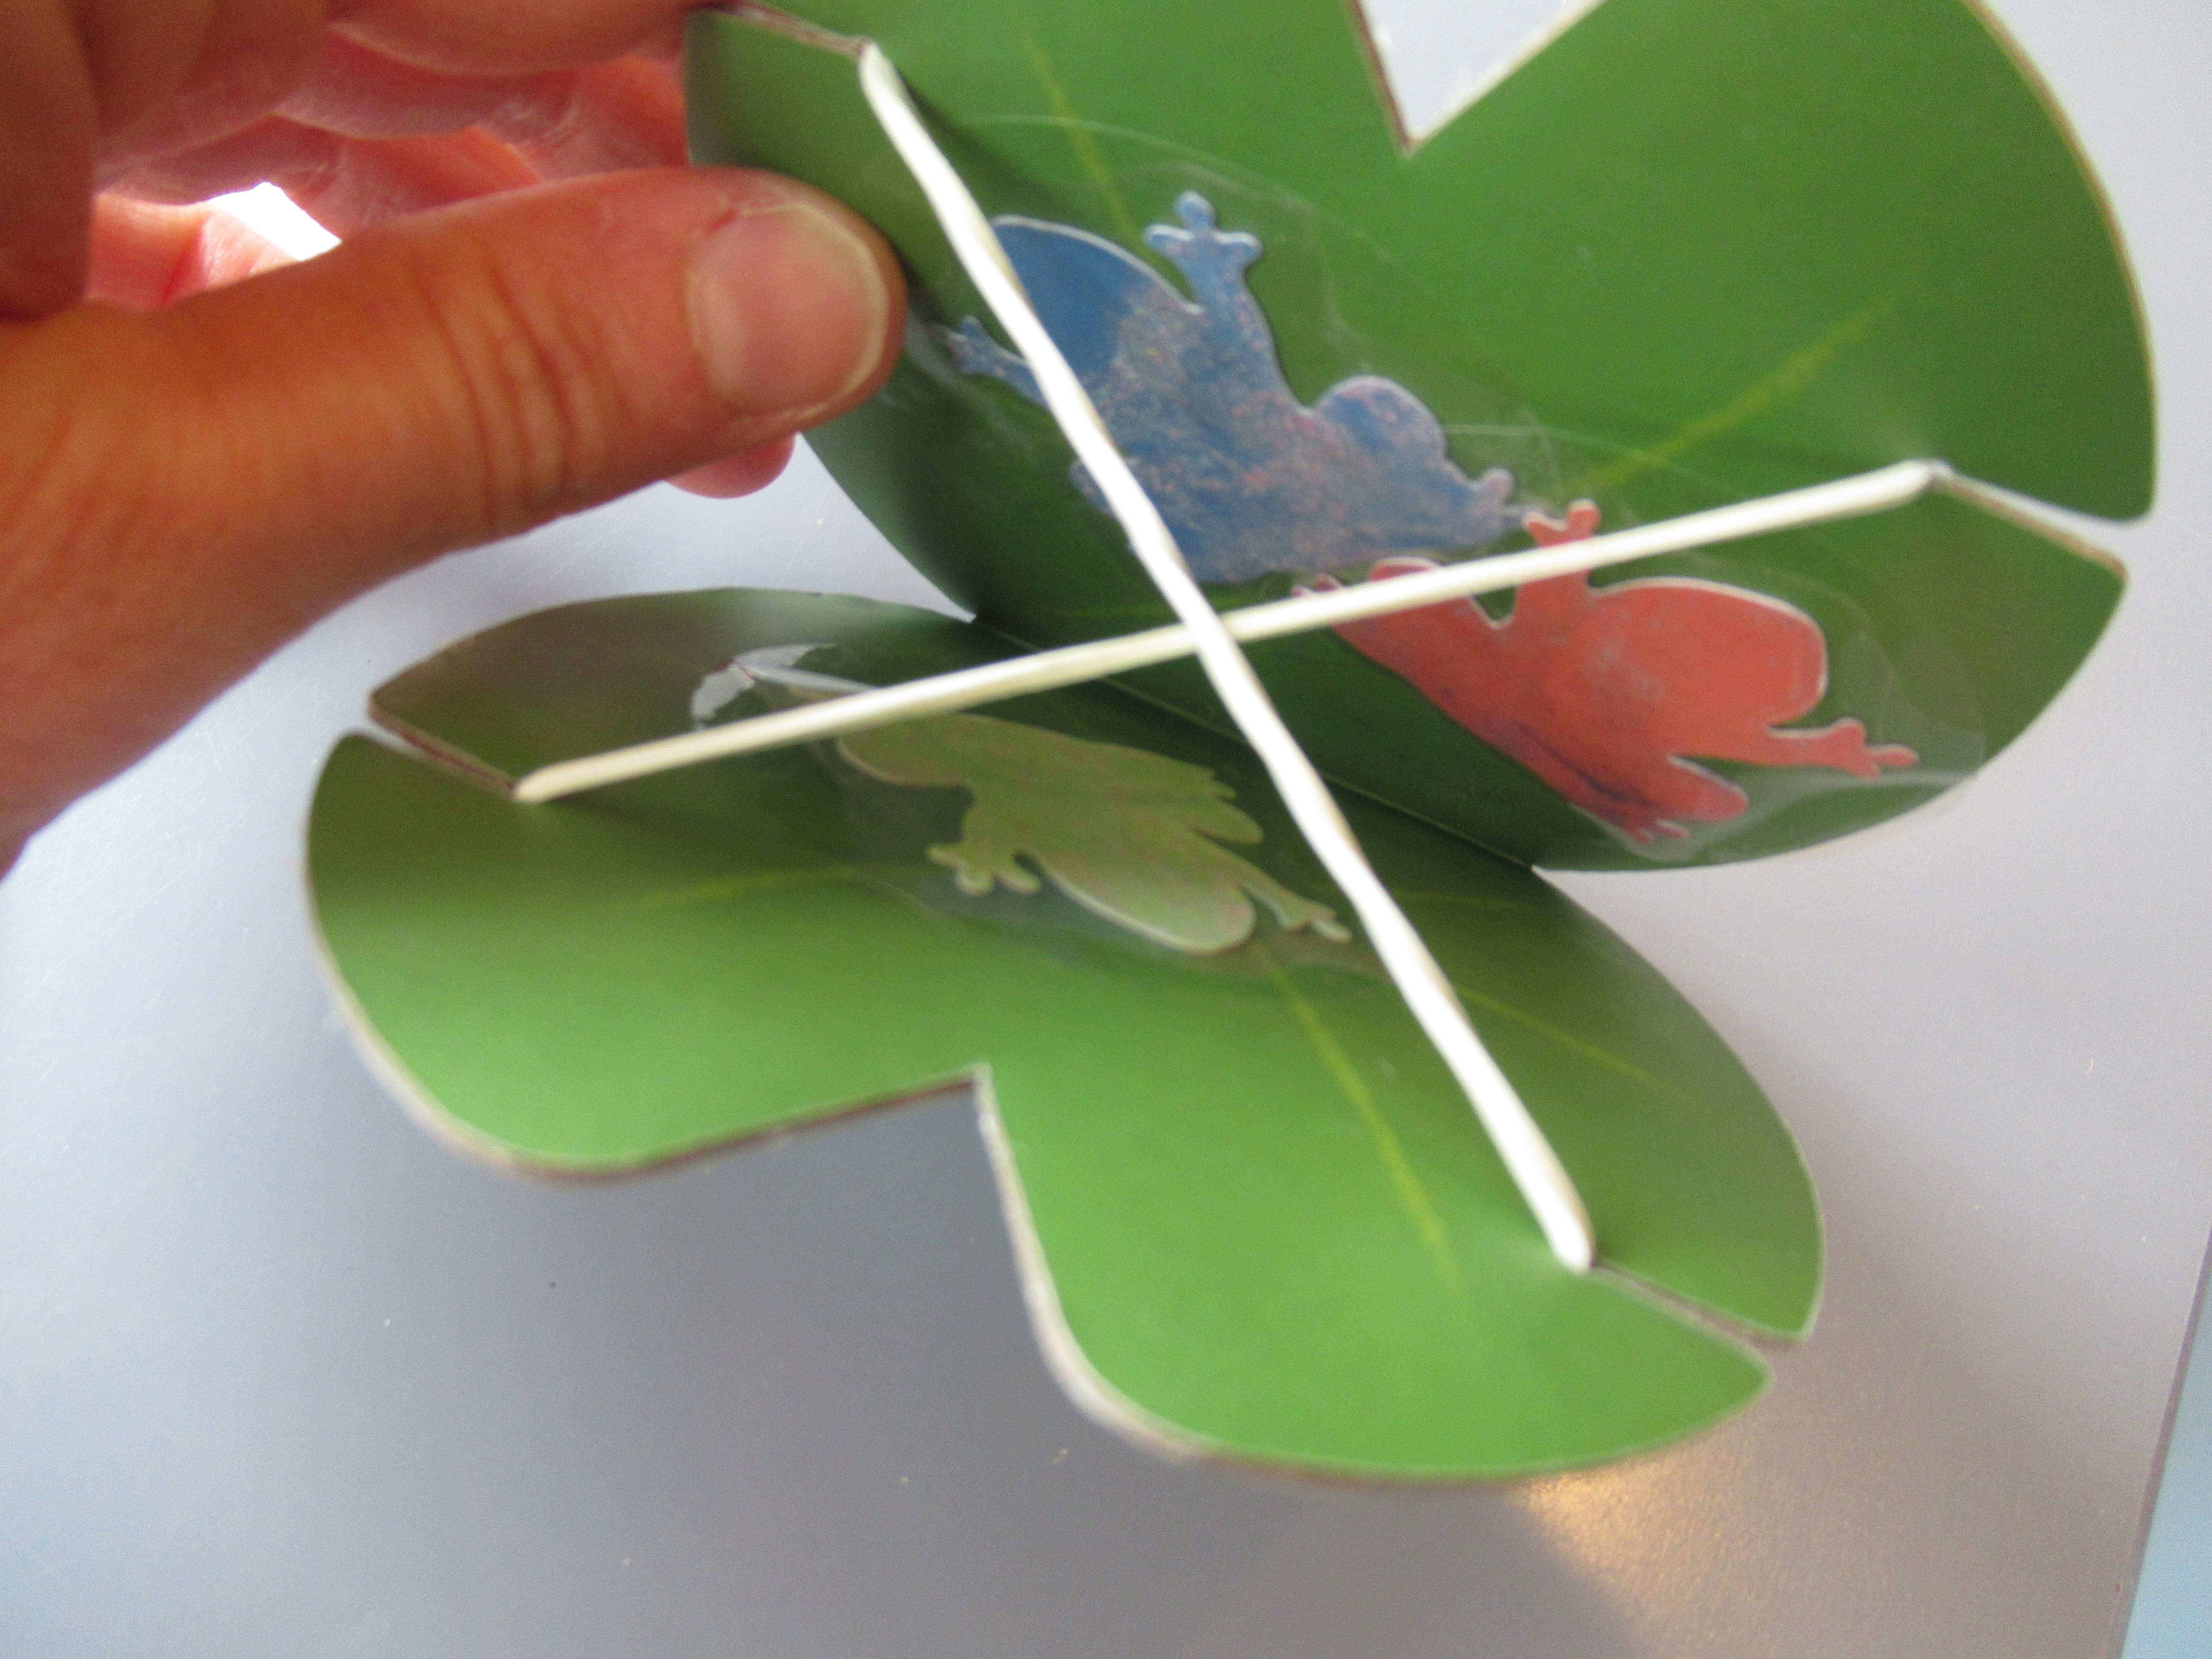
…project two, a Leaping Lily Pad. The scientific principal in action this time was energy, as in a spring (or a frog’s legs). Travis decorated the provided cardboard lily pad with a few of his completed frogs, then it was just a matter of wrapping it with the provided rubber band to create tension.

Release, and…. Pop!

We found that this only worked if we used both provided elastics, not just one.

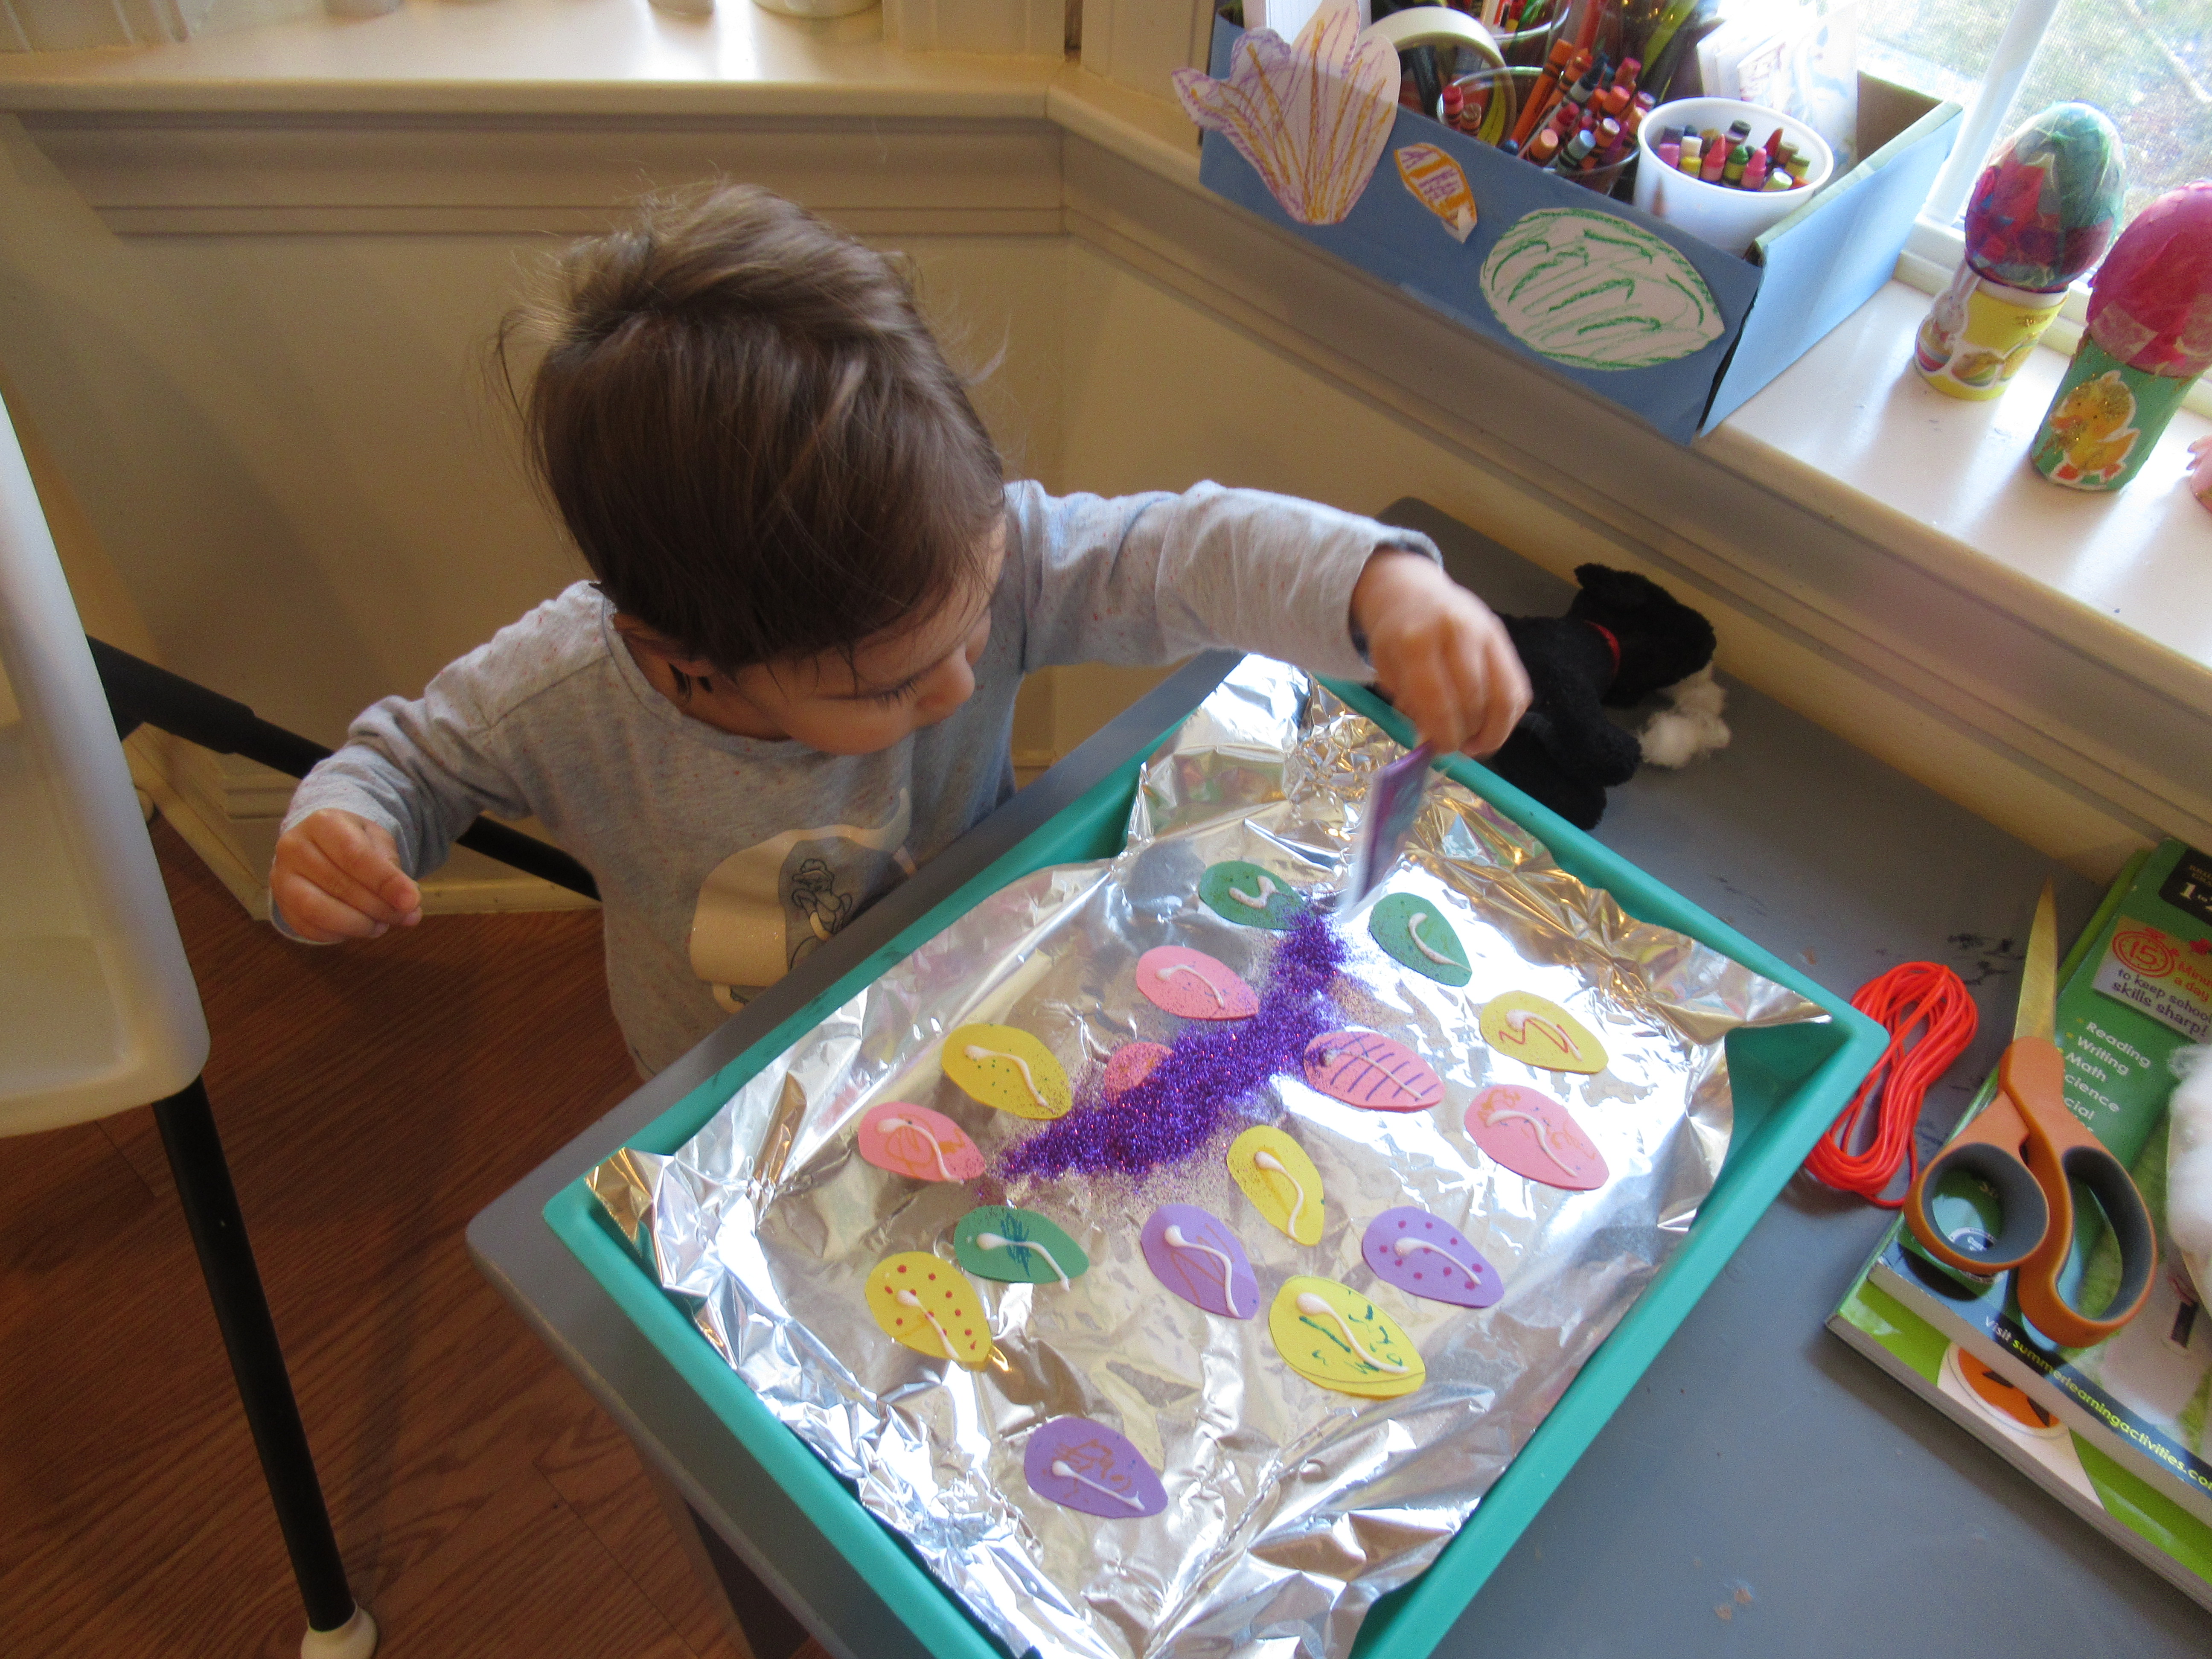
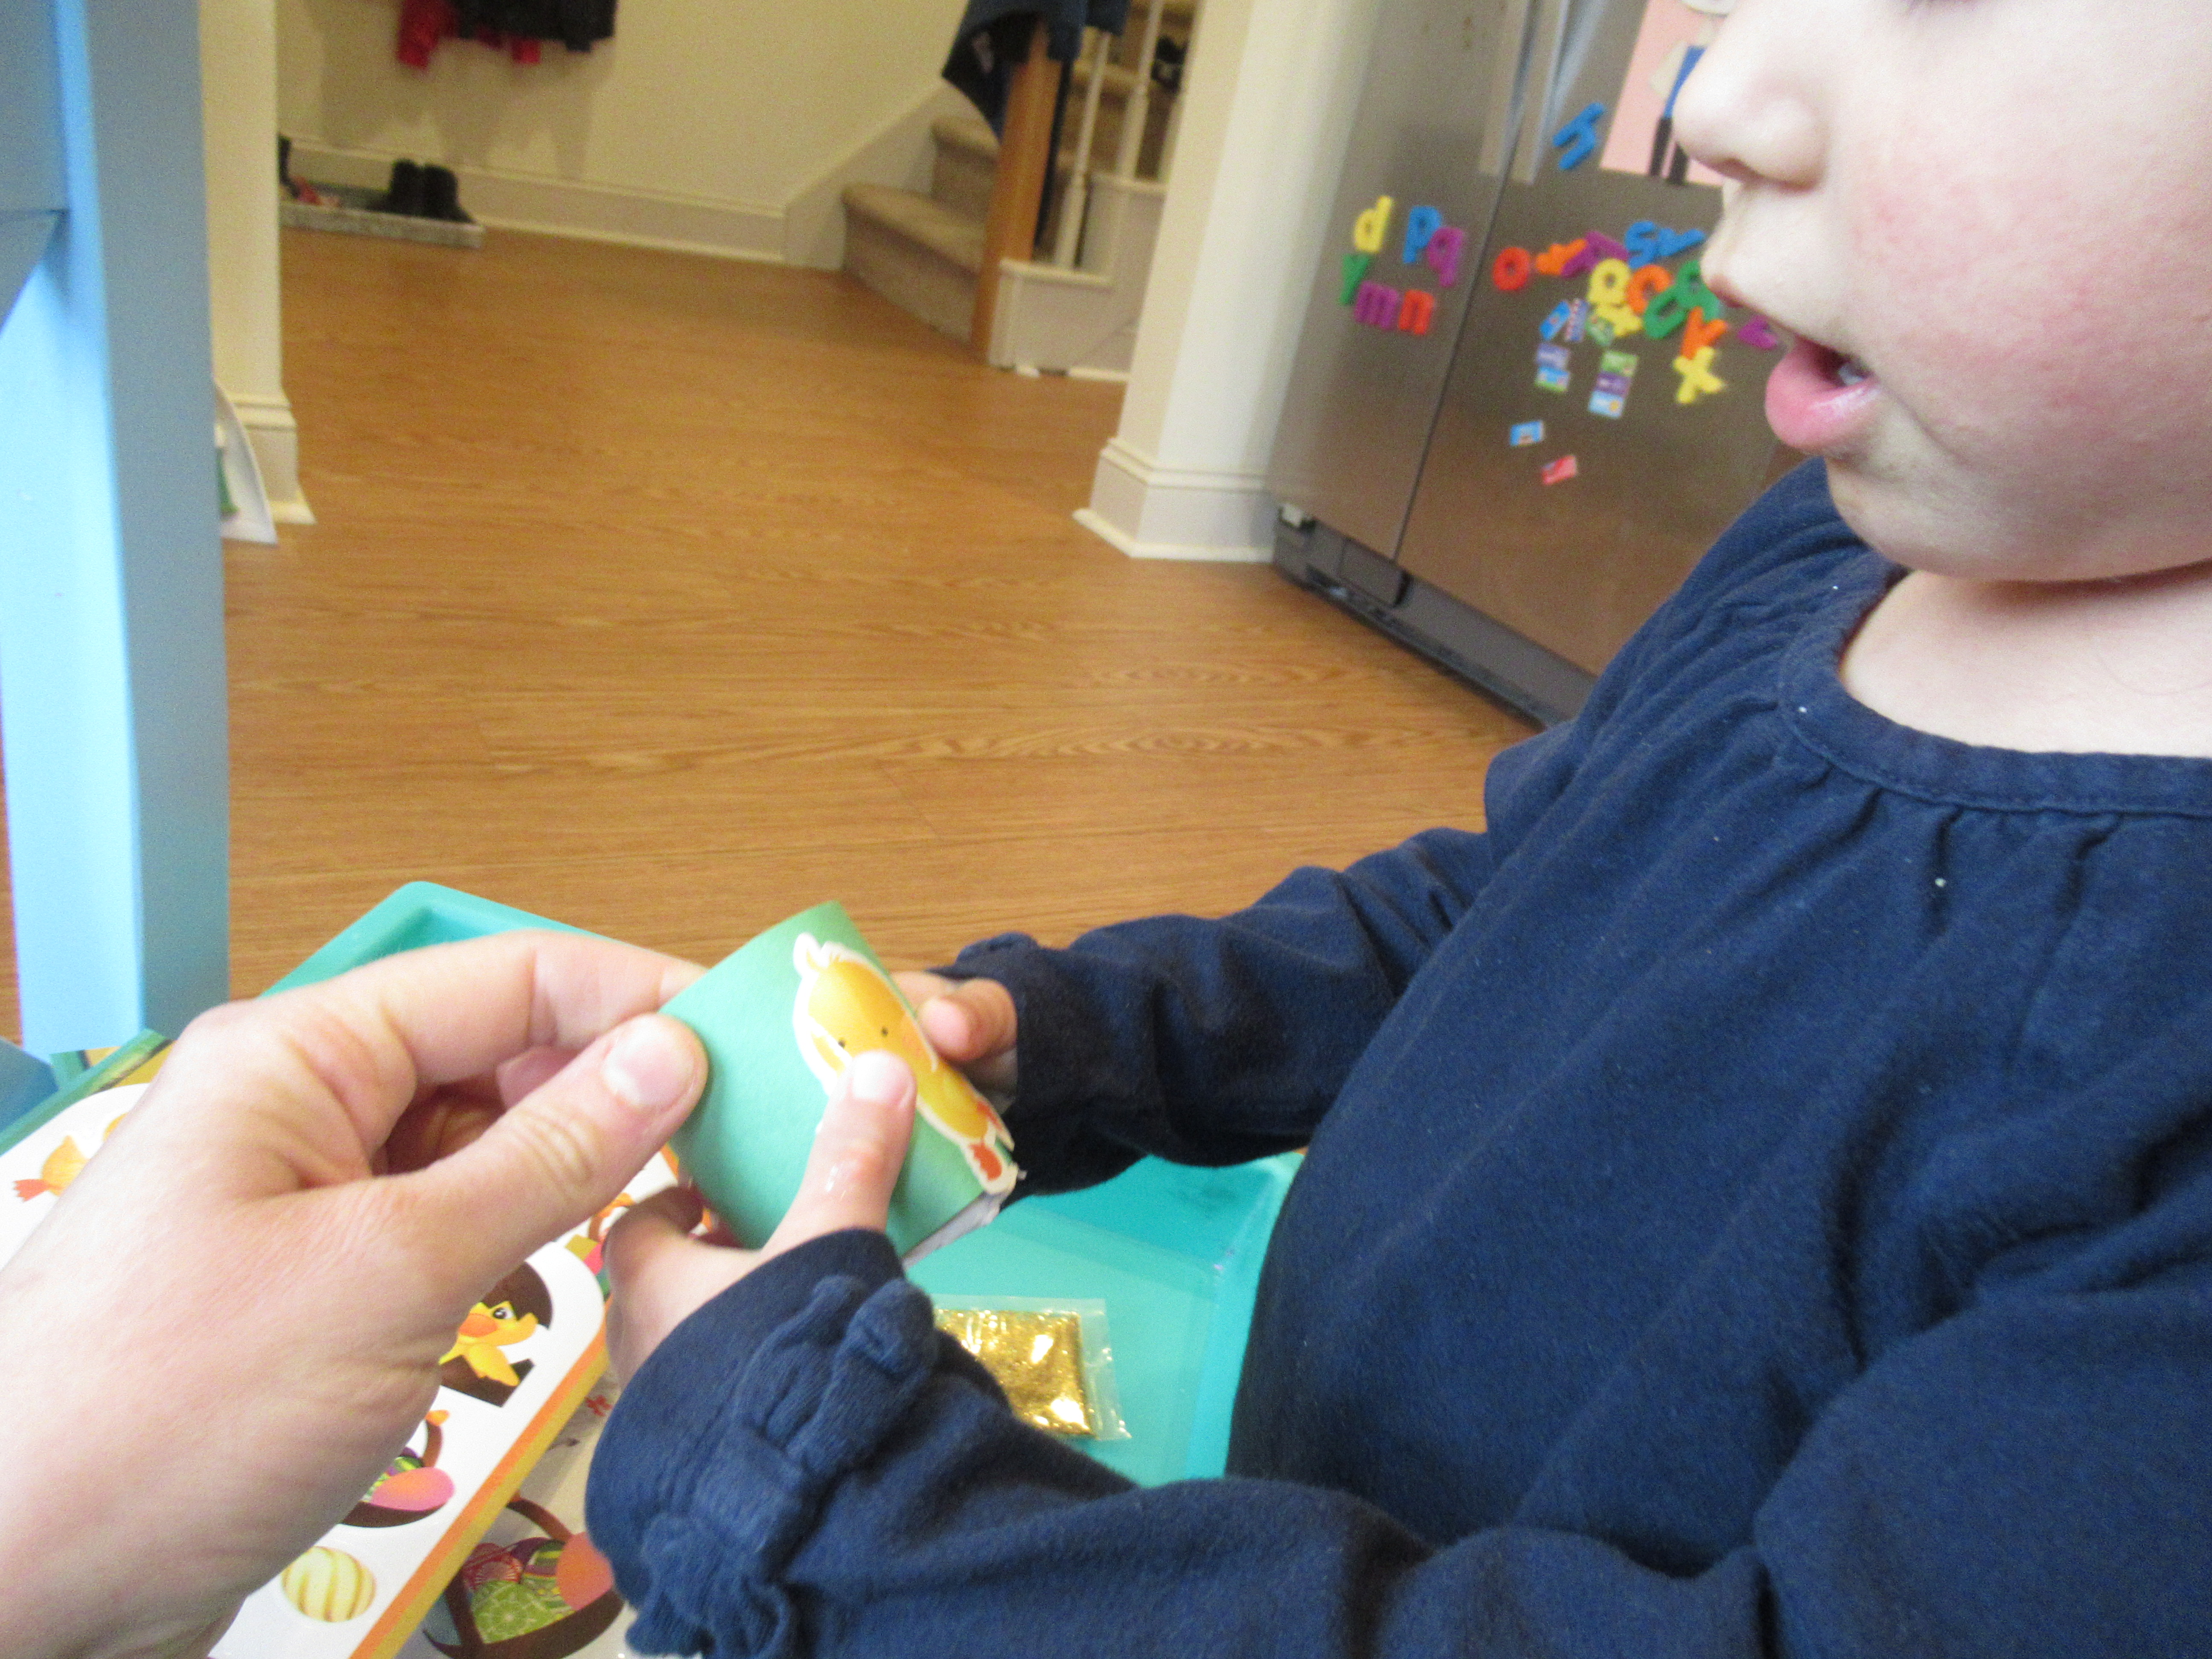
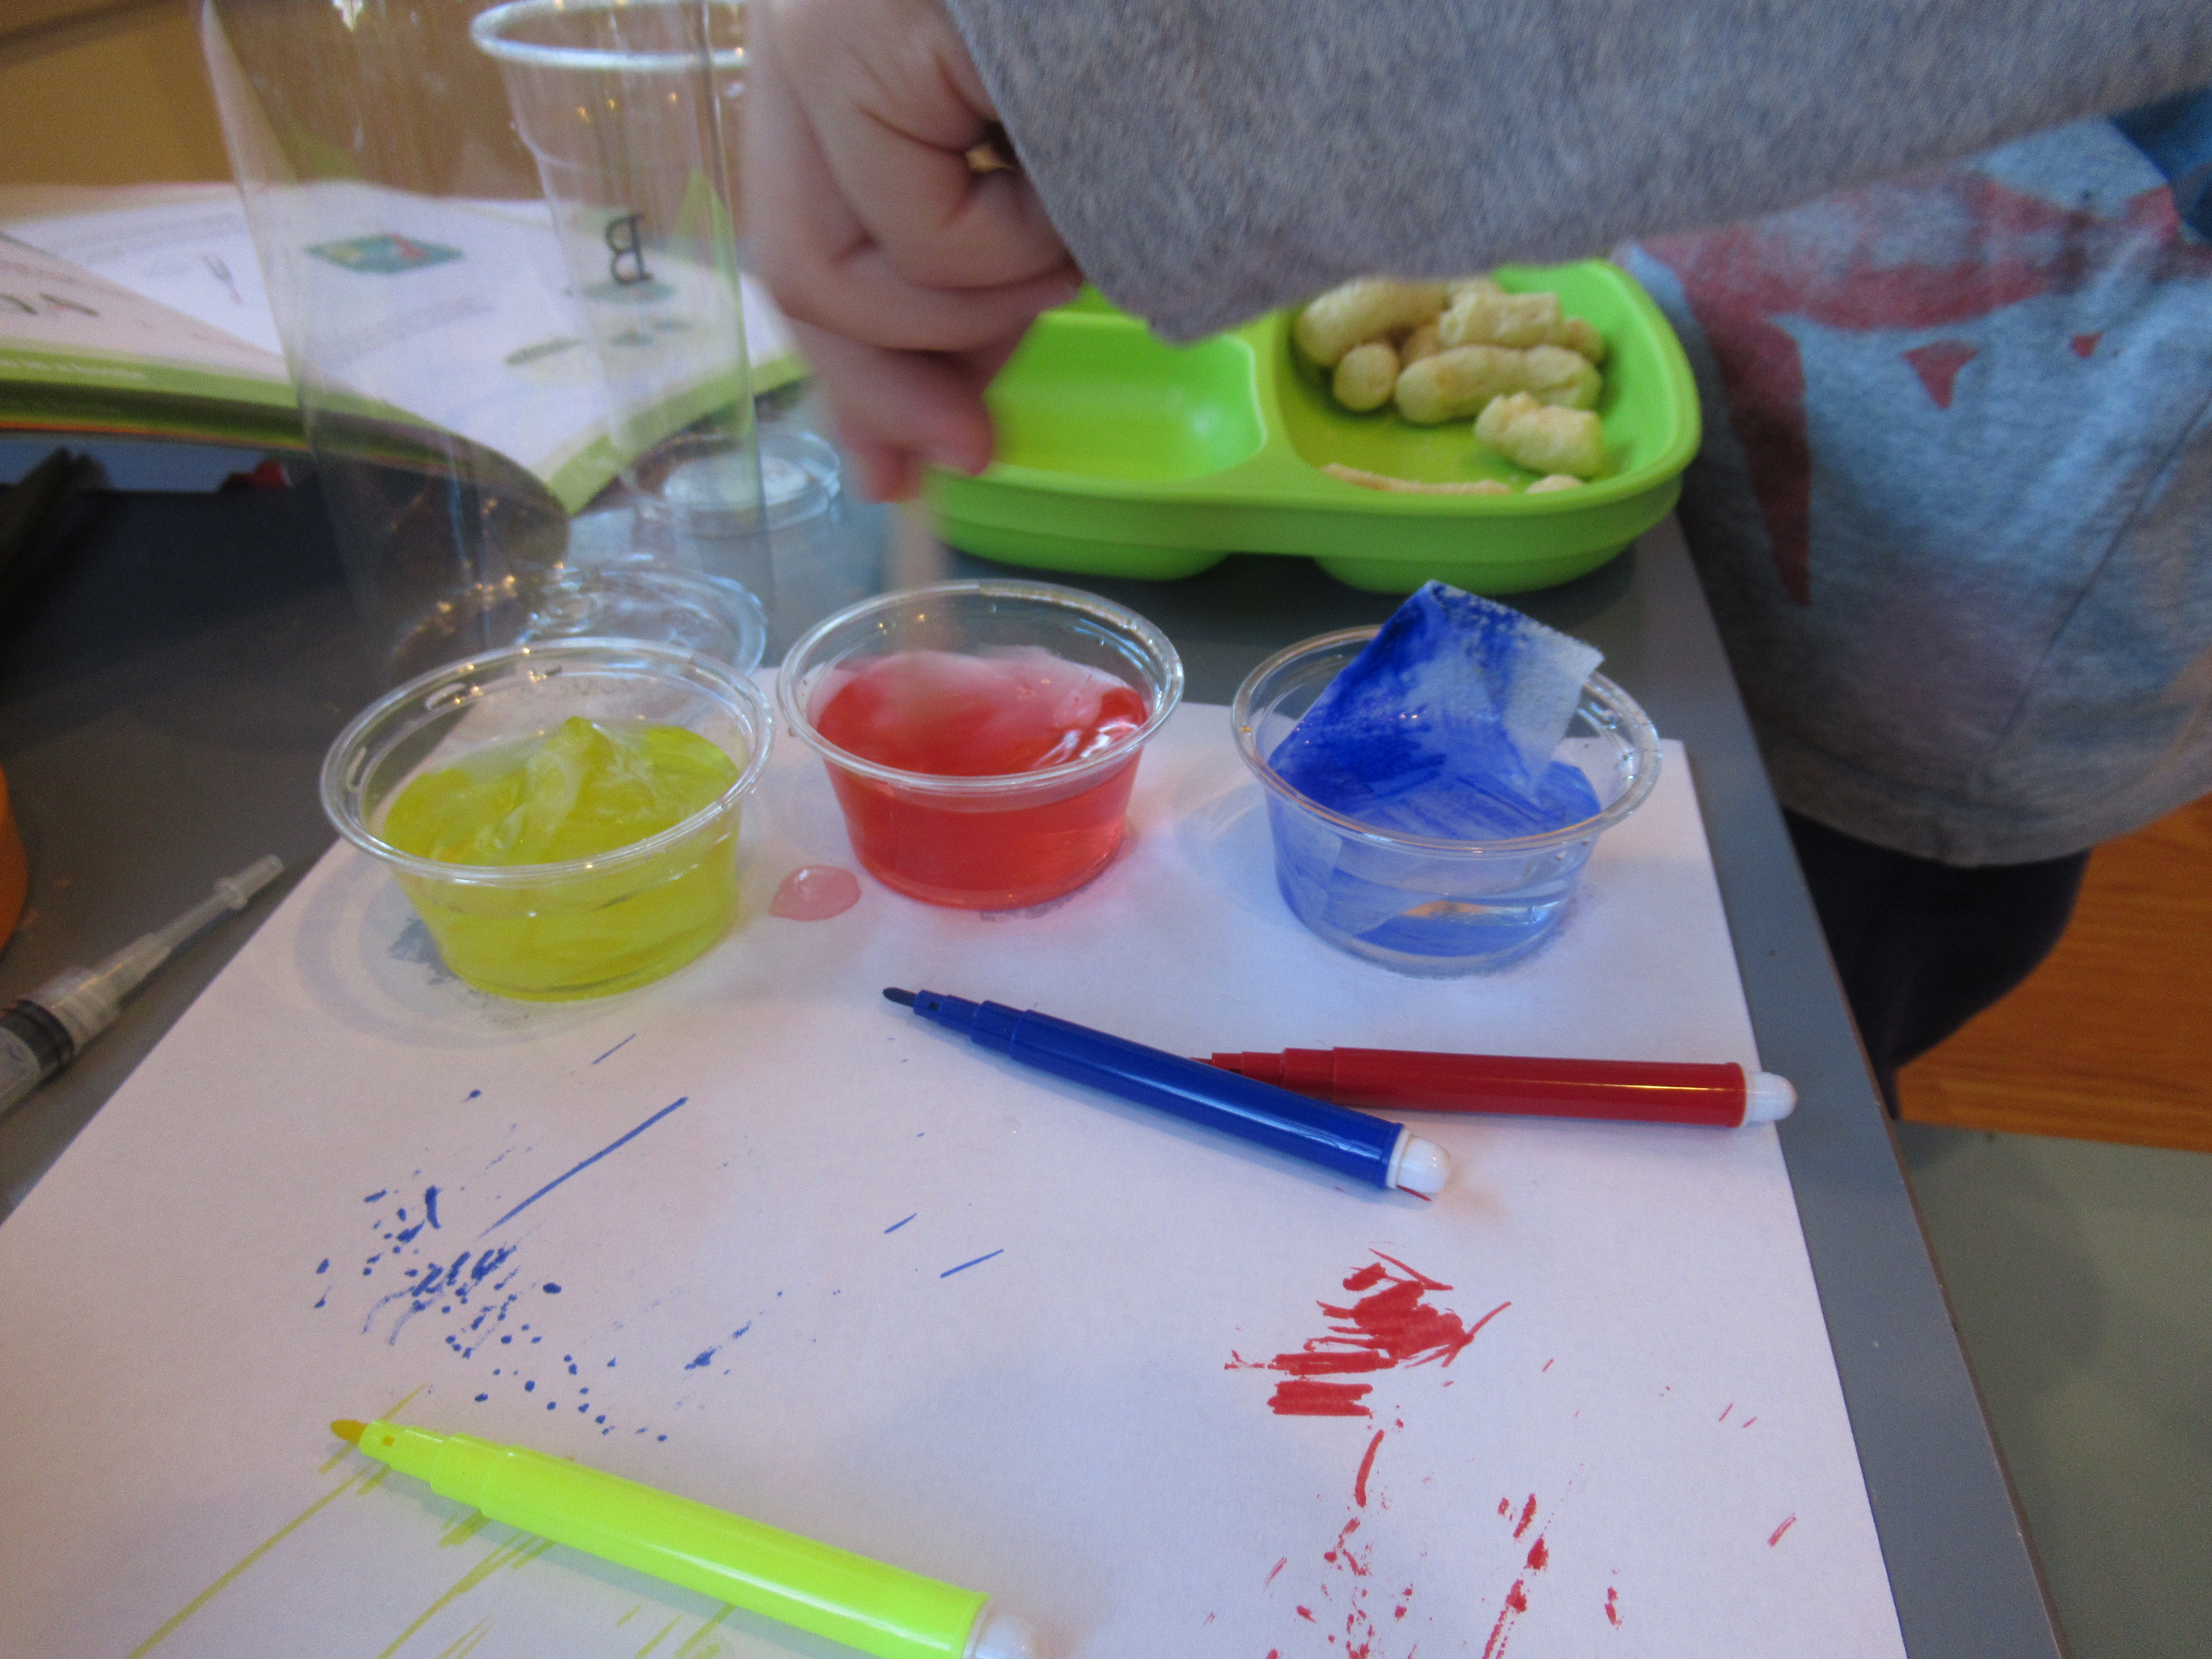
Now it was time to peer under the pond water and make an Aquarium in a Bottle, with the scientific concept of density at play. Travis mixed the provided salt into warm water, and filled three small plastic cups. For a fun way to color them, Kiwi instructs kids to scribble marker over thin paper squares. Place the paper in the cups, one each for red, yellow, and blue, and the water immediately changes color.

Next, he used the provided syringe to fill plastic fish with this colored salty water. The booklet contained helpful tips for testing the buoyancy of each fish. If there was too much water and not enough air, it sank; squirt out a little. If it floated on the top, there was too much air and not enough water; add a little more from the syringe!

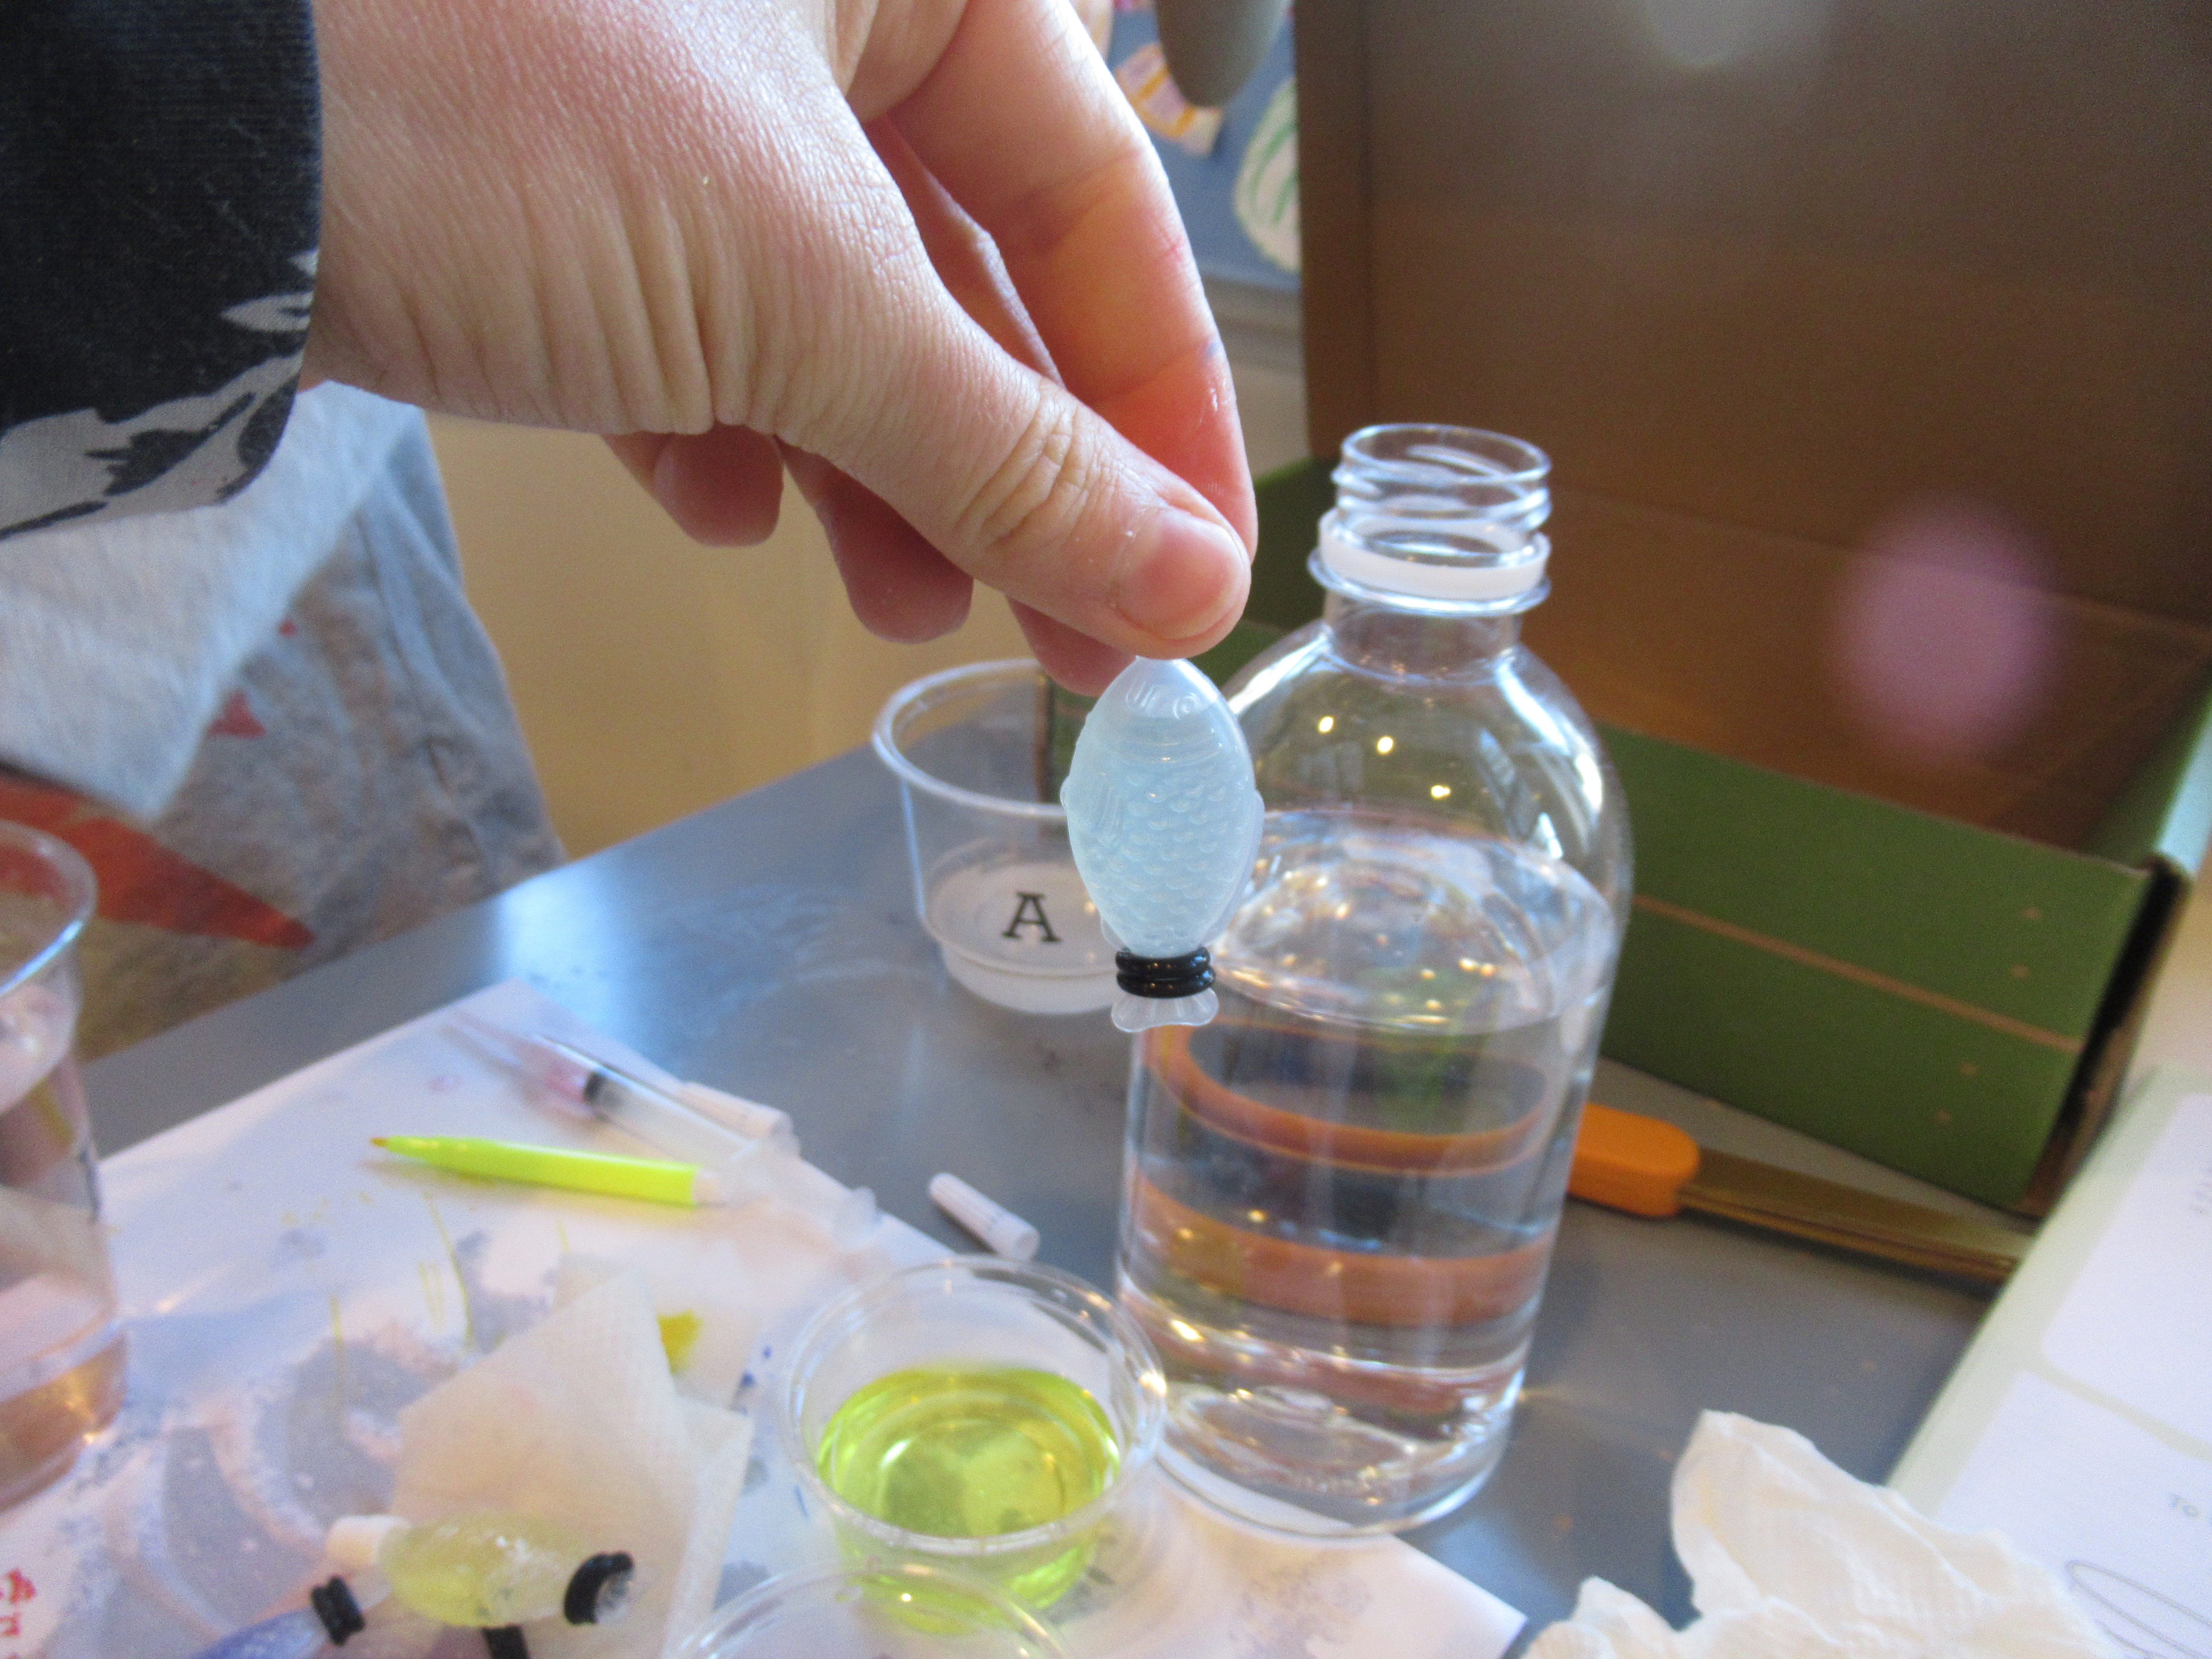
When all our fish were just right, Travis added them to the provided clear bottle for a little “aquarium” he can keep on display.

Kiwi often provides ways to upcycle the crate itself, and this month was no exception, with a suggestion to make another “leaping” project: Lively Leaper frogs.

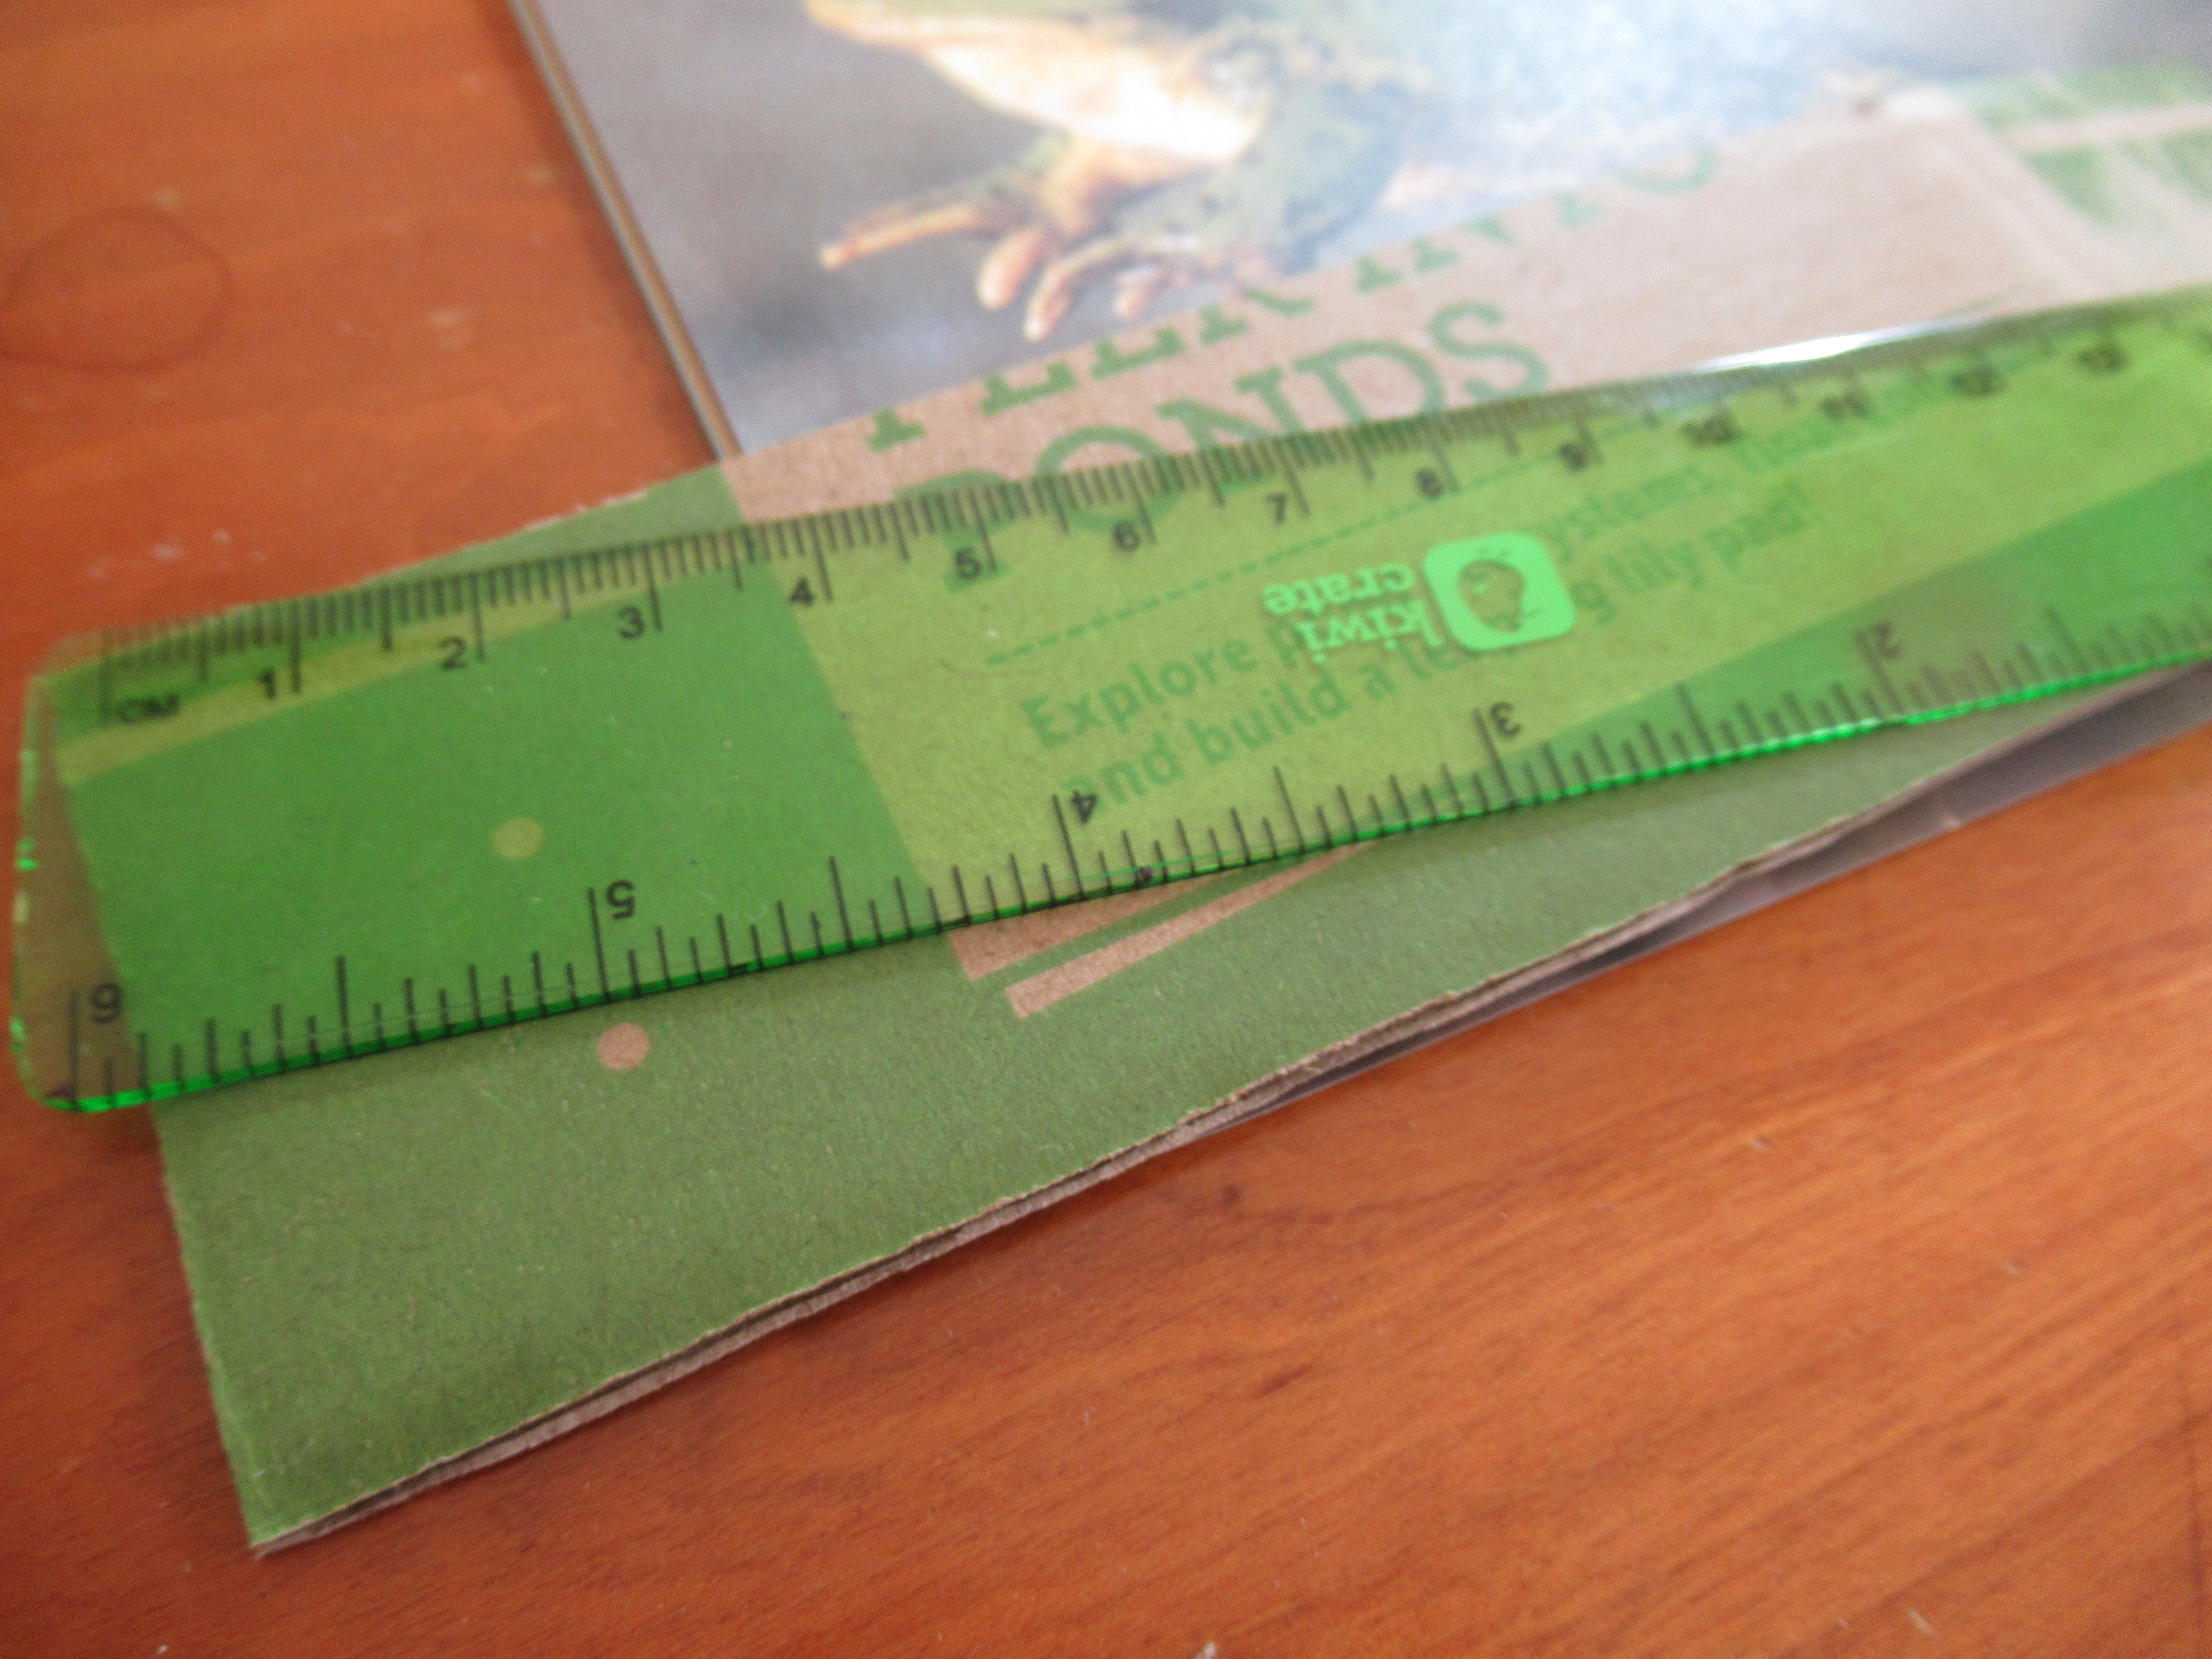
Cut the front flap from the crate (or a similar box) that measures 7 inches long x 2 inches tall. Make notches at 1.5 inches and 3.5 inches. Fold in half at the 3.5 inch mark, then fold again at the 1.5 inch mark, down in the opposite direction.

Just like the lily pad, hold your finger on it, then release and the frog “jumps”. We added a little green frog with marker for extra effect.

Overall, Travis liked that this crate explored lots of scientific concepts instead of just one topic in depth.

Dinosaur Fossil Excavation

Depending on the age of your child, this game can be either mostly sensory play or mostly STEM play. Either way, it’s sure to delight!

I set up a dinosaur excavation pit for Veronika with three kinds of “dirt”. The first was a box of chocolate cake mix, the second was crushed chocolate cookies, and the third was regular flour (although whole wheat flour probably would have worked better).

Next, I buried a few of our small plastic dinosaurs under the “dirt”. If your children are older, you can use store-toy bones or fossil prints, instead (or even make your own). Since I knew Veronika wouldn’t quite understand what she was seeing with the fossils, we stuck with whole dinosaur bodies. She was about to be a very lucky paleontologist.

I scattered a few rocks on top for a finishing touch, then set out an old shaving brush, bucket, and shovel. Time to dig!

She immediately took to shoveling up the dirt and transferring to her bucket, a process which she absolutely loved.

I showed her how to brush the dust and grime off the dinosaurs as she unearthed each one, but honestly she wasn’t much interested. Dinos, rocks, and dirt alike went into her bucket and then were dumped into the tray to start all over. She also enjoyed pouring the “dirt” back and forth between a few small plastic cups.

Don’t fear the clean-up. The mixture sweeps up easily… as long as you don’t get it wet. Trust me: You do not want to deal with wet chocolate cake mix on your floor.

Paper Plate Sheep Mask

Veronika recently made a woolly sheep from cotton balls, to celebrate March “going out like a lamb”. She loved the fluffy cotton balls so much that we followed up with another sheep craft today. This time, she got to be the sheep at the end!

To start, I cut the center from a paper plate and then added lots of glue around the rim. Veronika immediately began to place cotton balls all over the glue, and loved playing with extras, too!

We let the mask dry, then I cut two ears from sturdy white paper and attached with tape.

Baa baa,” said my little sheep. If you’re able, follow up with a visit to a local farm to see spring’s lambs!

Easter Egg Necklace

Veronika loves accessorizing, so we made this pretty little necklace for her to wear to Easter brunch this weekend!

To start, we needed to decorate the “beads”, in this case Easter egg shapes cut from construction paper. I chose a few different springtime shades like purple, green, and pink. She loved decorating with markers, telling me very specifically which ones needed dots, lines, or sometimes silly drawings like “slippers”, and took her work quite seriously!

Of course there’s no need to stop at markers. Use crayons, add stickers or sequins, or embellish with whatever else is in your craft bin. To add some sparkle to her jewelry, we squirted a little glue onto each egg and sprinkled with purple glitter. This made the craft significantly more messy, but this girl loves glitter these days.

For some fine motor skills, encourage your child to thread the egg “beads” ribbon to finish the necklace. I punched a hole near the top of each egg, and gave Veronika a yellow ribbon. (Note: You can wrap a bit of tape around the end of a ribbon to make it more like the aglet of a shoelace, for easier threading).

She needed some assistance, but soon was proudly modeling her creation.

“Bunny!” she said with a smile, without any prompting at all.

Easter Egg Holder

Veronika has decorated quite a few plastic eggs for Easter this year, but those roly-poly eggs can be difficult to display. Here’s a cute idea from The Toddler’s Busy Book to show off your toddler’s creations!

First, cut an empty paper towel tube into sections, each about 2 inches tall. Next, cut strips of construction paper to wrap around them, and glue on. We chose yellow, green, and pink, all lovely springtime colors. I don’t normally use hot glue for a material as thin as paper, but in this case it cut down on mess and drying time.

Now it was Veronika’s turn to decorate! She loved adding Easter-themed stickers like images of chicks, bunnies, and flowers.

Her favorite step, though, was making the holders sparkle with glitter. I decided the most mess-free way to do this was to pour a little glue into a paper plate and sprinkle the glue with glitter (Veronika chose gold), and then roll the tubes through. Stand upright to dry.

The eggs look great, and won’t wobble over!

Raindrop Stamp for a Rainy Day

Veronika has been obsessed with a rainy day episode of Blues Clues recently. So when we had a real rainy day today, I used the opportunity for a raindrop-themed craft.

First, squirt rainy day shades of paint onto a paper plate. We mixed dark blue, light blue, and black. Then, simply squeeze an empty toilet paper tube into a teardrop shape.

I showed Veronika how to dip in the paint and then stamp on the paper.

“Look at all the raindrops!” she said so happily. She took charge of the activity and didn’t want any help, which meant many of her raindrops were sideways. But I loved that the resulting artwork was authentically hers.

I covered a second sheet of paper with more raindrop stamps, and this time drew in a little dog ‘Blue’ towards the bottom.

In sum, this is a great way to keep toddlers busy of a rainy day.

Carrot Kid Craft

Last year, Veronika loved having her feet painted orange for an adorable springtime craft. This year we painted them green instead! Capture a few green footprints and they become the green fronds at the top of this carrot memento, just in time for the Easter bunny to nibble on.

To start, I sat Veronika down in front of a big sheet of paper and painted the soles of each foot green. Make sure you have wipes ready at your side so you don’t wind up with green footprints all over the floor!

I tested out two methods for the best print, either bringing the paper to her foot and pressing firmly, or having her walk across it. The former definitely made clearer prints! I cut out the best two and set them aside to dry.

Meanwhile, we made the rest of the carrot: cut a paper plate into a triangle shape and invite your toddler to tear orange construction paper into small pieces. Glue down the orange pieces until the plate is covered.

Glue the footprint fronds to the top and the carrot is ready!