Early Explorers Rocks

LP Rocks (18)

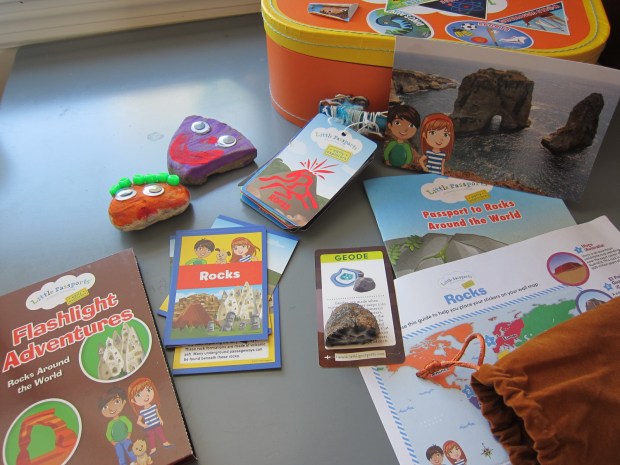
Our latest package from Early Explorers was on the seemingly simple subject of rocks, but there was so much fun to be had! Of course we received the usual: a sticker for Travis’s suitcase, stickers to pinpoint on his map that depicted amazing rocks around the world, flash cards, and an activity booklet. The booklet was heavy on math and tracing activities this month, which made this mama very happy!

LP Rocks (13)

Rocks Craft:

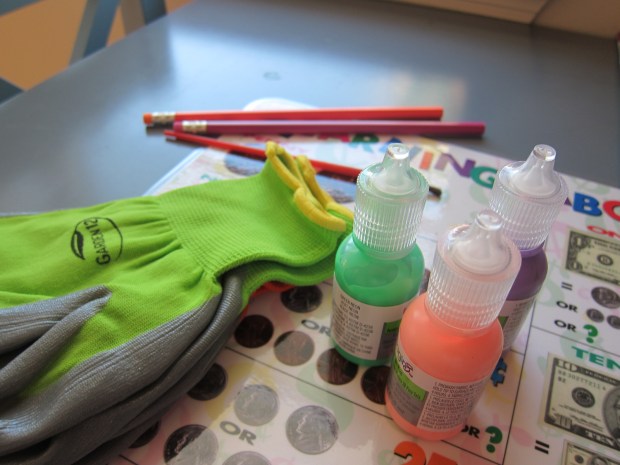
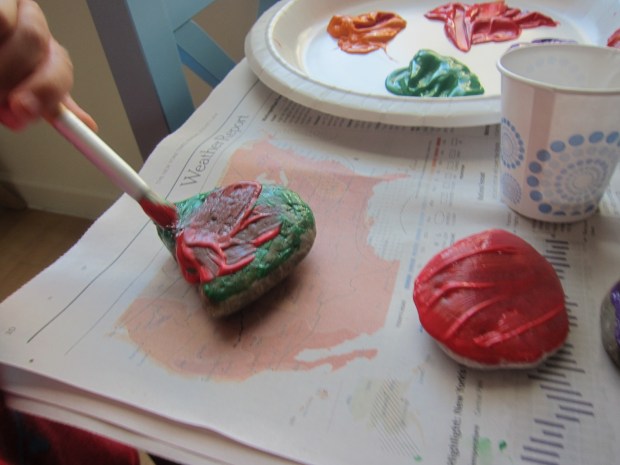
The booklet suggested making pet rocks, something Travis had only recently done in art class, but he was eager to replicate the activity at home. A trip to the beach gave us flat smooth stones that were perfect for turning into “pets.”

LP Rocks (7)

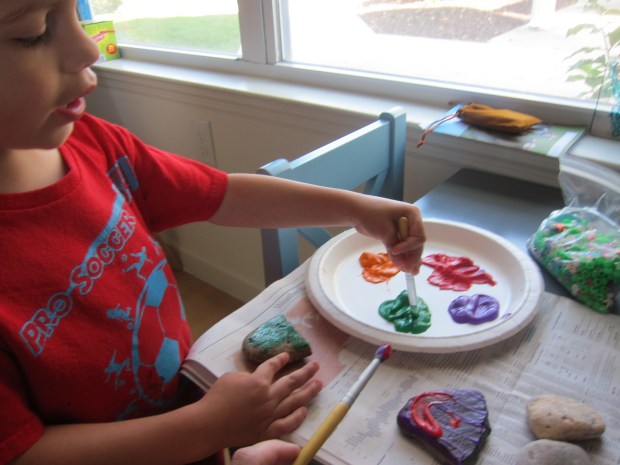
Travis carefully chose his colors, while I painted a smile on a second rock.

LP Rocks (8)

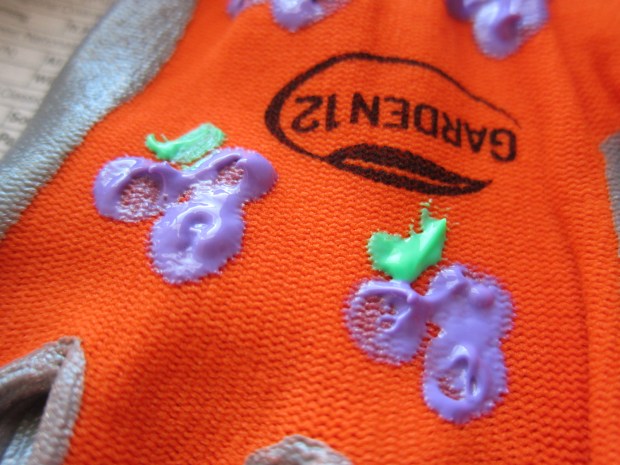
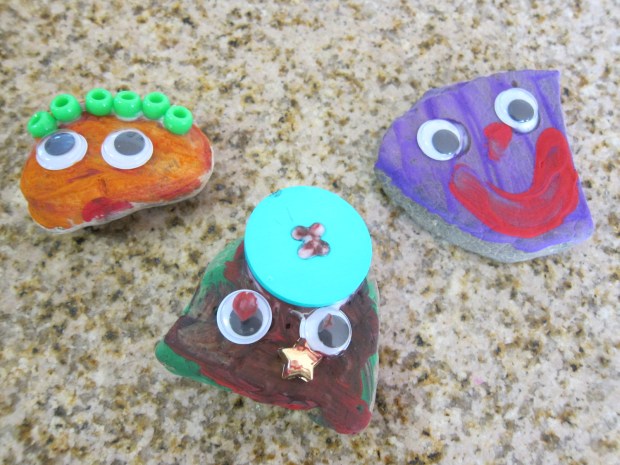
The one with the button hat is entirely his creation! He even named it. If you want to get extra creative, turn your pet rock into a frog.

LP Rocks (9)

Rocks Science:

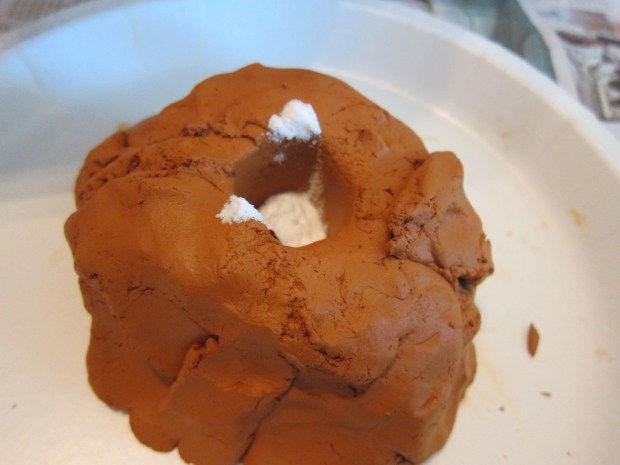
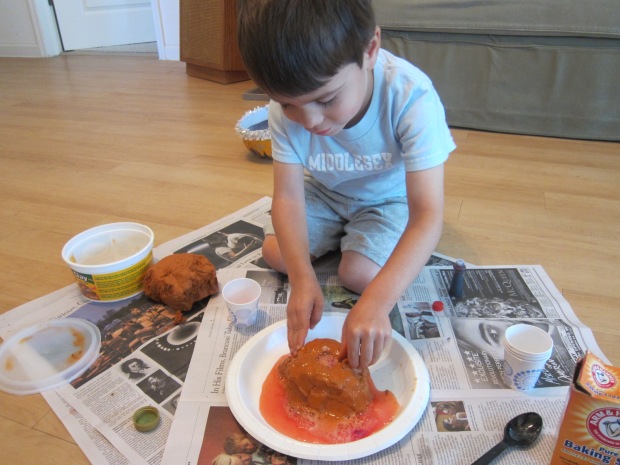
An oldie-but-goodie – make a volcano with baking soda and vinegar. We used terracotta-colored clay for the most realistic appearance, and even added a touch of red food coloring to our vinegar. Make a hole in your volcano, and fill with a little baking soda.

LP Rocks (4)

Pour in the vinegar…

LP Rocks (5)

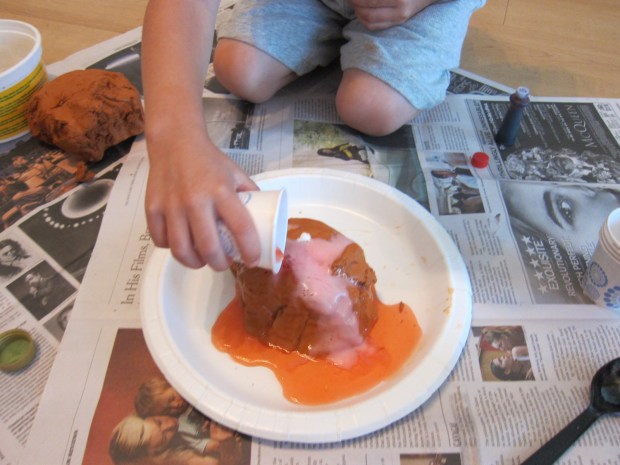
…and watch it explode! Don’t be surprised if kids want to repeat this one again and again.

LP Rocks (6)

Rocks Keepsake:

The geode Travis received was very pretty, and immediately became part of his “treasure” box, although I’ll admit I was a little disappointed this overlapped with the Natural Wonders pyrite we received in a previous package.

LP Rocks (2)

Rocks Field Trip:

A summer vacation was the perfect chance to search for rocks on the beach. (Or if you’re not near the beach, head to your nearest park and see what kinds of rocks you unearth).

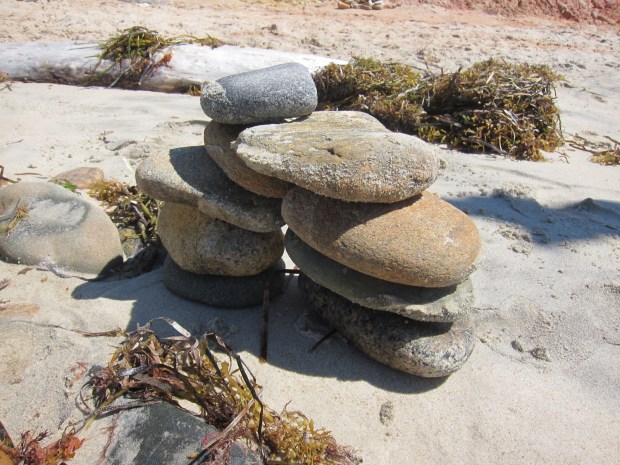
We checked out the cairns other people had stacked, including this wowza of a caterpillar…

LP Rocks (17)

…and tried our hand at our own “inukshuk”!

LP Rocks (15)

Rocks Further Activities:

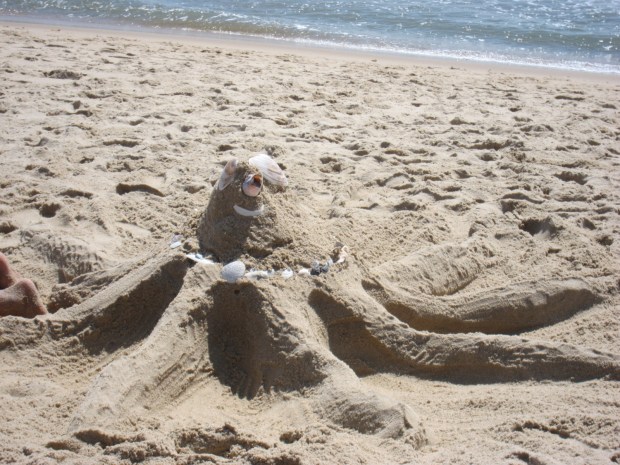
The booklet suggested building a sandcastle in a sandbox (with the scientific reminder that sand is really just broken down rocks and shells)… but we decided to go one better and attend a local sandcastle contest! Travis loved checking out some of the winners, including an octopus and mermaid.

Montauk (1)

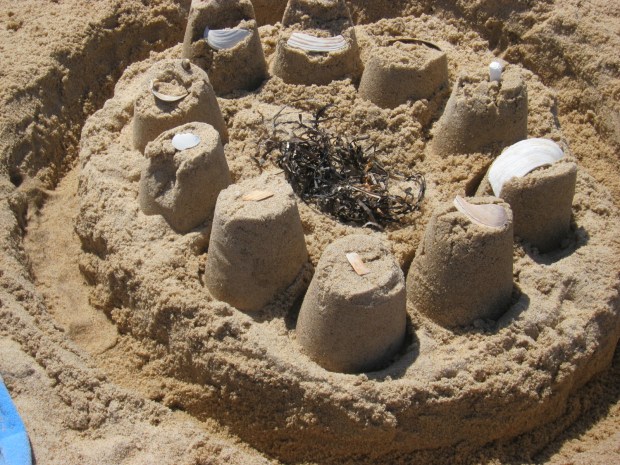
We made our own creation with towers, a moat, and beach finds as decoration.

Montauk (9)

Back at home, a recipe for rock layer parfaits was great fun to put together. Even little kids will get an idea about the layers that make up the earth when they make this recipe, whether or not they’ve seen the Grand Canyon.

LP Rocks (11)

In clear plastic cups, we layered the following:

Graham cracker crumbs (sand)

Banana slices (clay)

Raisins (large rocks)

Jam (lava)

Granola (fossils)

Agave nectar (mud)

Blueberry yogurt (water)

Travis wasn’t wild about eating the parfait, but he enjoyed putting it together!

LP Rocks (12)

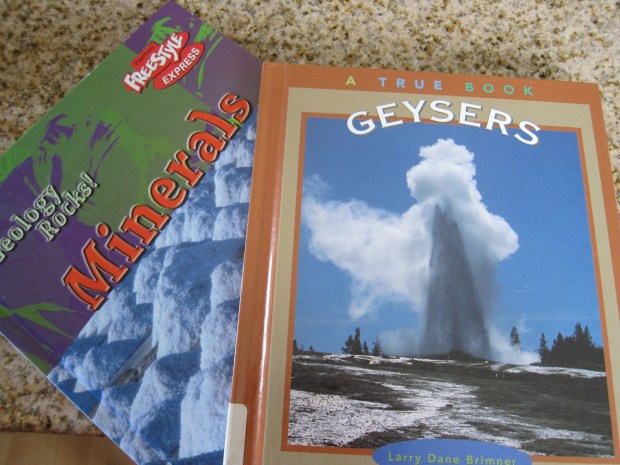
Finally, we headed to the library for books, choosing topics that the booklet had grazed upon like geysers and minerals. These were a bit advanced for Travis, but the pictures were fun!

LP Rocks (14)

We also selected our favorite rocks from the booklet. Travis said his favorite was any of the sparkly geodes.

Sandpaper Leaves

Sandpaper Leaves (7).JPG

We often think of leaf crafts as projects for the autumn, but here’s one that can be done in nearly every season (except winter!). It combines a little bit of nature, a little bit of sensory art, and a little bit of coloring all in one.

After a full family day at the park, we returned home with a collection of leaves. All of them were green this time of year (late summer), but we found leaves in as many different shapes as possible, everything from nearly oval, to trefoil, to pointy.

Sandpaper Leaves (1)

Once home, I traced the leaves in permanent marker on sandpaper, making sure to include lines for the veins (a quick little science lesson on how leaves drink their water!)

Sandpaper Leaves (4)

Travis loved selecting colors and filling in each leaf, with the sandpaper adding extra tactile fun.

Sandpaper Leaves (2)

He made some leaves true to life (oranges, greens), and went beyond nature with a few others in vibrant pinks.

Sandpaper Leaves (3)

Best of all was when he grabbed a handful of crayons for a rainbow leaf – his own invention.

Sandpaper Leaves (6)

Cut out the leaves and paste up on the walls or use as pretty gift cards the next time you send a loved one something special.

Sandpaper Leaves (5)

We loved this variation on leaf art!

Sandpaper Leaves (8)

Domino Steal Game

Domino Steal (3)

On the heels of our starfish counting game, here’s another great way to reinforce numbers and number recognition before back-to-school. Dominoes lend themselves to any variety of counting games – including just matching up the pips! – but this version involves stealing from the other players. An instant preschooler hit!

To play, you need two players, whether two kids, or an adult and one child. Pull out two dominoes, and each player counts the number on theirs. This is great not just for learning to count the dots, but also learning to recognize the arrangement of the pips by sight.

Domino Steal (2)

Whoever has the higher number on his or her domino wins that turn, and gets to “steal” the other players domino. Stealing was a big thrill of course! Here’s the thief in action:

Domino Steal (1)

I swear I didn’t rig the game, but Travis ended up with quite the collection.

Domino Steel (4)

When you’re done playing, I recommend leaving the dominoes out… They are a fantastic prompt for kids who want to arrange them, or play make-believe with them, or practice numbers on their own.

Starfish Counting Game

Starfish Count (4)

This adorable game is a fun way to get kids counting (or memorizing by rote) the pips on dice. The beach-y starfish theme makes it just right for the end of summer, if you’re helping kids prep for back-to-school!

I drew two starfish free-hand (don’t judge my stars too harshly!) and added smiles and 10 dots to each (to represent the bumps along a true sea star’s arms).

Starfish count (1)

Set out the starfish as your playing boards, along with pom poms and dice.

Starfish count (2)

Take turns rolling the die, and add the appropriate number of pom poms to your starfish board. The first player to fill in all their bumps wins!

Starfish Count (3)

In sum, a simple counting game that will boost kids’ confidence as they had back to the classroom.

Starfish Count (5)

DIY Sundial – Two Ways!

Sundial (4)

Summer is the perfect time to give kids a visual of how the sun moves across the sky during the day. Here are two ways to mark off the hours and watch the shadows move!

For our first sundial, we poked a straw through a paper plate, and set it securely between two planks of a back deck (alternatively, place in the yard with enough dirt around the straw to hold it firmly in place).

Sundial (1)

It was early when we started, a long 9 a.m. shadow, which Travis helped mark off.

Sundial (3)

We had to work around the sun a little bit (which disappeared behind the clouds a few times), but as we added hours, Travis could see how the shadow not only was shortest at mid-day, but also moved around the plate in a circle.

Sundial (5)

For a full-body experience, turn your child into the sundial! Sketch their outline with chalk at various points of the day, noting both location and length.

Sundial alt

After a full day’s cycle, they’ll be able to see how shadows move.

Our 100’s Jars Collection

100s Jar (7)

Back-to-school is just around the corner, and this activity is a fantastic way to get preschoolers and kindergartners thinking about numbers up to 100, as well as concepts like counting by 5’s and 10’s. All you need are a few empty glass jars and objects you already have around the house!

First I asked Travis if he could think of anything we had in the house that would number up to 100. He guessed toy cars (which might be true!) but I knew 100 cars wouldn’t fit in a jar.

I suggested we try coins, and soon we were emptying out his piggy bank.

100s Jar (1)

He quickly latched on to the idea that 10 groups of 10 would give us 100. I helped him count out 10 coins into each group, and then we counted the groups up: ten, twenty, thirty, and so on. Filling the jar was super exciting.

100s Jar (2)

Dried pasta was a bit hit to count for the next jar!

100s Jar (3)

This also showed him that 100 pasta shells took up more space than 100 coins.

100s Jar (4)

For our final jar, Travis chose shells.

100s Jar (5)

This time we grouped them into 20 groups of 5. He had a hard time following as I counted up by 5’s, but it was a good foundation to lay.

100s Jar (6)

In sum, this is a cute way to get your little one thinking about math, and so easy you can sneak it in between dinner and bath time! What do you have 100 of in your home? Please share in the comments!

Make Your Own Raisins

Grapes to Raisins (5).JPG

Ok, you’re melting in a heat wave and hot sunshine… But that will be cause to rejoice if you harness the power of that sun and show your kids how you can turn grapes into raisins.

Two years ago, we actually tried a similar trick using an oven, and I’d been waiting for the chance to make a sun-dried version. Boil a bunch of whole green grapes for 30 seconds, then immediately transfer to a bowl of ice water. Travis loved helping me make the ice water bowl!

Grapes to Raisins (2)

Place the grapes on foil pans, then cover with a breathable cloth and place somewhere outside that gets direct sunlight. Bonus points for weather that’s 85 degrees or above. Let the grapes stand for 3 to 5 days, then see how you’ve shriveled them into raisins.

By day 1, the grapes were definitely shriveled and wrinkly on the outside, although still the same size as regular grapes.

Grapes to Raisins (3)

As the days went on, they got smaller and wrinklier but – oh no! A bout of rain caught us by surprise, and our raisins turned moldy before we had a chance to try them.

Grapes to Raisins (6)

So even though we weren’t entirely successful, I can’t wait to hear your stories about sun-dried goodies in the comments.

Exploding Sodas

Exploding Soda (4)

We’re late the to the game on this one, but better late than never! Apparently big kids and science teachers have been exploding diet soda with Mentos for years now, but this activity was definitely new to my 4-year-old, and the perfect summer science experiment. Get outside – some place with lots of room – and then watch the geysers explode!

For the most fun, purchase several large bottles of diet soda in different varieties, so you can compare the height of the geysers (big kids may want to be more scientific about this, measuring off the heights, but we simply had fun).

Exploding Soda (1)

Line up the bottles, and drop five Mentos (very quickly!) into them one at a time. Note: You can drop in as many as seven Mentos, but by five, I had to run in the other direction.


Now here’s the important step – move back! The geyser is going to happen fast, and high.

The diet root beer took me so completely by surprise that I only had time for a picture of the aftermath.

Exploding Soda (2)

By the diet Coke, I was ready with my camera.

Exploding Soda (3)

Interestingly, diet Mountain Dew only gave us a small fizz.

Exploding Soda (6)

Travis loved hosing off the driveway in the aftermath!

Exploding Soda (5)

Which sodas did you try? Please share in the comments!

Granola Muffins

Granola Muffins

My preschooler doesn’t like granola stirred into his non-dairy yogurt, so I wanted a sneaky way to get this nutritional powerhouse into his diet. These muffins are the perfect fix; he has no idea the granola is there, but I know he’s eating muffins with an extra dose of hemp and flax and other granola goodness.

Ingredients:

  • 2 cups all-purpose flour
  • 1 cup brown sugar
  • 3/4 teaspoon salt
  • 1 teaspoon baking powder
  • 1/2 teaspoon baking soda
  • 3/4 teaspoon cinnamon
  • 1 cup granola
  • 1 tablespoon lemon juice
  • Scant 1 and 1/2 cups vanilla almond milk
  • 1/3 cup canola oil
  • 1 teaspoon vanilla extract
  1. In a large bowl, combine the flour, brown sugar, salt, baking powder, baking soda, cinnamon, and granola; set aside.
  2. Place the lemon juice in a measuring cup and fill with the almond milk to equal 1 and 1/2 cups. Let stand for 5 minutes.
  3. Combine the almond milk mixture in a bowl with the oil and vanilla. Add the wet ingredients to the dry ingredients and mix just until combined.
  4. Divide the batter evenly among 12 greased muffin cups. Bake at 400 degrees F for 20 minutes. Let stand in the pans for 5 minutes, then transfer to a wire rick.

Note: For true granola lovers, sprinkle the tops of the muffins with a little extra before baking.

Stamped Garden Gloves

Stamped Gloves (6)

As camp season comes to a close, we’re thinking about gifts to thank Travis’s counselors for a wonderful few weeks in the sun. In keeping with all that outdoor time they’ve spent with your children for the summer, consider these kid-painted garden gloves as a parting gift!

To make the project extra fun, we bought puffy fabric paints in pretty pastels, and instead of using paintbrushes, we turned pencil erasers into our tool of choice.

Stamped Gloves (1)

Squeeze out the paints onto a paper plate.

Stamped Gloves (2)

Dip a pencil eraser in a color, and stamp onto the gloves.

Stamped Gloves (3)

Travis made a set decorated with multi-colored dots.

Stamped Gloves (5)

Meanwhile I showed him a slightly more deliberate method of painting: purple dots in bunches of three to be purple grapes. A little brush of green paint for the leaves completes the look. Older kids will love making this version.

Stamped Gloves (4)

To present as a gift, simply wrap up the gloves with a seed packet of herbs and some twine. They would make a wonderful hostess gift for any summer friends you visit, as well.

Stamped Gloves (8)