Game of Stones

TIc Tac Rocks (5)

This is the most beautiful game to take to the beach or poolside this summer! It’s easily portable, fun for all generations, and also a cinch to put together.

It all starts with a trip to a park or the beach to collect stones. Travis was convinced some of the rocks we found were shark’s teeth, which made the collecting that much more fun!

Tic Tac Toe (1)

Use a paint pen or acrylic paints and a small paint brush to mark half of your stones with x’s and half with o’s – you’ll need 5 of each.

Tic Tac Rocks (2)

I had two old muslin bags around the house, one small and one large, so we made two copies of the game, one for our smaller rocks, and one for the larger.

TIc Tac Rocks (3)

Paint the bag with a tic tac toe cross-hatched board. Let dry.

Travis thought our new poolside game was a delight!

TIc Tac Rocks (7)

The bag now serves not only as your board, but also as the means to clean up the stones when you’re done playing!

Tic Tac Rocks (8)

Raspberry-Lemonade Slushie

Raspberry Slushie

My son loves Italian ice, particular lemon flavored, but I don’t always feel great buying him a treat so loaded with sugar. This homemade version has no added sugar at all, and gets its sweetness from raspberries instead. Mama and kid approved!

Ingredients:

  • 3/4 cup frozen raspberries
  • 1/2 cup lemon juice
  • 2 cups ice
  1. Combine all ingredients in a blender and process until slushy and smooth.
  2. Pour into cups and freeze for one hour before serving.


Nature’s Palette

Natures Palette (9)

This beautiful activity from High Five magazine combines a craft and a way to get outdoors. It’s quite similar to a rainbow hunt we did late last summer, but sometimes it’s fun to repeat an activity as your children age; they’ll reap different rewards from it each time!

This time we started by making a proper artist’s “palette,” which immediately had Travis excited. Cut a palette shape from a file folder (I did this step for Travis, since he wasn’t sure of the shape).

Nature Palette (1)

Next, cut paint chip samples (available for free at paint stores or home good stores) into pieces, and arrange on your palette. Travis was thrilled to use grown-up scissors, with a guiding hand.

Nature Palette (2)

Little drops of color!

Nature Palette (7)

Travis immediately seized upon the fun to be had with the remaining paint chips and extra file folders, and was soon making collages and creations.

Nature Palette (8)

He mostly cut squares and rectangles, but I helped him cut a few nature shapes like leaves and flowers, and we arranged them in pretty nature pictures.

Nature Palette (6)

Then came the real nature walk! Instead of going into the forest, I detoured us to a local botanical garden, knowing we’d find the full rainbow of colors there. Travis loved seeking out different shades on his palette.

Natures Palette (10)

We thought we might have to use the sky as our blue, until stumbling upon the perfect hydrangea!

Natures Palette (12)

In sum, this activity served as the prompt for a perfect mother-son summer afternoon.

Natures Palette (11)


Rainbow Density Cylinder

Rainbow Density (7)

Here’s a neat visual way for even young kids to grasp the concept of density. You’ll get messy in the kitchen, mix up some colors, and sneak in some science to boot!

Rainbow Density (1)

While Travis was napping, I set up paper cups and all of the liquids we’d be using for the project, in this order of density:

Corn syrup (or carob syrup)

Maple syrup

Water

Almond milk

Vegetable oil

Dish Soap

Rubbing alcohol

Note: Feel free to adapt this list, depending what you have at home, including agave nectar or honey for non-vegan families.

Travis was so intrigued at the set-up, and we talked briefly about how some liquids sit on top of (are less dense) than others. Was he ready to see how it worked? Yes!

Rainbow Density (2)

We tinted a few of our liquids with food color for a better visual effect: green for the water, red for the dish soap, and blue for the rubbing alcohol.

Rainbow Density (3)

Carefully help your child pour the liquids, in order of density, into a glass container. Thinner containers will work better, such as a recycled jam jars or an old dressing jar.

Rainbow Density (6)

It may take your layers a few minutes to settle, making a rather goopey mixture at first!

Rainbow Density (5)

After we gave it a moment, our layers were more apparent – we loved the hit of bright blue from the alcohol at the top!

Oddly, the blue alcohol layer disappeared when we returned to the jar about an hour later, but here you can see some of the layers even more clearly.

Rainbow Density (9)

Travis had so much fun that I gave him extra cups and additional food color to mix up for some time.

Rainbow Density (8)

A fun afternoon in the kitchen!

Cold Peanutty Pasta

Peanutty Pasta (5)

I love getting my little chef into the kitchen for each month’s recipe from High Five magazine, and this month featured a perfect summer pasta, meant to be eaten cold or at room temperature. The recipe was a great chance to hone skills including whisking and chopping with a butter knife. Plus, we got to use neat ingredients like fresh ginger root! Here’s my chef, excited to start.

Peanutty Pasta (1)

Adults, cook 8 ounces spaghetti according to package directions. Reserve about 1/2 cup pasta water, then drain the remaining pasta water and rinse the spaghetti well with cold water. Set aside.

Meanwhile, have your little chef help you combine the following in a bowl:

1/2 cup chunky peanut butter

2 tablespoons tahini

1 tablespoons chopped fresh ginger

2 tablespoons soy sauce

1 tablespoon sesame oil

1 teaspoon sugar

Peanutty Pasta (2)

Add about 6 tablespoons reserved pasta water to the mixture, and whisk until combined. If the sauce is still thick, add another tablespoon or two of the water.

Travis was so excited to try his hand at a butter knife for the next step. I cut a cucumber into rounds, and let him cut each round into quarters.

Peanutty Pasta (3)

In a large bowl, combine the cooked pasta, chopped cucumbers, 1/2 cup chopped peanuts, and the peanut sauce, tossing well to coat.

Serve at room temperature or chilled.

Note: To make the recipe nut-free, simply omit the chopped peanuts and use all tahini in place of the chunky peanut butter.

Peanutty Pasta (4)


Melted Crayon Art

Melted Crayon (4)

My son loves appliances, which he loves to play with (unplugged) under careful adult supervision. So when I saw this craft involving a hairdryer, I knew we had to give it a try.

I purchased a small canvas (8×8 inches) at the craft store, and cut the wrappers off a rainbow of crayons. You’ll want new crayons with nice pointy ends for this project, so it’s not the best option for recycling broken ones.

We arranged the crayons along the top of the canvas in roughly rainbow order, singing a rainbow song as we worked, and glued them down. Let dry completely.

Melted Crayon (1)

Then it was time to make some art! Cover your work area with newspaper, aim the hairdryer at the canvas, and turn on to the highest setting. He couldn’t believe I was letting him down this!

Melted Crayon (2)

With a guiding grown-up hand, we got right up close to the crayons. Now they were really starting to melt!

Melted Crayon (3)

Let the wax cool, then find some place to hang your work of art!

Melted Crayon (5)

Black Bean Burger Chili

Bean Chili

Here’s a chili so savory and delicious it will have meat-eaters going back for seconds, thirds… even fourths. Warning – it’s spicy!

Ingredients:

  • 4 frozen black bean veggie burgers (such as Gardein)
  • 3 (14-ounce) cans diced tomatoes, drained
  • 1 (15-ounce) can kidney beans, undrained
  • 1 (15-ounce) can black beans, undrained
  • 1 (15-ounce) can chickpeas, drained and rinsed
  • 1 onion, chopped
  • 1 red bell pepper, chopped
  • 2 tablespoons chili powder
  • 1 tablespoon Worcestershire sauce
  • 3 teaspoons dried basil
  • 3 teaspoons dried oregno
  • 2 teaspoons hot pepper sauce
  1. Thaw the veggie burgers and coarsely chop.
  2. Combine the burgers with all of the remaining ingredients in a slow cooker. Cover and cook on low for 7 to 9 hours, for flavors to blend.


Colors Crate

Koala Colors (7)

I was surprised when a color-themed crate arrived from Koala Crate this month. Colors seem so basic compared to other topics our subscription has covered, more like something we’d receive toward the beginning. Happily, we found that the activities and crafts inside were surprisingly complex and engaging. The booklet also felt especially interactive this month, including a color-by-shape page, seek-and-finds, and more.

Koala Colors (1)

First up was the Color Scavenger Hunt, using colored cellophane squares in all shades of the rainbow and a set of dice.

Koala Colors (8)

Roll one for color and one for the number of objects, then hunt for items around the house. Travis loved this little challenge!

Koala Colors (9)

The squares can be used for multiple purposes when your hunt is done. Roll a color and then think of something in that hue. Here’s Travis drawing a few items he thought of, like lettuce and carrots.

Koala Colors (10)

You can also hold the colored squares in front of familiar objects around the house and see how the colors shift, as with this apple.

Koala Colors (11)

Next we made the Watercolor Banner, which kids decorate first in crayon and then in watercolor (all materials provided in the kit).

We talked about things we see with lots of colors, which soon had Travis drawing nature scenes (flowers, a swamp) on his flags. I added a flag with rainbows and one with stripes.

Koala Colors (2)

Next, use the provided watercolors to paint over the crayons (a neat lesson in “resist” painting techniques).

Koala Colors (4)

Let dry before threading onto the provided rope, then find a spot to hang your banner. Travis opted for the old nursery!


Koala Colors (6)

Before you put away the watercolors, have some additional mixing fun. We started with the primary colors (dip your brush in the color, then in a cup of clear water), and I asked Travis what shade he’d like to make. Oh no – he requested white! The only one we couldn’t make. But we mixed up the secondary colors first, and then discovering how to make brown was a big hit.

Koala Colors (5)

The third craft, a Colorful Luminary, was a hit – and excellent for fine motor skills. Fit the provided tea light into the provided foam base, and add thin craft sticks in a circle around it.

Koala Colors (13)

Now add colored beads to each stick. I asked Travis if he wanted to do all one color per stick or arrange them in a pattern, but this was a bit advanced and he preferred randomly threading them onto the sticks.

Koala Colors (14)

Cap each stick with another foam piece to seal the beads in place.

Koala Colors (15)

Find a dark spot, and set the tea light ablaze. Beautiful! We talked about the ways the colors changed when the light was lit versus unlit.

Koala Colors (16)

Before we put away the fun, we repeated an old activity, Dyed Flowers, made by dying white carnations with food coloring. This is a great way not only for kids to see fun colors, but also to witness how liquids travel up a plant’s stem. Fill test tubes or small cups with water, and add food coloring to each. Place a white carnation in each tube, and let sit overnight.

Koala Colors (17)

You’ll have a lovely (though faint) color in each flower by morning. Our red worked best.

Koala Colors (18)

In sum, lots of great activities here, including for kids who learned their colors ages ago.


Fourth Birthday Party: Firefighters

Fire Party (19)

After a year-long obsession with firefighters and Fireman Sam, it was only natural to throw Travis a firefighter-themed party for his fourth birthday. This theme is so easy and fun to do at home, and the kids were finally at an age where organized activities can kick in. Top it all of with a big surprise from a real truck – read on!

We held the party mid-afternoon in our apartment with family and a few close friends – nothing too big to overwhelm the birthday boy! Mama and son both got new outfits for the occasion. The boy’s shirt is Carter’s and the dress is Isabel maternity.

Fire Party (3)

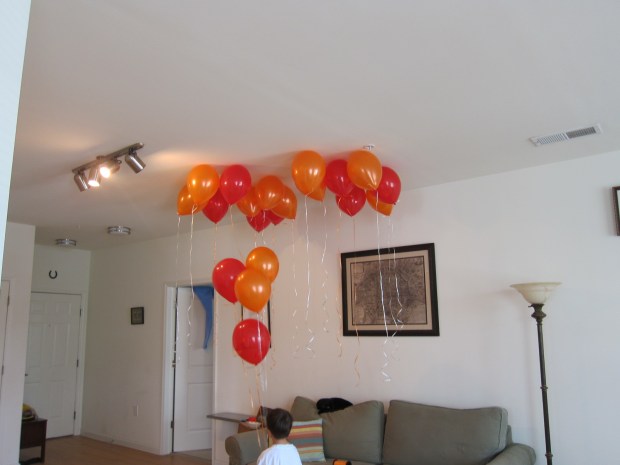
To set the stage (er, station), we set up a table with red tablecloth, along with red and orange balloons.

Fire Party (12)

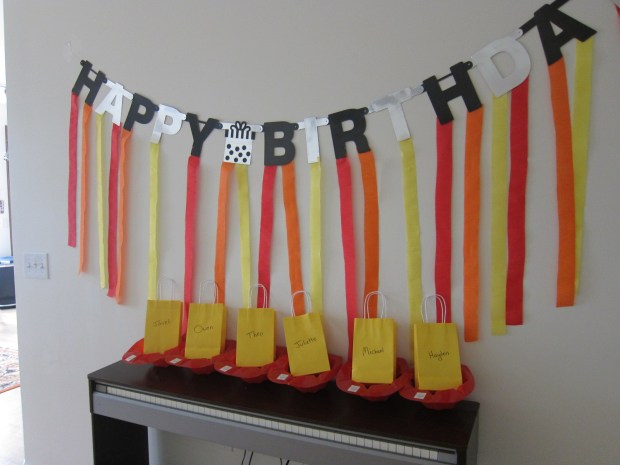
I strung a Happy Birthday banner with red, orange, and yellow streamers hanging from each letter. These were supposed to replicate flames, and although my husband teased that they didn’t look like flames at all, at least they carried on the color scheme!

FIre party (2)

If you can score old firefighter boots or a helmet (we borrowed ours from a volunteer firefighter friend!) fill it with red, yellow, and orange flowers.

FIre Party (15)

Firetruck plates and napkins carried the theme over to the food area, as well as a fire hydrant lemonade dispenser, which was a huge hit with the birthday boy. The hydrant is from Oriental Trading, as were individual hydrant cups that the kids first had to find hidden around the room.

Fire Party (8)

Don’t forget plastic utensils, set up in red and yellow fire buckets.

Fire Party (9)

As mentioned, this year the kids could really comprehend organized activities, so we had five “stations.”
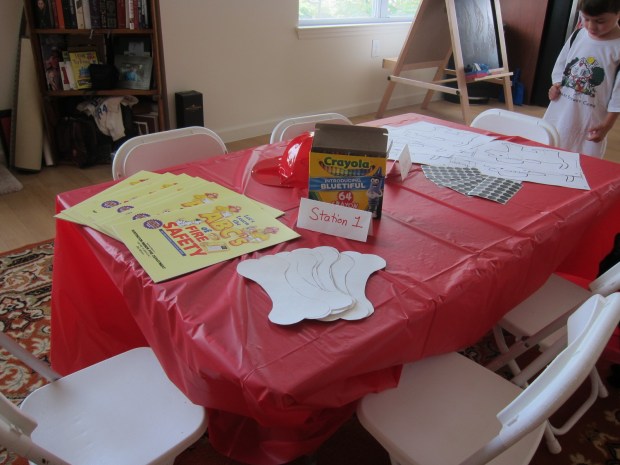
Station 1:

One half of the kids table featured fire safety leaflets and dalmatian doggie bones to color. The little artists in our group of friends had great fun here!
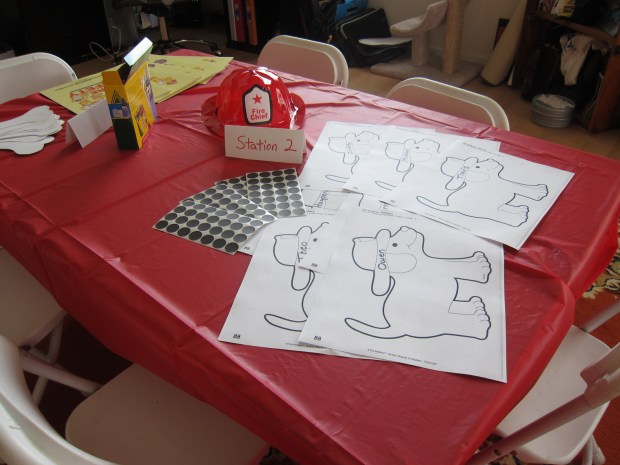
Fire Party (10)

Station 2:

Find a dalmatian printable or draw your own, and label each dog with a guest’s name. Once children find their dog, they can decorate it with black dot stickers. The perfect firefighter’s companion!
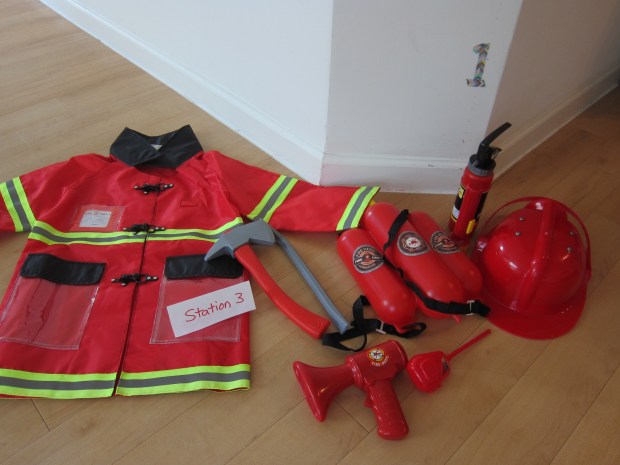
Fire Party (11)

Station 3:

A dress-up selfie station. I purchased one firefighter costume set with lots of props like axes, hydrants, radios, and helmets. Consider making a filter on an app like Snapchat, and proud parents can take pics of their kids dressed up. The more imaginative kids didn’t want to stop playing in this area!
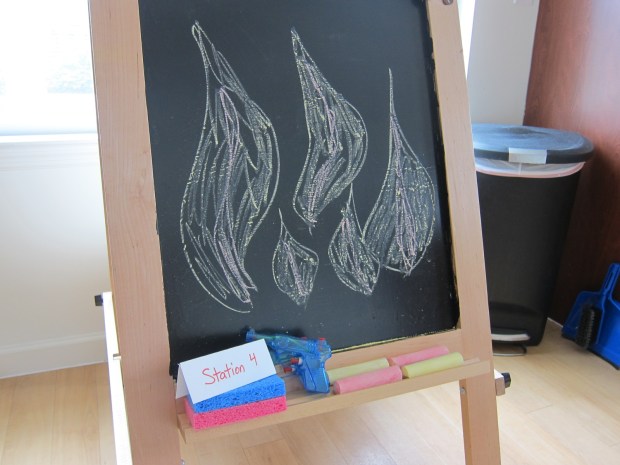
Fire Party (5)

Station 4:

Time to put out the fire! We don’t have a chalkboard, but I painted a whiteboard surface with chalkboard chalk and let dry completely. Decorate with yellow and red chalk “flames” and provide the children with small water guns to squirt out the fire. The youngest guests in our group were happy here nearly the whole party!

Fire Party (4)

Station 5:

Back to headquarters for meal time! The food continued the fiery theme, with “Five-Alarm Chili” for the grown-ups (consider serving a milder version for kids) and hot dogs fresh off the grill. Although I normally keep food vegan at Travis’s parties, we did grill up a selection of meat dogs and vegan pups. “Water-hose-melon” and “hot” tomatoes (decorated with tissue paper flames) rounded out the simple meal.

Fire Party (16)

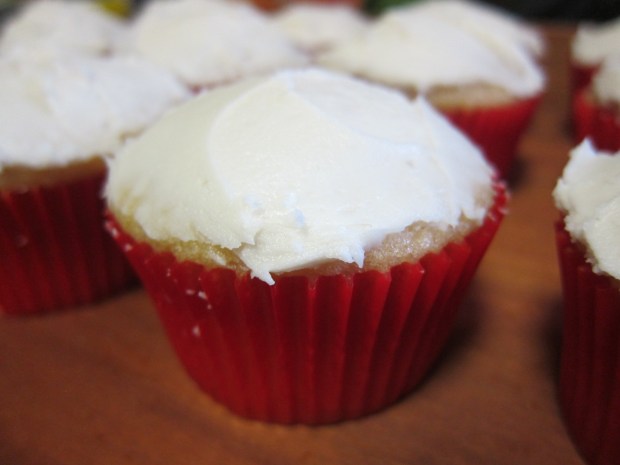
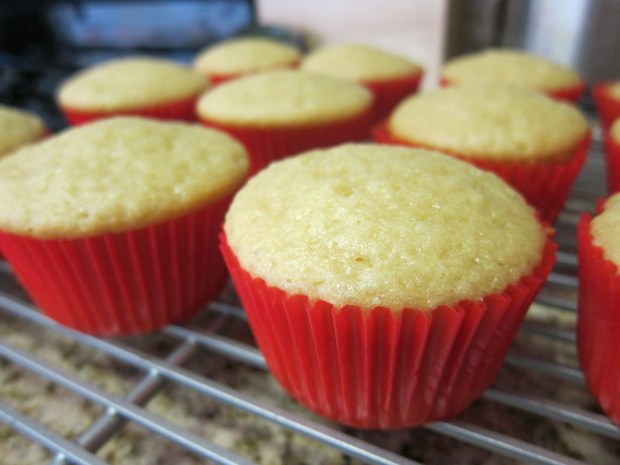
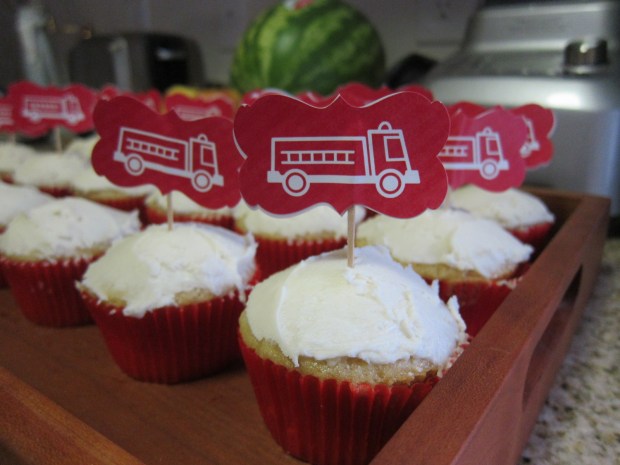
For dessert, bring out a tray of homemade cupcakes in red liners. Little fire engine toothpicks are the perfect finishing touch!

Fire party (1)

The highlight of the afternoon was a visit from a real firetruck. Contact your local fire station and see if they can send a truck and a few firefighters to provide a demo and safety tips. Many are very happy to do so, especially for a small donation for their time!

It turned out our local firefighters were busy with their 175th Anniversary fair, but we found a fantastic local party service, Captain Jack’s, who was happy to come for a half hour and show the kids his truck.

bday (13).jpg

And the hydrant, a huge hit!

bday (11)

Send guests home with little goodies that will continue the theme. Our goodie bags had items from Oriental Trading Company like firetruck crayons, mini water guns, firefighter tattoos, firefighter badges, mini flashlights, red lollipops (from Yummy Earth), and a fire hat for each child.

FIre Party (20)

Sound the alarm! This was one red-hot party.

Fire Party (17)

Fluffy White Cupcakes

Cupcakes (2)

In the past, I’ve outsourced birthday party cakes to vegan bakeries in our area, but this year I decided to be brave and go homemade. I’m happy to report these cupcakes are nearly foolproof, and were a huge hit!

Ingredients:

  • 1 tablespoon apple cider vinegar
  • 1 and 1/2 cups vanilla soy milk
  • 2 and 1/8 cup all-purpose flour
  • 1 and 1/8 cup sugar
  • 2 teaspoons baking powder
  • 1/2 teaspoon baking soda
  • 1/2 teaspoon salt
  • 1/2 cup canola oil
  • 1 and 1/4 teaspoons vanilla extract
  • 1/2 teaspoon coconut extract
  1. Line 20 muffin cups with paper liners (find a color that fits your party theme!), and coat with cooking spray. Set aside.
  2. Pour the cider vinegar into a measuring cup, and add soy milk to equal 1 and 1/2 cups; this will sour the mixture.
  3. Meanwhile combine the flour, sugar, baking powder, baking soda, and salt in a large bowl; set aside.
  4. Combine the soy milk mixture in the bowl of a stand mixer with the canola oil, vanilla, and coconut extract. Add the flour mixture, beating until combined.
  5. Divide the batter evenly among the cupcake liners (about 1/4 cup batter per cupcake).
  6. Bake at 350 degrees F for 20 minutes. Cool in the pan for 5 minutes, then transfer to a wire rack and cool completely before frosting.

Cupcakes (1)

Ok, I did cheat on the frosting and opted for a jar of Wholesome Sweeteners’ vanilla flavor. Go homemade on the frosting too if you have the time!