Ribbit Ribbit Toast

Ribbit Toast

We brought a spring pond in to snacktime today!

Toast one slice of whole wheat bread; meanwhile, mash half of an avocado. Spread the avocado evenly over the toast.

Cut two round pieces of carrot for the frog’s front legs, and a carrot ribbon for a smile.

Add circles up top for eyes – cucumbers or green olives work well!

Finally, for the big back legs, slice pieces from a green bell pepper and place one on each side.

This recipe hopped very quickly into my son’s tummy!

Egg Carton Baby Animals

Egg Chick (6)

We upcycled our relative’s Easter egg carton to make these cute spring-themed animals. In all honesty, Travis lost interest very quickly, but I still made the animals because we need signs of spring around here! (Yup, there’s more snow in the forecast for tomorrow…)

There are plenty of steps for kids to help out with – cutting out the carton sections and animal templates, gluing everything on, and adding marker decoration if they would like.

First, cut an egg carton into segments. Cut out as many as you’d like, to have a whole menagerie of baby spring animals!

Egg Chick (2)

I used pastel-colored paper and free-handed the shapes to add on to each animal – long ears and rounded paws for a baby bunny; pointed toes, a crest, and wings for a baby chick.

Glue on the paper pieces and let dry.

Egg Chick (4)

Finally, I used permanent marker to make eyes, a white pom-pom for the bunny’s nose, and a diamond shape cut from paper for the chick’s beak.

Egg Chick (5)

What animals would you and your kids make? Please share in the comments!

Egg Chick (7)

Bird Puppets for Racing

Bird Puppets (6).JPG

Here’s a silly game to play in the backyard, using just a few craft supplies from home!

First, we painted the inside of plastic cups… this was novel for Travis to paint the inside of something, and he took great care adding layers of blue, red, and purple paint.

Bird Puppets (1)

Once the paint dried, we glued a few feathers inside each cup as tail feathers.

Bird Puppets (2)

Two more feathers went on the outside of each cup as the wings, along with a construction paper triangle for a beak and two eyes.

Bird Puppets (3)

In the morning, we set up the race! Cut plastic straws to about the size of your cups, and tape on.

Bird Puppets (5)

Thread long strings anywhere outside like a tree branch, fence, or gate. Slip the other end of each string into the straw of a bird. Now bounce and jiggle your birdies down their strings all the way to the end. Which bird will win?

Bird Puppets (7)

Crispy Asparagus Fries

Crispy Asparagus Fries.JPG

After I prepared this dish, my son turned and told me he prefers “regular asparagus” – simply roasted in a little olive oil that is! But for those of you whose kids might like a change of pace, crisp asparagus stalks become almost like french fries in a few simple steps!

Set out three bowls on the counter: the first with a layer of flour, the second with 4 Ener-G eggs, and the third with a mix of panko and vegan Parmesan sprinkles.

Wash and trim one bunch of asparagus. Dip the spears in all three bowls, starting with the flour, followed by the Ener-G eggs, and ending in the panko mixture. Transfer to a baking sheet lined with parchment paper.

Bake at 450 degrees F for 10 minutes, until crisp.

Easter Nest Cookies

Easter Nest Cookie (2).JPG

I meant to post this recipe yesterday, but the Easter holiday ran away from me! Luckily, the nest-themed cookies work great for any point during the spring, as baby birds make their way into the world.

Prepare one package of vegan sugar cookie mix according to package directions and bake.

Immediately after the cookies come out of the oven, indent the centers with a spoon. Transfer to wire racks and cool completely.

Fill the centers of each cookie with frosting (any flavor will do!) and sprinkle with shredded coconut as the “twigs” of the nest.

Easter Nest Cookie (1)

Finally, nestle in jelly beans or your favorite round vegan candies as “eggs.”


Pinecone Hedgehog

Pinecone Hedgehog (4).JPG

Finally we have treasures from our first foray into spring nature walks! What animal did we bring home from our little “safari”? We decided to turn these pinecones into hedgehogs!

First, cut pipe cleaners into pieces about 2 inches in length and set out a cup or dish of white glue.

Pinecone Hedgehog (1)

Travis worked to dip the end of each pipe cleaner into the glue and we nestled them between the scales of the pinecone.

Pinecone Hedgehog (2)

A few finishing touches were all the hedgehog needed. A little glue helped us add a pom pom nose and felt pieces for ears.

To affix googly eyes, we first bent a small piece of pipe cleaner in half, then glued on an eye. Wedge the pipe cleaner ends into the pinecone with a little more glue to hold in place.

Pinecone Hedgehog (3)

What a cute critter – a little prickly though!

Pinecone Hedgehog (5)

Easy-Freezy Breakfast Burritos

Freezy Burrito alt

Make a big batch of this burrito filling on the weekend, roll up the filled burritos in foil, place them in the freezer, and bam! Breakfast all week is solved. Or in a pinch, we love these for dinner!

For my picky preschooler, I leave the scrambled tofu rather plain – just a dash of turmeric for color. Feel free to add additional spices or chopped veggies for older kids and grown-ups. We like to use the slightly-sweet breakfast sausage from Field Roast for these burritos.

Ingredients:

  • 2 tablespoons canola oil
  • 2 cups frozen hash browns
  • 6 ounces chopped vegan breakfast sausage
  • 1 (14-ounce) package firm tofu
  • 1/4 teaspoon turmeric
  • 1/4 teaspoon salt
  • 6 to 8 flour tortillas
  1. Heat the oil in a large skillet over medium heat. Add the hash browns and cook for 4 minutes.
  2. Stir in the chopped sausage and cook for an additional 3 to 4minutes, until browned.
  3. Mash the tofu with a fork until it resembles scrambled eggs. Add to the pan, along with the turmeric and salt. Cook for a final few minutes until heated through.
  4. Warm the tortillas for about 15 seconds each in the microwave. Divide the filling evenly among tortillas – depending how stuffed you want your burritos, you’ll have enough to fill 6 to 8 tortillas.
  5. Roll up in foil. Store in the fridge up to 3 days, or place in the freezer until ready to eat!


Toilet Paper Roll Binoculars

Binoculars (6)

At last! Spring has sprung, and we are eager to look for signs of it on these first warm days. It was the perfect chance to put together some easy homemade binoculars before setting off into the woods!

To make the binoculars, you’ll need three toilet paper tubes. Cut one of them open down the middle and leave the other two intact.

Binoculars (1)

Glue the two whole rolls together with hot glue. Affix the open tube on top with more hot glue (this is a grown-up step!).

Travis loved decorating his binocs since we had puffy bug stickers.

Binoculars (4)

Perfect for spring!

Binoculars (5)

All we needed as the finishing touch was a string for around his neck, which I affixed with a little more hot glue.

Then it was time to head out. Travis loved peering through the “lenses” for the first signs of spring!

Binoculars (10)

And look what we found – buds!

Binoculars (9)


Juice-Pouch Stomp Rocket

Juice Rocket (5).JPG

Don’t toss that juice pouch from your child’s next snack time. With just a few embellishments, your kid will have him- or herself their very own rocket launcher!

First, make sure the juice pouch is completely empty and rinse any juice from the straw. Reinsert the straw into the pouch; this is your launcher.

Cut a regular straw in half; discard half and keep the rest as your rocket.

Trace 3 trapezoids onto colored paper – littlest kids might need help with this one. The shapes should measure 3 inches on the bottom, 1 inch on the sides and 3/4-inch on the top. Cut out, and cut one of them in half vertically, leaving the other two full.

Tape the 2 full trapezoids to each side of the straw as the rocket fins. Add the half pieces of trapezoid at the bottom with more tape.

Juice Rocket (2)

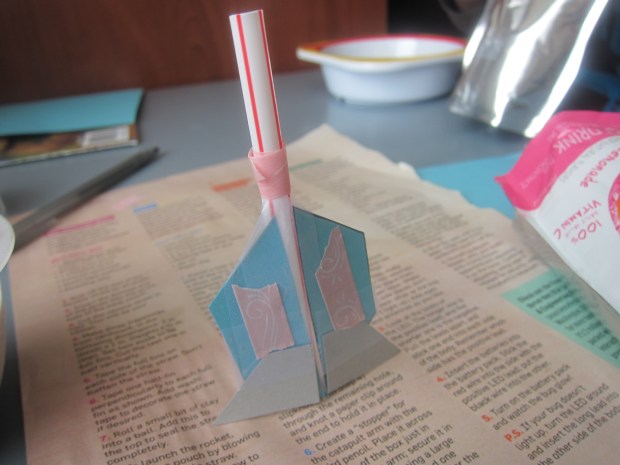
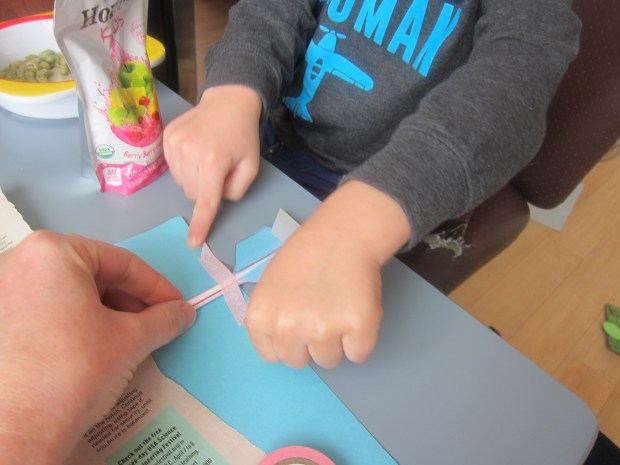
Travis decided that he wanted to add a few strips of washi tape as embellishment, too.

Juice Rocket (1)

Seal the end of the straw with a little ball of clay. Now your rocket is ready to soar!

Blow into the straw of the juice pouch to make sure it is full of air.

Juice Rocket (3)

Slide the “rocket” onto the straw of the juice pouch. Now stomp (or press) on the pouch and watch your rocket soar!

Juice Rocket (4)

You can teach your little scientist that this project works thanks to compressed air from the pouch, otherwise known as pneumatics!


Fingerprint Bird Painting

FIngerpaint Bird (6)

I originally planned this springtime-themed painting to be a fingerprint memento – I love capturing the size of Travis’s hands and fingers (and feet!) periodically. Turns out that Travis had different plans… but we still ended up with a great painting!

To make the project feel special, I purchased a real (small) canvas from the craft store – instantly things felt elevated above using regular paper!

Make the shape of a bird on the canvas using masking tape. Big kids will be able to tackle this step themselves, and little kids will like to play with leftover tape!

Fingerpaint Bird (1)

I set out fingerpaints for Travis and showed him how to dip in his fingertips and fill in the bird shape.

Fingerpaint Bird (2)

He very quickly decided he preferred a brush, and began filling in the bird that way. His brush strokes looked incredibly feathery, just like bird wings.

Fingerpaint Bird (3)

I loved the texture he was able to create!

Fingerpaint Bird (4)

So… not the fingerprint memento I had intended, but we still have a lovely work of art to welcome spring.

Fingerpaint Bird (5)