Cinnamon-Sugar Sweet Potato Fries

CInnamon Sweet Potato Fries

This sweet side dish is so easy it hardly merits being called a recipe. It’s the perfect hack for adding a little sugar and spice to dinner!

First, bake sweet potato fries according to package directions. Just after they come out of the oven, sprinkle with cinnamon and brown sugar to taste.

Serve with your favorite vanilla non-dairy yogurt for dipping!

Apple-Spice Mug Muffin

Mug Muffin (2)

When you’re craving muffins but don’t want a whole batch sitting around in the fridge or freezer, these individual mug-sized muffins are the answer to your prayers.

Ingredients:

  • 1/4 cup whole wheat flour
  • 4 teaspoons brown sugar
  • 1/2 teaspoon cinnamon
  • 1/8 teaspoon baking soda
  • 3 tablespoons plain unsweetened non-dairy milk
  • 1 tablespoon Earth Balance butter
  • 1/2 teaspoon vanilla extract
  • 3 tablespoons shredded apple
  1. The night before, combine the flour, brown sugar, cinnamon, and baking soda in a microwave-safe mug; Cover and set aside.
  2. In the morning, add the milk, butter (melted), and vanilla, stirring to combine. Fold in the apple.
  3. Microwave for 2 minutes, then let cool slightly before serving.

My son likes his muffin plain…

Mug Muffin (4)

…but I like adding a little extra chopped apple and a spoonful of vanilla non-dairy yogurt to serve. Or try a little dollop of soy whipped cream!

Mug Muffin (3)


Dot Paint Shamrocks

Dot Shamrock (5).JPG

We’re pretty crazy about St. Patrick’s Day around here (despite not being Irish!), so be on the lookout for several shamrock-themed crafts and recipes this week. In this first version, kids will love the reveal of the shamrock shape after they finish dotting their paint!

First, cut out a shamrock, either free-hand or using a template.

Dot Shamrock (1)

You can tape the shamrocks down to construction paper or poster board, but we actually did ours on foam board – this allowed us to later use it as a sign at our town’s St. Patrick’s parade.

Now you have two ways to dot paint around the shamrocks. First, there are good old dot paints.

Dot Shamrock (3)

For a novelty version, set out a tray of green paint and use pencil erasers to make small dots.

Dot Shamrock (2)

We liked doing both, to compare the big and little dots side by side.

Dot Shamrock (4)

Once you’ve finished dotting, peel up the shamrock shapes – voila! The silhouette is left behind. Now off to the parade!

Dot Shamrock (6)


Early Explorers Habitats

LP Habitats (24).JPG

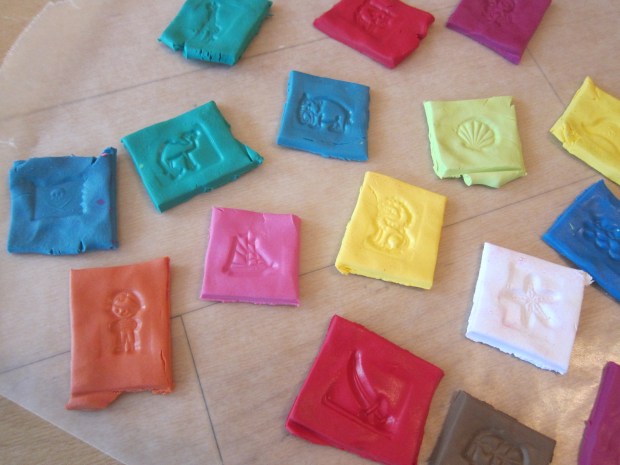
This month’s offering from our Early Explorers subscription was quite different than past kits. The booklet features many preschool readiness activities – mazes, matching, counting – but no suggested crafts or projects. As a result, we supplemented from Little Passport’s blog to add some additional fun.

LP Habitats (5)

The booklet featured great information, though, introducing children to habitats such as mountains, deserts, forests, and more. Travis loved the usual finds like the flashlight page and affixing his sticker on his luggage.
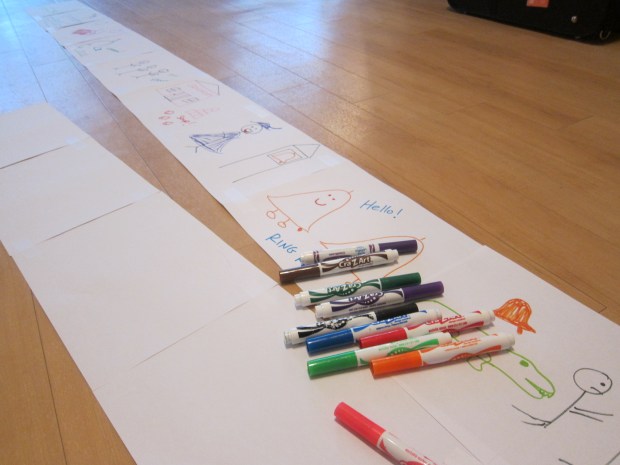
LP Habitats (4)

Habitats Art:

First up, we needed a craft! Papier-mâché mountains were perfect for the habitat theme – and so neat that they merited their own blog post!

LP Habitats (13)

The craft turned into a great way to supplement the info in Travis’s booklet about animals that live in the Himalayas and other mountain ranges.

Habitat Science:

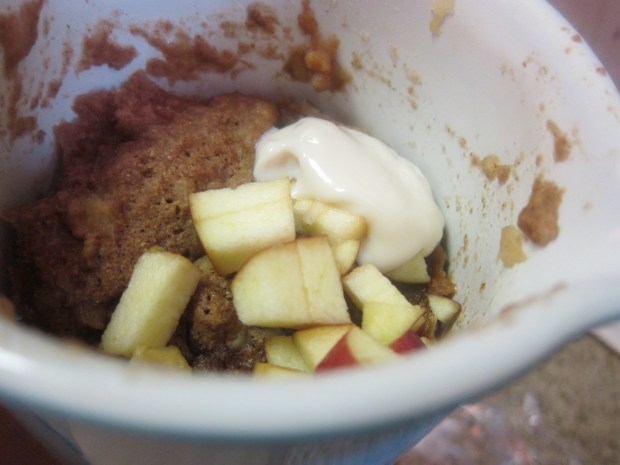
We also snagged the perfect science project off Little Passport’s blog – a rainforest in a jar! To recreate this warm, humid environment (one canopy tree can produce 200 gallons of water in a year!), we first added about 1/2 cup potting soil to a large mason jar, then filled with 1/4 cup water. I rather zealously added a little extra water, which may have been a mistake.

Rainforest Jar (1)

Next we rubbed flower seeds with sandpaper to break them up slightly, then added to the jar.

Rainforest Jar (3)

We also added some moss (I bought the moss at the craft store; I hate to disturb moss from nature).

Rainforest Jar (4)

Seal the jar and set it some place sunny.

Rainforest Jar (5)

Within a day or so you’ll see the condensation on the inside of the jar – neat! Keep a record of any changes you see, and make a note of how long it takes for your flowers to bud.
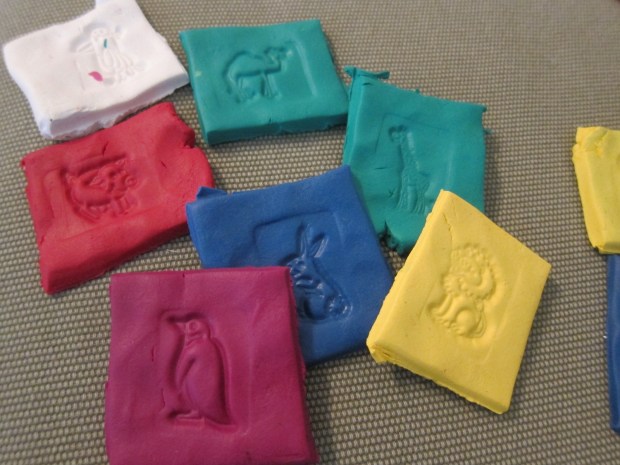
Rainforest Jar (6)

Habitats Keepsake:

This month’s keepsake was an instant hit, and I think the highest quality one we’ve received: a sticker book with four different habitats and reusable animal stickers to go in each setting.

LP Habitats (3)

As far as reusable stickers go, these are the best I’ve ever come across! Thick and durable, easy to peel off, and they match right back up on the sheets they came from when you’re done with play. Travis loved how floppy the stickers were!

LP Habitats (1)

He had to put every animal in a home before he tired of the game.

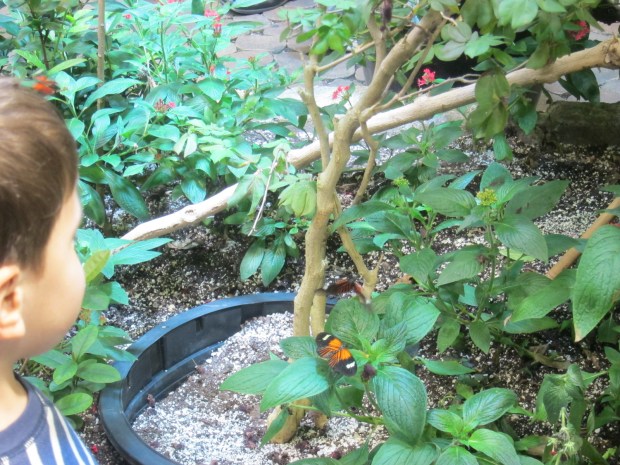
Habitats Field Trip:

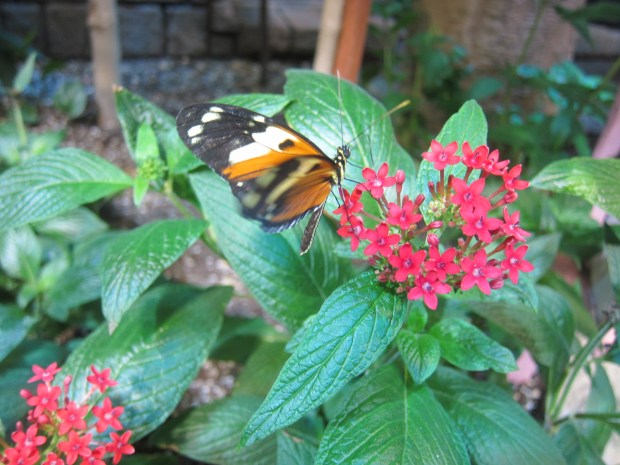
We decided to get as close to a tropical rainforest as we could here in the northeast – by visiting a butterfly exhibit! The humid room lives up to the name, and the butterflies are truly amazing, perching on fresh fruit…

butterflies (6)

hovering on leaves right before you….

butterflies (7)

and staying still enough to marvel at their curled tongues.

butterflies (2)

Habitats Further Activities:

Further activity suggestions this month really were about sitting down, talking and thinking together. I worried I might lose a preschooler’s attention, but Travis was quite engaged. First, we made a list of possible habitats, and he did great remembering – arctic, mountains, rainforests, etc.

LP Habitats (19)

I asked which was his favorite animal and he surprised me with polar bears, so we watched some online clips for kids about polar bears and their arctic habitat.

LP Habitats (20)

He also said that this is where he’d like to live, and to be a polar bear. (Brr!)

Since Travis’s drawing is still a little, well, abstract, I also set out coloring book pages of various animals and habitats that he could color.

LP Habitats (23)

Finally, we headed off to research and check out our local habitat. We take lots of nature walks anyway, so to capture what’s truly unique about our area, we went to where forest gives way immediately to the shore of Long Island Sound.

LP Habitats (26)

The only animals we saw on this cold snowy morning though were geese!

LP Habitats (27)

Noodle-y Kugel

Kugel (7)

To be frank, I’ve never seen a recipe quite like this in my life! It came to us care of Travis’s March issue of High Five magazine, and has multiple steps that are sure to delight your sous-chef in the kitchen. Pineapple with noodles? Yes, apparently this is a thing.

Kugel (1)

You can find eggless egg noodles, but I was unable to this time around. Instead, I chose a bag of curly pasta, both because the curls are reminiscent of the way wide noodles loop after they cook, and because it came in the right kind of bag instead of a box (more on that below!). Curly noodles also have the advantage that you won’t need to cut them into much smaller pieces for young eaters.

Ingredients:

For the noodles:

  • 1 (16-ounce) package eggless wide noodles or curly pasta
  • 6 tablespoons Earth Balance butter
  • 4 Ener-G eggs
  • 1 cup plain unsweetened non-dairy milk
  • 1/2 cup sugar
  • 1 (12-ounce) container non-dairy sour cream
  • 1 recipe vegan cottage cheese*
  • 1 (20-ounce) can crushed pineapple, drained

For the topping:

  • 2 cups organic corn flake cereal
  • 2 tablespoons sugar
  • 1/2 teaspoon cinnamon
  • 2 teaspoons Earth Balance butter
  1. Adults: cook the pasta according to package directions in a large pot; drain and set aside. Make sure to reserve the pasta packaging for step 6!
  2. Cut the butter into small pieces and have your child add the butter pieces to the warm pasta. Travis was very interested to see how quickly the butter melted!Kugel (2)
  3. In a bowl, whisk together the Ener-G eggs, milk, and sugar.
  4. Stir in the sour cream, prepared cottage cheese, and pineapple. Travis insisted on stirring all by himself.Kugel (3)
  5. Add the pineapple mixture to the noodles and stir to coat, then transfer the mixture to 13×9-inch glass baking dish coated with cooking spray.
  6.  To prepare the topping, place the corn flakes in the empty pasta bag, and seal; crush with your hands. This was – hands down! – Travis’s favorite part.Kugel (4)
  7. Add the sugar and cinnamon; seal and shake to coat.
  8. Sprinkle the topping evenly over the noodles, and add the remaining butter, cut into small pieces.Kugel (5)
  9. Bake at 350 degrees F for 45 minutes, until browned at the edges. Let stand at least 5 minutes before serving.

Kugel (8)

*To make a quick vegan “cottage cheese”, combine 1 package firm tofu and 1 tablespoon lemon juice in a bowl. Mash with a fork until the mixture resembles cottage cheese curds. Refrigerate until ready to use.

Raindrop Toss

Raindrop Toss (6)

Need a way to beat the blues on an indoor rainy day? This game can be thrown together with materials you likely have on hand, and turns raindrops into the cutest playing pieces ever.

First, we filled a big bin with rice and used a scoop to add about 2 tablespoons to each of 8 sandwich baggies.

Raindrop Toss (2)

Wrap rubber bands tightly around the bags to seal.

Raindrop Toss (1)

Bonus points: you can use leftover rice in a great sensory bin!

Next we wrapped the baggies in two layers of blue tissue paper, and secured with a second rubber band; now they looked a bit like raindrops.

Raindrop Toss (3)

To make them friendly raindrops, glue on googly eyes and pipe cleaner smiles.

Raindrop Toss (4)

While the glue dried, we made “puddles” on squares of craft foam. Paper plates would work well, too – anything you can draw or paint a blue puddle on. We added numbers so that we could keep score as we played, but that’s optional.

Raindrop Toss (5)

Set out the puddles and divide the raindrops among your players, then take turns trying to throw to the puddles.

Raindrop Toss (9)

This game is easily adaptable for multiple skill levels and ages, depending how far back players stand.

Raindrop Toss (8)

A splash!

Raindrop Toss (10)

Markers + Paper = A Long Story

Long Story (5).JPG

Snow day here! The school snow day caught me unawares (I was sure they wouldn’t cancel!) which means we had to come up with lots to do indoors and quick! Enter this easy two ingredient game, and you have endless varieties of play.

Travis was intrigued watching me set up. I laid down piece after piece after piece of white paper in a row, and taped them together, until we had a long scroll.

Long Story (1)

I told him it was for a story, and if he told me what was happening in each frame, I would draw it in. He ended up dictating a fantastic tale involving a crocodile on a boat, who likes to vacuum.

Long Story (3)

Later there were some bells with feet who come to the crocodile’s rescue.

Long Story (4)

I happily followed along with my limited art skills.

Long Story (2)

Once our scroll was filled, he immediately wanted another story. This time, I posed the challenge that he be the author and illustrator.

His story turned out to be all about bells (bells are big here, these days), who got progressively bigger, and had hair and large eyes to see bugs.

Long Story (7)

Even though the story was a bit nonsensical, I loved watching his artistic process, and seeing the way he used markers to capture what he was trying to say.

Long Story (8)

Using your same pictures, you can weave new tales with different words, or grab more paper and keep making up new stories. The only limit here is when you run out of paper or tape, whichever happens first.

Long Story (6)Happy snow day!

TV Puppet Theater

Puppet TV (9).JPG

When we first moved into our new home, we used a huge packing box to make a puppet theater… but it wasn’t very convenient to keep something so big around for long. This little version is much easier to keep and store, and is sure to delight!

We made ours from poster board, but if you use cardboard, your theater will be even sturdier. First, I used a ruler and x-acto knife to cut a square from the center of the poster board; this will be the TV “screen.”

Puppet TV (1)

Next, I showed Travis images of old-fashioned TVs online – he was instantly thrilled, and loved designing his own on our frame.

Puppet TV (2)

He made sure to add antennas and lots of dials and buttons.

Puppet TV (4)

To stand the TV upright, I cut the center piece of poster board in half, and affixed each piece with masking tape to the back of the TV. It was a bit wobbly, but it worked well enough!

Puppet TV (5)

Travis “turned” a dial, and the show was on!

Puppet TV (8)

He loved being behind the frame with silly puppet antics.

Puppet TV (6)

And was absolutely thrilled when mommy took a turn and put on a show.

Pretty soon he had a microphone” set up and singing puppets (even if they didn’t quite fit in the frame anymore).

Puppet TV (10)

Later I caught him playing at being a “repair man” who needed to come fix the TV. So all-in-all, endless good fun with this one!

Puppet TV (7)

Tasty Tacos


Tasty Tacos.JPG

French fries in tacos? Kids and adults alike will say, ‘Yes please!’ to this tasty twist on a weekday staple.

Ingredients:

  • 4 flour or corn tortillas
  • 1/2 cup refried beans
  • 1/2 cup shredded Daiya cheddar
  • 1/2 cup cooked corn kernels
  • 1 cup French fries
  1. Spread each tortilla with about 2 tablespoons beans, and sprinkle each with 2 tablespoons cheddar and 2 tablespoons corn.
  2. Top each serving with about 1/4 cup fries, then roll up burrito style or fold in half like tacos to serve.

Add toppings like salsa, non-dairy sour cream, or guacamole, if your family likes ’em.

Pressed Tiles

Pressed Tiles (13)

It’s rare that I can grab Travis’s interest for more than 30 minutes of crafting these days, so when this activity occupied us for nearly an hour, I knew we had a winner!

I came home with a new package of oven-bake clay, quite different from the white air-dry clay we normally use.

Pressed Tiles (1)

Travis was thrilled with all the colors, and in no time he had an assortment in front of him for chiseling, shaping, and rolling.

Pressed Tiles (7)

To make a lasting project, we used our collection of stamps – animal and pirate-themed sets worked perfectly – and pressed images into the clay. Once baked, I knew these tiles could be used for numerous games!

Pressed Tiles (2)

For the cleanest method, press the clay into a square, cover with plastic wrap, and press the stamp on top.

Pressed Tiles (6)

Travis didn’t always use the plastic wrap, which was just fine.

Pressed Tiles (5)

He mostly did his own thing with the stamps and clay while I made an actual set of tiles we could use in the future. I confess my fingers hurt by the end from warming up so many different colors and flattening to 1/4-inch thick! Travis meanwhile pretended he was baking some of his in an “oven.”

Pressed Tiles (10)

When it’s time to really bake the clay, arrange your tiles on a parchment paper-lined baking sheet and bake according to package instructions – ours went in at 275 degrees F for 30 minutes.

Pressed Tiles (8)

Now what to do with them! We decided we could use these as a more permanent version of our printable story cards.

Pressed Tiles (12)

You can also play games with the animals, assigning them by habitat or finding other ways to sort them.

Pressed Tiles (11)

If you want any of your tiles to be jewelry, make sure to poke a hole with a toothpick before baking. However you use them, these tiles are great for arts and crafts, fine motor skills, imagination, and more.