Homemade “Marshmallows”

Homemade Marshmallow (7)

Okay, so the following recipe won’t really make marshmallows… To achieve that, we probably need to get trendy and try using aquafaba. But really we just had a leftover box of vegan jel dessert in the kitchen and wanted to play with it – Travis has loved the wobbly dessert ever since I amused him with fake juice cups. The result was a goopy sugary mess that he adored eating by the spoonful!

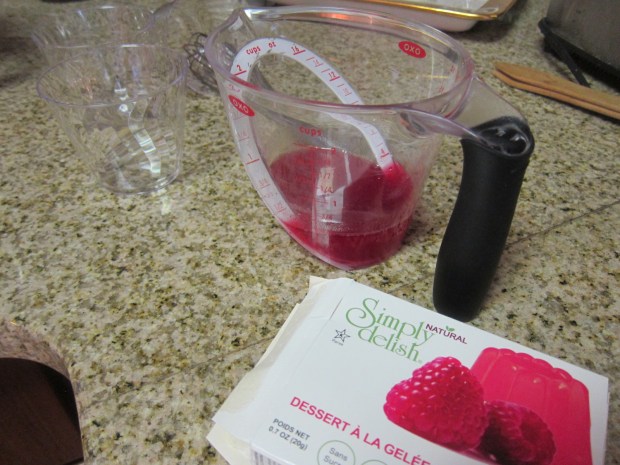
To start, dissolve 1 and 1/2 tablespoons of your favorite vegan “gelatin” dessert in 1/3 cup cold water; let stand for about 10 minutes. We used peach flavor, which meant our “marshmallows” had a peachy tinge.

Homemade Marshmallow (1)

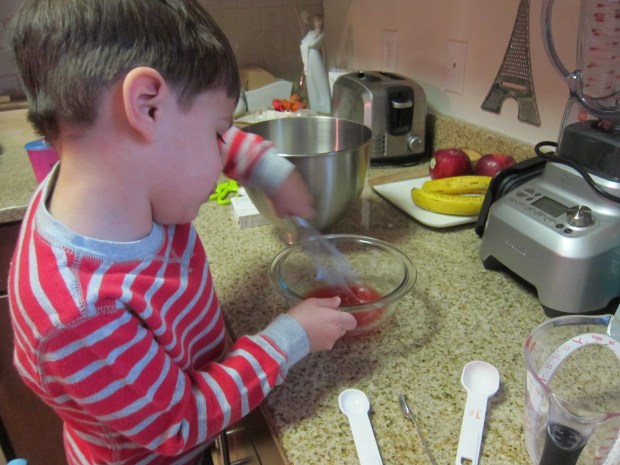
Meanwhile, combine 1 and 1/2 cups sugar and 3/4 cup water in a saucepan. Cook over low heat, stirring until the sugar dissolves.

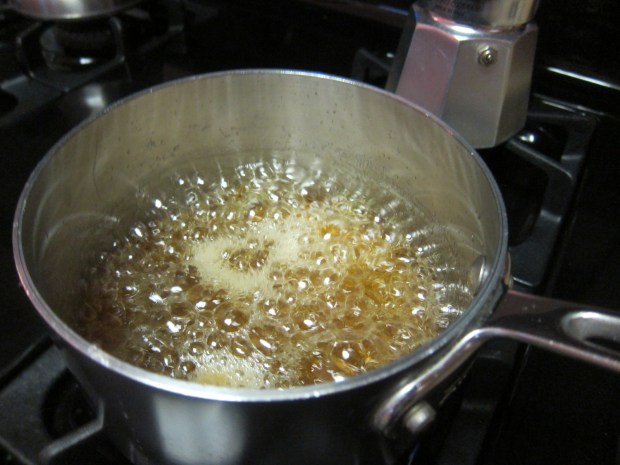
Add the gel mixture to the sugar, and bring to a boil over medium heat. Let boil for 15 minutes, without stirring.

Homemade Marshmallow (2)

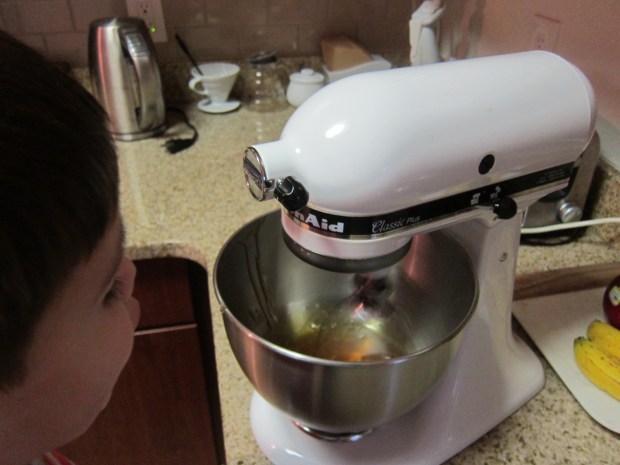
Remove from heat and cool slightly, then beat with an electric mixer on high speed until frothy. We were under no illusions that our mixture was going to get as thick as a real gelatin mixture would have, but we do love the mixer!

Homemade Marshmallow (3)

Pour into a 9×9-inch baking dish coated with cooking spray and let stand overnight.

Homemade Marshmallow (4)

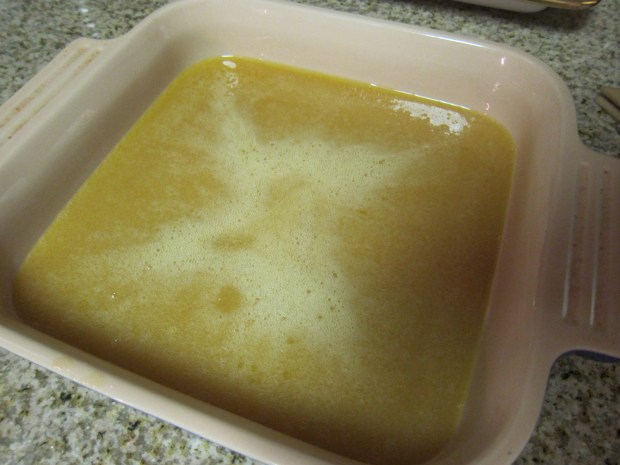
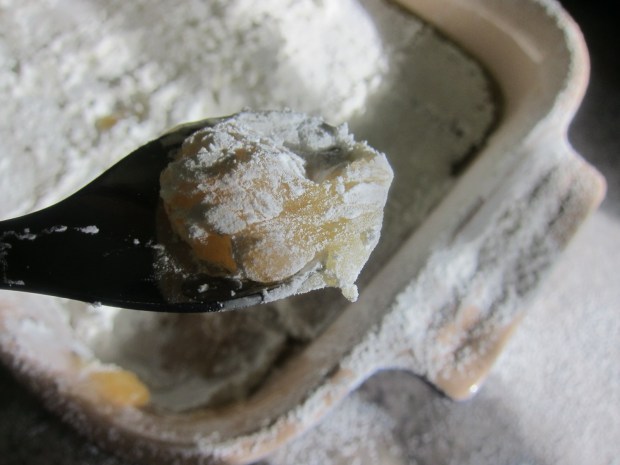
The dessert won’t set, but it will be wobbly and thick. We dusted the top with 1/4 cup cornstarch and 1/4 cup powdered sugar before eating it right from a spoon!

Homemade Marshmallow (6)

In sum, you’re going to stop eating after a couple of spoonfuls because this is pure sugar, but really the point is to savor moments together in the kitchen. I loved watching Travis whisk, stir, sift, and more. My favorite sous-chef!

Classroom or Naptime Keepsake

Keepsake (12)

A stuffed friend can make all the difference if your child feels anxious about school, or needs an extra snuggle at naptime. And when your child has a hand in making that stuffed friend, things are even better!

I am no sewer, so this craft was entirely new territory for me, requiring a sheet of cotton canvas from the craft store. First I asked Travis what shape he’d like his comforting keepsakes to be. The first was a small car, which we made small enough to fit in his school backpack. Then we traced a larger free-form shape for naptime, sort of like a cloud, but mostly abstract.

Keepsake (1)

Cut out your designs (you’ll need two of each, to be the front and back of the stuffie), and paint with fabric paint. This was a fun chance to use our paint roller! Let dry completely.

Keepsake (3)

You can decorate the keepsakes further before sewing and stuffing. Try gluing on pieces of felt, or coloring with fabric markers. Travis opted for the latter.

Keepsake (7)

Next it was time to stuff and sew! This meant a special trip to visit grandma and her sewing machine – Travis was ecstatic seeing the machine in action.

Keepsake (10)

At home, we finished the keepsakes with stuffing; Travis loved helping poke it into the furthest corners.

Keepsake (5)

He was so proud to set his naptime keepsake on his bed.

Keepsake (8)

Lastly we tucked the small car stuffie in his backpack, just in case he needs to give it a special squeeze at school.

Keepsake (11)

Cheesy Broccoli & Split Pea Soup

Cheesy Broccoli Soup.JPG

This creamy soup might just convince your kids to eat their broccoli… and their split peas, too!

Ingredients: 

  • 3 tablespoons Earth Balance butter
  • 1 small leek, chopped
  • 2 small garlic cloves, smashed
  • 4 cups water or low-sodium vegetable broth
  • 1 cup green split peas
  • 1/4 teaspoon black pepper
  • 1 and 1/2 pounds broccoli florets
  • 1/2 cup plain unsweetened almond milk
  • 1 and 1/2 cups shredded Daiya cheddar
  1. Melt the butter in a large saucepan over medium heat. Add the leek and cook for 5 minutes. Stir in the garlic.
  2. Add the water or broth, split peas, and black pepper. Bring to a simmer, then partially cover, reduce heat, and cook for 30 minutes.
  3. Stir in the broccoli and almond milk; simmer for an additional 10 minutes, covered.
  4. Let the soup cool slightly, then transfer to a blender and process until smooth.
  5. Return the soup to the saucepan and whisk in the cheese. Heat over low heat until the cheese is stretchy and mostly melted.

We like this with a few Gardein chick’n nuggets on the side!

Surprise “Juice” Cups

Surprise Juice (2)

The jell-o surprise waiting in these clear plastic cups is sure to delight your kids! It’s a fun way to discuss the difference between liquids and solids, and of course they also get to eat a tasty treat. My favorite vegan “gelatin” dessert is the jel dessert from Simply Delish.

First, I prepared one package of the dessert according to package directions – in this case, dissolving the powder in 1/3 cup cold water, then adding 1 and 1/4 cups boiling water. Make sure you use a flavor with the color of juice! I used raspberry.

Surprise Juice (1)

Pour the mixture into clear plastic cups and refrigerate for 1 hour, or until firm.

I called Travis over for a juice snack; that’s a special treat in this household, so he immediately trotted over. Just as he arrived, I pretended to spill one of the cups – oops Except nothing poured out.

Surprise Juice (3)

He was instantly delighted and intrigued, and had to test for himself if he could pour out the “juice.” He also wanted to know what it felt like (squishy)…

Surprise Juice (5)

…and if he could turn the cups completely upside down.

Surprise Juice (7)

He tried drinking through a straw next.

Surprise Juice (6)

But of course I had a spoon on hand, knowing the straw wouldn’t work.

Surprise Juice (8)

In sum, this game is sure to elicit giggles and delight.

Surprise Juice (4)

Homemade Stickers

Homemade Stickers (9).JPG

Not only will these lick-and-stick homemade stickers really stick, but they taste great too! The secret is a little bit of vegan gel dessert (such as Simply Delish).

Homemade Stickers (1)

To make the “glue,” first mix 1 tablespoon of any flavored gel powder into 2 tablespoons boiling water.

Homemade Stickers (2)

Your kids may want to draw their own stickers, but Travis preferred to dictate what I should draw, and I put together a little set for him.

Homemade Stickers (4)

Cut out your stickers, and paint the back of each with a generous layer of the gel; let dry.

Homemade Stickers (5)

While I don’t recommend sticking these any place that shouldn’t have food on it, we decided it would be perfect to make a collage on construction paper. To adhere, give the stickers a lick!

Homemade Stickers (6)

Travis was absolutely delighted with the taste, and had to lick every single one, meaning we had our collage in short order.

Homemade Stickers (8)

Keep this activity in mind for the next time your little one is under the weather. It’s the perfect calm game to play, with an added sweet treat at the end as a bonus.

Giant Alphabet Mat

GIant Mat (2)

This giant alphabet mat turns letter-learning into big fun. Much bigger than our alphabet parking lot, it’s a great visual and physical way to engage children with learning the alphabet. You can tailor the games on the mat to suit everyone from 2-year-olds to preschoolers!

First, lay an unused shower curtain liner on the floor and make circles for all the letters of the alphabet; I traced a plate to make the circles even. Write in the upper and lower case letters in each circle.

Giant Mat (1)

Your possibilities for play are almost endless, from here! First, try walking along the letters as you sing the alphabet song. You could also ask toddlers to toss bean bags into a designated circle, or ask them to hop to a specific space, if they are just learning their letters.

Travis still mixes up a few tricky lowercase letters, so our best use for the mat was to have him find the right spot for our set of lowercase magnets.

GIant Mat (4)

Because we’re into all things cars over here lately, he decided the best way to play was to load up his jeep and have it deliver each letter – whatever works!

Giant Mat (6)

Another great variation for pre-readers and kids learning to recognize the sound each letter makes is to find a toy in your home that starts with each letter.

Giant Mat (5)

I will confess: Travis wasn’t nearly as interested in this giant playing board as I thought he would be. But we’ll set it aside and try it again another day. Let me know what your kiddos think of the mat!

Giant Mat (7)

White Bean & Quinoa Pizza Burgers

Quinoa Burgers (2)

This complete little meal features hefty quinoa burgers and roasted broccoli on the side. I have a hard time finding vegan burger buns at our local grocery store, but we like to serve these on sandwich rolls (try O’Dough’s sub thins) cut in half so they are closer to the size of the patties.

Ingredients:

For the broccoli:

  • 3 cups broccoli florets
  • 1 tablespoon olive oil
  • 1/8 teaspoon black pepper
  1. Toss the ingredients together on a baking sheet; roast at 425 degrees F for 20 minutes, until browned and crisp at the edges; set aside.

For the burgers:

  • 1 (15-ounce) can cannellini beans, drained and rinsed
  • 1 and 1/2 cups cooked quinoa
  • 1 Ener-G egg
  • 1 teaspoon Italian seasoning
  • 1/4 teaspoon black pepper
  • 4 buns or sandwich rolls
  • 4 slices vegan cheese
  • 1/2 cup marinara sauce
  1. While the broccoli roasts, place the beans in a large bowl and mash until nearly smooth.
  2. Add the quinoa, Ener-G egg, Italian seasoning, and black pepper. Shape the mixture into 4 patties.
  3. Heat 2 tablespoons olive oil in a large skillet over medium heat. Add the patties and cook for 10 minutes, turning over halfway through. The burgers are delicate, so use care when flipping!
  4. To serve, place on buns or rolls. Top with your favorite sliced vegan cheese and spoon about 2 tablespoons marinara sauce over each patty. Serve with the broccoli on the side.

Quinoa Burgers (1)

Life Size Board Game

Board Game (3)

We loved this giant take on a board game, using our own bodies as the playing pieces! It’s a great way to burn off some physical energy indoors, plus work on counting skills, turn taking, and playing a game by the rules.

To set up your “board” all you need is painter’s tape. I made squares around the carpet in a pattern for us to move forward. If you want to make the game a bit more complex, add another shape (such as diamonds) that mean “move back one space.”

Board Game (7)

I threw together a very quick giant dice by taping construction paper on the sides of a tissue box and adding pips with a sharpie. If you have the time, glue on your construction paper for a more elegant look!

Board Game (1)

Now it was time to toss the dice. Travis delighted in throwing the giant cube.

Board Game (2)

He was quicker than I would have guessed at counting the pips, yelling out the numbers and then taking proud giant steps from square to square.

Board Game (4)

We have a winner!

Board Game (5)

We also played a version using big toy cars in a car race, driving them the right number of spaces forward with each roll.

Board Game (6)

If you create a giant board game, please share any variations or ideas in the comments, we’d love to hear!

President’s Day Fun

President Cookies (4)

Happy President’s Day to all! We marked the occasion with some edible fun and a little magic trick thrown in for good measure.

First up, the trick. Grown-ups (or big kids), fold a bill of any denomination down the center of the president’s face. Now make two additional folds over the center of each eye (the folds will be close together, which is why grown-up hands worked better here).

Moody Money (1)

You should now have three accordion pleats. If you tilt the bill upwards, the president will appear to smile.

Moody Money (2)

Tilt it down, and he frowns!

Moody Money (3)

We tried this with Abe Lincoln and then Andrew Jackson on the $20.

Moody Money (6)

Who had a very pronounced frown:

Moody Money (5)

I would have used George Washington as well, except had no singles in my wallet. It was a great way to introduce the names of these men to Travis.

Moody Money (4)

We continued the fun with an edible presidential treat.

First, microwave a handful of chocolate chips in a glass bowl at 20 second intervals, until melted – it will take about 1 minute. Using a toothpick, paint smiles and eyes onto round cookies. Vegan vanilla wafers would work, but we like the lemon cookies from Back to Nature.

President Cookies (1)

For Abe, adhere mini chocolate chips using frosting as the “glue” to be his beard. Cut two pieces of dark chocolate to be his hat, and attach together with additional frosting.

President Cookies (2)

For George, cut mini Dandies marshmallows in half, and adhere around the top of his head with frosting, to be his wig. Add a collar at the neck, with a mini chocolate chip for a button.

President Cookies (3)

Our presidents were gobbled up in no time!

Green Time: Play in the Snow

Snow Play (7).JPG

We’ve been so eager for a snowfall so we could get to our second installment of outdoor play suggestions from Ranger Rick Jr. Last night we got our wish – only about three inches, but because I doubt we’ll have much more snow this winter, we took advantage of it!

The first thing we had to do was test out the sled we bought but haven’t had a chance to use. There’s a tiny hill just off our apartment, and Travis enjoyed a few mini runs down it.

Snow Play (1)

Whoops, but as you can tell, he was not a fan lying down to try out a snow angel next.

Snow Play (2)

Making a small snowman was a bigger hit…

Snow Play (4)

…as was building a snow fort. Based on the magazine’s image, we used a bucket to build the fort, which worked so well! Although we didn’t have enough snow to build our walls up high, this is definitely how we’ll fashion future forts.

Snow Play (3)

Meanwhile, I loved that these suggestions got us out into crisp morning sunshine to make first tracks in the snow – especially since it had all melted by afternoon!

Snow Play (5)