Music Sheet Banner

Music Sheet (9).JPG

As we continue to decorate Travis’s room in our new home, this upcycled craft was the perfect idea for a kid who loves music. The banner would also make a fantastic party decoration, if you cut out enough triangles to spell a larger message like HAPPY BIRTHDAY.

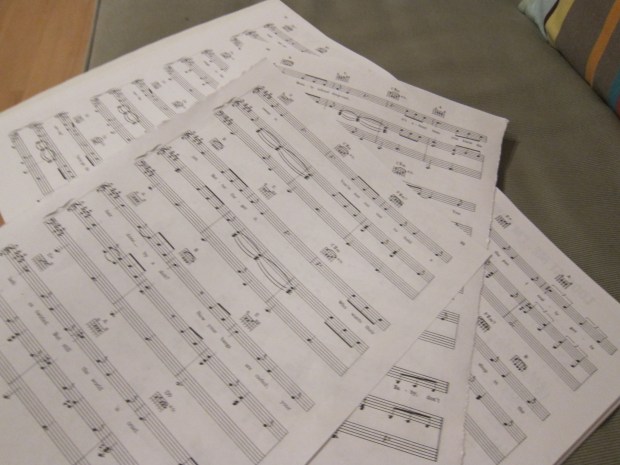
I have lots of piano sheet music at home, which made ripping up a few old songs a simple matter. Otherwise, look for second-hand sheet music at a garage sale or music store – no matter what song you pick, musical notes and clefs will be a pretty backdrop!

Music Sheet (1)

Travis loved helping cut the music sheets into triangles…

Music Sheet (3)

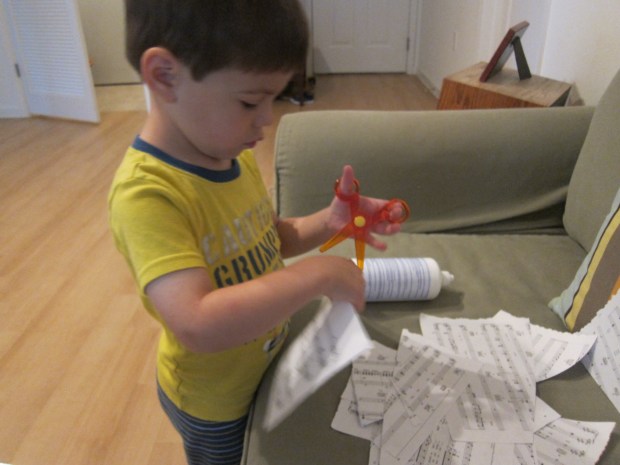
As well as ripping the scraps into ever smaller pieces for quite some time afterwards.

Music Sheet (2)

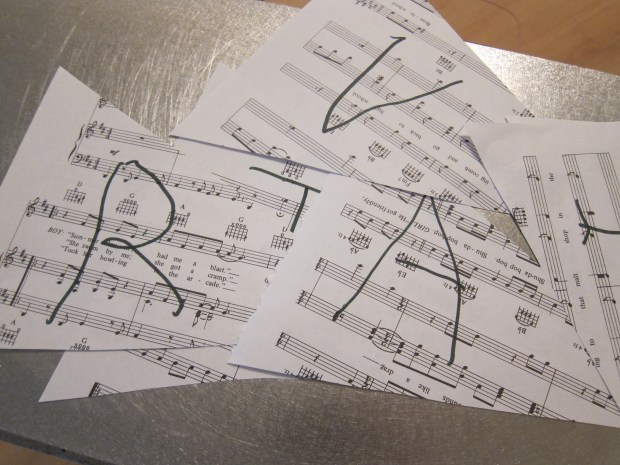
He can’t write his name on his own yet, but he and I did hold a marker together to form T-R-A-V-I-S. He was so proud!

Music Sheet (6)

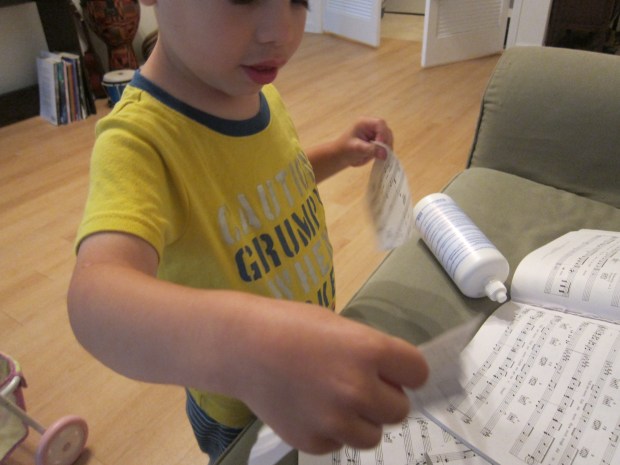
For final assembly, I simply attached the triangles to a piece of twine with a little bit of scotch tape, and that was it!

Music Sheet (7)

A new banner over his new big boy bed.
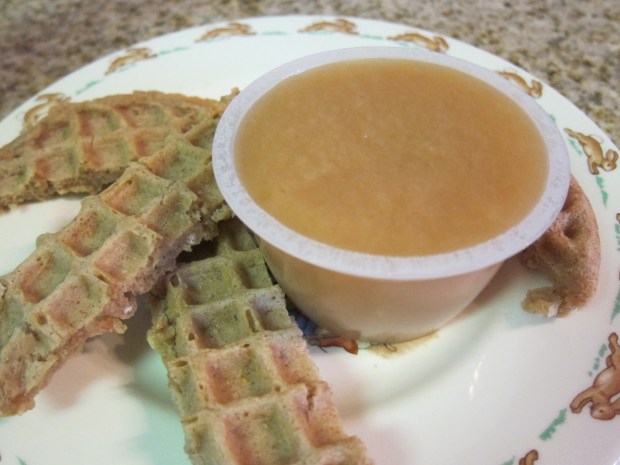
Music Sheet (8)

Making Moon Craters

Moon Crater (5).JPG

Some games are educational, some games are artistic – but for this one I confess we basically just wanted to take advantage of our new backyard and have some messy fun!

That said, the moon has been on our mind since the eclipse, so I asked Travis if he wanted to see an example of how asteroids and comets made craters on the moon. That was the extent of our “science lesson”, but older kids doing this project might want to look at videos of the moon or research craters a little further.

For our moon surface, I filled a bin with about 2 inches of white flour. A little cocoa powder sprinkled on top added contrast.

Moon Crater (1).JPG

Three “asteroids” of dried clay made the perfect asteroids. Hold them at about chin level, then drop down onto your moon surface.

Moon Crater (6)

There was a very satisfying puff of flour and cocoa with each impact!

Moon Crater (3)

And very neat holes left behind.

Moon Crater (4)

Because this activity was so action-based, here’s a quick video!


Straw Flute

Straw Flute (4).JPG

We’re on a musical instrument kick lately, and realized we needed to add some woodwinds (er, plasticwinds) to our collection, which was heavy on percussion! This “flute” won’t really make separate notes, but it is adorable and fun to put together.

Perhaps even better than playing with the final product, Travis loved helping select which color straws we should use. We counted out six, although you could make your flute larger or smaller.

Straw Flute (1)

Next, we snipped the straws into varying lengths, about 1 inch shorter each time. Great scissor practice, before preschool starts tomorrow!

Straw Flute (2)

I arranged the straws in height order and taped them together before handing the instrument over to my little fifer, who soon was tooting away a melody.

Straw Flute (3)

The flute practically begged for an Irish jig to dance along to!

Bucket + Tape = Drum

Bucket Drum (6).JPG

If your child needs a toy drum to bang on and quick – no time for drying glue or paint here! – then this is the craft for you.

All you need is packing tape and any old bucket (we had the perfect tin one from a trip to feed animals at a sanctuary).

Travis was very intrigued as I started taping over the top of the bucket.

Bucket Drum (1)

And thrilled when the hole on top was completely covered (I recommend two layers of tape), and realized that the bucket now had a drum head.

Bucket Drum (3)

That’s it, a drum is born! Pencils make the perfect, no-crafting-required sticks, though if you want to get fancier, you might try rubber ball drum sticks.

Travis loved that he could start drumming right away. I took advantage of a later nap to glue on ribbon as embellishment.

Bucket Drum (4)

In no time at all, we had a drum circle!

Bucket Drum (7)


Salt Shaker Noise Maker

Salt Shaker (9).JPG

After an evening out at a kids’ music concert, Travis began the next day making believe he was a drummer in the band – at 6.30 in the morning. Needless to say, this didn’t go over well with a sleeping daddy… and likely the neighbors as well!

The solution? Throw together an instrument for your child that is (slightly) quiet! I was lucky enough to have an empty salt shaker on hand, and some dried rice as well. If you don’t have dried rice, dried beans or even unpopped popcorn kernels would work well.

Salt Shaker (2)

Travis enjoyed the challenge of fitting the rice into the salt shaker, little by little. Once we decided it made just the right shake-a-shake-a-shake-a sound, I taped down the spout of the container to prevent spillage.

Salt Shaker (1)

Travis gave it a few shakes without waiting for any decoration at all!

Salt Shaker (3)

For a simple decoration, cover with colored construction paper and then adorn with markers or glitter paint.

Salt Shaker (4)

For something a little more elegant, we tried one covered in scrapbook paper and ribbon.

Salt Shaker (8)

This is a great instrument for all – fun for the kids, and sanity-saving for the adults!


Rainy Day Window Painting

Rainy Window (5)

If you’re having a gray and rainy Labor Day weekend like we are, turn any frowns upside down with the slightly-taboo feel of this project… indoor painting on the windows!

Grown-ups, don’t cringe; I promise the paint is going to wash off your windows really easily. The secret? Dish soap!

In the cubes of an ice cube tray, mix equal parts dish detergent and washable paint for each color. Provide your child with q-tips as the paint brushes.

Rainy Window (4)

Travis couldn’t believe I was letting him use the window as his canvas. He jumped right in drawing “clouds” and squiggles.

Rainy Window (1)

His expression here pretty much says it all!

Rainy Window (3)

The beautiful, slightly shiny colors were the perfect antidote to the gray day outside our windows.

Rainy Window (2)

Travis may or may not have discovered it was equally as fun to rub a paint-smeared q-tip over his bare legs. I may or may not have been feeling so lenient of this cozy Snday afternoon that I let him paint away and followed up with a bath…

Rainy Window (6)

Ready for the best #momhack of all about this game? Clean-up is half the fun! After Travis was paint-free, I set him loose with a spritz bottle on the window.

Rainy Window (7)

The glass was sparkly and shiny and paint-free in no time.

Rainy Window (8)

Creamy Red Lentil Soup

Creamy Red Lentil Soup

This recipe is an easy way to use up leftovers if you have an abundance of cooked rice and/or lentils on hand, in the category of what I call #veganproblems.

Ingredients:

  • 1 and 1/2 cups cooked red lentils
  • 1 cup cooked jasmine rice
  • 1 cup vegetable broth
  • 1 small garlic clove
  • 1 and 1/2 teaspoons balsamic vinegar
  • 3 tablespoons fresh-squeezed lemon juice
  • 1/4 teaspoon salt
  • 1/4 teaspoon black pepper
  1. Combine all of the ingredients in a blender; process until smooth. Serve!

Stomp with Dino Feet

Stomp Dino (6)

What’s more fun for a preschool tot than stomping around the house? Stomping around with dinosaur feet of course! Get out some sillies with this cute idea from High Five magazine.

To start, adults will need to trace a dinosaur foot shape on a large piece of craft foam. I really have no idea what a dinosaur footprint looks like, but a three-toed creature seemed to fit the bill!

Stomp Dino (1)

Cut an X into the foam with scissors near the ankle of each foot – this is how your child will wear the dino feet.

Stomp Dino (2)

Travis loves practicing with kid-safe scissors, so although cutting the dino foot was beyond his skill, he helped me snip out a few triangles that we would need later on. “Dinosaurs need lots of triangles!” he told me very seriously.

First though, we had to paint our dino feet! Travis smeared on some pink, and I added a few orange dots for contrast.

Stomp Dino (3)

Let the paint dry, then add the final adornment with the smaller pieces of foam you cut out.

Stomp Dino (5)

And now it’s time to stomp!

Stomp Dino (7)

Rainbow Hunt

Rainbow Hunt (10)

The next time you’re at a paint store, stock up on paint chip samples (free) in every color of the rainbow. Then you can turn your next walk in a garden into a magical rainbow hunt!

Rainbow Hunt (1)

If you don’t have a garden of your own, find the nearest botanical garden or arboretum and enjoy this game on a summer’s afternoon.

Most paint samples come in strips of 4 or 5, so I cut them into individual squares and then placed all our “rainbow chips” in a bucket.

Rainbow Hunt (6)

There are two ways to play and we tried both. First, Travis selected a paint chip at random and we hunted until we found just the right shade…

Rainbow Hunt (13)

Aha!

Rainbow Hunt (5)

Or, we spotted a flower that we liked and then found the paint chip that was nearest in color in our bucket.

Rainbow Hunt (9)

Travis loved crossing every color of the rainbow off the list!

Rainbow Hunt (12)

This game was a fantastic prompt for stopping to appreciate a garden on another level…

Rainbow Hunt (11)

for paying attention to flowers we otherwise might have missed….

Rainbow Hunt (7)

and for enjoying all the scents and textures around us.

Rainbow Hunt (4)

Another great hit from Barefoot Books Kids’ Garden cards.

Rainbow Hunt (3)