Dream Pillow

Dream Pillow (3)

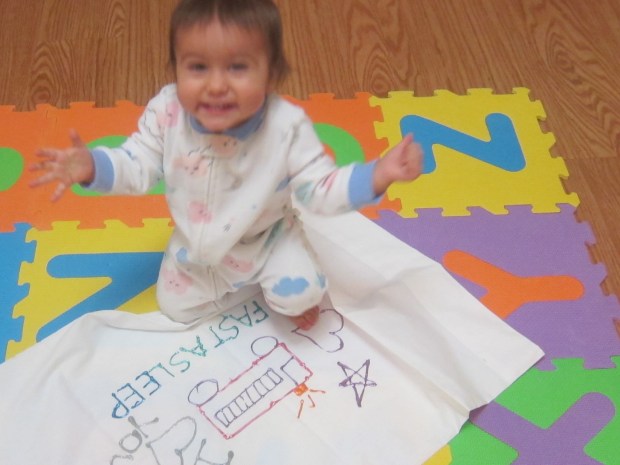
At thirteen months old, Veronika is finally sleeping with a few stuffed animals and other soft things in her crib. In particular, I made the change because she seems to want comfort in the middle of the night, and is learning to self-soothe like a champ. This crafty idea for parents is in the hopes of giving your little one sweet dreams!

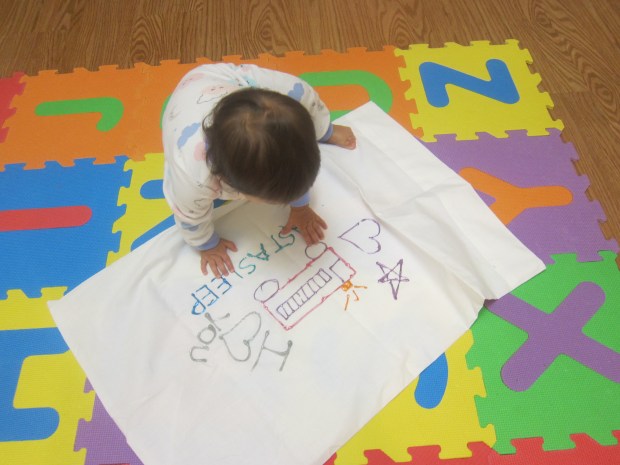
Use puffy fabric paints to design anything on a white pillowcase that would appeal to your child. Veronika loves firetrucks right now, so that was a natural choice, including a siren and a note that this vehicle-loving girl is fast even when asleep.

Dream Pillow (1)

I added hearts and messages of love for extra sweet dreams.

Dream Pillow (2)

Big siblings might want to get involved too! Let the paint dry completely, then wash the pillowcase before use.

Dream Pillow (4).JPG

Veronika loved the feel of the puffy pants, and seemed to find comfort in the item almost immediately. We love that this can travel with us, too, for familiarity even if she sleeps in a travel crib while away.

Dream Pillow (5)

Toys Play Hide and Seek

Toys Hide and Seek (5)

Veronika is old enough now to enjoy games of hide and seek. Tonight, I put a fun spin on the game by taking it to the water!

Toss a variety of container lids into the tub at bath time. Ideally these would all be opaque with an older toddler, but with my one-year-old I didn’t worry that some were see-through. The lids themselves are half the fun of the game, since they will make excellent bath toys.

Toys Hide and Seek (1)

While she was watching, I put a rubber frog under one of the lids.

Toys Hide and Seek (2)

“Where’s frog?” I asked. She didn’t get it at first, reaching around for other lids. But I showed her how to lift the correct lid and declared, “There’s frog!”

Toys Hide and Seek (3)

Now she was interested. I hid him under another lid, and this time she proudly looked around, then reached under.

Toys Hide and Seek (4)

There’s frog!

Toys Hide and Seek (6)

Needless to say, the lids and frogs made for a great bath time.

Beach Party

Beach Party (3)

If you can’t get some place warm and beachy this winter, here’s my favorite suggestion for entertaining kids indoors: Bring the beach to you!

This morning, we woke to gray skies and cold weather, so on a whim I set out a few beach towels, as well as all our summer beach toys. There were sand buckets and shovels….

Beach Party (1)

…a travel tic-tac-toe game…

Beach Party (4)

…inflatable pool toys, and more! Of course for added authenticity, we cranked up the heat a few degrees so the kids could put on their bathing suits.

Beach Party (2)

I had intended the game mainly for Veronika, but big brother Travis had to join in, and soon was “sunbathing”.

Beach Party (5)

If you want to go all out, there’s so much you can do here. Add tropical music, tropical snacks, or even real sand and real water for your little ones to scoop and play with in a sensory way.

Apologies for the dark quality of these photos; yes we played this game before the winter sun was even up!

Commute

Commute (2)

A play tunnel is a fantastic gross motor toy, and worth investing in (you can find them for under $20 on Amazon). Of course there’s just the fun of crawling through it, which Veronika loves endlessly!

Commute (3)

I like to put my head on one end, say “peek-a-boo”, and watch her proudly crawl to catch me.

Commute (1)

Another cute idea is to have your baby “commute” items from one end to the other. This helps with the idea of sorting and categorizing.

Commute (5)

We played first with her pretend food set, having her bring the food from a basket at one end to where I waited with a second basket at the other.

Commute (6)

Then we tried the game with puzzle pieces.

Commute (7)

Veronika trotted back and forth through the tunnel, filling in pieces to the base each time.

Commute (8)

What games do you play with a crawl-through tunnel? Please share in the comments!

Commute (9)

Cheery O’s!

Cheerios (4).JPG

O cereal is the deservedly one of the best first cereals for babies, and for so many reasons. The circles are easy for a little one to pick up with little fingers; they dissolve easily in the mouth, and those cute circles are just begging to be played with, too!

To wit, today at snack time I didn’t just set o cereal on Veronika’s tray; instead, I gave her two cups, one empty and one full, to turn it into a pouring and scooping game.

Cheerios (1)

She took right to it, and loved learning to pour directly from one cup to another, her best success with pouring yet.

Cheerios (3)

She also loved the small plinking sound that the cereal made if she dropped it into a cup by hand.

Cheerios (5)

And of course there is happy nibbling that takes place throughout the game! This is fast, fun, easy entertainment for any young toddler.

Cheerios (2)

Photo Fun

Photo Fun (6)

School pictures are in this year for big brother Travis, which reminded me that I don’t have an annual photo yet of Veronika to capture time in the same way. So as I picked out frames for Travis’s photos this year, I made sure to include a few fun photo ideas for Veronika!

Find a picture that you love (I chose a shot from her first birthday), and have wallet-sized prints made at your local drugstore. Insert into mini frames, alongside the professional portraits of older sibs.

Photo Fun (1)

The perfect thing to brighten up my kitchen window!

Photo Fun (2)

For some additional photo fun, I also had prints made of family members at a recent wedding, and used Mod Podge to adhere these around an 8×10 inch frame (make sure you choose a frame with a flat front, and no raised bumps).

Photo Fun (3)

Fill in any blank spaces with cute prints or pictures from kids’ magazines. Now you have a crazy collage that can frame a recent favorite picture of your baby.

Photo Fun (4)

As time goes by, you can make a collection of these annual portraits. You could even keep them all in the same mini frame, one atop another, so you can flip back through the memories when nostalgia strikes.

Photo Fun (5)

Easy Nature Sensory Bag

Nature Sensory (6)

You could do this easy sensory activity with a toddler in any season, but it was particularly nice to fit in a little bit of nature in the winter. An unseasonably warm day meant our snow melted and Veronika and I headed outside briefly to find wintery treasures.

We returned inside with a pine cone, pine branches, a few leaves, and acorns. I filled a gallon-sized zip-top bag with just a bit of water, then added our treasures.

Nature Sensory (3)

Veronika was immediately intrigued when I handed it to her at her high chair tray (older toddlers might liked this taped down to a table). We talked about the different textures, especially the hard, round acorns.

Nature Sensory (2)

Because the colors were a bit drab this time of year, I ended up slipping inside a few tiny red jingle bells to mimic the look of red berries. Ok, so they were not really from nature, but they added quite the pop! She loved poking these around through the water with one finger.

Nature Sensory (8)

We can’t wait to do this activity in the spring, and see how different our nature bag looks!

Nature Sensory (7)

Look at Photos and Paintings

Look at Paintings (2)

There’s no need to go to a fancy art gallery to expose your children to artwork (although you certainly can!). For the easiest art lesson of all, look to your own walls. Chances are you have something hanging up, whether an old poster, a family photo, or a painted work of art. Today, Veronika and I took a “gallery” tour of our walls!

There was so much opportunity here for language development. As we paused before each painting, I talked about the objects she could see, like cars or trees.

Look at Paintings (1)

We talked about what shapes we saw in this one…

Look at Paintings (3)

…the colors of a dark, brooding piece…

Look at Paintings (6)

…and even her cultural heritage!

Look at Paintings (7)

The frames themselves might delight your little one, too. Veronika loved feeling the texture.

Look at Paintings (4)

One piece of art in our home was even painted by a family member, an opportunity to talk about relatives.

Look at Paintings (5)

Even more fun, we sat down together to look through old photo albums. Veronika loved turning the pages.

Look at Paintings (8)

And seemed so surprised every time she recognized her brother!

Look at Paintings (10)

Again, focus on language development here as you name items in each picture, or the shapes and colors you see. What a lovely “museum” tour this was!

Look at Paintings (9)

Ball Verbs

Ball Verbs (5)

Sometimes we forget to make time for the simplest play with our babies. To wit, here’s a fantastic game to fill the time with a thirteen month old (or thereabouts), using any and all balls you have around the house.

I set out a variety of baby sensory balls as well as a few larger sports balls. The soccer ball was an instant favorite!

Working with one verb at a time, we worked our way through all the different motions we could do with the balls. Rolling of course is always fun.

Ball Verbs (1)

But even more so, Veronika likes to make them bounce!

Ball Verbs (4)

Then we worked on throwing. This was a little more advanced, but I showed her how to toss sensory balls into a little bucket.

Ball Verbs (3)

You can also stand your little one up for “baby soccer”. As I brought her toe against the ball each time, I said, “Kick!”

Ball Verbs (2)

She can’t execute the motion on her own yet, but she’s getting there. Since I left out the assortment of balls all day, there was lots more rolling, dropping, and bouncing to be had.

Ball Verbs (6)

Fill and Roll

Fill and Roll (7)

Here’s an advanced version of a game Veronika and I played recently with lids and containers. This time, we were more deliberate about it, using only round containers that could be filled and then…rolled!

Fill and Roll (2)

I placed a favorite stuffed animal (a small Elmo) inside a container and sealed the lid. Now I rolled it back and forth between us.

Fill and Roll (1)

“What’s inside?” I asked. She didn’t wait long to find out. Her eager fingers were able to open up the lid…

Fill and Roll (3)

…and discover Elmo!

Fill and Roll (4)

We then played several variations on the game, adding in toy tennis balls or other surprises, something new each time she fetched off the lid. She loved just putting on and taking off the lid in between each round.

Fill and Roll (6)

Then I used a clear tennis ball container with a similar purpose in mind, but this time since the container was clear, she could see the item inside and watch it roll.

Fill and Roll (8)

She loved chasing after a few toy cars sealed up this way. And was so proud when she removed the lid and fetched them out.

Fill and Roll (9)