Rainbow Sensory Bags

Rainbow Sensory Bag (4)

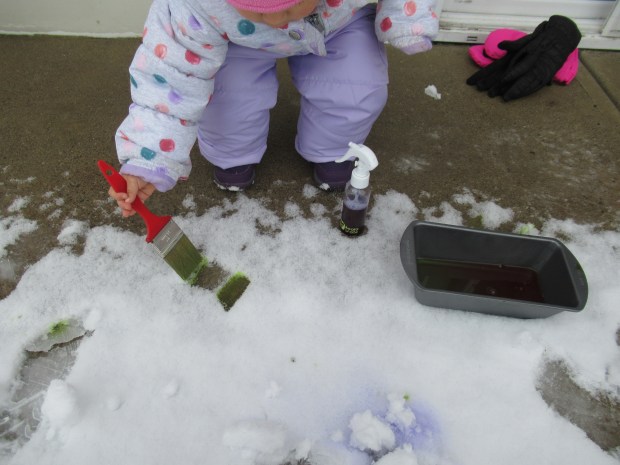
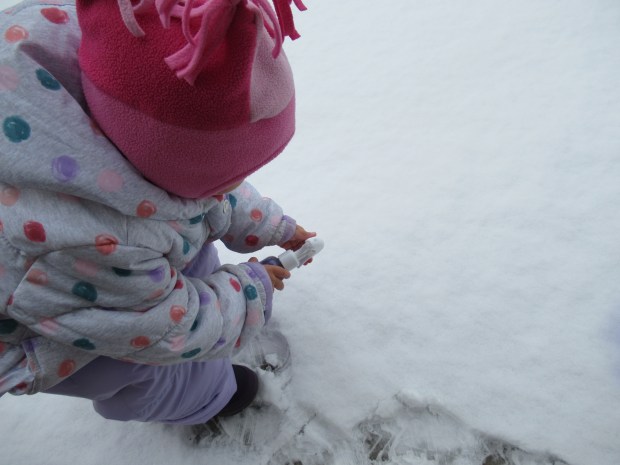
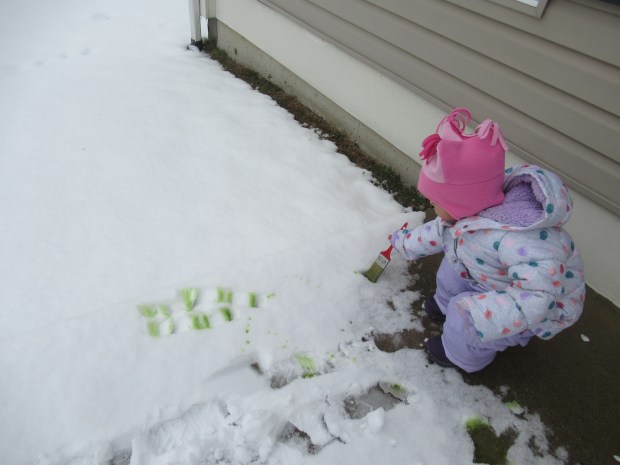
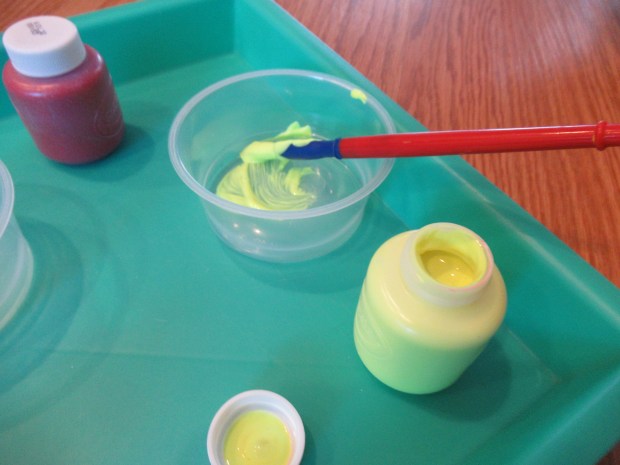
Mixing paint is such a great way to teach kids about the difference between primary and secondary colors (namely, that you achieve one of the latter by mixing two of the former), and I’m always looking for ways to make the lesson hands on. These hair gel bags make it easy to mix the colors together in a fun and squishy way!

Rainbow Sensory Bag (2)

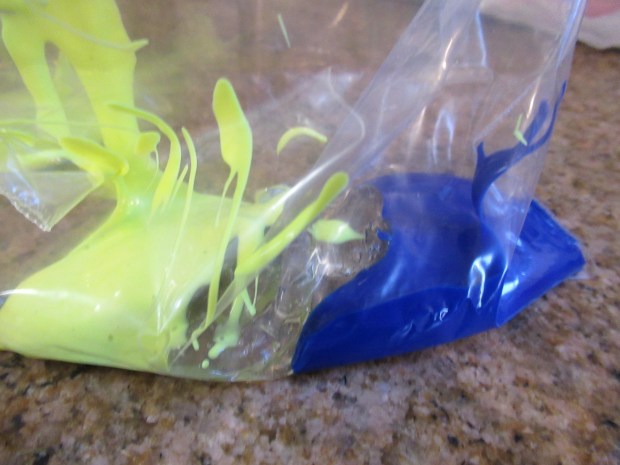
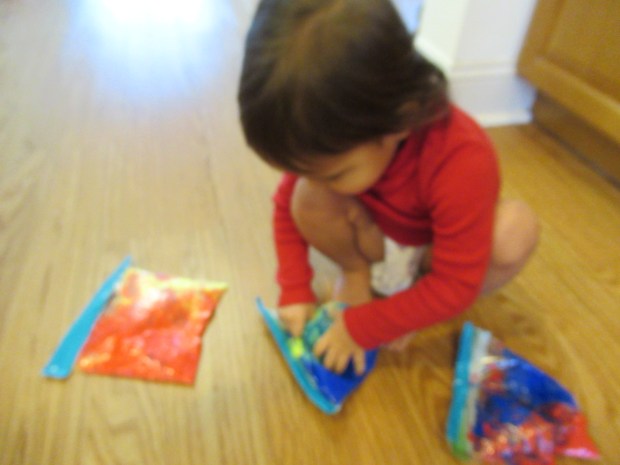
To start, squirt a little clear hair gel into each of three sandwich-sized zip-top bags. Add the primary colors on either side of the gel, so you have one bag that contains red + yellow, a second that contains yellow+ blue, and a third that contains blue + red.

Rainbow Sensory Bag (1)

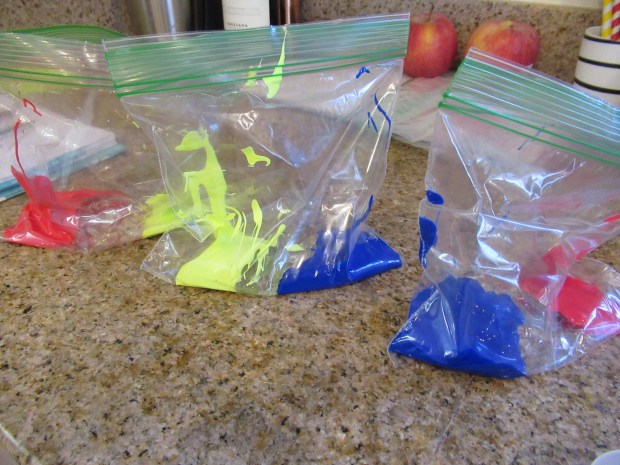
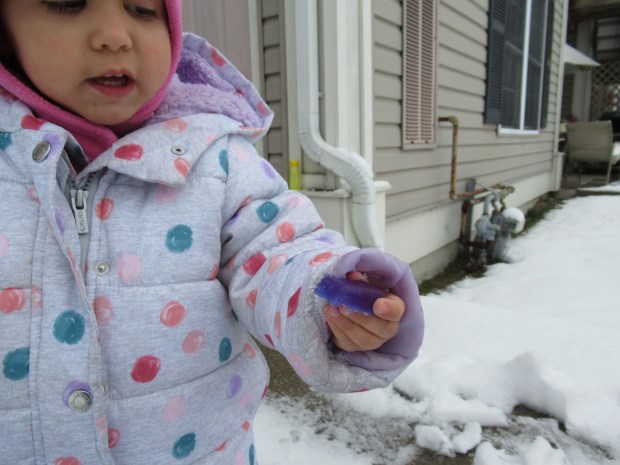
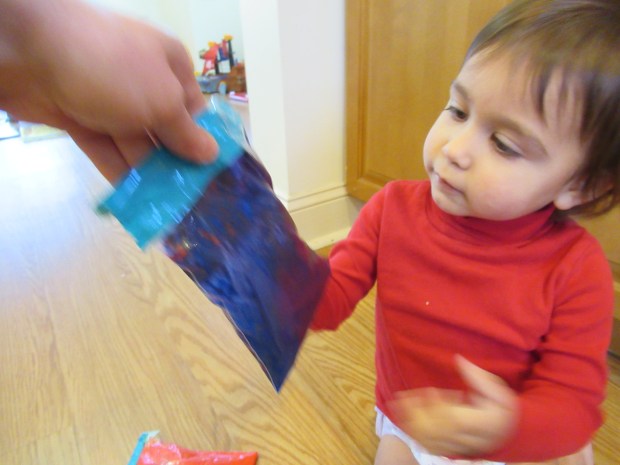
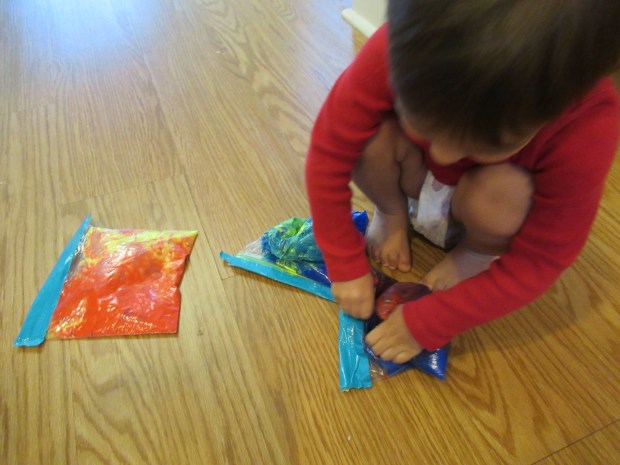
Seal tightly and add a strip of duct tape at the top of each for security. Now invite your toddler to squish and mush!

Rainbow Sensory Bag (3)

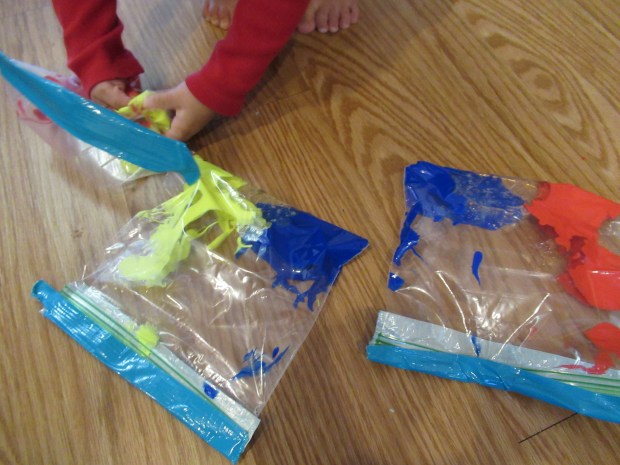
Veronika was particularly pleased when the red and blue combined to make her favorite color (purple).

Rainbow Sensory Bag (8)

We simply made this about the squishy sensory play today, but see my previous post on primary color storytime for reading suggestions that can go along with it.

Rainbow Sensory Bag (5)

If you have enough paint, you might consider making one bag that contains just red paint + hair gel, one with yellow paint + hair gel, and one with blue paint + hair gel, in which case you’ll wind up with the full rainbow lineup at the end.

All Gone!

Clean Up Dump (2)

In my experience, toddlers love dumping things to and from containers. This game plays right to that interest while introducing (or reinforcing) the notion of “all gone!”.

I set up a tray filled with some of Veronika’s building blocks and then placed an empty bin a little ways away (far enough that she’d have to trot over to it, but not so far away as to be a big journey!). Then I handed her a smaller bucket that she could fill with some of the blocks.

All Gone (1)

“Go and fill the empty bin!” I encouraged with a big smile.

All Gone (2)

She made a few trips back and forth like this, until now the first tray was empty and the bin was the full one. “All gone!” I said in mock delight as I held up the tray.

All Gone (4)

Don’t be surprised if your toddler starts parroting this phrase and wants to go back and forth between the containers several times.

All Gone (3)

When Veronika lost interest in this first version of play, we added in a new element: wheels. More specifically, she has a new dump truck that was perfect for loading and unloading the blocks.

Clean Up Dump (3)

She loved to fill this one up and then zoom it to the tray to tilt back the load.

Clean Up Dump (6)

In fact, a dump truck like this would be a great way to encourage a toddler to clean up, vrooming each load from a messy floor to a bin.

Clean Up Dump (1)

National Puzzle Day

National Puzzle Day (6)

January 29 is National Puzzle Day, and if ever there was a day to stay cozy and warm inside with puzzles, the 10 degree day we had today was it! We played with puzzles in a variety of ways for my big kid and toddler both.

First up, we marked the holiday by learning a few puzzle trivia facts. Travis was wowed to learn that the jigsaw puzzle was invented as long ago as the 1760s, and that the world’s biggest jigsaw puzzle comes in with 54,000 pieces!

National Puzzle Day (1)

Veronika celebrated too, thanks to toddler-friendly Cereal Box Puzzles!

Cereal Box Puzzles (2)

The bright pictures on the front of cereal boxes make perfect puzzles for toddler hands. I cut triangles from a few box covers (making one or two pieces, depending on the picture), and set her to puzzling over how to slot these triangles back in.

Cereal Box Puzzles (5)

You can make this task harder for older kids by increasing the number of pieces to put together. Big brother Travis wanted a turn, too!

National Puzzle Day (4)

Next, I simply set out wooden puzzles for each of the kids. Veronika loves her chunky peg puzzles, or those that feature items like vegetables and shapes.

National Puzzle Day (2)

Travis puzzled over a few classic jigsaws, which is always great to see.

National Puzzle Day (5)

But don’t forget that jigsaw puzzles aren’t the only kind out there! Picture puzzles, word searches, or trivia all fit the bill, too. Even mama stole a moment for a puzzle or two.

National Puzzle Day (3)

Snow Painting

Snow Painting (3)

When nature turns the world white with snow, then it becomes one giant canvas for your toddler to paint! To wit, Veronika and I tested two methods to paint the snow today. I recommend using all-natural food coloring for this activity, since the “paint” will be left behind once the snow melts, although technically you can use liquid watercolors.

Snow Painting (2)

First, I filled a spritz bottle with water and a generous amount of purple food coloring (a mix of red and blue). Veronika is still building up the strength to use the spritz bottle, so I helped her out to make neat purple “spray paint” splotches on the snow.

Snow Painting (1)

The second method was easier for her little hands. Fill a container with water and drops of food coloring, then hand over a wide bristle paintbrush.

Snow Painting (4)

All Veronika had to do was dip and paint! Soon we had a patio that was a vibrant mix of purple and green. As a note of caution, you may want to skip yellow for this particular project, since people tend to be leery of yellow snow!

Snow Painting (5)

In sum, this was a novel and fun way to play with the world’s white canvas.

Ice Jewels

Ice Jewels (6)

The next time there’s snow in the forecast, make a batch of “jewels” ahead of time so you can delight your little ones with sparkly ice treasures!

Ice Jewels (2)

To make the jewels, simply freeze water in the compartments of an ice cube tray and add a bit of all-natural food coloring to each. I like to fill the compartments only about half way so the colors stay separate; otherwise you risk having them splash together and result in brown gems.

When Veronika and I headed out to the back patio to explore the recent snowfall, I popped the treasures out of the ice cube tray for her.

Ice Jewels (5)

These are so fun to arrange in pretty patterns, as we did on the rungs of her slide. Your kids might want to make patterns along tree branches, the edge of a walkway or patio, or even just on top of the snow.

Ice Jewels (3)

Veronika also loved that pretty pockets of color appeared in the snow wherever she tossed them in. Then you can dig up your buried gemstones and start all over.

Ice Jewels (7)

Snow Squishy Bag

Snow Squishy Bag (4)

I’ve put together complicated sensory and squishy bags for Veronika before, but sometimes nature supplies you with all the materials you need! To wit, we had fresh puffy snow on the ground outside when we woke up this morning, so I simply dashed out, filled a bag with snow, and then sealed it shut. Instant sensory bag!

Snow Squishy Bag (1)

Of course the first thing your toddler will discover with this particular bag is the temperature. “Brr, that’s cold!” Veronika said with surprise.

Snow Squishy Bag (3)

And then she promptly placed her hands down again.

Snow Squishy Bag (2)

You can squish the snow around in fun ways inside the plastic. Then Veronika requested purple snow. I hadn’t even thought to add color, but why not! We squirted in red and blue food coloring and then tested whether we could mash the snow around enough for the two colors to blend.

Snow Squishy Bag (5)

And then of course the other fantastic thing about snow is that your toddler gets a quick STEM lesson on states of matter. It wasn’t long before the fluffy snow started to change…

Snow Squishy Bag (6)

…into purple water, instead! This sensory bag is by its very nature (heh), short lived, but lots of fun.

Snow Squishy Bag (7)

DIY Cups for Color Sorting

DIY Color Cups (7)

Save up your empty non-dairy yogurt containers for a few days, and then you’ll have all the materials needed to make a color sorting game for your toddler!

I decided to stick with just three colors today (choosing the primary colors of blue, yellow, and red), instead of overwhelming Veronika with the full rainbow. It started out with some messy painting play, first painting each clean empty container with one color. Let dry completely.

DIY Color Cups (2)

Once the containers were dry, they were ready for color sorting! We used a set of colored dominoes for this game, and Veronika could readily fill each one with the corresponding color domino. If you don’t have dominoes, try other small objects like pom poms or beads.

DIY Color Cups (6)

But here’s the twist to this game; after the first round of proper sorting, we made it silly! I mixed up all the dominoes into the wrong colored cups, and challenged her to sort them back to where they belonged.

DIY Color Cups (9)

She caught onto the humor of it, and laughed as she dumped the dominoes back and forth for a while, giggling that they were “trash”.

DIY Color Cups (10)

Your toddler will end up with a big pile and can sort things back into their proper places once more.

DIY Color Cups (4)

Winter Treasure Hunts

Nature Scavanger (2)

It can be tough to motivate kids to get outside on cold days (and let’s be honest, to motivate ourselves as grown-ups, too). But even the simplest suggestion of a treasure hunt can serve as enticement! To wit, Veronika and I did two quick hunts today, the first for nature treasures and the second for toys.

For the first, I simply set her the task of finding various nature items around the yard, ones I knew she could spot easily. Her first task was to spot the bright pop of red berries.

Nature Scavanger (4)

Next up was to find a prickly pine cone! Add anything to the list that your child can find easily in winter. If your kids are older, you can make a scavenger hunt sheet or index cards with images of each item to find.

Nature Scavanger (5)

For the second “hunt”, I hid a few of her favorite toys (like little bunny figures) around the yard, then told her that the bunnies might be hiding. Could she find them? She was so surprised and delighted when she spotted them!

Nature Scavanger (1)

We weren’t outside for long, but these two little hunts helped us get a bit of fresh air!

Nature Scavanger (3)

Rainbow Toy Scavenger Hunt

Rainbow Toy Scavenger Hunt (4)

Here’s a great color lesson for toddlers that’s interactive and hands-on!

To start, I drew a rainbow with markers on the biggest piece of paper available, in this case an old paper grocery bag that I opened up to lie flat. Ideally I would have made the rainbow even bigger on poster board or butcher paper, but the grocery bag worked in a pinch. This was a fun chance for a little art side-by-side, since Veronika wanted to color, too.

Rainbow Toy Scavenger Hunt (1)

Once the rainbow was complete, it was time to make it 3-D! I curated this activity slightly for Veronika since she’s so young, gathering a variety of toys in easy-to-spot solid colors, and placing them in piles near the rainbow. These included blocks, toy cars, dominoes, plastics fruits and veggies, and bean bags.

Rainbow Toy Scavenger Hunt (2)

Now I asked Veronika to help me fill in the rainbow! She quite quickly grasped the idea, reaching to put items on the line of the same color. Our bumpy rainbow quickly took shape.

Rainbow Toy Scavenger Hunt (5)

Even better, the completed rainbow is likely to invite your child to play solo for some time after, since all those toys are now right at hand!

Rainbow Toy Scavenger Hunt (6)

Older toddlers and preschoolers can make this more of a true hunt, and trot all about the house looking for one color at a time before lining up the items they’ve found on the rainbow lines. But even this sit-down “hunt” was great for my two year old!

Rainbow Toy Scavenger Hunt (3)

2 Ingredient Homemade Snowballs

2 Ingredient Snowballs (8)

There’s no need to wait for the next snowfall before your kids have a good old-fashioned snowball fight. Make your own snowballs at home with just two ingredients in this hands-on activity!

To make the snowballs, you’ll simply need 1 (16-ounce) box cornstarch and 1 (7-ounce) can shaving cream. Combine these two ingredients in a craft bin and stir.

2 Ingredient Snowballs (1)

I wish I had photos from the exuberant mixing session that followed. This is messy toddler play at its best, and Veronika was up to her elbows (literally!) in the mixture. Unfortunately, I was up to my elbows in it, too, so couldn’t grab my camera in the moment.

2 Ingredient Snowballs (2)

Once the mixture comes together, it is shockingly not messy at all, but rather squeezes together into perfect “snowballs”. We headed outside with our ammo!

2 Ingredient Snowballs (3)

Older kids will no doubt want to have a real battle. In that case, you’ll probably want to make a double batch, and then each team can make a fort and pelt away. The snowballs are so soft that there’s no need to worry about anyone getting hurt.

2 Ingredient Snowballs (4)

For toddlers, the delight is more sensory. Veronika loved the way she could hold one of the soft snowballs carefully in two hands. But the second she tossed it to the ground, it splattered into crumbles.

2 Ingredient Snowballs (6)

She loved doing this off our patio, or even sending snowballs down her plastic slide.

2 Ingredient Snowballs (7)

Once everything was in crumbs, she kept playing for a long time. She enjoyed picking up the leftover bits of the mixture and then sprinkling it down to make it “snow” all over the yard.

2 Ingredient Snowballs (9)

Although I wouldn’t recommend regularly sprinkling a shaving cream mixture on your grass, it doesn’t hurt once during the winter season!

2 Ingredient Snowballs (10)