Flurry in a Hurry

Flurry in a Hurry (4)

If your kids are like mine, then they are so excited for snow this winter. To help them wait it out, make a snowstorm in a jar instead!

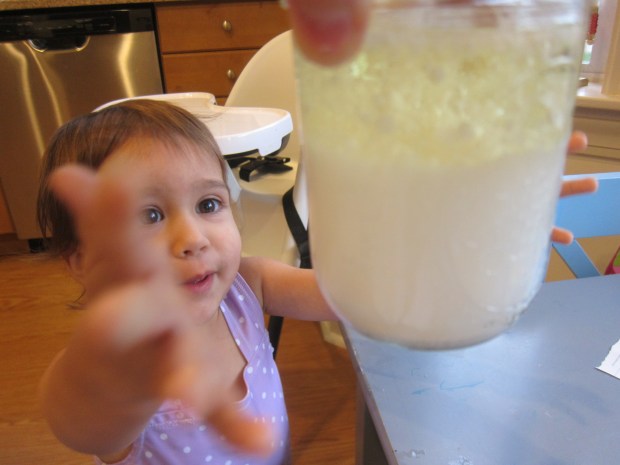
This is one of those classic experiments that never grows old. Simply stir together 1 teaspoon white paint and 1 cup water in the bottom of a mason jar. Fill nearly the rest of the way with baby oil.

Flurry in a Hurry (1)

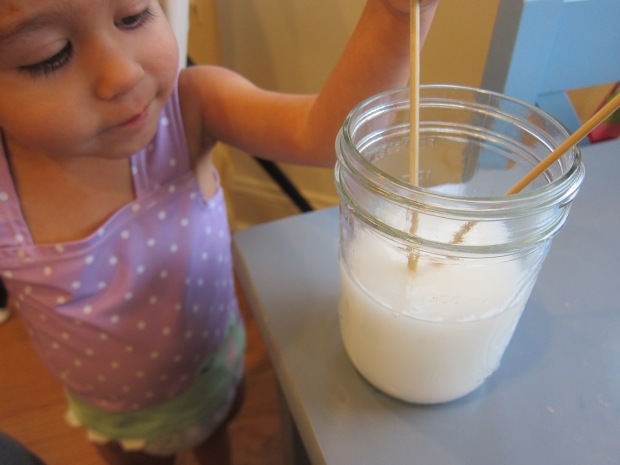
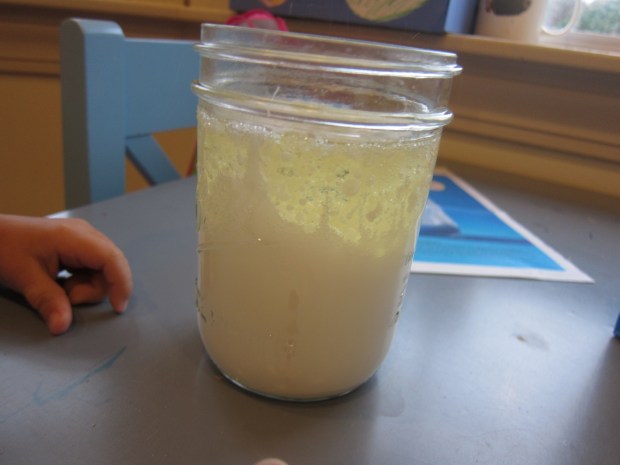
Now drop in Alka-Seltzer tablets, one at a time. Veronika loved plopping these in!

Flurry in a Hurry (5)

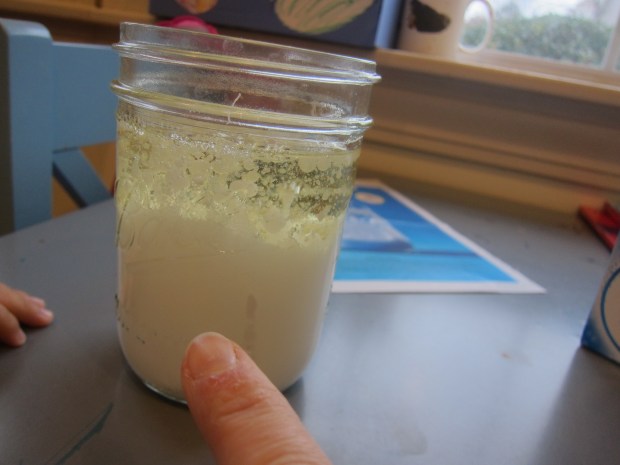
The resulting bubbles will immediately make the white paint rise up and then down again, a little snowstorm in miniature.

Flurry in a Hurry (3)

If we added two tablets in at once, it was more like a blizzard!

Flurry in a Hurry (2)

After watching for a little while, we decided it would look even prettier in blue stormy skies, so added a few drops of blue food coloring.

Flurry in a Hurry (6)

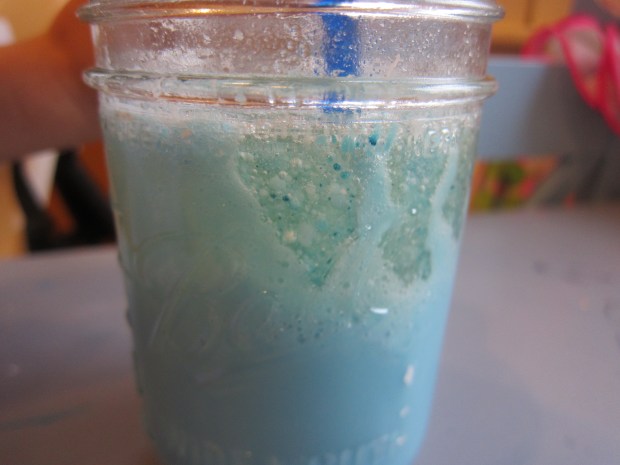
It was a little harder to see the white paint as “snowflakes”, now, but Veronika was equally delighted watching this stormy sky.

Flurry in a Hurry (8)

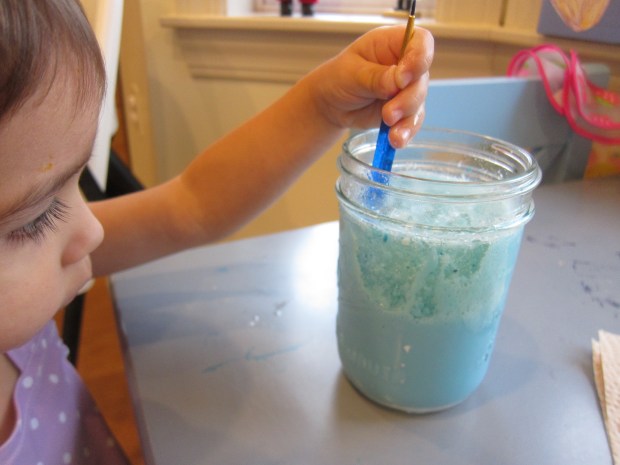
We went through six Alka-Seltzer tablets before she tired of it!

I Spy Baggy

I Spy Baggie (5)

Veronika is at an exciting stage where she’s mastered shape-recognition games, so we’re moving on to letters! I realized she knows some from others when she grabbed letter puzzle pieces and said she wanted to sleep with “I” and “S” (!) so clearly she’s ready.

It’s great to start with letters in your toddler’s name, since this is often the first word he or she will need to write in preschool. I used just Veronika’s nickname today (V-I-K-A) and placed chunky magnet letters in a zip-top bag. We filled the bag with white rice and then could play a game of I Spy!

I Spy Baggie (1)

“I spy a V,” I told her, and she quickly followed suit, digging through the rice grains to unearth the letters. “An I!” she said.

I Spy Baggie (4)

She thought it was hilarious to see letters in rice, and soon was trotting over to the fridge to add more to our bag.

I Spy Baggie (7)

“Let’s at the red O,” she might say, or the green A, etc. I was so proud to see how many she knew already!

I Spy Baggie (6)

For variation, I then wrote a few letters on index cards and placed these with only a small covering of rice in sandwich-sized zip-top bags.

I Spy Baggie (12)

These were fun because she could swipe the rice aside with a few fingers and reveal the letter underneath.

I Spy Baggie (11)

This was a great first letter-recognition game, and can easily grow with your child.

I Spy Baggie (10)

For preschoolers, try writing early sight words on the index cards instead. For younger kids, draw shapes!

I Spy Baggie (3)

Flashlight Fun

Flashlight Fun (9)

You don’t need to wait until after dark for flashlight games. If clouds or rain have you stuck indoors, kiddos in want of entertainment will love pulling out flashlights even by day!

To wit, we had dark, cloudy skies today (though no rain), and Veronika seemed a bit aimless. So I pulled out a flashlight and shined it into the toy purse she was fiddling with. The game was instantly more fun! What else could she shine it on?

Flashlight Fun (1)

She loved body parts. “Mommy’s hand! Mommy’s arm! Mommy’s knee!”

Flashlight Fun (3)

And then she searched for corresponding bits on herself with her beacon of light.

Flashlight Fun (4)

Reflective or shiny surfaces were fun, like the wood of our coffee table…

Flashlight Fun (6)

…or the glossy pages of a photo book. Be sure to name everything the flashlight lands on; Veronika proudly narrated as she spotted a chair, her ears, and more.

Flashlight Fun (7)

Then she went hunting for favorite toys with it. She loved the way the light looked in her stuffed puppy’s eyes.

Flashlight Fun (8)

Last stop: don’t forget to shine up at the ceiling! I’d say we brightened up a gray day.

Flashlight Fun (2)

Popcorn Pictures

Popcorn Pictures (4)

I love toddler crafts that turn everyday items into art supplies. To wit, we had a bag of plain popcorn in our pantry which I knew could double as snack and craft time all at once!

I set out pieces of paper and a shallow plate filled with white glue, then showed Veronika how to brush the glue all over the paper. With a little guidance from mommy, we began covering the glue with popcorn pieces so it looked like a blanket of snow with a little snowman on top.

Popcorn Pictures (2)

It was fun to dip individual pieces of popcorn into the glue and add these like snowflakes in the sky.

Popcorn Pictures (3)

For variation, Veronika then helped me fill a zip-top bag with some of the popcorn and we added pink paint; seal and shake to distribute over the popcorn.

Popcorn Pictures (5)

We let the paint dry, then smeared a glue stick all over a piece of construction paper and taped down the pink pieces. In circles, they looked like little spring flowers, so we drew on stems for a final touch.

Popcorn Pictures (7)

Truth be told, Veronika needed a lot of adult guidance for this one because she was way more into snacking on the popcorn than crafting with it. Either way, she had fun! Which of the two does your toddler prefer? Please share in the comments!

Popcorn Pictures (1)

Thanksgiving Turkey Play Dough

Turkey Play Dough (7)

After having fun with a construction paper turkey craft, I wanted a version Veronika could more readily create all by herself. The solution? Play dough turkeys!

To start, I needed a batch of brown play dough and turned to an old favorite recipe for pumpkin pie-scented play dough that fit both color and season. It does require cooking, but is remarkably easy. In saucepan, combine:

2 and 3/4 cups flour

1 cup salt

4 teaspoons cream of tartar

2 tablespoons pumpkin pie spice

6 tablespoons vegetable oil

2 cups water

Cook over low heat, stirring with a spatula, until the mixture pulls from the sides of the pan. Let cool on wax paper, then knead a few times and it’s ready to go!

Turkey Play Dough (2)

I set out balls of the play dough on a tray along with: wiggle eyes, pipe cleaners (cut in half, which is an easier length for my toddler), bright feathers, and triangles cut from orange craft foam for beaks.

Turkey Play Dough (1)

Veronika loved it when I showed her how to make balls for heads and bodies, then decorate like a little turkey.  She very soon started her own version. “It’s Mr.Turkey!” she said, proudly.

Turkey Play Dough (4)

From there, she was off and running with her own creations. She loved poking pipe cleaners and feathers into the soft dough.

Turkey Play Dough (3)

The biggest hit, though, was adding wiggle eyes, which were “cheeks” and more, according to her narration.

Turkey Play Dough (8)

It turned out the craft foam “beaks: could be used more like little turkey feathers, too!

Turkey Play Dough (11)

Every once in a while she would lift the dough to her nose to inhale deeply. “It smells really good!” she said of the pumpkin pie spice.

Turkey Play Dough (13)

For fun, I also made a flatter turkey body and head for her to decorate, and we added looped pipe cleaners and smaller feathers to this one.

Turkey Play Dough (9)

After that, she kept playing with all the materials for a while… So long in fact that it kept her up past her normal nap time!

Turkey Play Dough (14)

Simple Block Learning: Shapes and Colors

Block Learning Shape and Color (8)

This idea was an extension on recent block puzzle play with Veronika. But this time, she had to puzzle out two variables at once: color and shape.

To start, I laid down a sheet of butcher paper and began to trace some of her soft foam blocks, making sure to use a corresponding crayon color for every block color.

Block Learning Shape and Color (2)

She immediately was naming shapes and colors as I worked and wanted to trace (i.e. scribble) alongside me! In retrospect, I would set this up while she was napping for a cleaner piece of paper.

Block Learning Shape and Color (1)

But eventually, I had enough shapes traced for the real puzzling to begin. It was neat to see her mind work through this activity. She immediately put a red triangle in place when I pointed out the red outline.

Block Learning Shape and Color (4)

Rectangles threw her off since we had both short ones and long ones, and she tended to either mix up the two or orient her rectangles in the wrong direction.

Block Learning Shape and Color (5)

Often, she proudly laid down a shape in the right outline (e.g. square in square), without any regard for the color.

Block Learning Shape and Color (6)

And all of that was perfectly fine! I loved that this was a challenge for her, and how gamely she rose to it.

Block Learning Shape and Color (7)

The activity also lends itself perfectly to extended play. Once all those shapes were in place, we could start connecting them like bridges into ever-bigger structures and towers.

Block Learning Shape and Color (10)

Without any prompting, she trotted away and then brought back a toy car. Now we had tunnels for cars to go through or garages to park them in!

Block Learning Shape and Color (12)

We eventually re-positioned the blocks into one long road for her to drive cars down, which she loved.

Block Learning Shape and Color (13)

She played solo so happily and I caught her driving cars up one side of a triangle block and down the other, almost like it was a mini mountain.

Block Learning Shape and Color (15)

And through all of this, she kept up the narrative of shapes and colors to herself. This activity was a true joy.

Gratitude Pumpkin

Gratitude Pumpkin (5)

We’re gearing up for a cozy Thanksgiving just as our family of four, but that only has us thinking all the more about what we’re thankful for or missing this year. One neat idea is to write down all the ideas your family can brainstorm… on a pumpkin!

As the kids came up with ideas (and mommy, too!), I wrote down all their words in permanent marker. Travis named favorites like Star Wars, friends and play dates. Don’t discount a toddler’s ability to name the things they love; that counts as the first step toward feeling grateful.

Gratitude Pumpkin (1)

Veronika also wanted to scribble with markers as I wrote, which meant our final pumpkin wasn’t “perfect”. But I loved this touch of reality on it.

Gratitude Pumpkin (2)

The resulting gratitude list was so simple but beautiful, and will make the perfect centerpiece for a Thanksgiving table!

Gratitude Pumpkin (3)

Thankful Tree for Thanksgiving Gratitude

Thankful Tree (8)

This collaborative family project works either as a countdown to Thanksgiving day, or simply as a craft to put together all in one go as the holiday approaches. Ours was sort of a mix of the two!

To start, cut open a brown paper grocery bag and cut into the shape of a tree with a trunk at the bottom and a few branches near the top. Attach to a wall with masking tape.

Thankful Tree (2)

I next cut leaf shapes from red, brown, and orange construction paper, making enough so there would be one for each day of the month until Thanksgiving.

Thankful Tree (1)

If you’re using the tree like a countdown, ask your kids each morning to name something they’re thankful for as soon as November starts. The response might be prompted by the day itself; for example on the day we had bright sunshine, we were thankful for the sun (and another day, rain!).

Thankful Tree (4)

We didn’t start on the first of the month, so we also had a day with a big brainstorm session to catch up. There are no wrong answers when it comes to this tree, and it’s fun to include big sibling ideas (Root beer! Star Wars!) with little sibling favorites (Bicycles! Puppies!).

Thankful Tree (5)

Even the littlest siblings can help attach a leaf to a branch.

Thankful Tree (6)

By the end you’ll have a beautiful tree full of family thanks.

Thankful Tree (7)

Create-a-Turkey Tray

Create a Turkey Tray (6)

This art project works well as a solo activity to keep preschoolers or elementary school kids busy while you prep a Thanksgiving day feast. And with a toddler, it becomes a fun craft to do side-by-side!

To set up the tray, I cut large circles from brown construction paper for turkey bodies and smaller brown circles for heads. I then added “feathers” cut from construction paper in multiple hues, and orange triangles for beaks. Finally, add piles of wiggle eyes, glue sticks, and additional sheets of paper to be the background.

Create a Turkey Tray (1)

From here, big kids can assemble their own turkey!

I showed Veronika first how to choose a large brown circle (“What shape is it?” I asked her), and to rub the glue stick on the back so we could press it to one of our large squares of paper.

Create a Turkey Tray (3)

Next we added a small circle for the head. As she glued this one down, I pointed out the size difference between the small and large!

Create a Turkey Tray (5)

We then named the colors as we glued down each feather. She also proudly pointed out that the orange beak was a triangle shape!

Create a Turkey Tray (4)

She loved the wiggle eyes on the tray, so I gave her a small cup that she could dump out and refill a few times. Don’t forget to glue two onto the turkey!

Create a Turkey Tray (2)

You can let your toddler make a more free-form “turkey”, too, which is a great part of the art process. I love crafts like this where we end up with one that looks like its “supposed” to and another that is authentically Veronika’s.

Create a Turkey Tray (7)

Thanksgiving Turkey

Thanksgiving Turkey (5)

If a painted handprint turkey is too messy or squirmy an ordeal with your toddler, consider a traced outline of a hand instead this Thanksgiving! This turkey was particularly fun for Veronika to decorate because it doubles as sensory play.

First, I placed her hand flat against a paper plate and traced with pencil. Don’t worry if your outline is wobbly or missing in places; you can always fill in the gaps with an approximation.

Thanksgiving Turkey (2)

After the outline was traced, we colored in the turkey with brown crayon, and then decorated with materials from our craft bin. Veronika loved gluing down dried beans…

Thanksgiving Turkey (3)

…plus pouring extra beans from cup to cup for a while!

Thanksgiving Turkey (1)

Meanwhile, I added a few brightly colored beads on each “feather” and drew a beak and wattle as the finishing touch.

Thanksgiving Turkey (4)

For fun, I traced my own hand for us to decorate as well. Now we had a mommy turkey and a baby turkey!

Thanksgiving Turkey (6)