Tape Resist Candy Cane Painting

Tape Resist Candy Cane (7)

Tape resist is a great art method for toddlers because they get to make a mess but still wind up with a recognizable image or picture. This candy cane version is just right around the holidays!

I first placed horizontal strips of masking tape on white construction paper, then squirted generous blobs of red fingerpaint all over it. I was glad we did this in a craft tray, because it definitely got messy.

Tape Resist Candy Cane (1)

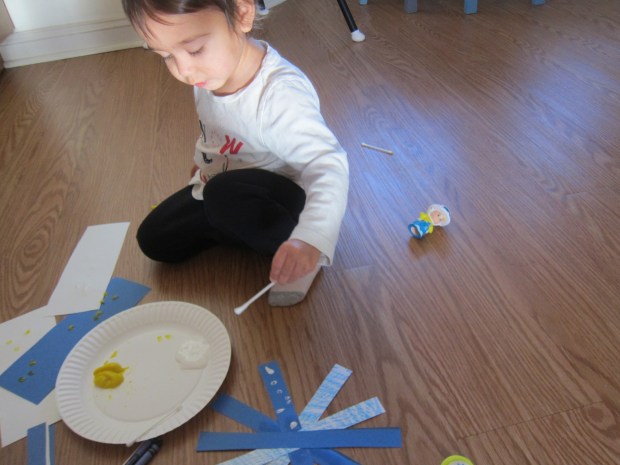
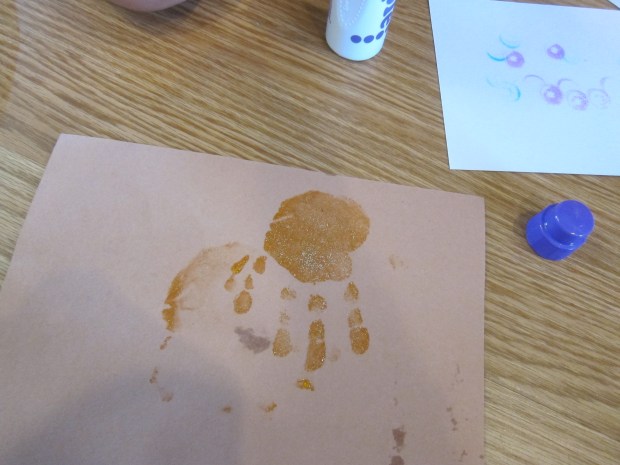
All Veronika had to do now was smear! She quickly decided she wanted to use yellow paint instead, so I let her play with that on the side and finished off the red version, making sure to wipe off excess paint.

Tape Resist Candy Cane (3)

Immediately peel off the strips of tape, then let the paint dry completely. “Look what I made!” Veronika proudly said when she spotted it drying on the table.

Tape Resist Candy Cane (4)

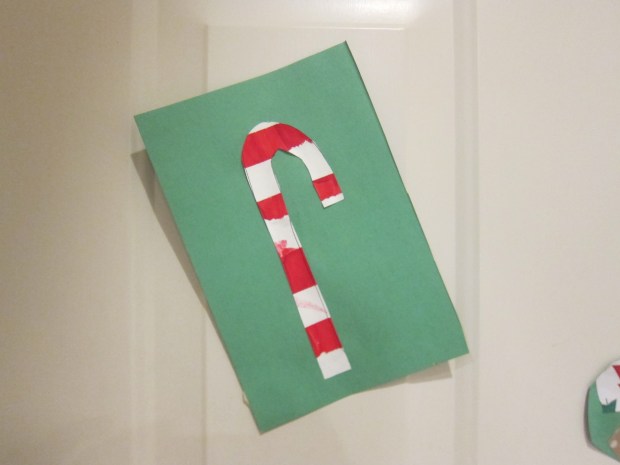
Once dry, I cut the paper into candy cane shapes and glued them against a green paper backdrop. You can hang these from a door if you attach a loop of ribbon, or simply tape to a wall as holiday decor.

Tape Resist Candy Cane (6)

No one will believe your toddler can make such straight lines, but they can!

Wrapping Paper Stocking

Wrapping Paper Stocking (8)

As you wrap gifts this holiday season, no doubt you’ll end up with just as many scraps and small bits of wrapping paper as I do. So after some early gift wrapping today, I gave Veronika the leftovers!

She loved looking at all the different patterns before we even started crafting with them, particularly seeing images of Santa Claus and Christmas trees.

Wrapping Paper Stocking (1)

I then gave her a glue stick to smear all over a piece of green construction paper and showed her how to add the scraps of wrapping paper any which way.

Wrapping Paper Stocking (4)

I made sure to leave a little space blank at the top, but other than that, all the placement was up to her!

Wrapping Paper Stocking (5)

Once the glue dried, I cut out a simple Christmas stocking shape, and wrote her name at the top.

Wrapping Paper Stocking (6)

This makes a great decoration to hang around the holidays and is great for early name recognition, too!

Wrapping Paper Stocking (7)

Easy Snowflake Craft

Easy Snowflake Craft (4)

Here’s a quick snowflake craft for toddlers to put together. Depending how many your child wants to make, you can hang just one in a window or create a whole snowstorm of them!

Ideally I would have had two shades of blue paper for this project, but since I only had dark blue, we scribbled all over a piece of white paper with blue crayon. Of course Veronika was a very happy scribbler! Now we had two shades of blue, which I then cut into strips about 1-inch wide.

Easy Snowflake Craft (1)

Use a glue stick to arrange 5 or 6 strips of paper into a snowflake shape.

Easy Snowflake Craft (2)

Next, I poured a little white paint into a paper plate and showed Veronika how to dip in a q-tip and dot onto the snowflake. She loved this painting method!

Easy Snowflake Craft (3)

Let dry, then hang in the window like a giant snowflake drifting down. This is the perfect craft to look at while we wait for winter to give us the real thing!

Easy Snowflake Craft (5)

Cotton Ball Snowman, Two Ways

Cotton Ball Snowman Craft (11)

A snowman made of cotton balls is a toddler classic for a reason; after all every toddler seems to love soft, puffy cotton balls, and they really do make adorable snowmen!

The first version Veronika and I made today involved more parental work than the second. I traced 3 sizes of circle cookie cutters on contact paper, then cut out. Tape down to a piece of construction paper with double-sided tape so that the sticky part of the contact paper faces up. Now have your toddler cover with cotton balls!

Cotton Ball Snowman Craft (1)

The three circles will immediately resemble the head, torso, and bottom of a snowman. This was a great opportunity to point out the relative sizes of the circles.

Cotton Ball Snowman Craft (3)

I then cut a few additional details from construction paper which Veronika could help glue on, including an orange carrot nose, a red scarf, and black circles for buttons and eyes. Make sure to have your toddler help squeeze out the glue, which is great for those little finger muscles!

Cotton Ball Snowman Craft (6)

The second version we made allowed Veronika to be more in charge. This time, we simply smeared a glue stick onto construction paper in circular motions, a big circle on the bottom and smaller on top.

Cotton Ball Snowman Craft (7)

After sticking on cotton balls for the body, I then gave Veronika pom poms to add for decorations. This was a great way to give her agency over how the snowman turned out.

Cotton Ball Snowman Craft (8)

If your child wants to add a background, use a white crayon for a snowy scene. For all that, Veronika’s favorite part of the whole activity was dumping cotton balls from one container to another, which was just fine.

Cotton Ball Snowman Craft (4)

As I said, toddlers love those fluffy little cotton balls!

Cotton Ball Snowman Craft (10)

Insta-Graham Houses

Insta-Graham Houses (9)

You can always make gingerbread from scratch, but if your kids want to decorate gingerbread houses in a hurry, look no further than graham crackers! We love the vegan s’moreables from Kinnikinnick; armed with those plus store-bought vegan frosting plus empty cartons of non-dairy creamer, we were ready to go.

Insta-Graham Houses (4)

We first smeared some of the frosting over the sides of the cleaned and empty cartons. Press on graham crackers to each side of the carton. The fit wasn’t perfect, but we weren’t going for Instagram perfection here!

Insta-Graham Houses (2)

Now use additional frosting as “glue” to add candy details. We used candies from Yum Earth, as well as mini candy canes and Dandies mini marshmallows.

Insta-Graham Houses (1)

Travis loved making window frames…

Insta-Graham Houses (5)

…and was particular proud of the marshmallow door he created with a front path made of jelly beans.

Insta-Graham Houses (6)

For snow, we added extra frosting on the top of the carton, then sprinkled down shredded coconut. A blizzard!

Insta-Graham Houses (7)

Little sister Veronika got a turn to decorate, too! She loved alternating between taking bites of candy and sticking one onto the carton where I had applied frosting.

Insta-Graham Houses (13)

There’s lots more you can do here, depending how crafty the family is feeling! Make trees from upside down ice cream cones coated in frosting and green sprinkles, or add tile roofs, or turn yours into log cabins with the aid of pretzel sticks. I confess, though, we skipped all that.

There are magical families who make their gingerbread houses last as beautiful decorations throughout the holiday season. Needless to say, we are not that magical family; within moments the house was part of Travis’s Star Wars Lego battle.

Insta-Graham Houses (11)

But I had happy smiling kids, and that’s the most Insta-graham-able thing of all!

Insta-Graham Houses (8)

Snowy White Play Dough

Snowy White Play Dough (5)

I love making homemade play dough with a seasonal theme, and this snowy white version is perfect now that winter is near and snowy days are ahead! The secret to that pure white is to use cornstarch instead of regular flour.

To make this silky-smooth play dough, combine the following in a bowl:

1 and 1/2 cups cornstarch

1/2 cup salt

1 tablespoon vegetable oil

1 tablespoon cream of tartar

Add 1 cup boiling water and stir until combined. Let cool.

Place the dough on a craft tray and knead to the right consistency. You may need to sprinkle with a little extra cornstarch. We also then added a little bit of silver glitter, which made it sparkle just like fresh-fallen snow.

Snowy White Play Dough (2)

Now it was time to play! Veronika had so much fun with this snowy-themed dough. First we simply rolled out snowballs or snowmen. Red beads made fun decorations!

Snowy White Play Dough (9)

It was also great as pretend cookie dough, and I gave Veronika star- and snowman-shaped cookie cutters to keep with our seasonal theme.

Snowy White Play Dough (1)

Her favorite use for it, though, was pretending it was a layer of arctic ice (or, as she called it, the snowy beach). I pulled out a set of arctic animals who could romp through this wintry land.

Snowy White Play Dough (8)

“Seal is on the beach!” she would say with delight, or, “Orca is in the water!”

Snowy White Play Dough (12)

The play dough is also great for leaving animal “tracks” in the snow. She loved hopping along an arctic hare or stomping along the wolf and fox.

Snowy White Play Dough (14)

After spending some time with the play dough together, it was great for her solo play, too; I loved seeing her imagination and senses at work.

Snowy White Play Dough (11)

Reindeer Handprint Ornament

Reindeer Ornament (7)

This sweet keepsake captures the size of your child’s handprint around the holidays, and results in an adorable reindeer ornament that you’ll be sure to hang on the tree for many years to come.

For this particular handprint, you can paint your child’s hand with brown paint and then press firmly onto brown felt or brown craft foam. However, I decided last minute to use a deep orange paint instead, which I thought would pop a little more against the brown. It ended up looking great!

Reindeer Ornament (2)

I painted Veronika’s palm with the orange paint, and then she eagerly (and very helpfully!) spread her fingers for a perfect print on the felt.

Reindeer Ornament (4)

In fact, she loved it so much that she asked me to paint her hand again, and then both hands, and loved making a few extra prints on scrap paper. Needless to say, we needed a quick emergency bath.

Reindeer Ornament (3)

Meanwhile, glue the felt to a piece of thin cardboard (such as an old cereal box) and let the paint and glue dry completely. Once dry, cut out around the handprint. Use a hole punch to make an eye near the top of the thumb. Draw a red nose on the tip of the thumb, then cut a small slit near where antlers would be. Slip in a V-shaped length of sparkly red pipe cleaner for the antlers.

Reindeer Ornament (5)

Punch one final hole in the top center and add red yarn or ribbon. Now Rudolph is on our Christmas tree!

Reindeer Ornament (6)

Naughty or Nice Jar

Naughty or Nice Jar (6)

We don’t do Elf on the Shelf in our house, because I don’t love the idea of the kids being “watched” for good behavior before Christmas. That said, if your kids’ attitudes could use a little tweak this holiday season, consider this Naughty or Nice Jar instead.

To make the jar, I first covered an empty oatmeal container with sparkly red felt. Empty coffee canisters or similar round containers would work well, too.

Naughty or Nice Jar (1)

Next, add a belt and buckle from craft material. I used black construction paper for the belt and a shiny silver chenille stem for the buckle, but black and yellow felt would also work for this part, or even aluminum foil for the buckle!

Naughty or Nice Jar (3)

Trim the bottom of the felt if needed so the jar stands flat, then trace the bottom circle on yellow construction paper. Cut out and cover the bottom of the jar. Write in the words “Naughty or Nice?” in permanent marker.

Naughty or Nice Jar (4)

Now to put the jar to good use! Good behavior receives a reward in the jar and bad behavior earns a piece of coal. The goal is for kids to have more treats than coal as the month progresses, so they wind up on Santa’s nice list by Christmas Eve!

Naughty or Nice Jar (5)

Mini candy canes were our rewards for nice behavior and I found fun mini “coal” erasers in case of any naughty antics. Once Travis understood, he was doubly motivated to make Santa’s “nice” list this year!

Note: If you make a pair of these jars, you can fill one with all treats and one with all coal (real or fake), then seal. It makes a fun gag gift for a recipient who would appreciate the humor.

Ice Cream Cup Stick Snowflakes

Ice Cream Stick Snowflakes (10)

This is the first year Veronika is truly aware of our Christmas tree, and she absolutely loves it. If your toddler wants to put his or her own personal stamp on the tree, this is a great toddler-friendly craft that results in pretty ornaments.

Note: You don’t need to hoard ice cream cup sticks for the project, either; mini craft sticks are available for purchase at craft supply stores.

Ice Cream Stick Snowflakes (1)

I placed lots of these sticks down on a tray and showed Veronika how to squirt glitter glue on them. Glitter glue is a fantastic toddler art supply because not only is it sparkly and fun, but the squeezing is great for fine motor skills.

Ice Cream Stick Snowflakes (3)

As she drizzled the glitter over a stick, I then would press another across it, piling up 4 each time until they looked like the branches of a snowflake.

Sometimes she needed a little help and we would squeeze the tubes together. She loved watching the sparkly color appear on the next branch of the “snowflake”.

Ice Cream Stick Snowflakes (7)

Once we had four finished snowflakes, she wanted to continue the play with extra glitter glue, scooping it up with additional mini craft sticks for quite a while.

Ice Cream Stick Snowflakes (5)

Meanwhile, let the glitter glue dry completely (which can take a while), then use hot glue to attach a loop of yarn or gift ribbon to each snowflake.

Ice Cream Stick Snowflakes (9)

These were beautiful on the tree!Ice Cream Stick Snowflakes (11)

Felt Recreatable Christmas Tree

Felt Tree (12)

I’ve always loved the idea of a felt Christmas tree for the kids, but was never ambitious enough to make my own. Thanks to an early Christmas gift, we now have a version the kids can use. Although we didn’t craft ours, the idea is so wonderful that it merits a blog post.

If you are going to tackle a homemade version, you’ll need to start with a very large piece of green felt. Cut out a Christmas tree shape and then cut a stump from brown felt; use tacky glue or hot glue to attach them together.

Felt Tree (5)

Add Velcro dots at various intervals on the tree and hang on a wall.

For ornaments, you can then use additional colors of felt to cut out simple Christmas shapes: think yellow stars, red candy canes, or little squares for gift boxes. Use hot glue any time you want to attach two colors of felt together where details are needed, like ribbon on the gift boxes.

Felt Tree (6)

Needless to say, I wasn’t that crafty and was so thankful to receive this early gift for the kids. What’s wonderful about these felt trees is that kids can decorate them again and again without getting near the real (breakable!) ornaments.

Felt Tree (3)

Veronika in particular loved the tree. We talked about each item as she attached them to the Velcro squares, or the colors or shapes. She loved pointing out that the presents were squares, or the hooks of the candy canes.

Felt Tree (10)

She even pulled off one particular ornament in the shape of a lollipop and enjoyed “feeding” it to her stuffed animals. What a thoughtful Christmas gift!

Felt Tree (4)

I also appreciated how easy it was for her to attach or pull off the decorations, thanks to the Velcro dots.

Felt Tree (8)

Big brother Travis swooped in now and then to add an ornament.

Felt Tree (9)

And whenever the kids want to, they can take everything off and start all over again!

Felt Tree (7)

This is definitely a decoration that we’ll trot out to play with for years to come.

Felt Tree (13)