Paper Nail Salon

Paper Salon (9)

It took a while for my four-year-old, but Travis is just now learning to color in the lines instead of scribbling willy-nilly, and he’s so proud. Since we’ve also been learning lots about the body lately, I thought this clever little activity would combine the two nicely – some anatomy about the hand, as well as a chance to hone those coloring skills.

I printed a hand template rather than attempting to draw one from scratch, and cut out about 5 or 6 hands for him, drawing fingernails onto each.

Paper Salon (1)

You can have a quick chat about nails before the coloring begins, too, like how our nails never stop growing or other fun factoids.

Paper Salon (2)

Now for the artsy part; the challenge was to “polish” each nail, staying as near to the lines as he could.

Paper Salon (3)

Travis was up to the task! He loved picking a color for each hand, like gray or pink or blue.

Paper Salon (5)

And then of course because glitter glue makes everything more fun, we decided to add glitter glue jewelry to some of the hands.

Paper Salon (4)

And since Travis likes to get impish these days, some of our salon patrons soon found themselves covered in “goop.”

Big kids might want to get really artistic with their nail designs! You can stick to markers, or, let them use real polish. For one special hand, I traced the hand shape onto thick cardstock and let him actually swipe on a coat of polish.

Paper Salon (6)

Cute and fun, of a quiet morning!

What is a Landmark?

Landmark (15)

We’re only in our second month of a subscription to Raddish Kids, but I continue to be impressed with the company’s thorough lesson plans to accompany each recipe. I mentioned last month that the lessons are meant for everyone from preschoolers through big kids, so you’ll need to adapt and adjust accordingly. To wit, I worried Travis wouldn’t get much out of a lesson on French landmarks (to go along with the French dessert we baked), but boy was I wrong!

The idea is to learn about the Eiffel Tower specifically, and then follow-up with a discussion of landmarks in general. So we started with a video clip about the Tower.

Landmark (1)

Travis had so many questions right away: Could you really go to the top? What was the tower made of? How did they light it up at night? He was even more amazed when I pulled out a few old photos from my own trip up to the top!

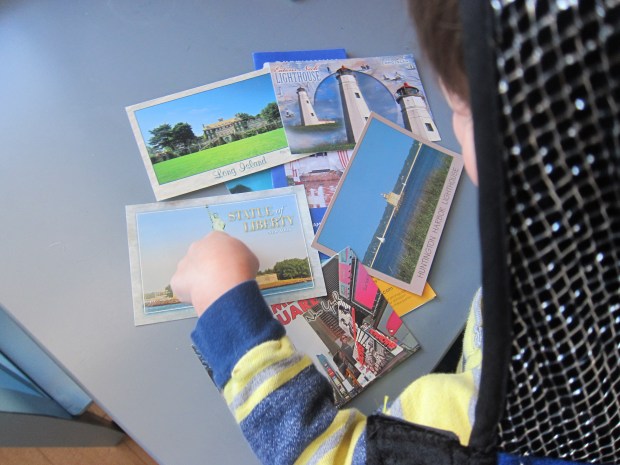
Next, we looked at pictures of other landmarks. I selected some from a travel magazine, and showed him a mix of man-made (the Great Wall of China) and natural (the White Cliffs of Dover). Now it was time to ask him to define a landmark based on what he saw.

Landmark (2)

This was a tricky question for a preschooler, but he decided it was something you built. I pointed back to the cliffs again, and we settled on this definition: anything that can be easily recognized, that marks a specific location.

We explored further with a fantastic STEM activity, encouraging kids to build replicas of famous landmarks. Duplo was a natural medium for my preschooler, and he loved the challenge.

Landmark (4)

Here is our little Eiffel Tower, replete with a tourist on top!

Landmark (5)

We also tackled London Bridge, the Parthenon, and the Leaning Tower of Pisa.

Landmark (6)

Big kids can get super creative with these, in a wide variety of materials, and aim to be much more exact.

Landmark (8)

From here, older children can go on to make a brochure, travel blog, or model of any landmark they choose. But Raddish’s suggestion for young kids was to keep things closer to home. I’ll be honest: If I didn’t have a three-month-old, I would have taken Travis to a world-famous landmark in nearby New York City, like the State of Liberty or the Empire State Building.

Landmark (13)

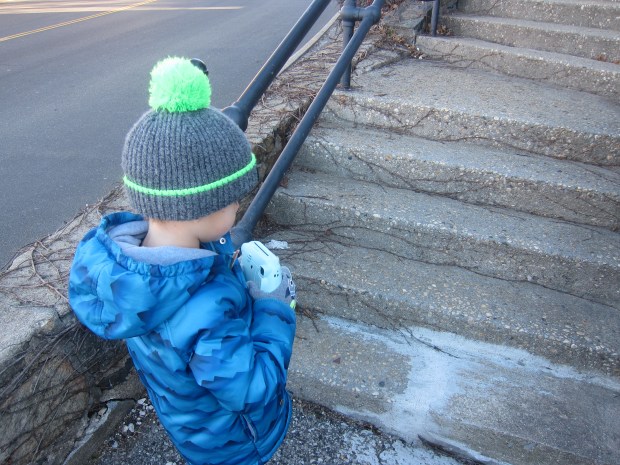
But since that was out of the cards, I asked Travis if he could think of a landmark in our little town, and was so proud when he remembered the bell we pass ever day en route to school, part of a Soldiers and Sailors Memorial Building.

So off we went on a frigid morning for a few pics!

Landmark (9)

Travis loves using our instant camera, so was a happy participant despite temps in the teens.

Landmark (10)

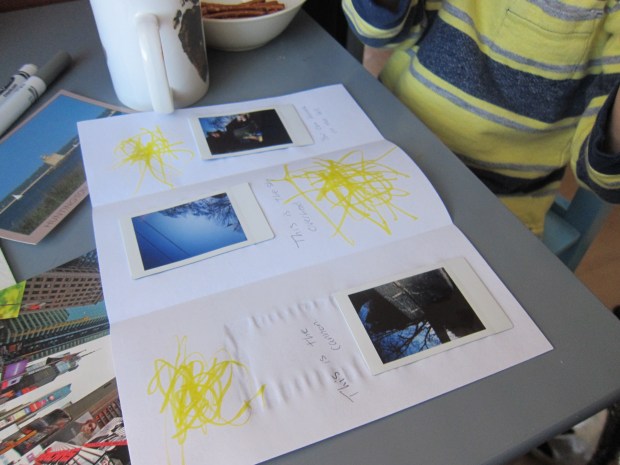
We came home and wove it all together by making a brochure. I showed him a few examples, and soon he was gluing pictures down proudly.

Landmark (14)

In sum, this was definitely an advanced social studies lesson for a preschooler, but I’m glad we accepted the challenge to tackle it. Travis learned so much, and we had a blast in the process.

Landmark (12)

My Punny Valentine Tacos

Taco Bout (9).JPG

It’s the second year that Travis and I are on the hook to produce Valentine’s cards for all his classmates, and we turned once more to Parents magazine. This year, all of the Valentine’s Day cards featured cute puns about food. I asked Travis to pick his favorite, so tacos it was!

First we traced circles onto yellow cardstock. You want the circles to be about 5 inches across, so a DVD makes the perfect item to trace. Travis was so proud that he traced all 20 of the ones we made, his circles getting neater and neater each time.

Taco Bout (2)

Next we folded the circles in half. Be sure to make a nice crease

Taco Bout (4)

Fill one half of the “taco shell” with glue, and press on green shredded paper. Travis was so into this material, since we’ve never used it before. Let dry.

Taco Bout (5)

Our counter was starting to look like a taco stand!

Taco Bout (7)

Once the “lettuce” dried, we add a few red “tomatoes” to each taco – with red heart stickers of course.

Taco Bout (8)

On the front of each taco shell, I wrote out “Taco ’bout a good friend! Love Travis”. Note: You can also write this on the inside of the shell, if preferred.

Travis was so excited about this project, and proud that we had shells, lettuce, and tomatoes in our tacos. We can’t wait to give them to the class!


Taco Bout (10)

What are you making for Valentine’s Day this year? Please share in the comments.


DIY Crazy Hair Wig

Crazy Wig (6).JPG

Travis has been into disguises lately, so when I suggested we make a wig, he couldn’t wait to see the final result! This project will be a little time consuming on the part of you, grown-up, but it’s definitely worth the effort.

Crazy Wig (1)

First, I let Travis select a color of pipe cleaner for the base of the wig, and we measured around his head with two for the perfect fit. Twist them together until they are the proper size.

Crazy Wig (2)

Next, I cut lengths of ribbon for the hair. I used thick green and yellow yarn in alternating blocks for most of the wig, but added in fun pops of color with a slightly thinner rainbow yarn. This means a lot of tedious knotting and tying, but Travis was thrilled. “Can I watch?” he asked, when I was sure he’d want to play elsewhere.

Crazy Wig (3)

At last, the wig was ready for a try-on.

Crazy Wig (4)

Travis loved being in disguise!

Crazy Wig (7)

He soon dubbed himself “Mummy Man.” Based on your child’s current interests, this wig could make them anything from a mummy to a fairy princess to a wizard to so much more. So go have some crazy fun!

Crazy Wig (8)

Exercise Cube

Exercise Cube (4).JPG

Stuck inside on a winter day and need to get moving? Look no further than this game to get those kiddos some exercise, no playground required!

I gave Travis an empty tissue box, and told him we needed to think up an activity for each side of the cube. This was a nice quick math lesson, since we counted to see how many sides our cube had: 6!

Exercise Cube (1)

Travis was really into brainstorming the activities, and actually came up with some I wouldn’t have thought of, including… yoga! Great idea. By the end, our list included:

Yoga

Jump up and down

Run in a zig-zag

Touch your toes

Roll onto your back

and Spin in a Circle

Older kids can have fun drawing a picture to go with each caption. Travis liked my little drawings; no points for artistry here, I stick to stick figures, but these got a giggle.

Exercise Cube (2)

We used a glue stick to attach one activity per side of the box. It dried in no time, and then it was time to play.

Exercise Cube (3)

Travis loved it! We took turns tossing the big dice, and got quite silly, especially when mommy had to spin multiple times in a row, or when he got to run in a zig-zag (his fast favorite).

Here he is spinning:

Exercise Cube (8)

And rolling over:

Exercise Cube (9)

Uh oh, toe touching was tricky for mama…

Exercise Cube (7)

…but a cinch for Travis.

Exercise Cube (6)

The only note of caution here: He wanted to keep playing long after I was winded! Needless to say, we got in our exercise on this gray cold day.

Exercise Cube (10)

Healthy Plate

Healthy Plate (4)

Travis has begun asking questions about why we eat vegan, questions which I’m always more than happy to answer, whether from a health standpoint, or how it helps the earth, or how it’s good for the animals.

As far as health goes, it can help kids to have a visual, so today we set up a little game and thought about what a healthy meal looks like. Obviously this works in every household, whether you’re vegan or not, but it drives home the idea that many foods (most, in fact!) are vegan, and everyone benefits from filling their plate with plant-based items like fruits, veggies, legumes, and grains.

As a bonus, there’s some fractions involved. First I asked Travis to draw a line dividing his plate in half. He had to think about this for a moment before making a big blue line. That was exactly right, I told him, since at every meal we want half of our plate to be filled with veggies and fruits.

Healthy Plate (1)

Next he divided one of those halves with a second line, and I told him he’d made quarters. One quarter was for grains and one for protein. We talked about what both of these words meant; sometimes we forget the obvious, like how Travis didn’t realize bread was made from grains.

Next we filled our plates! On the first we used real food. I presented him with different foods, and he had to decide where each went.

Healthy Plate (2)

He was so thrilled with how our plate divided up, and asked if he could eat it all; he almost couldn’t believe it when the answer was yes, why not!

Next, we went through a magazine and cut up pictures to fill each of our categories, and glued these onto a second plate. This gave us a slightly more permanent visual to refer back to.

Healthy Plate (3)

Obviously this is a simplified way to talk about a healthy diet, but it’s a great way to get kids thinking about it.

Q-Tip Skeleton

Qtip Skeleton (10).JPG

This little craft is great for kids who learning about the body and bones. Big kids can be really exact with it, mapping out locations for the humerus, femur, and more. For my four year old, it was fun just to talk about our bodies and bones, and help him see a skeleton take shape.

To set up the craft, I cut out a skull shape from white construction paper and glued it onto a piece of black paper.

Qtip Skeleton (1)

Next we needed to make bones! To do so, I cut q-tips into varying lengths, including a few that I left whole for bigger bones in the body. This is a fun step because q-tips are quite hard to snip through, which means they go flying when you cut them. Travis became the bone-gathering doctor!

Qtip Skeleton (2)

I asked if he wanted to decide where to place each bone, or preferred to have me lay down lines of glue for him to follow. He asked for the latter, but then it was a great game for him to match the length of my glue stripe to a properly sized “bone.”

Qtip Skeleton (4)

He loved doing the hand. “Look, it’s my pinkie finger!”

Qtip Skeleton (6)

This was a great chance to talk about the differences in the length of our bones. We needed to find a long one for the femur, I explained, which was the biggest bone in the body.

Qtip Skeleton (5)

It was also neat to touch our real, corresponding bones as we worked. He loved feeling his spine.

Qtip Skeleton (7)

When the skeleton looked almost done, I asked him what we still needed. “Hip bones!” he decided, touching his own, so we glued down a few more pieces.

Qtip Skeleton (8)

So proud of my little scientist putting this one together.

Qtip Skeleton (9)

Self-Portrait

Self-Portrait (9).JPG

Travis is learning to depict objects in his drawings as they are; by this I certainly don’t mean exact replicas, but rather, he’s paying attention to shapes, sizes, and other elements that make up an animal or person instead of just scribbling. I love seeing the little bubble people he sends home from school with stick arms and legs, reminiscent of my own kindergarten drawings!

So today, we decided to make a deliberate self-portrait.

Self-Portrait (1)

To make this exciting and new, I produced a handheld mirror, and asked him to really think about each thing we added to the picture before penciling it in. What shape was his face, I asked. A circle! So we started with a big one.

Self-Portrait (2)

We went feature by feature, and soon had circles for eyes, a triangle for his nose, and a U-shaped mouth.

Self-Portrait (3)

Once he had finished his pencil drawing, I outlined it in black sharpie to make each feature clearer. He loved seeing the picture take shape like this!

Self-Portrait (4)

To color it in, we had another novelty: watercolor paintbrushes that he loved. Simply dip the tip in water, and the color comes out of the brush. You could also use watercolor crayons or pastels, for this project.

Self-Portrait (5)

Travis very proudly added brown hair and brown eyes. He noticed in the mirror that his nose was beige, but decided yellow was the closest color in our pack.

Self Portrait (6)

And a big red smile of course!

Self Portrait (7)

I was so proud watching the care that he put into this project. And the watercolor paintbrushes were such a hit that he spent nearly an hour after making painting after painting, and hung them on our wall as an art gallery.

Self-Portrait (8)

In other words, this project was a huge success.

Self-Portrait (10)

Homemade Body Paint

Body Paint (6)

Some kids love face paint the moment they see it, but it took Travis a long time to warm to the idea of having his face painted. A recent fascination with all things superhero and supervillain has gotten him past the hesitation, and I was so proud of him when he dared to have character paint at a recent party. To continue the fun, I suggested we make this  DIY paint at home to amplify his superhero play!

Cooking the paint is half the fun. First, we scooped 1 cup cornstarch into a pot.

Body Paint (1)

We added 4 cups water, 6 tablespoons sugar, and 1 teaspoon salt.

Body Paint (2)

I cooked the mixture over medium heat, whisking frequently, until just before boiling – it will look like pudding. Travis loved watching from a little distance away.

Make sure you let the paint cool completely, at this point!

When it was cool, we divided among cups and added about 4 drops of food coloring to each cup. Travis new exactly which colors he needed for his game.

Body Paint (3)

He didn’t hesitate one whit before painting all up and down his arm. Is that a blue Spiderman I see?

Body Paint (4)

Mommy got to be Green Goblin.

Body Paint (5)

Travis was a bit disappointed that the paint didn’t dry, meaning he couldn’t keep it on an extended time period, but this was still great fun. Next time I think we’d do it right before bath, to fully enjoy a mess before a cleanup. The paint would also be great outside in warm summer weather!

Squeeze Your Own Juice

Squeeze Juice (6).JPG

In the February issue, Travis’s High Five magazine gave us pretend hot chocolate … But real orange juice! Travis had an absolute blast with this easy squeeze-your-own project.

First, he helped me peel two big oranges. He was very interested in the peel, and what it felt like, since normally I present him with oranges already cut up.

squeezejuice28129

Next he proudly put all the orange wedges into a large zip-top bag.

squeezejuice28229

Seal the bag tightly, making sure the air is out, and then squeeze! Travis went wild with the squishing and mushing.

squeezejuice28329

Once it looks like you have enough juice in the bag, place a strainer over a cup. Let the juice trickle into the cup, reserving the solids in the sieve. Travis was very pleased about this step, since he always tells people he doesn’t like orange juice with pulp.

squeezejuice28429

(Note: we found that it was easier to get the last of the juice out of the orange segments squeezing them directly in the strainer, rather than still in the bag).

squeezejuice28529

Time for a taste test!

squeezejuice28729

Travis loved it, deciding it was kind of sweet, and the freshest orange juice he’d ever tasted.

squeezejuice28829

Next we got a little scientific with the project, wondering what would happen if we squeezed a grapefruit instead. Travis surmised that since the grapefruit was bigger, we’d have more juice.

squeezejuice28929

Ding ding ding! He was correct.

squeezejuice281029

Thanks for the great burst of citrus on a cold winter’s day, High Five. This was such a neat way to show kids where their boxed juices come from.