Yarn Snowballs

Yarn Snowballs (5)

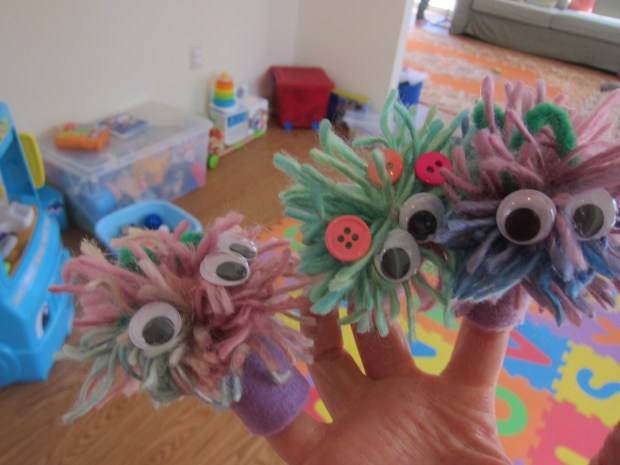
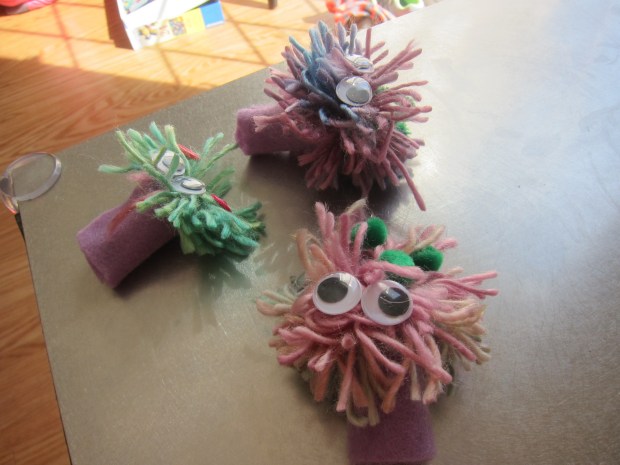
These fun indoor “snowballs” are a larger version of homemade pompoms Travis and I recently made for finger puppets. We found this larger version to be much easier than the little fork version!

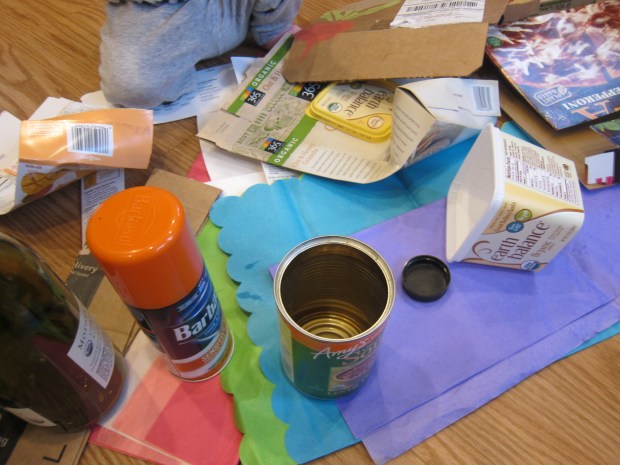
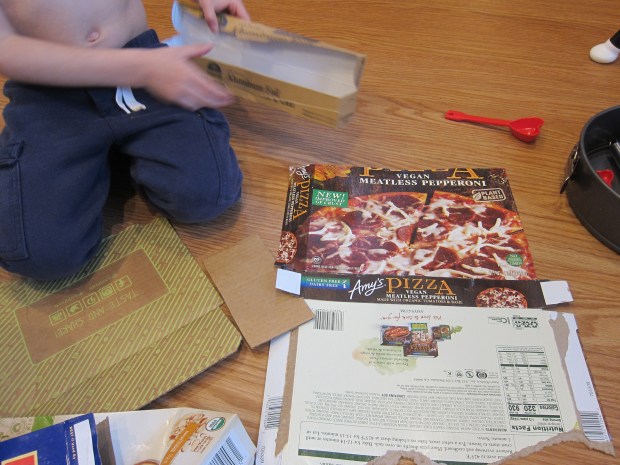
Cut a U-shape from cardboard (ideally a stiff box cardboard, but even a manila folder worked in a pinch).

Yarn Snowballs (1)

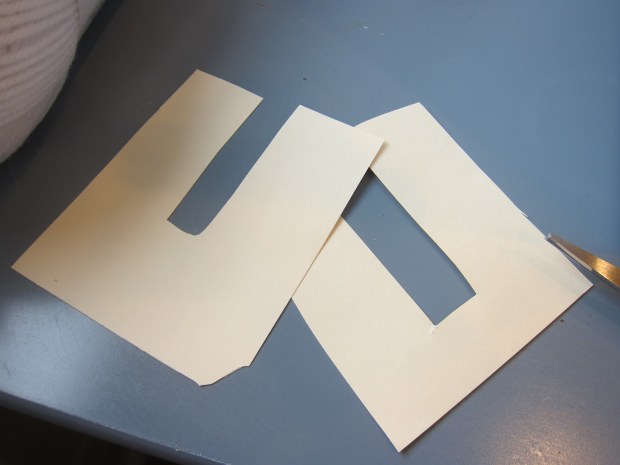
Begin winding white yarn around the U until you have a nice fluffy pile. Wrap a piece of yarn around the center, going through the notch of the U, and double-knot securely. Slide off of the U, then snip all the loops and fluff out.

Yarn Snowballs (2)

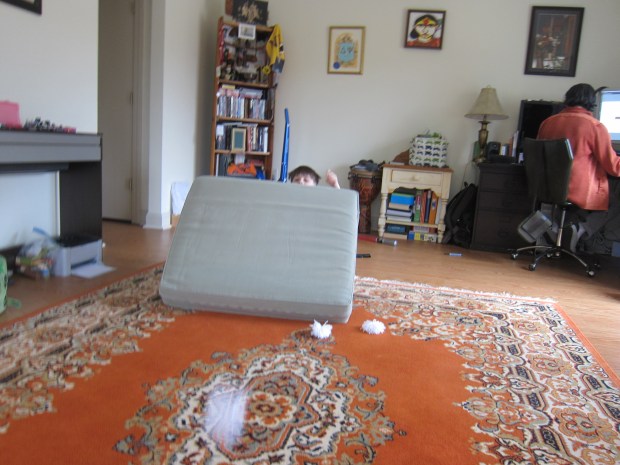
Once we had 6 “snowballs”, it was time for a battle.

Yarn Snowballs (3)

For extra amusement, we even set up pillow forts and then had at each other.

Yarn Snowballs (4)

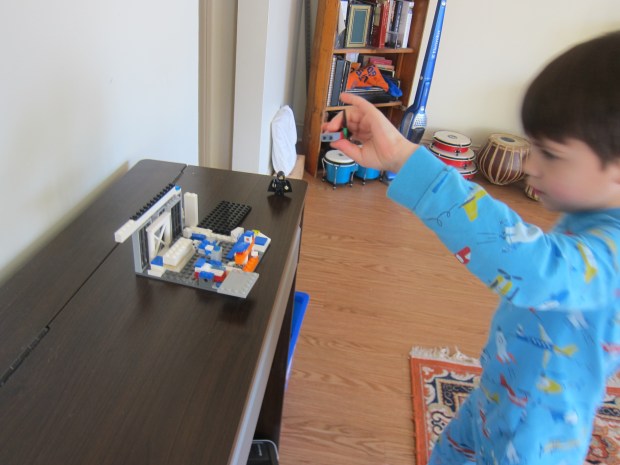
Then Travis wanted to have batting practice against the snowballs, saying this was his defense against my attacks.

Yarn Snowballs (9)

We laughed and dodged and pelted each other for ages with this game! (Thank goodness there wasn’t the icy sting of real snowballs, as we would have been covered in snow).

Yarn Snowballs (8)

Action shot!

Yarn Snowballs (7)

This was one of the best mother-son activities we’ve done to date, and that’s saying a lot.

Balloon Hovercraft

Balloon Hovercraft (3)

This balloon activity is a simple but neat way to demonstrate friction. Similar to an old balloon propeller experiment Travis tried, it illustrates Newton’s third law (that for every reaction, there is an equal and opposite reaction). So when the air from the balloon is allowed to escape, the it propels the CD forward. Consider it for a quick science class if you’re homeschooling this week!

I raided my old CD binder for the project, which had the kids immediately intrigued. This is not technology they see often anymore.

Balloon Hovercraft (1)

Hot glue a pop-top water bottle cap to the middle of the CD, making sure the seal is air-tight.

Balloon Hovercraft (2)

Fit a balloon over the bottle cap, then blow through the hole in the bottom of the CD to inflate the balloon. This definitely takes some lung power!

Balloon Hovercraft (4)

Immediately seal the pop-top. Place the balloon on a flat surface, and lift the pop-top. As the air rushes out, your balloon will go forward, which had big wow factor every time.

Balloon Hovercraft (5)

We never managed to create enough energy to have the CD actually lift and hover, but please share in the comments if you do! We did get it to zoom, though, which you can see in this quick clip:

How Music Moves Us

Musical Mood (5)

With social/emotional learning at the forefront of my mind in our new era of social distancing, I was glad to see that Travis’s latest Raddish Kids crate included a lesson on how music effects our moods. (All of the recipes this month have musical themes: stay tuned!). Being able to connect words to emotions is key, now more than ever, and we liked the can-do focus on how music can change or improve your mood.

As he came to the table I asked him: “How are you feeling right now?” He answered that he was feeling tired, but also silly.

Musical Mood (6)

We watched a quick explanation of how music can affect the brain and mood, which had him giggling.

Musical Mood (7)

Next I played him four samples of music, choosing:

  • Classical
  • Rock ‘n’ Roll
  • Heavy Metal
  • Folk

Musical Mood (1)

For each one, he drew a simple face on the provided worksheet that showed how it made him feel. I knew he was goofing off a little, but he decided the classical made him happy, the rock ‘n’ roll made him angry, the heavy metal made him excited, and the folk made him sad. Whether or not this was all true, it was nice to give him vocabulary to think about emotions.

Musical Mood (2)

Now it was time to experiment! First we played the heavy metal, and I let him have at a piece of paper with a paintbrush and watercolors. Then we switched to the classical, to see if there was a difference. Again, it was a little harder for a kindergartner to take this activity seriously. First he just liked making big dark puddles on the paper.

Musical Mood (3)

But then I noticed during the classical he was choosing brighter colors and his brush strokes were slowing down. So perhaps the music had a subconscious effect after all!

Musical Mood (4)

Older kids can explore further, perhaps making a playlist intended to make a family member feel a certain way, or creating a soundtrack to amcertain part of their day. To test this out subtly, we played some energizing songs (i.e. Can’t Stop the Feeling) for clean-up time, and it had everyone in a great mood at a time when the kids normally feel a bit grumpy.

Sign Language

Sign Language (3)

Travis and I did a brief lesson on American Sign Language during homeschool today, a lesson plan provided by Raddish Kids (which, by the way, has dozens of homeschool units even if you don’t subscribe to their recipe kits).

The lesson was a great way to talk about embracing and accepting difference, starting by asking Travis if he knew what it meant to be deaf. Once I explained the concept to him, it immediately became familiar since he remembers some of the Sign he used as a baby, and we use it now with little sister Veronika. A video link had neat biology about the ear.

Raddish provided lots of links which could make this a very detailed homeschool unit for older kids. We kept things simple and jumped ahead to learning a few songs in ASL, including Itsy Bitsy Spider.

Sign Language (5)

Veronika was grinning when we checked out a video for 16 animals in ASL, since she already knows most of these. She looked thrilled we were speaking “her” language.

Sign Language (6)

It was fun to go through the alphabet and Sign the kids’ names, too!

Sign Language (7)

You can add to the lesson by cooking a love-ly recipe or curling up with books on the topic. We read I Have a Sister, My Sister is Deaf by Jeanne Whitehouse, Hands & Hearts by Donna Jo Napoli, which had us learning a few new Signs, and The Deaf Musicians, a great book for onomatopoeia by Pete Seeger.

Sign Language (8)

Extend the unit with older kids by doing a biography of a famous deaf person. Fun suggestions include Beethoven or Helen Keller.

Pompom Puppets

Pompom Puppets (6)

Travis needed an art project for the first day of “home school”, so I turned to Highlights magazine for inspiration. It turned out the pompom puppets we tackled were a bit advanced for a kindergartner, but we sure got silly and had fun making them.

The method looked simple enough: Wind colorful yarn around the tines of a fork to make the body of a pompom.

Pompom Puppets (1)

Tie with a small piece of yarn in the center, making sure to tightly double-knot, then slide off the fork and snip the loops on either end so you have the frills of a pompom.

Pompom Puppets (2)

This sounded good in theory! But we quickly found out that the fork resulted in very small pom poms and they unraveled into pieces when we tried to cut the loops. Thinking quickly, we wound around mommy’s fingers instead! This resulted in workable pompoms.

Pompom Puppets (3)

To turn them into puppets, wrap colored felt around your child’s finger until it is the right size, then use glue to secure.

Travis helped pick out decorations for his silly creatures, but once again the project was a bit hard for small hands. I jumped in with a little hot glue to secure pipe cleaner antennae, wiggle eyes, and button decor according to his wishes.

Pompom Puppets (4)

What silly creatures!

Pompom Puppets (7)

Travis loved waving them on his fingers. Soon they even had little space pods to travel around in.

Pompom Puppets (9)

Plus he even had fun playing with the extra yarn from our failed attempts, in what turned into a very creative game. So these turned out to be great for imaginative play, even if the crafting was too advanced for him.

Pompom Puppets (8)


Do Nothing Day

Do Nothing (1)

Like many of you, we now find ourselves in a period of “social distancing”; school is closed for 3 weeks and we’re limiting our exposure to the rest of the world. Places that are familiar to the kids like libraries, museums, and local classes are shut down. So I pondered how to approach this period without scaring the kids. One idea? Turn the ability to do nothing into a game, at least for one day. As in: have a do nothing day!

The idea of no chores and no appointments and no assignments is sure to appeal to kids, turning what might otherwise feel like a strange break into a fun adventure. We almost always have at least one outing or activity daily, so today when the kids woke up I declared it a “Do Nothing Day”. We even could stay in our pajamas as long as we wanted!

Do Nothing (3)

Beds could go unmade.

Do Nothing (9)

Chores could be skipped and playtime was a must. The kids could lounge together on the couch eating snacks and watching a Disney movie.

Do Nothing (2)

Other perfect ways to pass the day? Building with Legos…

Do Nothing (4)

….coloring pages…

Do Nothing (8)

…and getting silly while cooking a recipe all fit the bill.

Do Nothing (6)

Obviously we won’t keep this up every day (home school for Travis starts tomorrow!) but it set things off on a playful, joyful note instead of a scary one.

A few other helpful tips to “social distance” without alarming the kids.

  • Get outside every day. Even a small patio or lawn will give your kids fresh air and a daily dose of nature, even when you avoid playgrounds and group areas.
  • Use Facetime and Skype. Stay in touch with older relatives or others you might not be able to see in person now.
  • Order groceries online. Though this is something I’ve skipped in the past, you’ll have peace of mind if you check out an online service instead of bringing kids to a crowded store.
  • Build your mom community: Set up a group text list, and you’ll keep each other sane virtually, answer one another’s questions, and get through this time “together apart”.
  • Have a routine every day. Kids thrive on routine. Now that our Do Nothing Day is done, each day will have scheduled time for reading, math work, quiet coloring or puzzles, crafts, and more.
  • But finally, a little extra screen time can’t hurt. And will help you keep your sanity.

Do Nothing (10)

Please stay tuned. I’ll have lots of activities and crafts in the days and weeks ahead. Wishing health to all.

Puffy Shamrock

Puffy Shamrock (6)

This easy shamrock makes the perfect good luck charm for your front door this St. Patrick’s Day!

Older kids can trace a shamrock shape themselves on green cardstock, but I took care of that part for Travis and helped him cut out along any tricky curves.

Puffy Shamrock (1)

Originally the plan was just to cover it with green pom poms and we had quite an assortment: small ones, medium ones, and sparkly ones!

Puffy Shamrock (2)

As soon as Travis saw some wiggle eyes in our craft bin, though, he knew our shamroock needed them, so those got glued on first.

Puffy Shamrock (3)

He began adding drops of glue and filled in all the remaining space of the shamrock with pom poms, sometimes having fun with a pattern (“3 sparkly, 1 plain!”), and sometimes just in random order.

Puffy Shamrock (4)

He was very precise about filling in any tiny gaps with the small pom poms near the end.

Puffy Shamrock (5)

Once the glue dried, I added a loop of green ribbon on the back so we could hang it from the doorway. Here’s hoping for the luck of the Irish!

Puffy Shamrock (7)

Ice Sun Catchers

Ice Suncatcher (5)

We’re in the very last days of winter here, so Travis and I wanted to try one last icy project! To start, he ventured outside to collect a few late winter/early spring nature finds, including old pine boughs, pine cones, and the first of the tulip petals!

Inside, we arranged these in the lids of Tupperware containers, along with a loop of ribbon for each. Travis was very deliberate about placing the items.

Ice Suncatcher (2)

If it’s still icy winter where you live, set them outside to freeze. We cheated a bit and used the freezer!

Ice Suncatcher (4)

Once completely frozen, run a little warm water around the edges of the lids and the sun catchers should release easily. Now hang them to sparkle in the sun!

Ice Suncatcher (6)

As a bonus, the nature items will simply fall back to earth once these melt, and all you have to do is collect the ribbons.

Ice Suncatcher (7)

Rainbow Craft Challenge

Rainbow Challenge (5)

Just in time for St. Patrick’s Day, Travis’s art challenge from Highlights magazine was to make a rainbow using tissue paper, glue, and… anything from the recycling bin!

So of course first we had to dump everything from the bin onto the floor. Travis loved going through the pile, including boxes and tubes and cans that we didn’t ultimately use for the project (some of which became props for his games all afternoon).

Rainbow Challenge (1)

A pizza box was the largest piece of cardboard available so that became our base. We glued down blue tissue paper for a quick background.

Rainbow Challenge (2)

I had bought tissue paper in every color of the rainbow, and assumed we would tear these into tiny pieces. But Travis had other ideas, and I loved watching him twist a sheet of each color into a rope, then glue these in rainbow order.

Rainbow Challenge (3)

A black bottle cap made a pot of gold and white tissue paper glued on to a container lid became a puffy cloud. Clever!

Rainbow Challenge (4)

Here’s hoping we have some extra luck whenSt. Patrick’s Day rolls around next week.

Peppermint Sugar Crystal Sticks

Peppermint Crystals (4)

If your kids love rock candy, they’ll be intrigued by this method to make it at home. Unfortunately, our spate of bad luck with crystallization projects continues, but here’s a step-by-step guide. I’d love to hear if your kids are successful with this one!

First, bring 1 cup water to a boil in a saucepan. Stir in 2 cups sugar and continue to cook at a boil until the sugar dissolves.

Peppermint Crystals (1)

Carefully pour the mixture into two small mason jars. Add a few drops of peppermint extract to each. Travis loved the way this smelled! Next he added a couple drops of red food coloring to one and green to the other.

Peppermint Crystals (2)

Ideally, use lollipop sticks to grow your crystal candy. We had to improvise and used toothpicks instead, which may explain our poor results. Dip these in the peppermint sugar solution, then roll in regular sugar. Use a clothespin to suspend them in the red and green liquid, making sure they don’t touch the sides or bottoms of the jars.

Peppermint Crystals (3)

Now wait!

Peppermint Crystals (6)

We did see a little bit of crystallized liquid form near the surface of the jars after about three days, which we could skim up with a spoon, but nothing crystallized on the toothpicks.

Peppermint Crystals (5)

Well, that didn’t deter Travis from spooning up some sugary liquid for a quick snack!