Paper Bag Village

Bag City (6).JPG

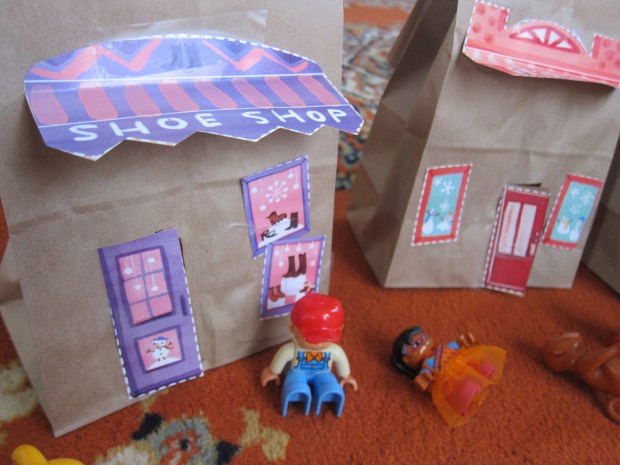
There was a bonus activity in Travis’s latest issue of High Five magazine: doors, windows, and awnings to cut out and affix to paper bags to make a whole paper bag town. All you need to supply are the paper lunch bags.

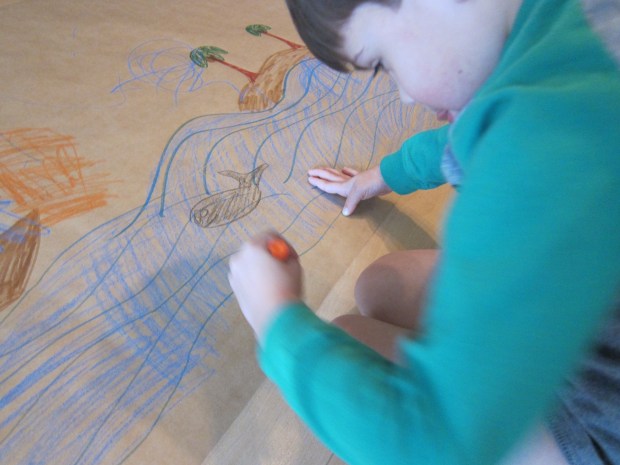
This was quite similar to a little village Travis and I put together recently, but oddly this time he was way more into it – I think because the doors and other building details came ready-made and he loved the way they looked!

Bag CIty (1)

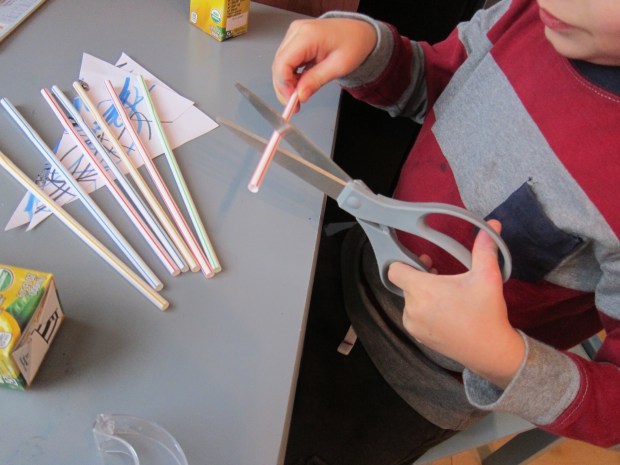
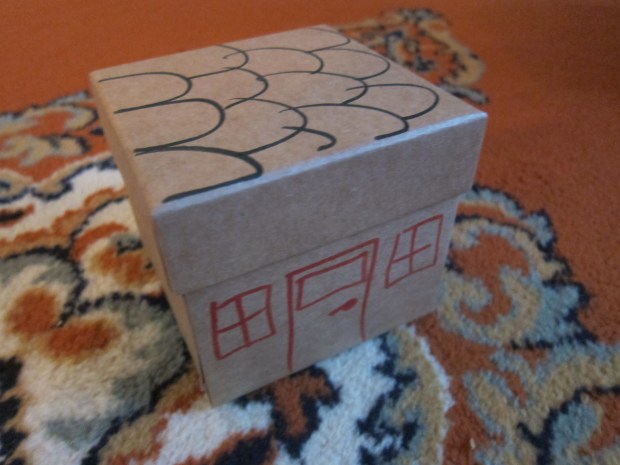
Cutting along the dotted lines is great practice for little hands, though I had to help with some of the trickier shapes like awnings.

Bag City (2)

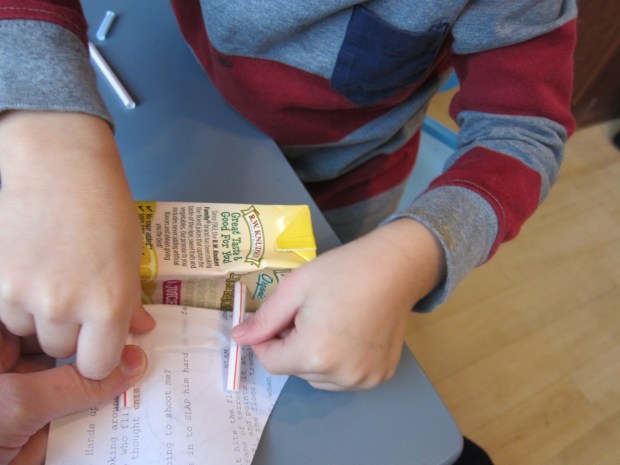
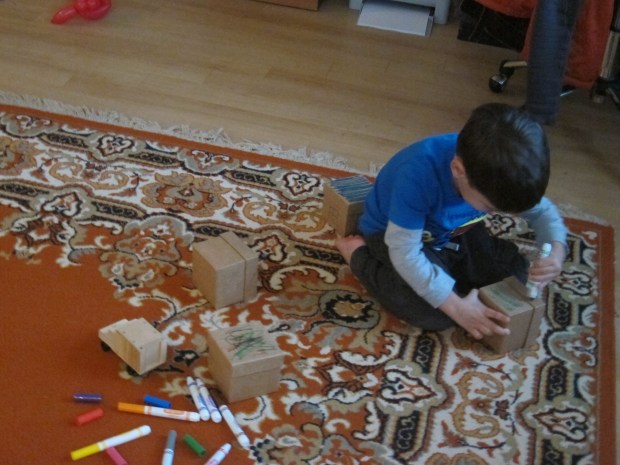
Travis preferred taping on the features rather than gluing, so that we could play right away.

Bag City (5)

Pretty soon we had: a library; a shoe store; a school; a toy store; and a bakery.

Bag City (4)

The instructions recommend stuffing with newspaper so the buildings hold their shape, before taping closed, but Travis insisted that he be able to open and close the doors. I made a cut out in the bag around each taped door so that he could swing them open and closed, and let Duplo people go inside.

Bag City (3)

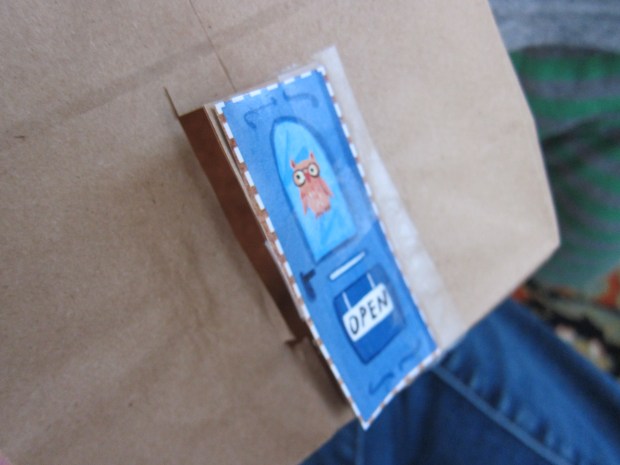
This meant we left the bags un-stuffed, so they were a bit flimsier, but he had such a blast it hardly mattered!

Bag City (8)

Cute idea, thanks High Five!

Bag City (7)

Little Tree Crate

Little Tree final.JPG

We loved our Swirly Ornaments holiday crate from Kiwi Co., and the kit for Little Tree turned out to be just as wonderful. The project set the stage for a festive mood inside our apartment on a drizzly December morning. Read on!

To start making the tree, we first needed to do some math, dividing the kit’s green pipe cleaners into two equal piles. This was a neat way to introduce Travis to counting out two sets of something, just as you would for dealing out cards in a game, for example.

Little Tree (15)

Cut the pipe cleaners from one pile in half, and leave the others long.

Insert the provided wooden stick into the round wooden stand.

Little Tree (16)

Starting with the long pipe cleaners, wrap around the stand.

Little Tree (17)

Repeat with the short pipe cleaners. Travis loved the wrapping, and insisted on doing so himself for each one.

Little Tree (4)

Adult step: snip the pipe cleaners at an angle, so your tree is a triangle shape. Travis was really psyched to see our fake tree in the same tapered shape as our real tree.

Little Tree (5)

Peel the backing off a provided star sticker, and attach at the top of the tree.

Little Tree (6)

Next up, thread on the provided beads and bells as ornaments. “Which are ornaments and which are lights?” Travis wanted to know.

Little Tree (9)

Good question, but either way, all beautiful!

Little Tree (10)

To make the base, use any round bowl to trace a circle onto the provided red felt.

Little Tree (11)

Cut out and decorate with the provided gold glitter glue.

Little Tree (14)

Travis was equally delighted by the “presents” that can go under the tree – two wooden cubes, onto which we glittered-glued pom poms.

Little Tree (13)

You can set your tree out as a pretty decoration, and we also plan to leave it alongside cookies and non-dairy milk for Santa on Christmas Eve! It’s also the perfect size to be a play tree for your child’s stuffed animals.

Little Tree alt.JPG

To round out our festive morning, we made hot cocoa and added in a cute Snowman-themed spelling lesson from Education.com.

Little Tree (1)

This fun picture word match was a great way to cuddle up inside during the cold winter months and practice Travis’s spelling skills. For more spelling activities and printables like this check out Education.com!

Little Tree (2)

In sum, we had all the makings of a cozy winter morning.

Little Tree (3)

Swirly Ornaments Crate

Swirly Ornament (8).JPG

Kiwi Company occasionally puts out special holiday-themed crates, and we’ve been holding on to this one since last December! Reading the title on the box, I imagined the final product would be ornaments with beautiful swirls. Little did we know the method to make the ornaments was swirly, too!

Travis was so excited seeing the three plastic globe ornaments, since we had just set up our tree. Add two of the provided watercolors (in primary colors) to each globe for a quick lesson in color mixing. You’ll be able to make one orange, one green, and one purple ornament. Next squirt in a drop of the glittery silver paint.

Swirly Ornament (1)

Add a marble, and get swirling! As you swirl, the marble will help the paint coat the entire globe.

Swirly Ornament (3)

As a parental aside, this was very precarious proposition with a four-year-old. Of all the Koala projects we’ve ever done, this was by far the messiest! It was quite hard for Travis to swirl enough to coat the inside of the ornament without also spilling paint, so step in if you need to.

He loved the drying method that came next though; upend the ornament over a provided paper cup. The marble and any excess paint will fall out.

Swirly Ornament (2)

We set ours aside to dry for about an hour.

Swirly Ornament (4)

Ideally, flip the ornaments at this point and allow to dry on the inside, too, overnight. Travis was too impatient though and wanted to pop in the provided corks and seal them up!

Swirly Ornament (5)

To finish each ornament, we wrapped a sparkly pipe cleaner around the neck.

Swirly Ornament (6)

Add a silver ribbon (a great chance to practice tying a bow), then thread a provided bell onto the pipe cleaner. Hook the end.

Swirly Ornament (7)

Now it’s ready to hang on your tree!

Swirly Ornament (9)

The kit also suggested gifting the ornaments (just slip on a gift tag and it’s ready to go)…

Swirly Ornament var

…or attaching one to your stocking as a sparkly decoration.

Swirly Ornament alt

Let the holiday season begin!

Swirly Ornament (10)


Juice Box Pirate Ship and Flags

Juice Boat (6).JPG

This is likely the last of the boats Travis and I will make for a while, but a few lemonade juice boxes in the fridge made us decide to construct one last version before we put our pirate games to rest!

First, enjoy a juice box of course.

Juice Boat (2)

Once it’s empty, I recommend taping over the hole where the straw was, to avoid juice leaking out (or your boat filling with water in the tub).

Pierce two holes in the top of the juice box for the masts (grown-up step!).

You can use the juice box straw for the mast, but we found that thicker, regular plastic straws were sturdier. Snip these into thirds, and use two of the pieces for this project.

Juice Boat (4)

Travis loved snipping the straws so much, I had to redirect him for the rest of the boat!

Juice Boat (3)

Decorate a piece of paper with markers or stickers to make your sail, then cut into a triangle shape.

Juice Boat (1)

Tape onto the two masts, and you’re ready to set sail on the seven seas.

Juice Boat (5)

These are perfect little boats for bathtime, although they won’t hold up very long – the paper sails especially are only good for a short while.

Juice Boat (7)

Travis decided the paper sail was too flimsy. We had leftover pirate stickers, so decorated a big piece of red foam instead.

Pirate Flags (2)

Although not attached to the ship, he loved doing this, and waving it around. You could even teach a bit of the history behind pirate flags, often flown to scare merchant ships so they could take them over without ever having to fight.

Pretty scary!

Pirate Flags (4)


Apple Art for Tummy Time

Apple Tummy (5)

This is an adorable black-and-white art project you can use to enhance baby’s tummy time – and big sibs might want to get in on the craft, too!

First, I cut an apple in half, and painted the halves with a thick coat of black paint.

Apple Tummy (1)

Press the apples onto sturdy white paper. I made a row of three apples per page.

Apple Tummy (3)

To vary the image, you can also paint in full apples with little stems.

Apple Tummy (2)

I invited Travis to have a go at making a print, too, and we came up with this more abstract version:

Apple Tummy (4)

For Veronika’s tummy time, we folded the papers in half so they could stand upright, and surrounded her with a little apple forest. These are great for pointing too, and talking about the image.

Apple Tummy (6)

We also sang “One little, two little, three little apples…” etc. to the tune of Ten Little Indians. You could also make up stories about apples!

Apple Tummy (7)

What is your baby looking at for tummy time? Please share in the comments!

Origami Boat

Origami Boat (10)

Travis and I have been finding neat materials from which to make boats, now that we’re on a bit of a pirate kick. I found the instructions for this origami boat online, and thought it looked fun. It turned out to be quite tricky, but Travis and I had a ball, laughing at our gaffes, and cheering when we got it right!

Ideally use origami paper, but construction paper works in a pinch. Either way, begin by trimming into a rectangle. Fold the paper in half horizontally, and open back up. Fold in half down vertically and leave folded.

I was so proud Travis wanted to do his own folding!

Origami Boat (2)

Next fold the upper two corners into the center crease, forming two triangles.

Origami Boat (3)

Fold up the bottom of the paper on both the back and front – now it looks like a pirate hat!

Origami Boat (4)

But don’t stop there. Now you’re going to push the bottom two corners toward each other, a process that really only makes sense once you feel it intuitively. It will make the paper into a square that folds flat (hint: tuck in the excess flap on the front and back).

Origami Boat (5)

Now fold up the bottom of this diamond on both front and back, pressing flat.

Origami Boat (6)

Take the edges of this triangle toward the center – another tricky step! You’ll form another square. We had a good giggle over this one as we figured it out!

Origami Boat (7)

Finally, pull the top corners out, and press flat – now you have a boat!

Origami Boat (8)

It should hold pretty well, but for a little added security, I stuck masking tape on the edges.

Origami Boat (9)

Travis was SO proud, an loved his boats so much that he requested a fleet. I soon became pretty adept at making them, so he had lots of boats to fly around the apartment.

Happy folding!

Pirate Telescope Spotting Game

Telescope Game (6).JPG

Travis and I can’t get enough of pirate games these days, and this fun activity engaged us on multiple levels – as an artistic craft to start, and then as a competitive game. If you have enough kids, it would be perfect to play at a pirate-themed birthday party!

First, we needed to set the scene. We originally intended to paint on a big piece of craft paper (a large piece of cardboard would work, too), but we were out of blue paint – you can’t have an ocean scene without blue!

Thinking quickly, we switched to markers and crayons. I drew Travis a basic scene: ocean, pirate ship, desert island. Big kids may want to take charge of this part themselves!

Telescope Game (2)

Next we needed a couple of telescopes. Some decorative washi tape and an empty paper towel tube made one quite quickly.

Telescope Game (1)

We tried to make a stacked telescope by layering cups together. This might have worked more easily with paper cups, since we had to tape two plastic ones together (and work carefully to snip out an eye hole), but the tape sort of ruined the look.

Telescope Game (3)

This image is way more what we were going for.

maxresdefault

But there wasn’t time to be fussy! (We fit this game into baby sister’s nap), so now it was time to test our pirate spotting skills.

Telescope Game (5)

Taking turns, one person added something to the ocean landscape, and the other pirate looked through the telescope to discover what was new.

Telescope Game (4)

This was a great challenge for Travis’s budding art skills. He had fun drawing me a treasure chest, a starfish, and more.

Telescope Game (7)

And he loved spotting the items that mommy pirate drew, like a whale and a parrot.

Telescope Game (8)

As mentioned, you could have a whole group of kids play this at a party, and turn it into a competition for who spots the new item first!

Enjoy, landlubbers!


Turkey Napkin Holder

Turkey Napkin (7)

We put together this cute craft from High Five magazine just in time for Thanksgiving. In our vegan household, we love adorning our table with turkey-themed crafts, not a real turkey to eat.

But as we sat down to make these napkin holders, Travis and I discovered that we had every color construction paper except… the brown that we needed! Some quick thinking and we decided to color white paper in with brown crayon. Travis declared this so fun, and seemed so proud of our improvisation.

Turkey Napkin (1)

Next we needed to cut the brown paper into kite shapes. This was a bit tricky for Travis, so I trimmed things up into neat diamonds while he had fun with safety scissors and extra paper.

Turkey Napkin (3)

Armed with our kite shapes and a few recycled toilet paper tubes, we glued the tubes to the center of each piece, and folded up over the tube.

Next we glued on facial features, a good chance to talk about shapes – circle eyes, triangle beaks, and a semicircle for the wattle.

Turkey Napkin (2)

Travis favorite part was the feathers at the end. Add dots of glue to the paper behind the head.

Turkey Napkin (5)

Crumple bits of fall-colored tissue paper (we used reds and yellows and pinks) and attach each to a dot of glue.

Turkey Napkin (6)

Slip in a Thanksgiving napkin, and enjoy the feast!

Turkey Napkin (8)

Mini Box Houses

Box Houses (7)

Well, here’s yet another example of my 4-year-old having a mind of his own, taking a game I intended one way in another direction entirely – but loving every minute of it!

We’ve been having lots of fun with various materials, finding ways we can make cities lately, and have used everything from paper bags to old cereal boxes to tape.

This time, we pulled out some papier mache craft boxes, which I thought would make adorable houses, and I encouraged Travis to draw windows and doors. But he said he just wanted to color them – the entrance was through the roof!

Box Houses (2)

Pretty soon we populated our village – a rock with a smiley face, a stuffed turtle, and “Blocky the Block.” Pet rock friends would make great village residents, too.

Box Houses (5)

The game got really fun when we poked a hole in each door with a tiny key, and he twisted the key in every door to let in his residents. He was busy with this for ages while I prepped dinner!

Box Housees (6)

Eventually he did draw some doors, too, making great rectangles – great pen control practice!

Box Houses (3)

Overall, these little boxes provided ages of great fun.

Box Houses (4)

Have you tried making any of our craft houses? Which was your child’s favorite? Please share in the comments!

Box Houses (1)

Make Your Own Building Blocks

Own Building Blocks (4)

I have a preschooler who definitely needed attention this morning, and it’s a good thing I had a game waiting in the wings! For a couple of weeks now, I’ve been saving old food boxes (cereal cartons, cracker boxes, tea, etc.) in various shapes and sizes, and now it was time to put them to multiple uses!

First we had to cover the blocks in wrapping paper, which Travis loved, especially helping with the tape. We decided we liked using brown craft paper best, although solid colored wrapping paper would be fine.

Own Building Blocks (1)

Travis immediately took to stacking the boxes, so proud of his creations!

Own Building Blocks (3)

Pretty soon thereafter it was Batman’s fortress.

Own Building Blocks (5)

I took the time to draw house details – doors and windows – and we set up a cute Duplo main street…

Own Building Blocks (6)

…but this didn’t interest him for long.

Own Building Blocks (2)

A much bigger hit was… box bowling!

Own Building BLocks (7)

Set up the boxes and take aim.

Own Building Blocks (8)

Next, we took our stacking to the next level by adding cups.

Own Building Blocks (9)

It was a neat architectural challenge to encourage him to use paper cups in between each box layer.

Own Building Blocks (10)

You can also make the blocks more educational. Can you sort the boxes by size, for example?

Own Building Blocks (11)

Or, turn them over and write the letters of your child’s name, one per box. I was so proud of how quickly Travis had his letters in the right order!

Own BUilding Blocks (12)

Finally, have some good, silly fun. We made a fort and threw cup bombs at each other. Who knew you could do so much with a few boxes?

Own Building Blocks (14)