Test the Grasp Reflex

Grasp REflex (6)

Babies are born with several reflexes, such as the rooting reflex (turning to follow with an open mouth if the side of the mouth is touched) and the Moro reflex (that particular, funny way in which babies startle).

But perhaps the cutest is the grasp reflex. Your little one’s tiny hand is remarkably strong, and if you stroke the palm, those mini fingers will grasp tightly.

Grasp Reflex (3)

Test your baby’s reflex at a quiet moment by placing your pointer finger in his or her palm. Almost certainly the little hand will clench shut. Snap a pic if you can, and encourage siblings to test out how strong the newest member of the family is, too! Not only are you creating a sweet memento, but you’re double-checking your baby’s healthy reflexes in the process.

Grasp Reflex (1)

Print out the photos and place in a small frame. These would be lovely to display somewhere in the nursery… Or tuck them into your newly created Memory Box!

Grasp Reflex (4)

Coffee Filter Fish

Coffee Fish (9).JPG

Pretty rainbow fish are lighting up our doors and windows these days! This is an easy activity you can do with your child almost any time, requiring only coffee filters and markers.

First, be sure to cover your work surface (things will get wet!) and prep your materials. You’ll need permanent marker for this craft, not the washable kind, which made Travis feel very grown up.

Before he even started coloring our white coffee filters, he grew impish… Who doesn’t just want to spray water?

Coffee Fish (1)

He slowed down once I demonstrated how to color in a filter as completely as possible for the best results, so the colors will bleed together. Then he got to soak my marker-covered filter.

Coffee FIsh (4)

Now he had the idea!

Coffee Fish (5)

He scribbled in various color combos, declaring this one was a library fish, that one was a doctor fish, etc.

Coffee Fish (6)

We left our filters to dry completely.

To complete the fish, cut a triangle from one part of each circle as the mouth.

Coffee Fish (7)

Glue the triangle onto the opposite side of the circle – voila, a tail!

Coffee Fish (8)

Finish by drawing in eyes, and hanging the fish some place where they will catch the sunlight.

Coffee Fish (10)


Watercolor Resist Painting

Watercolor Resist (8).JPG

Our recent Cityscape crate from Koala Crate reminded me of the beauty of resist painting, which we haven’t done in quite some time. That was the inspiration for this beautiful ocean-themed project!

No need to have strong artistic skills; I printed a template for our sea creatures and traced each one onto contact paper.

Watercolor Resist (1)

Cut out and attach each animal to a piece of watercolor paper.

Watercolor Resist (2)

We talked about ocean colors as we added watercolors, which had Travis proudly concentrating on blues, purples, and greens.

Watercolor Resist (4)

It was an interesting lesson that the watercolor wouldn’t spread across the plastic surface of the contact paper!

Watercolor Resist (3)

If your child tires of painting before the entire paper is covered, that’s fine; just be sure the watercolors reach all the edges of the animal shape.

Watercolor Resist (6)

Let dry, then peel off for the big reveal. Wow!

Watercolor Resist (7)

Snack Cup Jellyfish

Snack Jellyfish (6).JPG

Travis currently adores any animal with lots of long legs, be it the eight-legged octopus or the many tentacles of the jellyfish, so I knew he’d love this simple. fun craft. It’s the perfect way to make use of canned fruit or applesauce cups once your snack cup is empty!

Snack Jellyfish (1)

We rinsed the snack cups, and then covered with a layer of glue.

Snack Jellyfish (2)

I gave him squares of red and orange crepe paper (tissue paper would work, too), and we layered them until our jellyfish bodies were covered. Let dry.

Snack Jellyfish (3)

His favorite part was adding the tentacles, carefully applying a dot of glue on the inside of the cup where each should go, and attaching a long ribbon of crepe paper.

Snack Jellyfish (4)

Add two eyes to the body of the jellyfish, and let dry again.

Snack Jellyfish (5)

Finally – time to play with Mr. Jellyfish! These are wiggly and wonderful to “swim” around your home.

Snack Jellyfish (7)

If you prefer to use them more as decoration, poke a small hole in the top of the snack cup and thread through a string. Hang near an open window or air vent where you can watch them sway.

Chalkboard Painted Block Puzzle

Chalkboard Puzzle (6).JPG

Travis has been home sick from school this week, so we’ve been looking for quiet, indoor games. Puzzles are a fantastic way to keep a child entertained when under the weather, engaging their mind while letting their bodies rest. A little leftover chalkboard paint helped us make up a craft-y version, as well!

While Travis rested, I painted wooden cubes (available at craft stores) with chalkboard paint on all sides. For the least mess while drying, paint 3 sides and let dry, then flip over and paint the remaining 3 sides.

Chalkboard Puzzle (2)

Ideally I would have used larger cubes, but the small ones I had on hand worked just fine. Once the paint dries, take turns with your child making drawings in chalk, and having the other person assemble.

Chalkboard Puzzle (4)

To wit, I designed a car and flower for Travis.

Chalkboard Puzzle (7)

He was briefly into the puzzles, but more intrigued with the idea of chalking all over the squares.

Chalkboard Puzzle (3)

Even more fun was how easily they can erase with just a swipe of a wet paper towel, when you’re ready to change the design.

Chalkboard Puzzle (5)

Here he is making a puzzle for mommy – hope I can figure out the right way to put all those green squares together!

Chalkboard Puzzle (9)

The perfect activity for any time you need to lie low.

Paper Bag City

Paper Bag City (7).JPG

Following our fun with Koala’s city-themed crate, we constructed our own city at home, using nothing but extra paper lunch bags!

First, paint the bags to resemble buildings, with one color on the bottom, and black (or another second color) on top for the roof. This turned out to be more of a puzzle for Travis than I imagined, since he just wanted to paint the bags any which way. Providing a guiding line for him helped…

Paper Bag City (4)

…But the point is never perfection!

Paper Bag City (1)

I let him decorate a few houses to his own taste, and made a few others to add to our city. Let the paint dry completely.

Paper Bag City (2)

If your child wants to paint on features (doors, windows), they can do so. Instead, I added those later with permanent marker.

Paper Bag CIty (8)

To finish your town, fill each bag with about 1 cup dried beans to weight it down. Fold the top edge over and tape into place.

Paper Bag City (5)

You can set the buildings up on a car playmat, or just on the floor. Bonus points for toy vehicles in your city!

Paper Bag City (10)

Since this particular city belonged to a four-year old boy, soon we had villains knocking down the houses… He sure does come up with games I never would imagine!

Paper Bag City (11)

What buildings will be in your town? Please share in the comments!

Pineapple Pumpkin (and More Pumpkin Fun)

Pineapple Pumpkin (8)

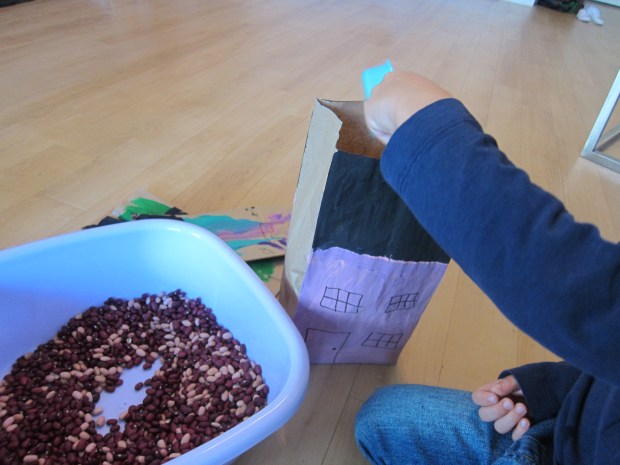
We had so much fun at the pumpkin patch this year; Travis needed to come home and carve one right away. We even sorted and saved the seeds for roasting (full recipe below). With our final three pumpkins, we got a little craftsier, putting together these three painting projects.

First up was Mr. Pineapple Pumpkin. Paint your pumpkin with a layer of yellow acrylic paint and let dry overnight.

Pineapple Pumpkin (1)

Once dry, I added upside-down V marks with a sharpie to mimic the exterior of a pineapple.

Pineapple Pumpkin (4)

Travis helped glue on two eyes, and we used dot stickers (cut in half and slightly overlapped on the top) for the mouth.

For the pineapple stem, attach two pieces of green sticky-back craft foam together, leaving a sticky overhang on either side. Cut leaf-like shapes into the foam. Attach one sticky portion to the stem, then wrap tightly and use the remaining sticky edge to hold the “stem” in place.

Deck out your pineapple fellow with a blingy pair of shades for the final touch!

Pineapple Pumpkin (5)

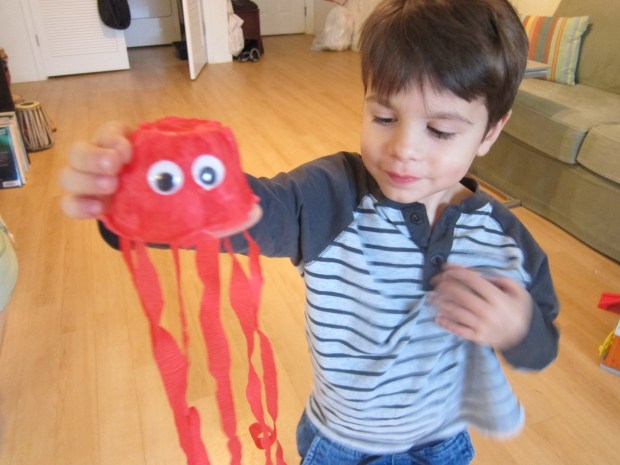
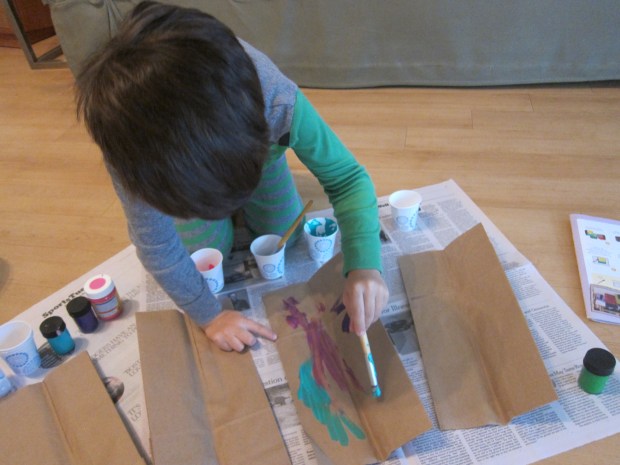
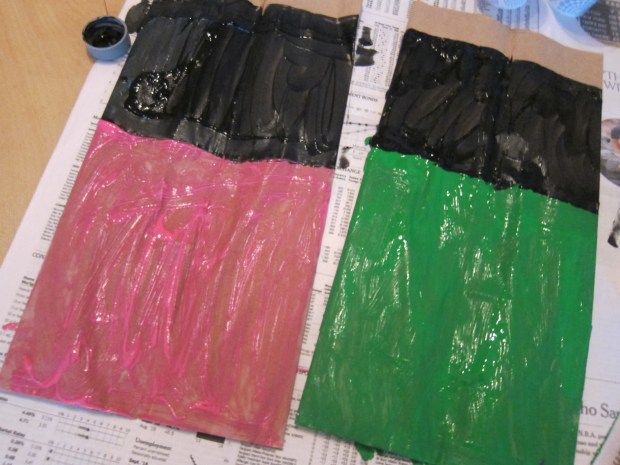
Needless to say, this particular pumpkin craft required significant adult help for a four-year old. For something he could do entirely on his own, I set Travis up with puffy paints and a whole pumpkin.

Pineapple Pumpkin (2)

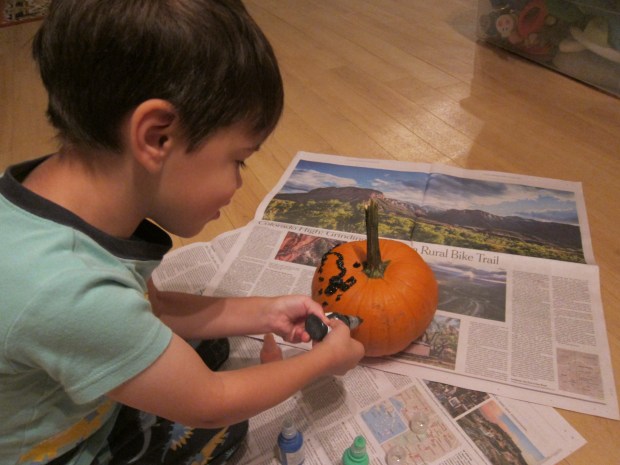
He loved squeezing out all the colors, which almost looked like goopy spider webs.

Pineapple Pumpkin (7)

Kids who are too young to carve might also love attaching feathers to a pumpkin, or sticking on pre-cut foam shapes for a funny face. Many sets of facial features come available in craft kits, and Travis enjoyed selecting this goofy look.

Pineapple Pumpkin (6)

What pumpkins are adorning your stoop this year? Please share in the comments!

I’ll leave you with this easy pumpkin seed recipe:

Scoop seeds from 1 pumpkin (about 1 cup). Rinse well and pat dry. 

On a baking sheet, drizzle with 1 and 1/2 tablespoons melted butter and sprinkle with 1 teaspoon salt.

Roast at 200 degrees F for 40 minutes. Increase the heat to 325 degrees F and roast a final 5 minutes.


Leaves + Contact Paper = Fall Placemat

Fall Placemat (5).JPG

It’s been a rather disappointing autumn for leaf color in our neck of the woods, with oddly warm temperatures keeping the leaves stubbornly green. Happily, we returned home from a recent nature walk with enough leaves that had managed to turn shades of red, orange, and yellow, and knew we needed a quick project for them. Here we are on the hunt – it’s finally cold!

Nature alph (4)

If you want to make this a science project as well as an art one, talk about how the leaves stop producing chlorophyll this time of year, which reveals the hidden autumn shades under the green. I touched on the matter briefly, but really we were just happy to come home with pretty finds.

Fall Placemat (2)

To easily preserve your leaves, make this placemat:

Place a piece of contact paper, sticky side up, on a work surface. Travis got impish at first, and wanted to stick his hands to the paper a few times!

Fall Placemat (1)

Encourage your child to arrange the leaves in whatever manner they see fit, varying the shapes, size, and colors until they are happy with their arrangement.

Fall Placemat (3)

Seal the leaves by placing a second sheet of contact paper, sticky side down, on top. Trim to size and voila – you have the perfect fall placemat.

Fall Placemat (4)

If you have the inclination and enough leaves, go ahead and make several; these would make wonderful holiday placemats. For Thanksgiving decor, perhaps?

Fall Placemat (6)


Puffin Costume

Puffin (10)

Our October issue of Ranger Rick Jr. featured a cover story on puffins, with information inside about these bright-beaked birds. If your child is still looking for a Halloween costume, consider putting together this DIY puffin outfit. It’s perfect for trick-or-treating… or just everyday dress up!

Because we were making the costume simply for play at home, I skirted a few corners. But you can be more exact if this will actually be the Halloween garb of choice for your child.

First, make the puffin’s head. Fold a 20 inch x 12 inch piece of white felt in half. Draw the head shape (available from the online template) onto one side of the fold and cut out.

Puffin (1)

Add two “head top” shapes cut from black felt with fabric glue or a hot glue gun. Next cut the beak shape from orange construction paper and glue on as well. Let dry.

Puffin (2)

We added details like eyes and feathers with a marker. Here is my very serious puffin testing out the headpiece.

Puffin (7)

The piece of black felt I had at home was big, but not quite large enough for the suggested wings – a full 34 inch x 18 inch rectangle! So working with what I had, I traced on the wing shape from the template in chalk, and cut out. I added a ribbon to tie around Travis’s shoulders; if you are using truly large enough felt, part of the felt itself will become the tie.

Puffin (5)

Finally, we needed puffin feet. Trace the foot shape onto orange craft foam and cut out; add details with marker.

Puffin (6)

Poke a pipe cleaner (ideally orange) through the middle of each foot shape, and wrap around the thong of a flip flop. If you’re going all out for Halloween, make sure your pipe cleaners and flip flops are orange too! Yellow pipe cleaners and some old summer flip flops worked for us in a pinch.

Puffin (9)

Finish a true puffin costume with a white shirt and white pants.

My little bird was happy just to fly around the apartment.

Puffin (8)

What a cute idea this was!

Easy Pinecone Wreath

Pinecone Wreath (5)

We’ve had a kindness wreath up on our door for over a year now – a project that we loved, but the time now feels right for a change. We used fall nature finds to craft this easy wreath on a store-bought twig frame.

As the title of this post suggests, you’ll need pinecones of course, but feel free to add other treasures that your children bring in from nature. We added some beautiful fall foliage!

Pinecone Wreath (1)

You can use ribbons to attach the pinecones, but I worried this wouldn’t be strong enough. Instead, we wrapped floral wire around each pinecone – Travis loved this new material (under adult supervision, of course).

Pinecone Wreath (2)

I did the wire wrapping, but he selected the perfect spot on the wreath for each pinecone.

Pinecone Wreath (3)

To attach the leaves, we simply tucked in their stems.

Pinecone Wreath (4)

Is there a homemade wreath hanging on your door for this autumn? Please share in the comments!

Pinecone Wreath (6)