Spare Part Sidekicks

Spare Part Sidekicks (4)

We’ve done projects in the past that are meant to clear out the craft bin; this project is similar, except was meant to clear out the tool box! Now’s the chance to use all those spare parts you might have lying around (think: paper clips, brads, washers, corks, screws, and bits of yarn).

Spare Part Sidekicks (1)

As a base for Travis’s pals, we used spare pieces of wood from a relative’s woodshop. If you don’t have wood scraps, rinsed out metal cans work great, too; just add tape around the rim to cover any sharp edges.

Spare Part Sidekicks (2)

Travis worked on the layout for each “sidekick”, deciding where the spare parts should go. He particularly wanted to use a cork as a big nose for one!

Spare Part Sidekicks (3)

I then handled the assembly since it involved hot glue. If your child wants to tackle the project solo, use glue dots instead.

Spare Part Sidekicks (6)

These sidekicks were ready to play!

Paper Plate Chick

Paper Plate Chick (5)

Spring is in the air, which always has us thinking of baby animals, especially little yellow chicks! This particular chick craft doubles as a handprint memento of your toddler.

To start, I squirted yellow fingerpaint into a cup and Veronika helped paint a paper plate. “I’m painting!” she said so proudly.

Paper Plate Chick (1)

Imagine her surprise when I took a paintbrush and painted some of that yellow right onto her palm. Press down onto white paper and repeat with the other hand. “I left a paw print!” she said, referencing her current favorite show, Blue’s Clues.

Paper Plate Chick (2)

Let the paint dry, then cut the handprints out and use tape or glue to attach to either side of the paper plate, forming the wings. I taped a few feathers onto the back of the plate, as well, so they would stick up from the top.

Paper Plate Chick (4)

Only a few final details were needed now: a little scrap of feather for a beak, two wiggle eyes, and orange marker for legs.

Tipping Egg Toy

Tipping Egg Toy (9)

Here’s a silly DIY bobble toy, for which all you need is a leftover Easter egg, either plastic or wooden.

We used a wooden one because we wanted to paint it first. Little blue pants, an orange tie, and a thick black mustache made a dapper looking little fellow. Kids could also paint their egg more like traditional Easter eggs, with dots or stripes.

Tipping Egg Toy (1)

Travis giggled when he saw the little fellow!

Tipping Egg Toy (2)

Next, you’ll need to add a weight in the bottom half of the egg. Travis loved pressing clay down into the bottom of ours, and we added a marble for good measure. If you have no clay, you may need to secure your weight with hot glue.

Tipping Egg Toy (3)

Give it a push with a finger and watch your egg wobble up and down, thanks to the weight at the bottom!

Tipping Egg Toy (7)

Here he is in mid-motion!

Tipping Egg Toy (6)

As a bonus, Travis loved playing with leftover clay for a while after, being artistic in a way I haven’t seen from him in quite a while!

Tipping Egg Toy (8)

Primary Color Rainbow Suncatcher

Rainbow Suncatcher Primary Color (8)

St. Patrick’s Day gets us thinking about all things rainbows and pots of gold. Here’s a neat way to show a toddler how to make a full rainbow… just from the three primary colors!

To start, I cut an arc from contact paper and taped it down to the floor. I then cut lots of tissue paper squares in red, yellow, and blue. I had these mixed in our craft tray which I soon worried was a mistake, instead of sorting them. But the big messy mix turned out to be half the fun!

Rainbow Suncatcher Primary Color (1)

To make the rainbow, you’ll need to work deliberately row by row. An outer row of red is followed by an overlapping yellow (to make orange), then plain yellow. Next overlap blue (to make green), then add a row of plain blue. Finally, overlap a little more red and you’ll get a bottom row of purple.

Rainbow Suncatcher Primary Color (3)

Veronika wasn’t old enough to understand that the colors needed to stay in their proper rows, but I soon realized the benefit of having mixed all the colors in the tray; she was the perfect helper to find me each right color. “Now let’s find only red squares!” I told her, and she happily dug through the tray.

Rainbow Suncatcher Primary Color (2)

Then she discovered how fun it was to make the tissue paper rain down as I finished up the rainbow.

Rainbow Suncatcher Primary Color (5)

The real engagement with the craft began for her once the suncatcher was taped to the window. Of course there’s the obvious element that now it sparkled and shone…

Rainbow Suncatcher Primary Color alt

…but now the full rainbow magically appeared as well. Where red and yellow overlapped, there was orange; yellow and blue made green, and blue and red made purple. We sang rainbow songs and Veronika loved following the arc of it with her fingers.

Rainbow Suncatcher Primary Color (7)

Next she pretended her favorite toy was sliding up and down it! We’re going to keep this beautiful rainbow suncatcher in the window to cheerfully greet the spring.

Rainbow Suncatcher Primary Color (9)

Sandpaper Shamrocks

Shamrock Threading (4)

I happened to have a sheet of green sandpaper, and realized it would be perfect for a few Irish shamrock crafts as we gear up for St. Patrick’s Day!

For the first project, I cut small shamrock shapes from the green sandpaper, and then used a hole punch to add a hole near the top of each. A piece of green lacing cord would be perfect for threading!

Shamrock Threading (1)

I encouraged Veronika to thread the lace through the hole of each clover. After a few tries, she seemed to tire of the task so I finished up her necklace.

Shamrock Threading (3)

She sure loved wearing this adornment, though! I realized it will make a great homemade alternative to the light-up shamrock bling the kids usually get at the St. Patrick’s Day parade (cancelled of course this year).

Shamrock Threading (5)

Note: If you don’t have green sandpaper, you can also cut the shamrocks for this necklace from green construction paper. A shoelace would work well for the thread!

For the second project, I cut several sizes of shamrock from green and orange sandpaper.

Shamrock Rubbings (1)

I placed these under regular white paper and showed Veronika how to rub over them with the side of a green crayon. The shamrocks are magically revealed!

Shamrock Rubbings (4)

She needed a little help for this step, especially rubbing the crayon with enough force, but she also proudly wanted to try it solo.

Shamrock Rubbings (5)

It was particularly neat to see how different textures of sandpaper came through; the rougher green sandpaper resulted in a darker and more pronounced rubbing than the fine-grained orange sandpaper.

Shamrock Rubbings (6)

“It’s a shamrock!” she said with delight each time. Both of these crafts are a great way to introduce toddlers to the symbolism and colors of St. Patrick’s Day.

Shamrock Rubbings (8)

Potato Stamped Crafts

Potato Stampers Press (11)

It just doesn’t feel like St. Patrick’s Day without a little potato art, a fun way to introduce a new painting “tool” to toddlers. The simplest of all is to make potato prints and here are a few fun ways to make that oldie-but-goodie feel novel.

Potato Stampers Press (1)

First, I set out a dish of green paint (for the Emerald Isle of course) and showed Veronika how to dip the cut sides of a raw potato in the paint, then press onto a piece of paper. Cover the paper with lots of prints and you have a pretty little piece of artwork!

Potato Stampers Press (2)

For something with more of a design element, I showed Veronika how to press four prints together so they looked like the four leaves of a clover.

Potato Stampers Press (5)

All you need to do is add a stem with green marker!

Potato Stampers Press (12)

She also thought it was neat to dip the potatoes in paint and then smear across the paper instead of simply stamping.

Potato Stampers Press (7)

We got some really neat swirls and designs like this!

Potato Stampers Press (4)

Of course there’s no need to stick with green paint, or even the St. Patrick’s theme, especially if you try this craft at another time of  year. To wit, Veronika chose a little pink paint and we made a few pink-stamped ovals with it.

Potato Stampers Press (3)

Once the paint dried, I cut out triangle and oval shapes from pink construction paper to be a pig’s ears and snout. She loved gluing these down, along with wiggle eyes.

Potato Stampers Press (8)

“He says oink oink!” she told me proudly.

Potato Stampers Press (9)

I drew on a few final facial features, so then she wanted to draw too, telling me she was adding “three black cheeks”.

Potato Stampers Press (10)

All of the above would make beautiful decorations to your home for St. Patrick’s Day, or cards to send in the mail!

St. Patrick’s Day Wreath

St. Patrick's Wreath (8)

Here’s a pretty front door decoration for St. Patrick’s Day, with steps that kids can help out with, too! This is a riff on a similar wreath we made for Valentine’s Day, and the inspiration for both is care of the ever-fabulous Hands on as We Grow.

To start, you’ll need a cardboard circle as the base. A pizza box would have been ideal, but I used poster board and hot glued two layers together for added durability, since we had no pizza in the house.

I then set out a plate of green paint along with squares of green and orange tissue paper (for the colors of the Irish flag). As I wadded up each tissue square into a little “flower”, I handed it to Veronika. Her job was to dip in the green paint!

St. Patrick's Wreath (2)

We made dollops of glue on the white wreath background and pressed down the flowers. She loved helping with the glue even more than the paint. I left a little of the white cardboard showing, too, as the third color of the Irish flag.

St. Patrick's Wreath (4)

While the glue and paint were drying, I also cut hearts from green construction paper. Three hearts taped together become a shamrock! These made a nice touch here and there on the wreath.

St. Patrick's Wreath (6)

Finally, I cut strands of orange and green ribbon and hot-glued onto the back of the wreath, then looped over the hook on our front door.

St. Patrick's Wreath (7)

Here’s wishing you the luck of the Irish this St. Patrick’s Day!

St. Patrick's Wreath (9)

Messy Potato Drop Painting

Messy Potato Drop Paint (10)

It’s almost St. Patrick’s Day, which means cue the potato painting projects! Today, Veronika and I painted with potatoes in a way that made a delightful mess, plus it got us outside in a first burst of spring warmth.

To set up, you’ll need cooked and cooled potatoes cut into chunks of various sizes. You can use all one type of potato, but for novelty I used one sweet potato and two red ones. Next time I would add in tiny new potatoes, too!

Messy Potato Drop Paint (5)

I unrolled a long piece of butcher paper on the grass and then set out plates with paint in the colors of the Irish flag: green, orange, and white. To make your artwork, pierce each soft piece of potato with a craft stick and dip in paint. Hold it up over the paper…

Messy Potato Drop Paint (4)

…then drop!

Messy Potato Drop Paint (9)

Veronika immediately needed a turn. She loved that she could dip the potatoes in the paint without getting messy thanks to the craft stick handles. The first time she held a potato aloft over our paper, she seemed unsure that she was really supposed to drop it.

Messy Potato Drop Paint (3)

At first, she would bend down and use it more like a stamp. But then she grew braver, and…

Messy Potato Drop Paint (7)

Drop! Each landing potato makes a great splattered print on the paper. Have fun experimenting and dropping the potatoes from different heights, as well as using them like stamps with the craft stick handles.

Messy Potato Drop Paint (8)

We even covered one round red potato with paint and then rolled it along with a craft stick as a paddle, leaving a trail of green paint behind. As mentioned, I think small new potatoes would be fun dipped in paint and then scattered down onto the paper, so we’ll add those in next time.

Magical Watercolors

Extreme Watercolor (5)

Nothing brings my kids running faster than when they get to do something that’s normally taboo or off-limits. In our house, one of those things is permanent marker. So my question of, “Who wants to color with permanent marker?” immediately had two pairs of feet racing to join the fun!

I invited the kids to draw whatever they wanted on sheets of white poster board. Travis drew a favorite TV character, and Veronika narrated to herself as she scribbled (including telling me she drew a Q for Queen and a T for Truck!).

Extreme Watercolor (1)

Once they were satisfied with their drawings, I gave each a sheet of aluminum foil. A second normally off-limits item! Now the task was to scribble over it with washable markers.

Extreme Watercolor (3)

Encourage your kids to be abstract and use lots of colors here, the more the better.

Extreme Watercolor (2)

For a third fun component, I handed them the spritz bottle! I had to help Veronika with this part, but Travis loved using the spritz bottle solo, saturating his black marker drawing completely.

Extreme Watercolor (4)

Place the black marker drawings face down over the colorful foil and press firmly, then lift up. Just like magic, your white paper has been covered with “watercolor” paint! The kids oohed and aahed at the big reveal.

Extreme Watercolor (6)

These were so pretty that we had to hang them up in the playroom for display. Thanks to Parents magazine for this fun idea!

Extreme Watercolor (7)

Get Sculpting

Get Sculpting (7)

It’s not often that we test out a whole new material, but thanks to a tip from Parents magazine, I purchased a roll of plaster cloth (available on Amazon), which lets you make the easiest at-home papier-mache crafts ever, no newspaper strips or messy flour mixtures required!

Our first project was very simple so even a toddler could help: a bowl. To set up, I inflated a balloon, cut strips of the plaster cloth, and filled a tray with a little water.

Get Sculpting (1)

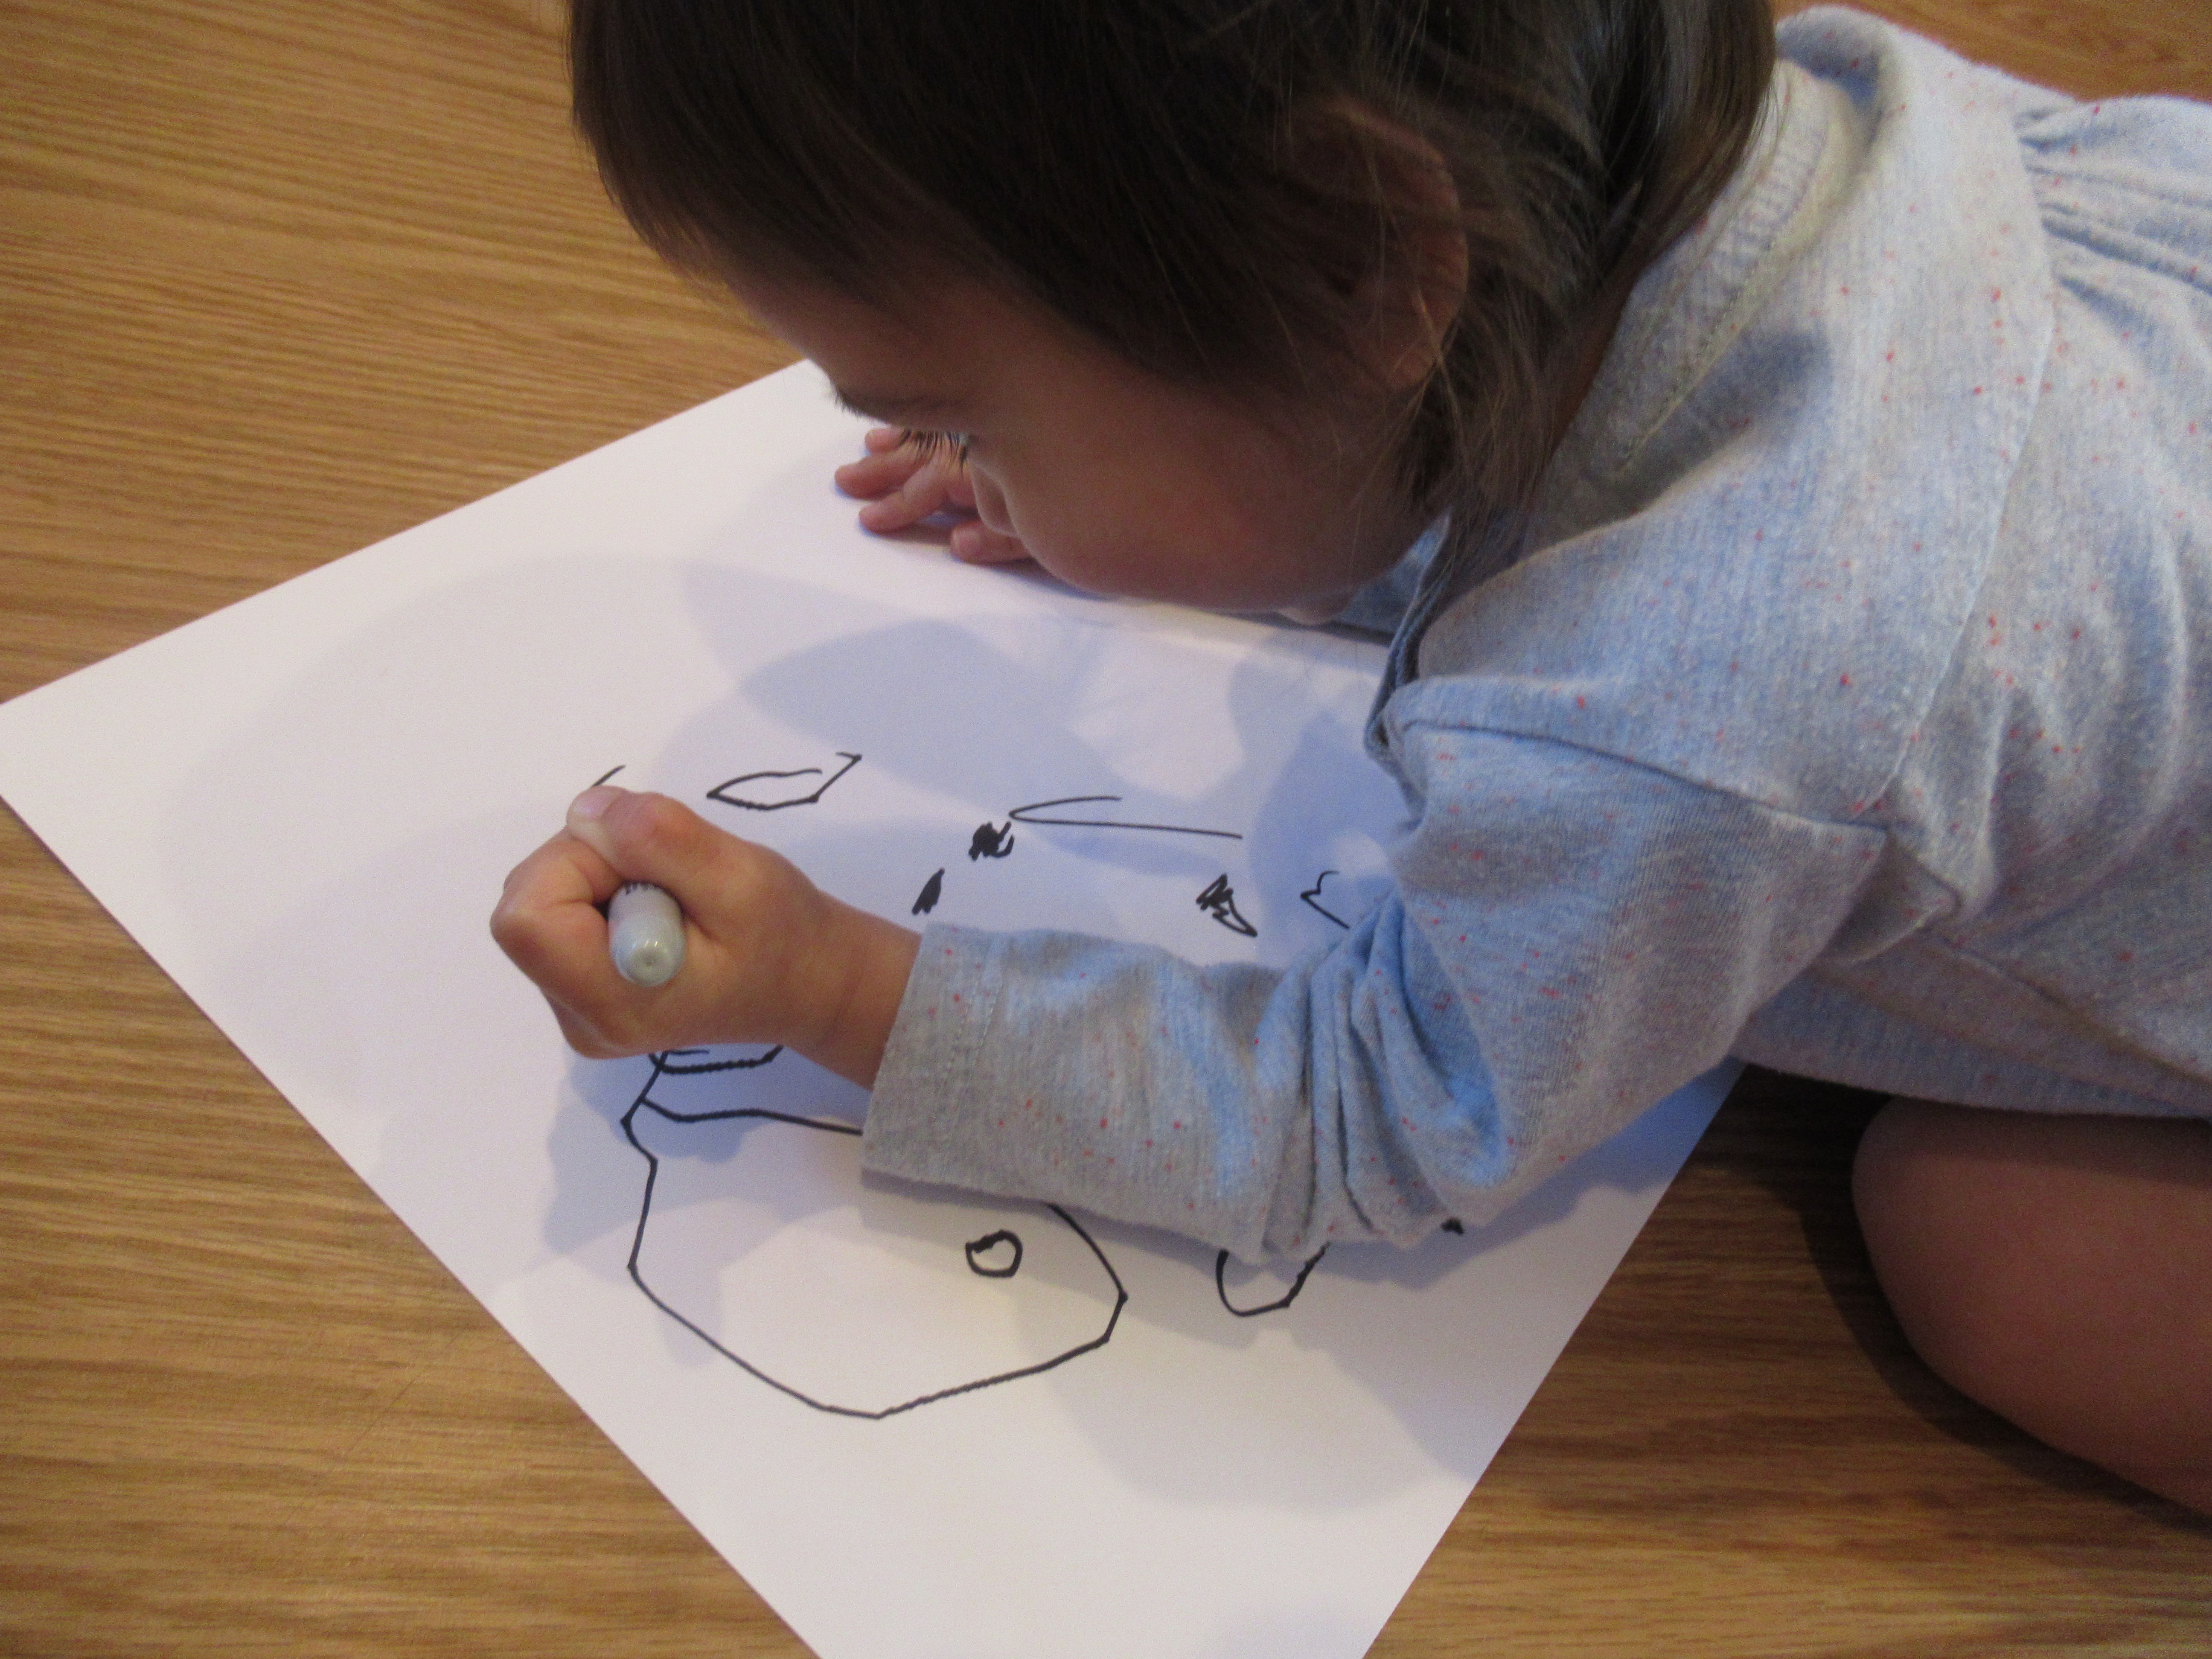
The method is simple, although be prepared for a little mess! Veronika first tried to dip the balloon right in the water, which made it pop! I quickly inflated a second, and this time she realized she needed to dip in the plaster cloth strips instead. I let her have a few to swirl and play with in the water.

Get Sculpting (2)

For the strips that you’ll actually adhere to the balloon, you only want to dip in the water for about 3 seconds and then scrape off any excess liquid. Press onto the balloon and cover halfway until you’ve made a bowl shape. Expect fingers to turn white and messy, making this the best kind of hands-on sensory art.

I set the balloon aside in the sink, which seemed the safest place for it; the plaster cloth only takes about 30 minutes to dry. Next, I popped the balloon, leaving the bowl behind.

Get Sculpting (4)

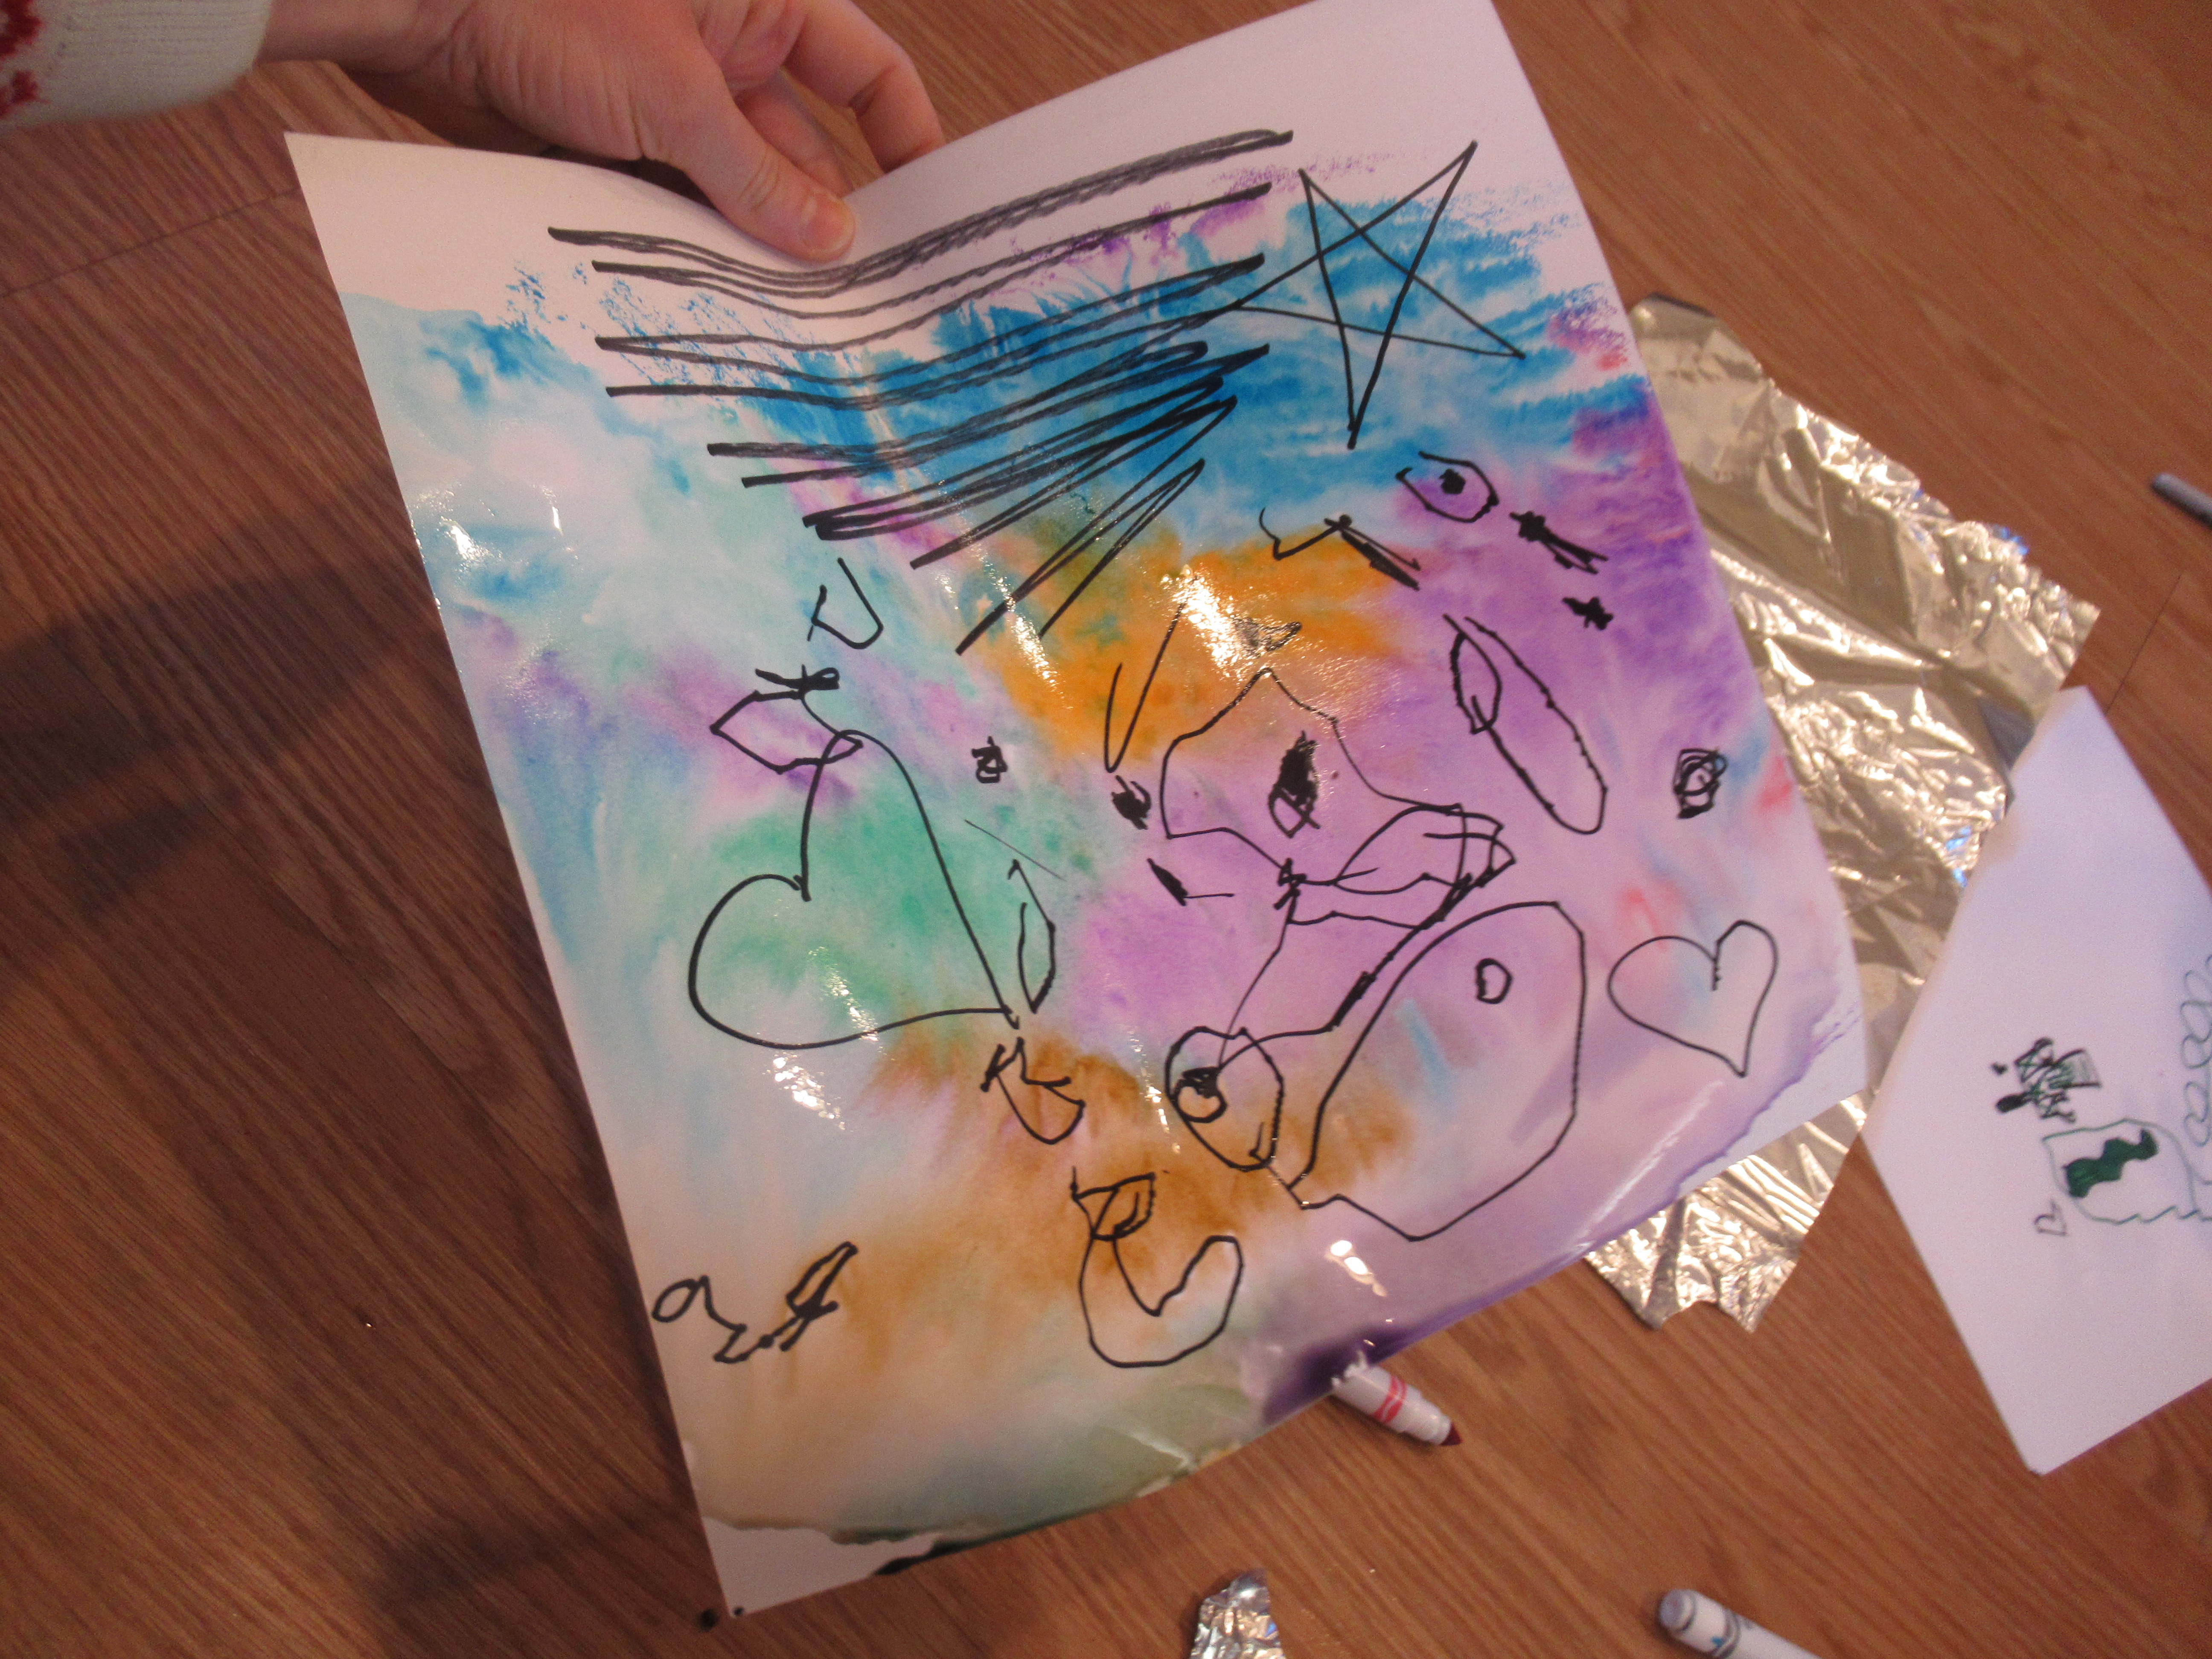
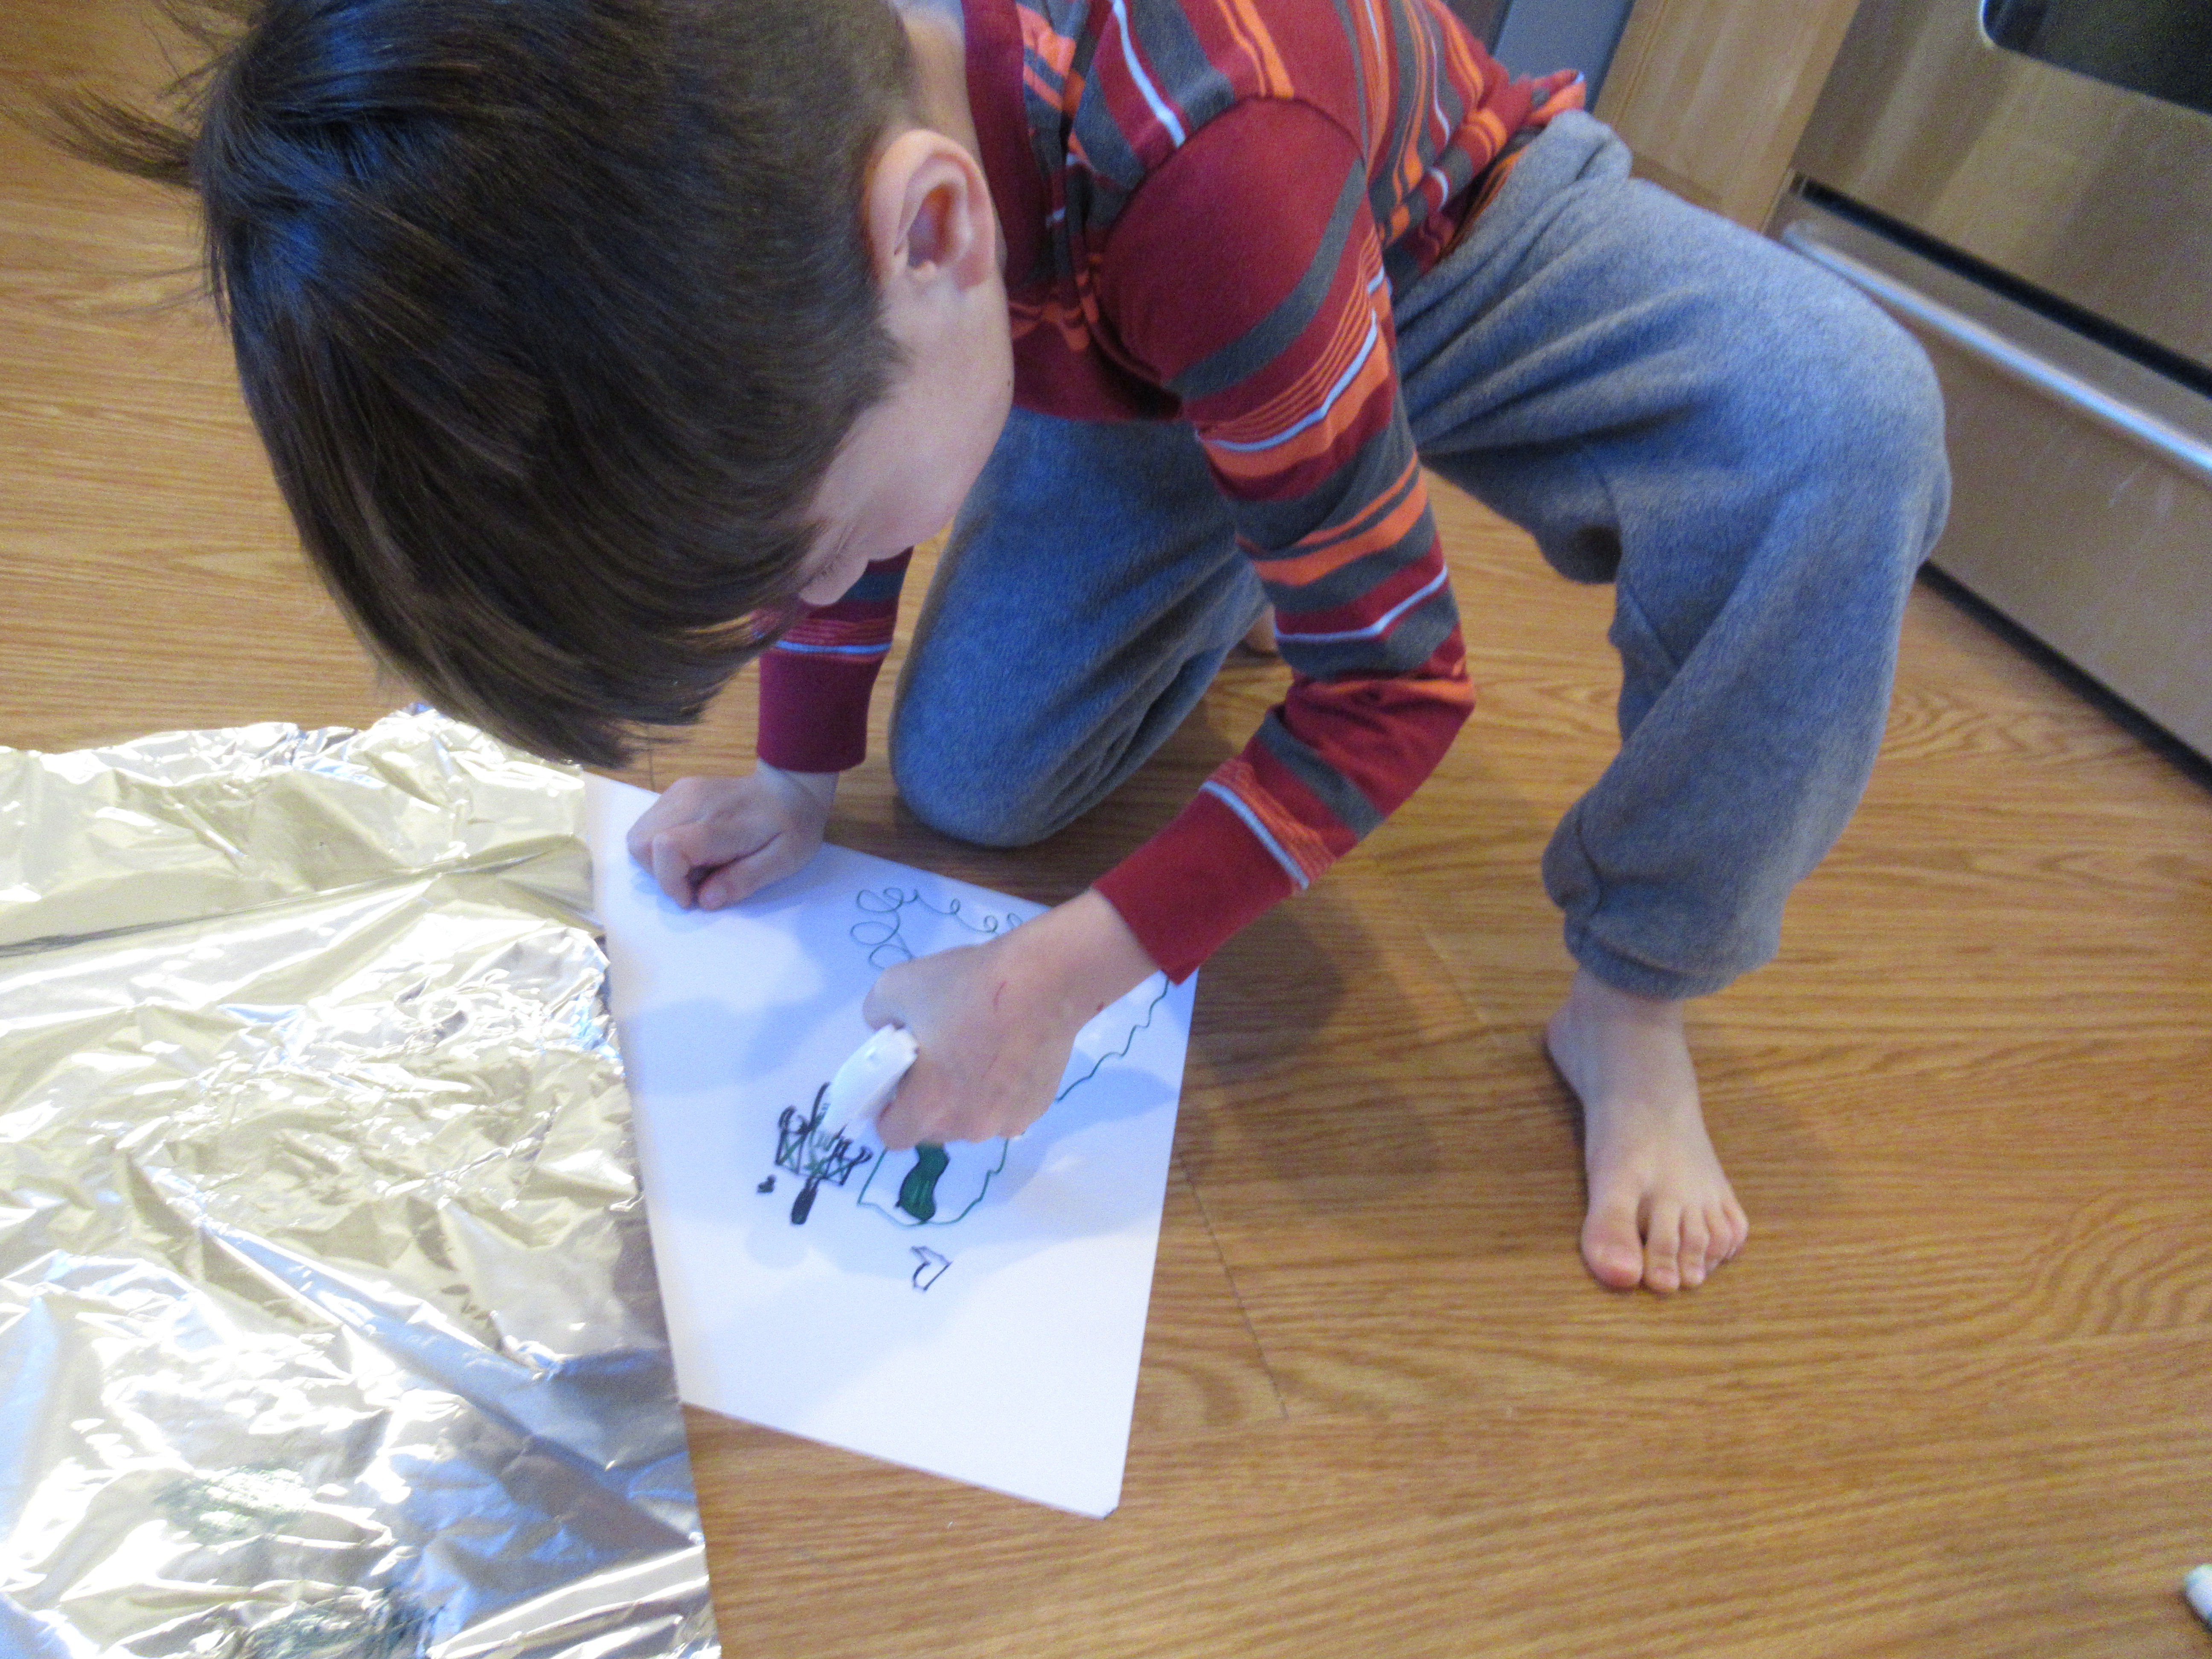
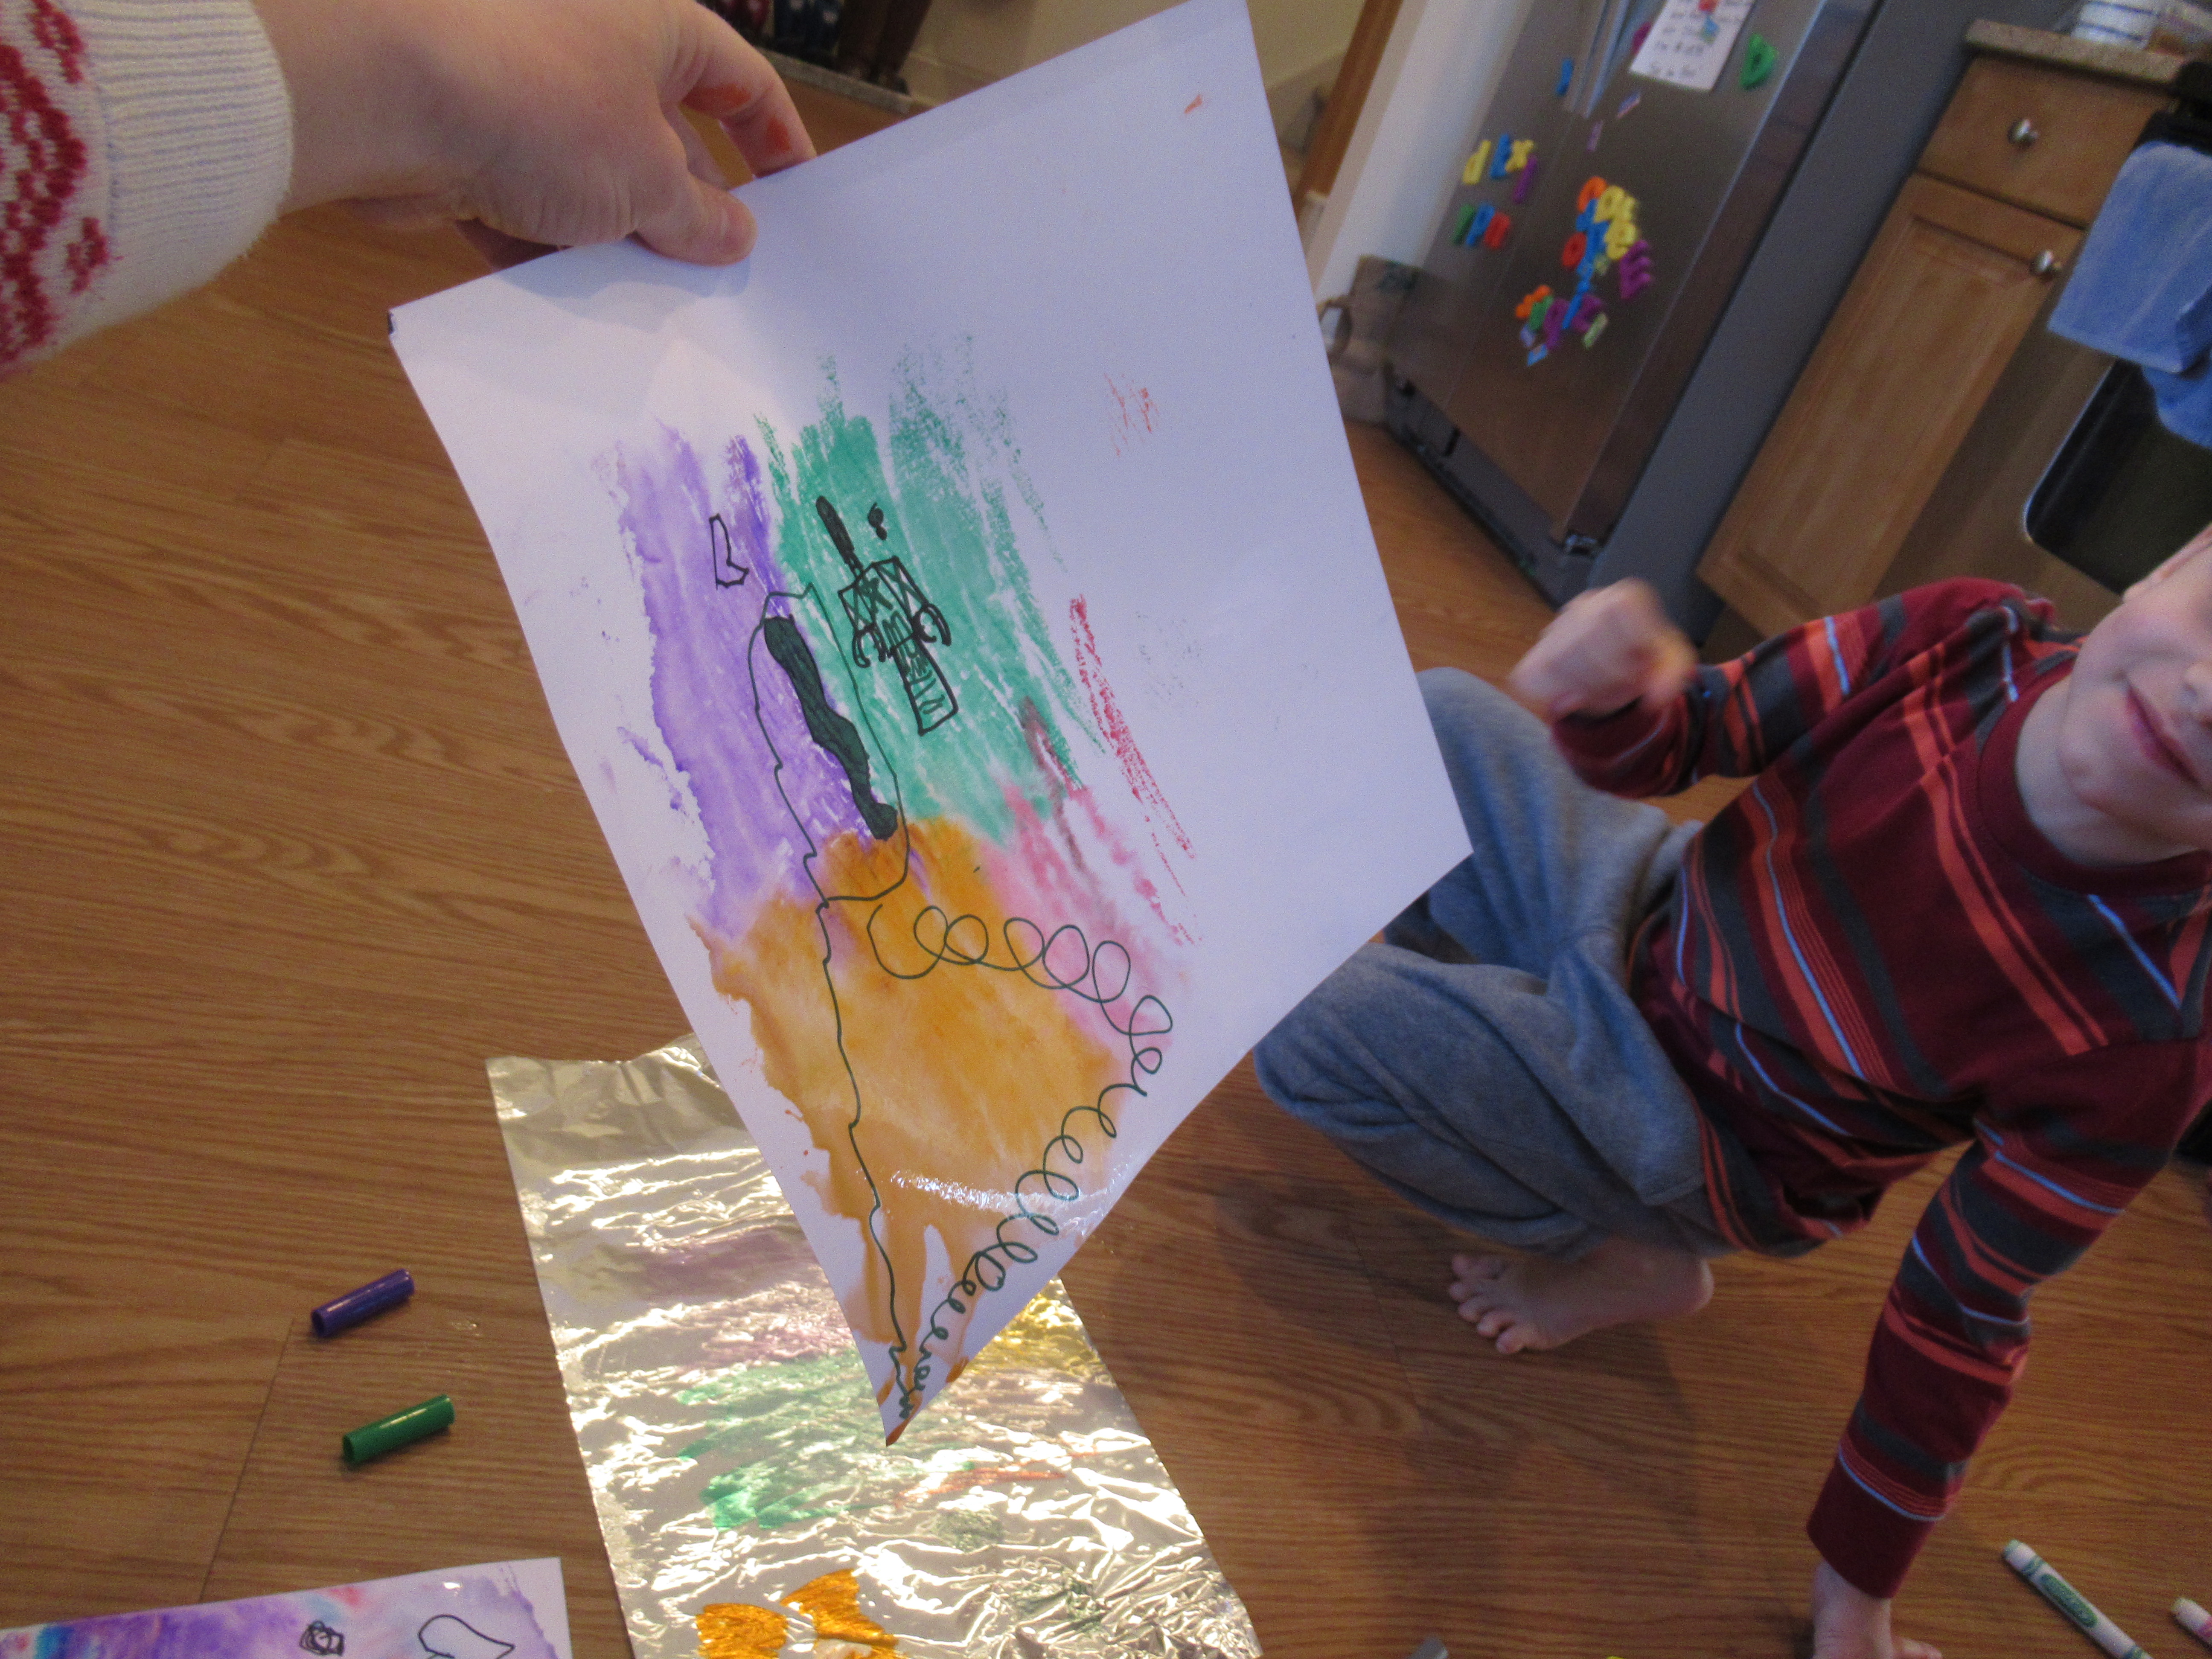
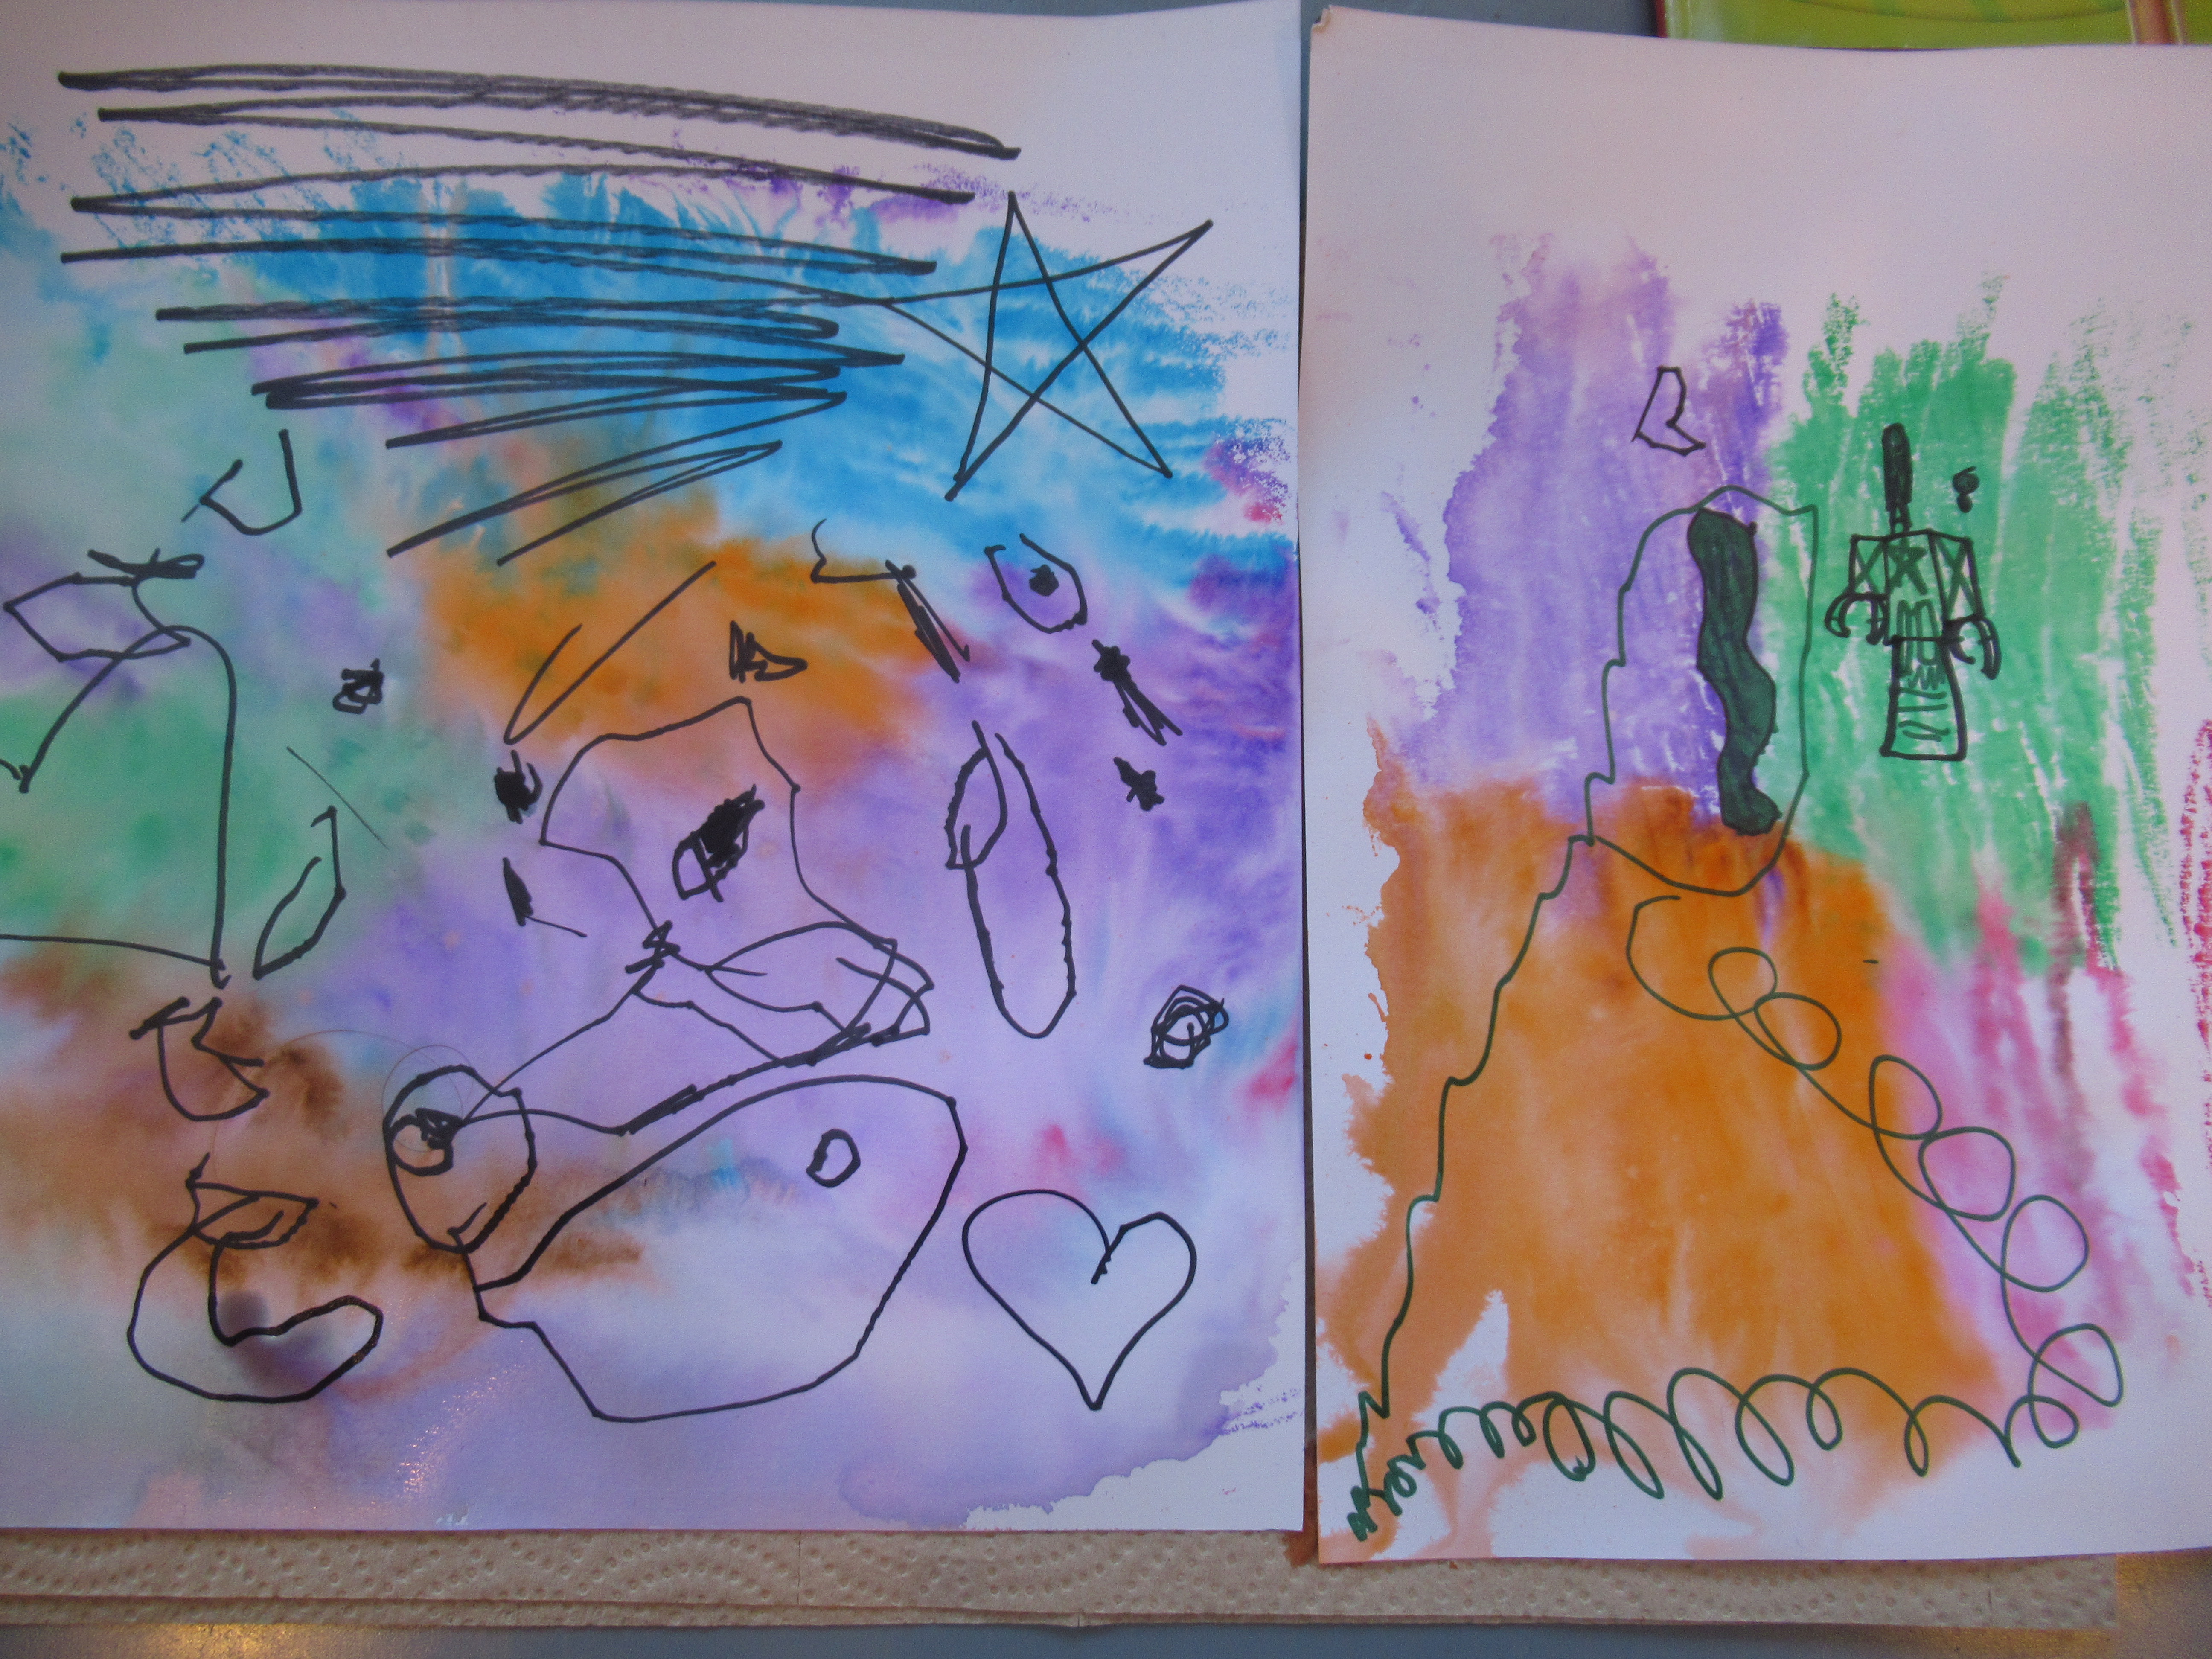
Time to decorate! First Veronika wanted to add stickers, but these wouldn’t adhere to the slightly damp plaster.

Get Sculpting (5)

We used markers instead, which took on a faded watercolor effect on the plaster. The result was really quite beautiful! Since the bowl is fragile, this particular craft is better suited for display and not storage.

Get Sculpting (6)

There’s plenty of plaster cloth left over on our roll, so we’ll have to think of another project soon!

Get Sculpting (8)